 |
|
01-08-2011, 07:09 PM
|
#1
|
|
StanceWorks Regular
- Join Date: Jan 2011
- Location: Canada
- Posts: 294
- User Status:
Offline
|
We can rebuild it. 91 Golf
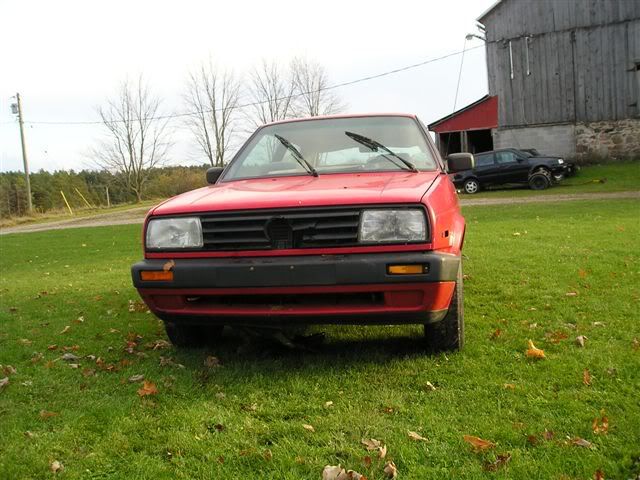
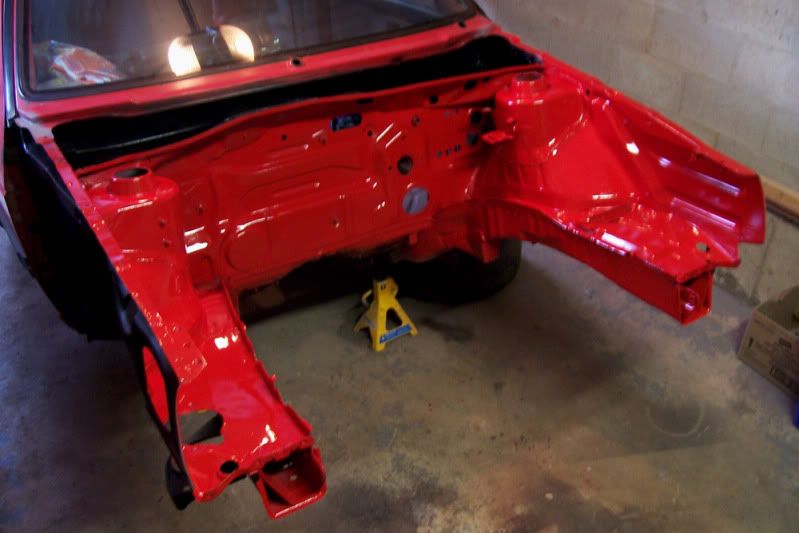
I've always been a fan of mk2's and been looking for an opportunity to pick up a project. Last year it came as a tornado red 91 Golf CL. I bought it off a vwvortex member near Waterloo. It's had numerous previous owners starting in Nova Scotia, making its way to Ontario, sitting in a field for two years and finally me for a whopping $150.
These are the pics of the original FS ad.
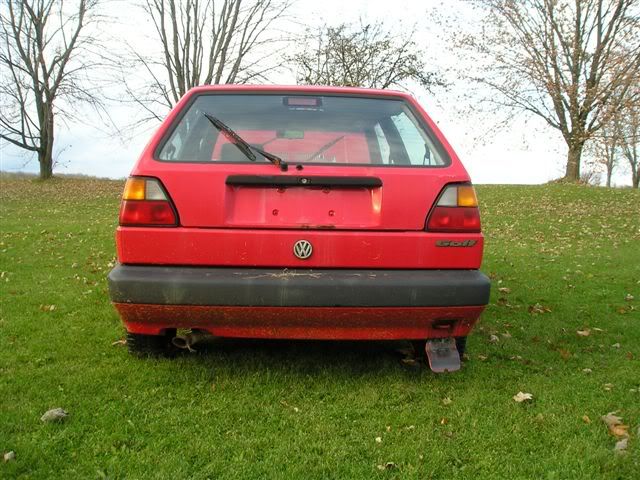
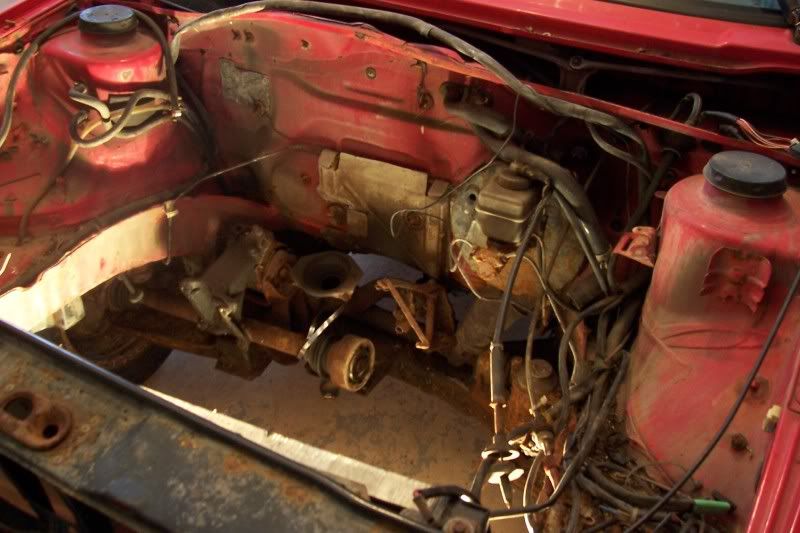
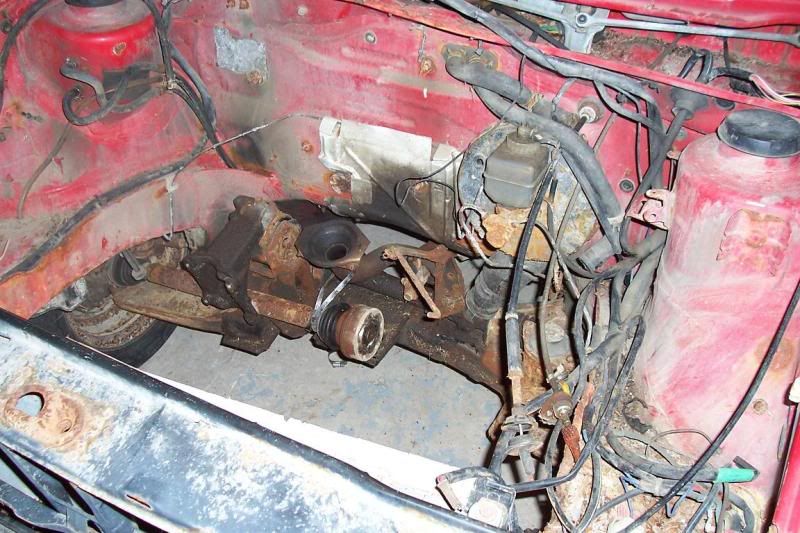
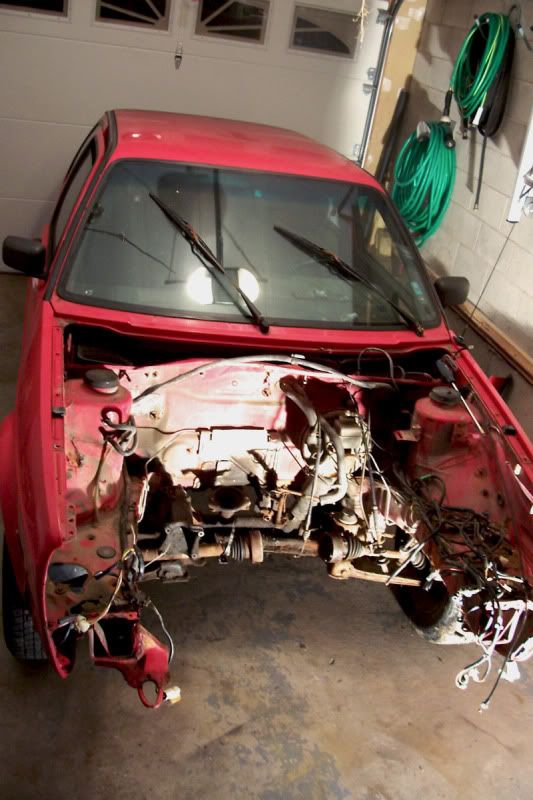
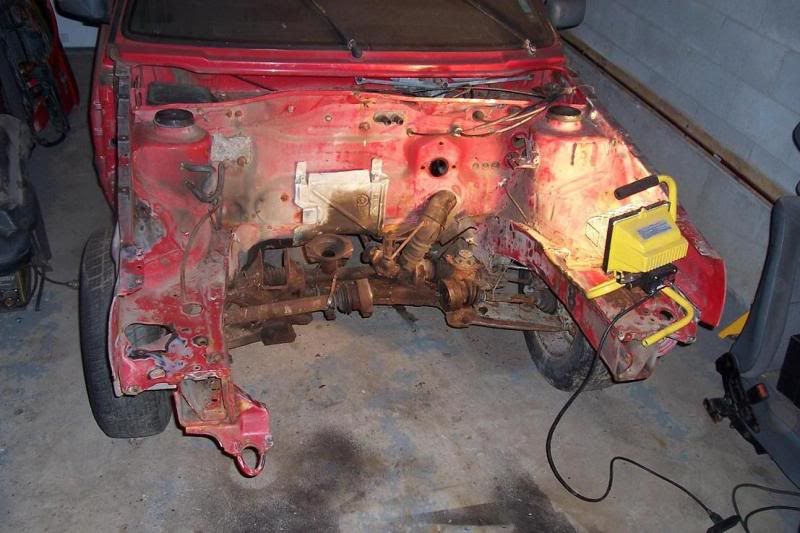
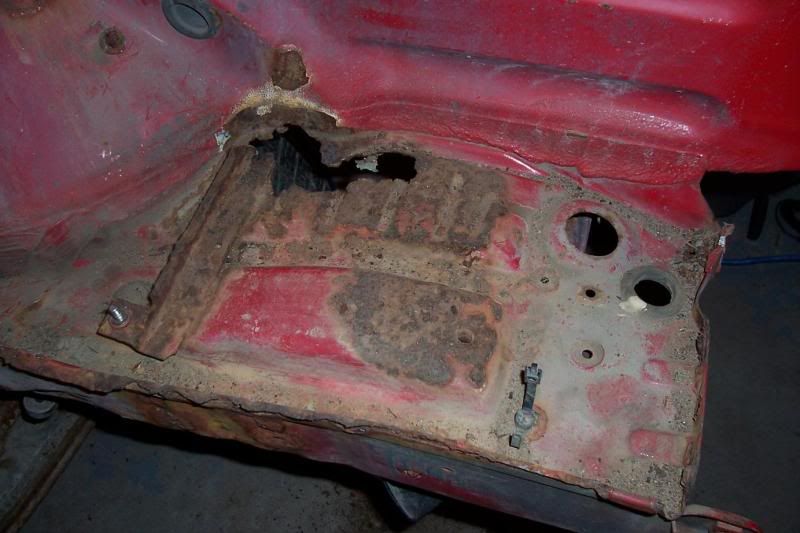
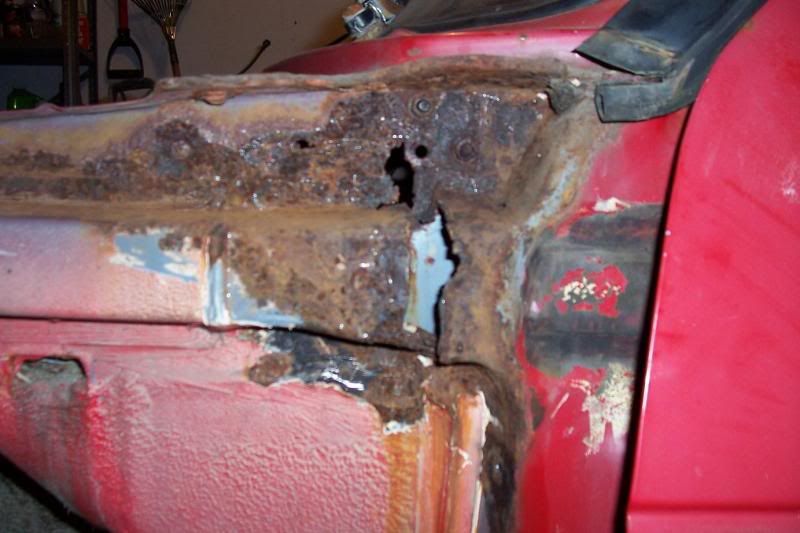
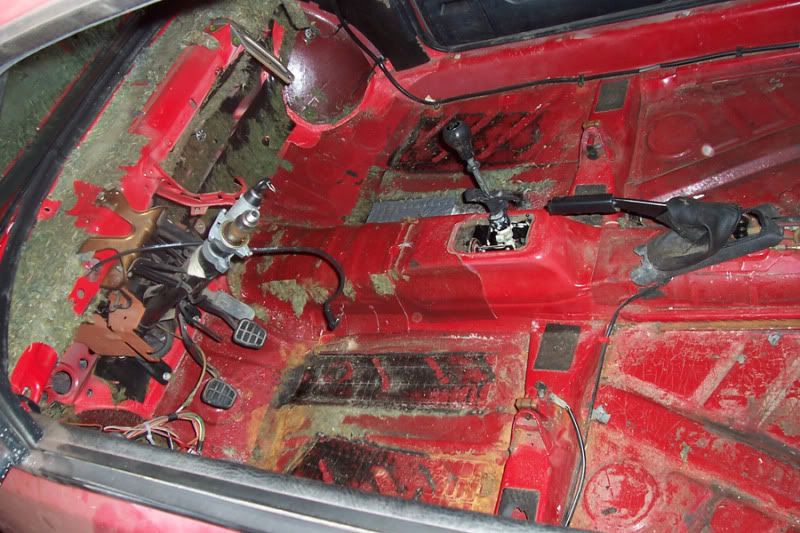
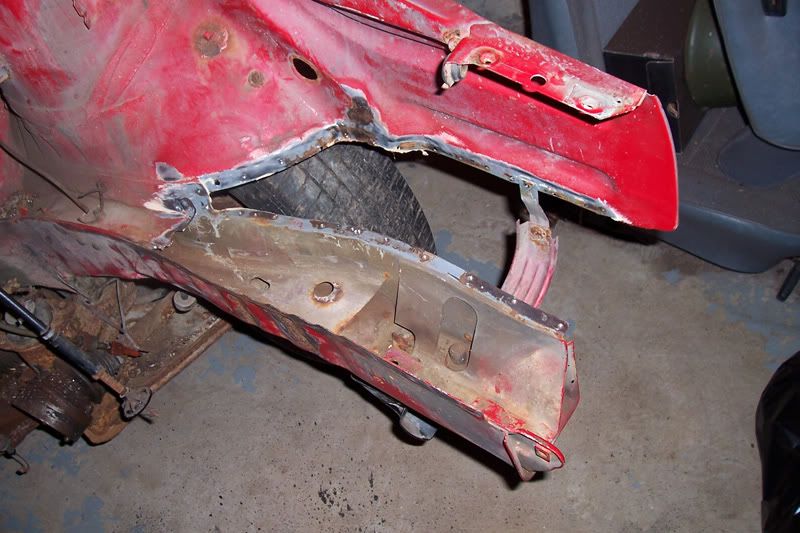
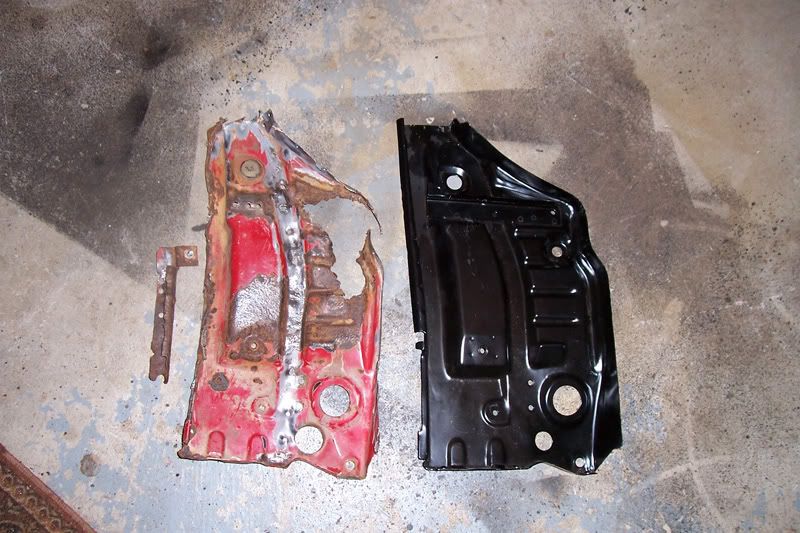
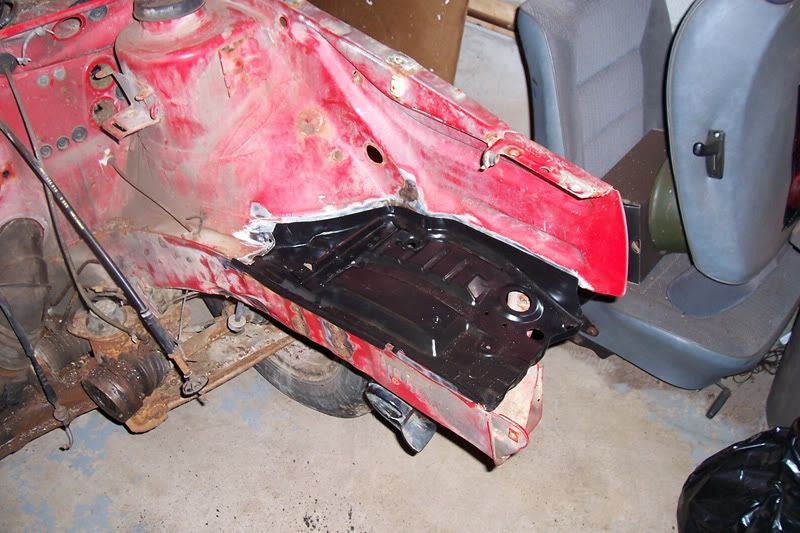
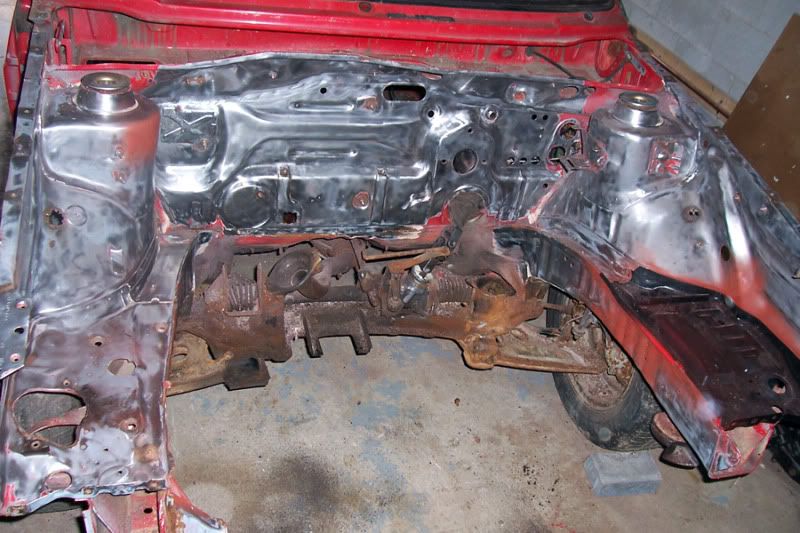
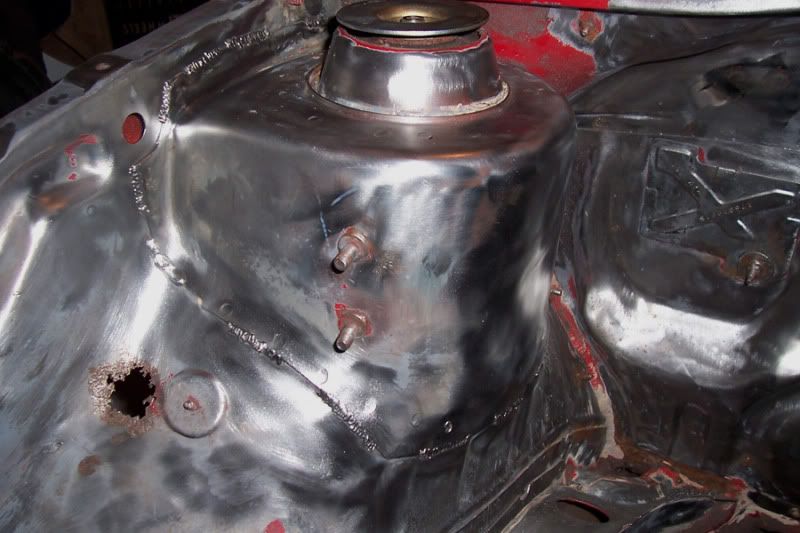
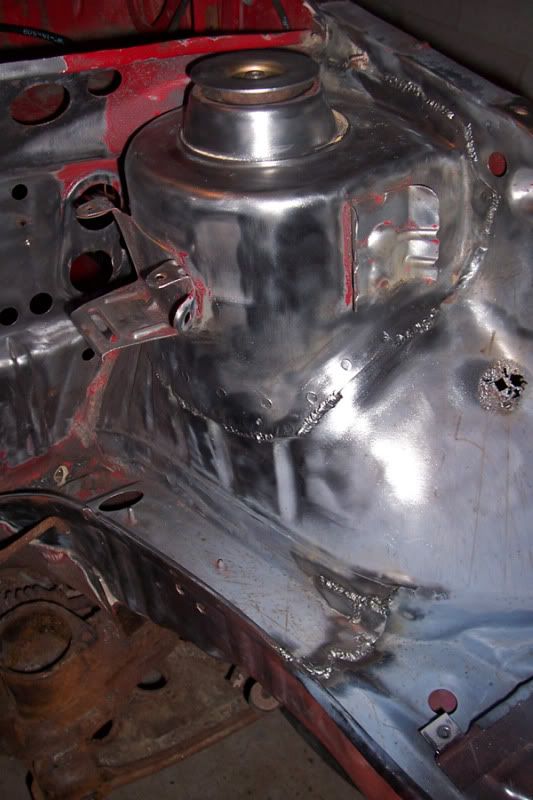
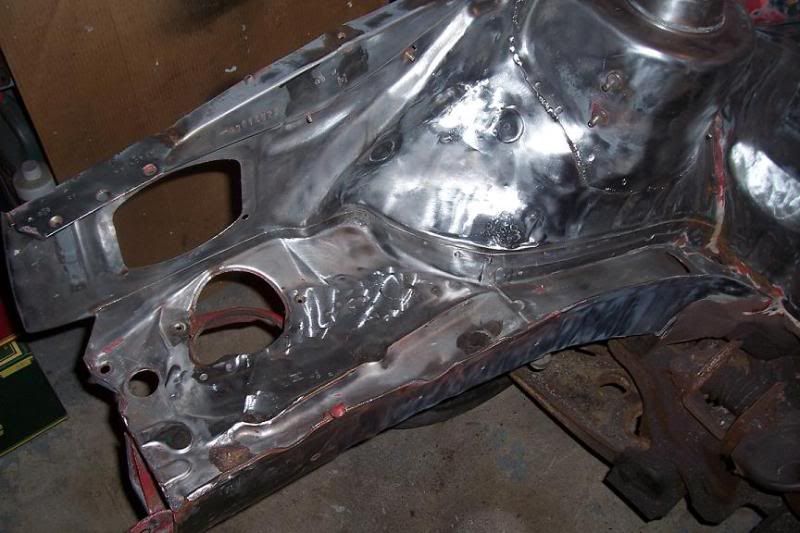
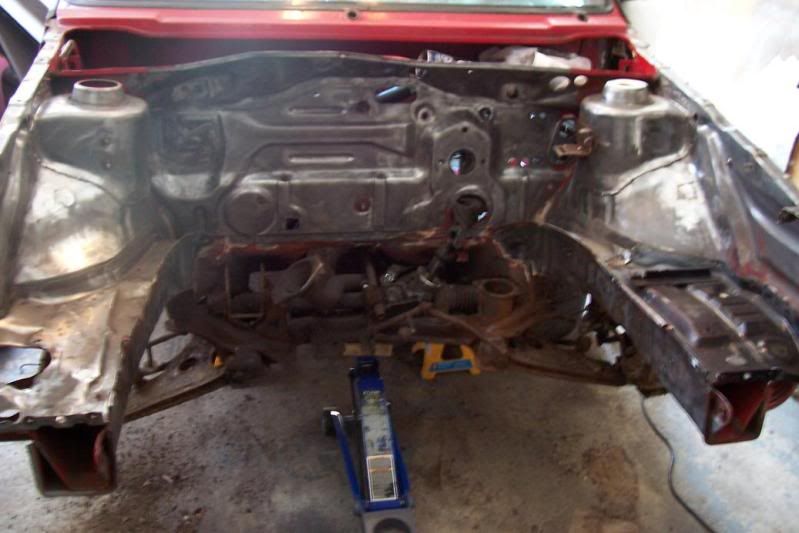
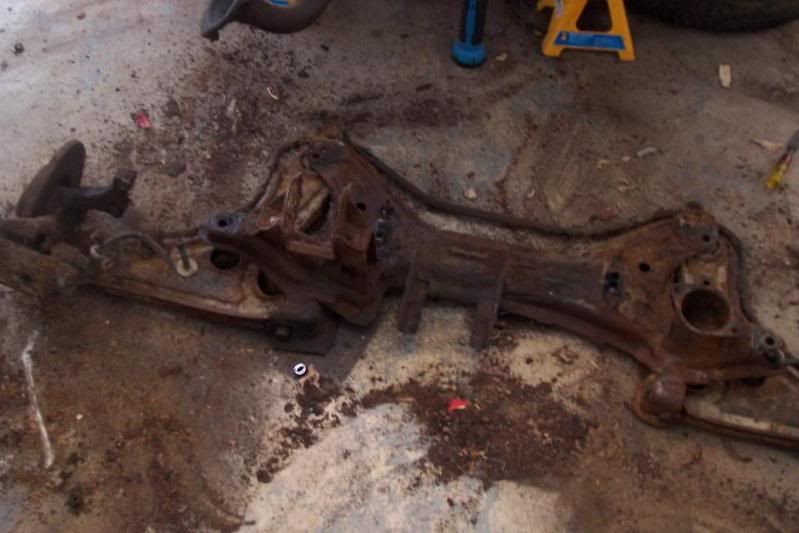
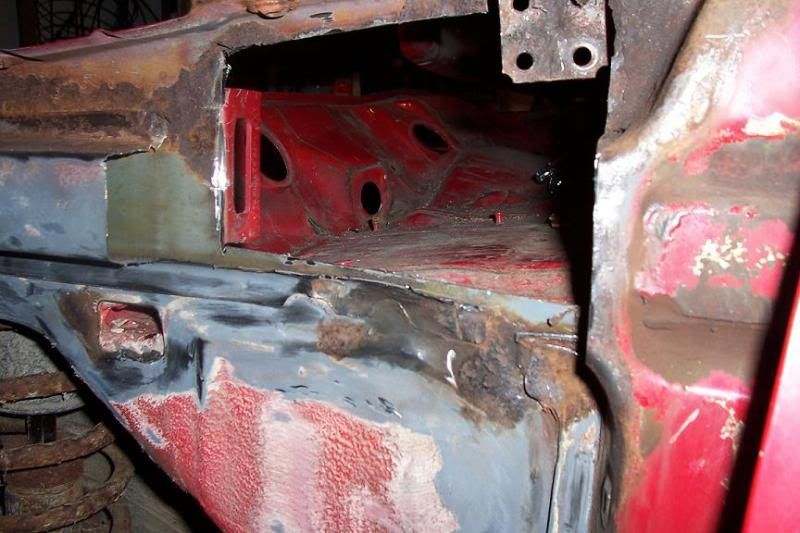
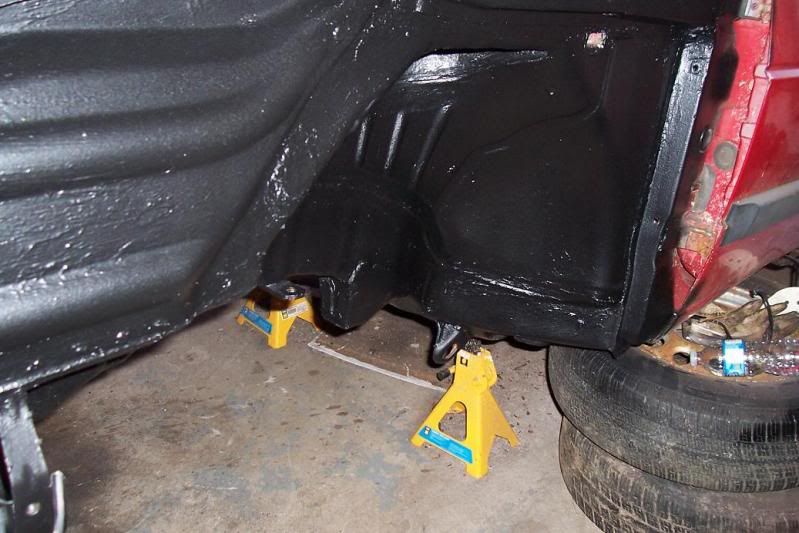
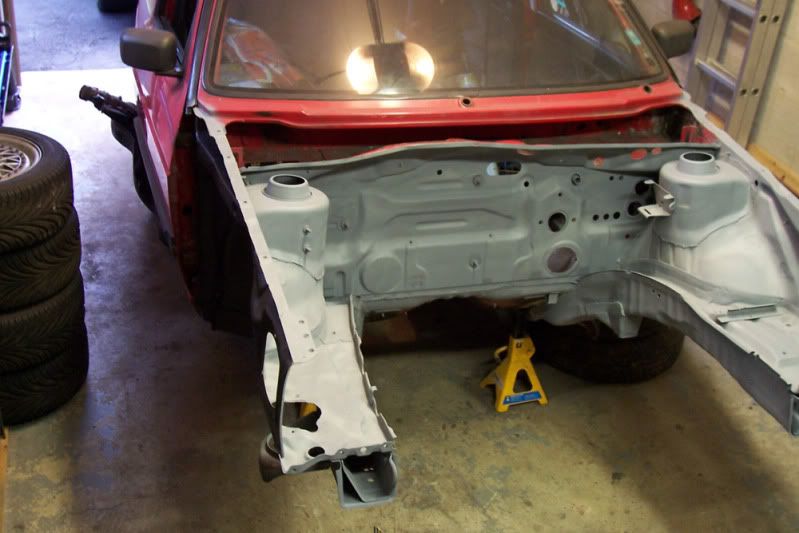
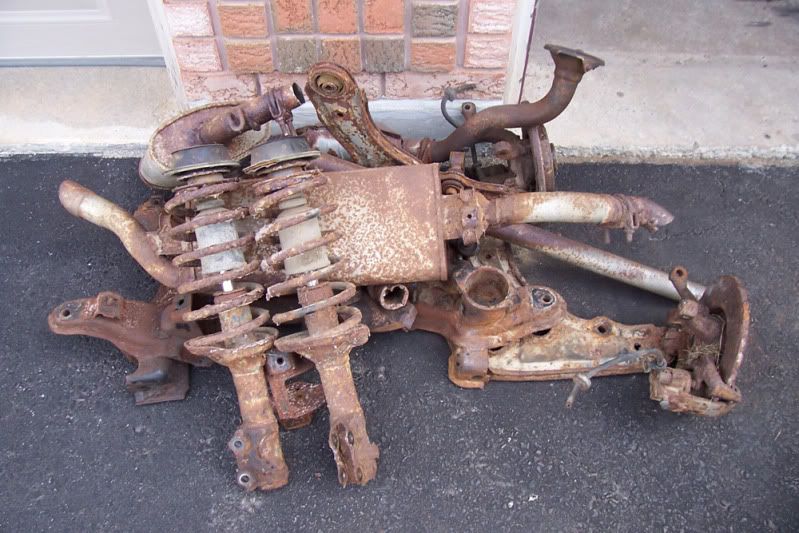
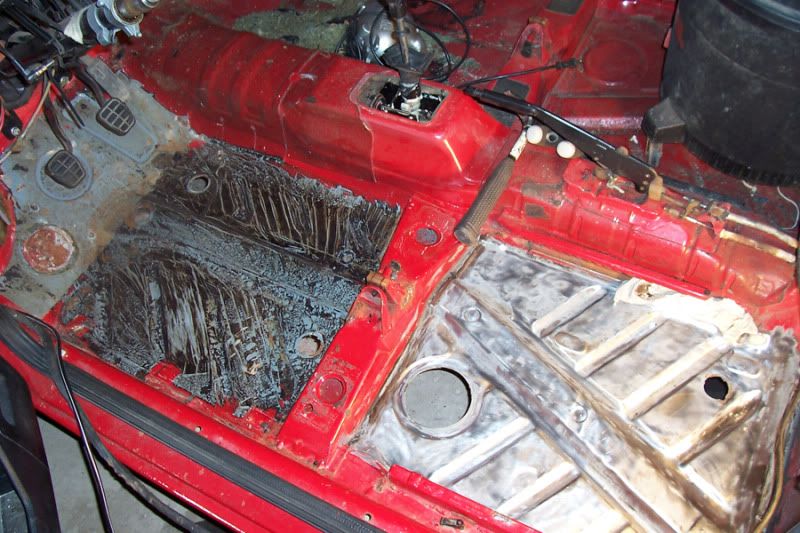
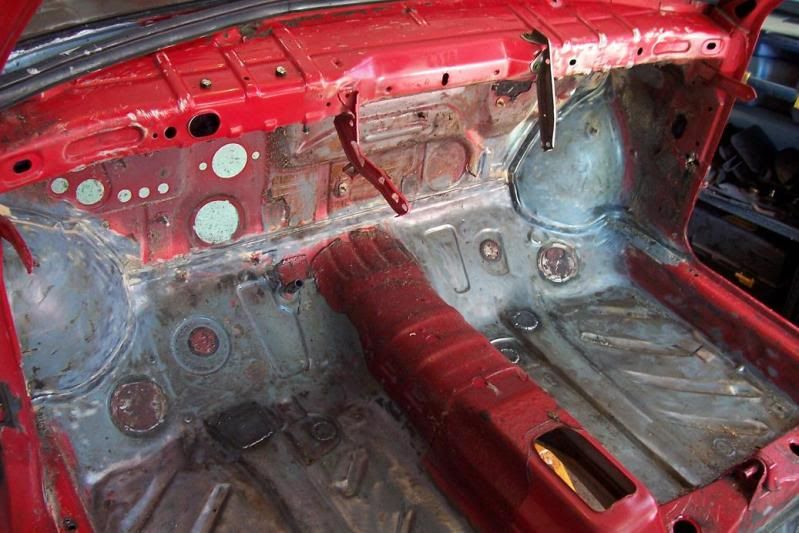
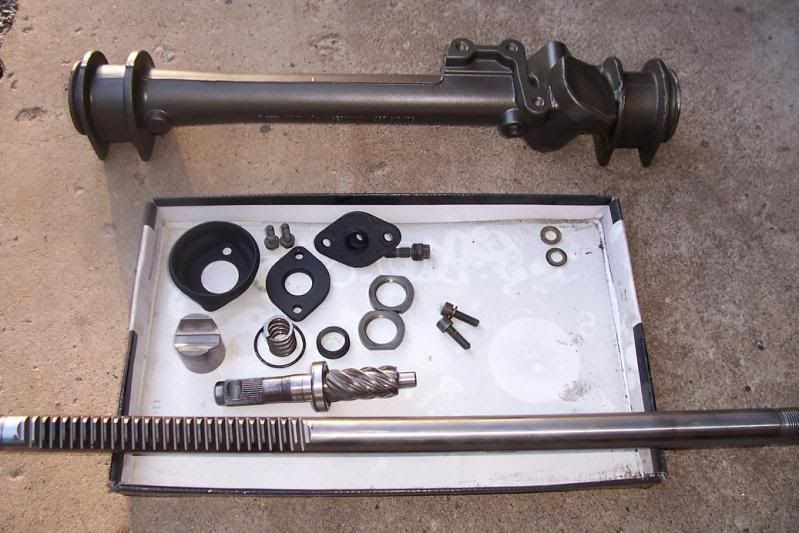
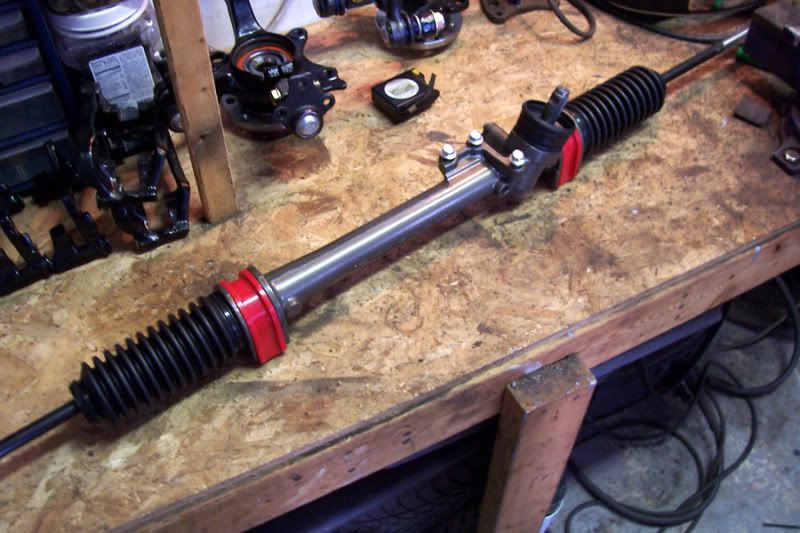
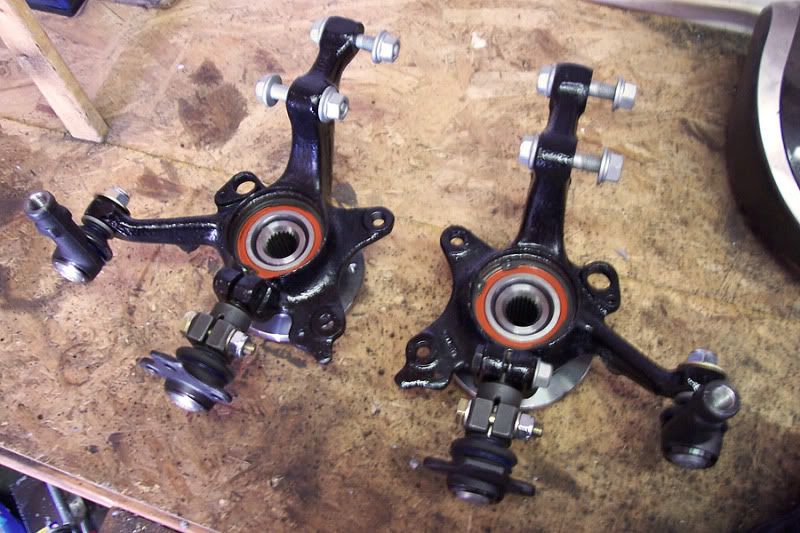
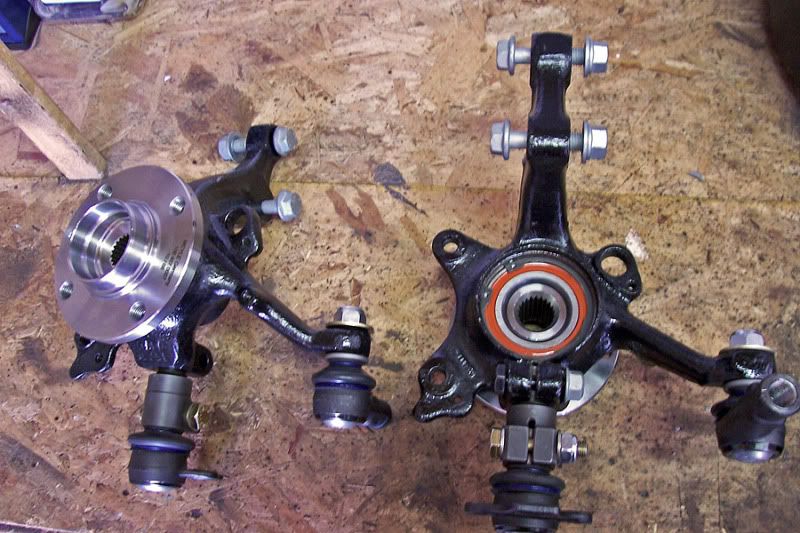
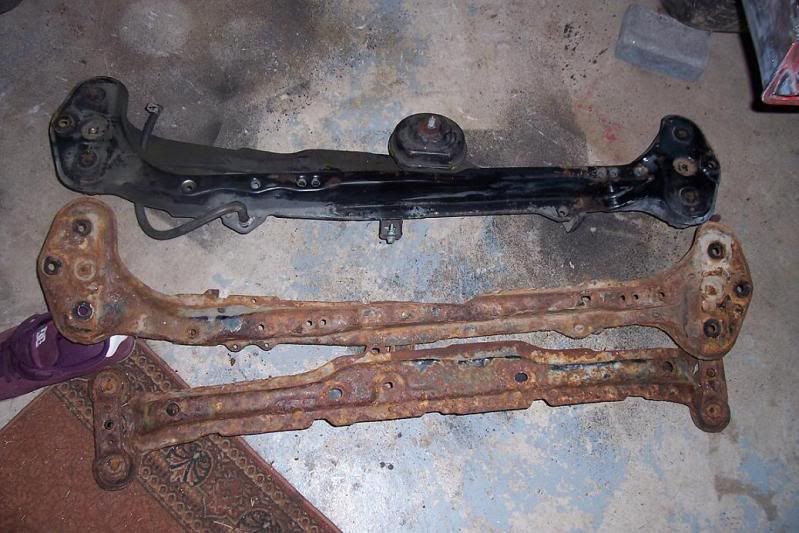
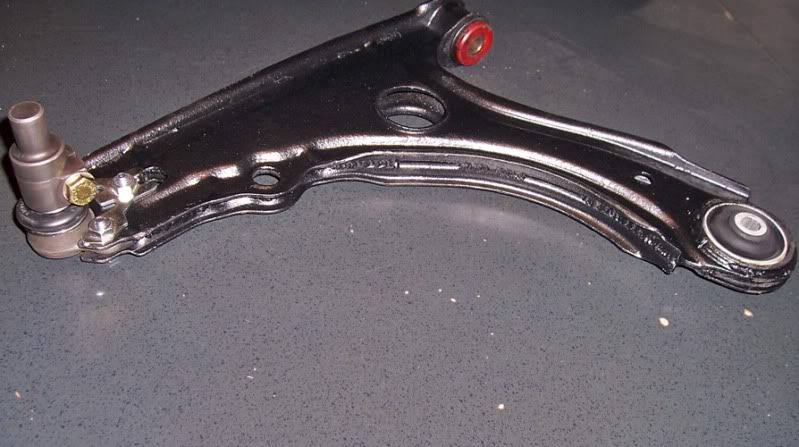
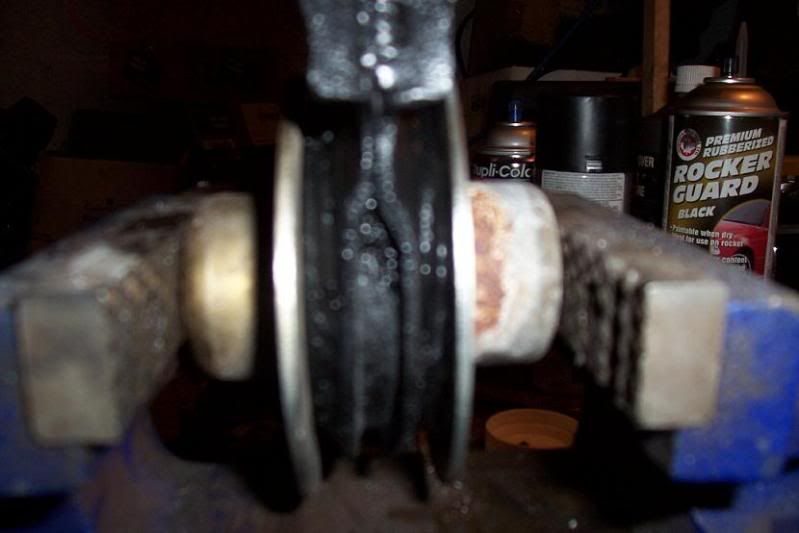
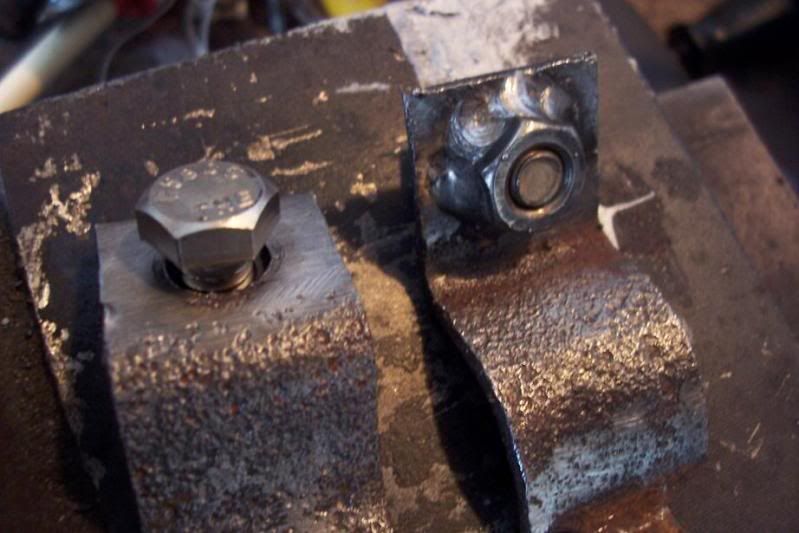
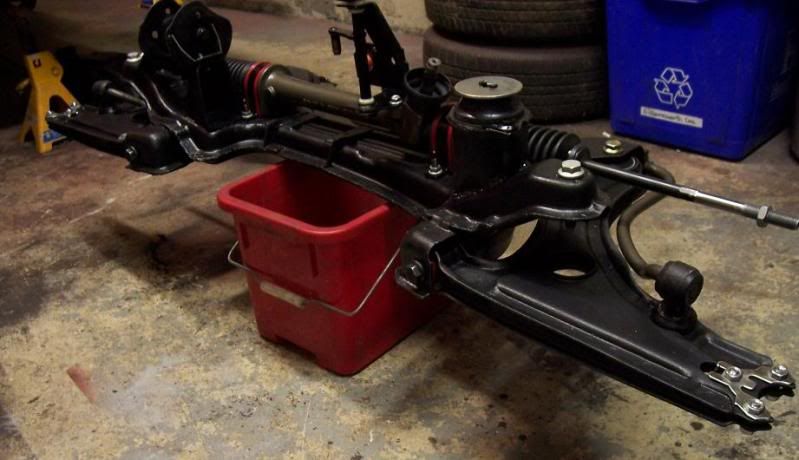
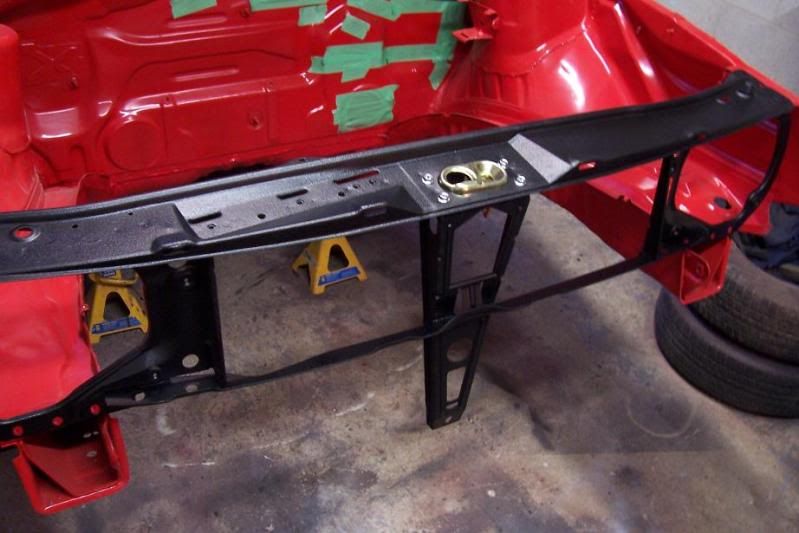
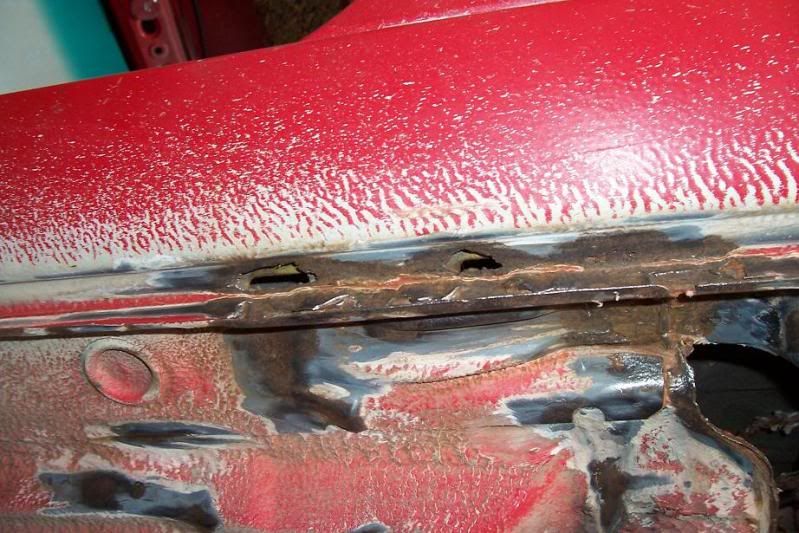
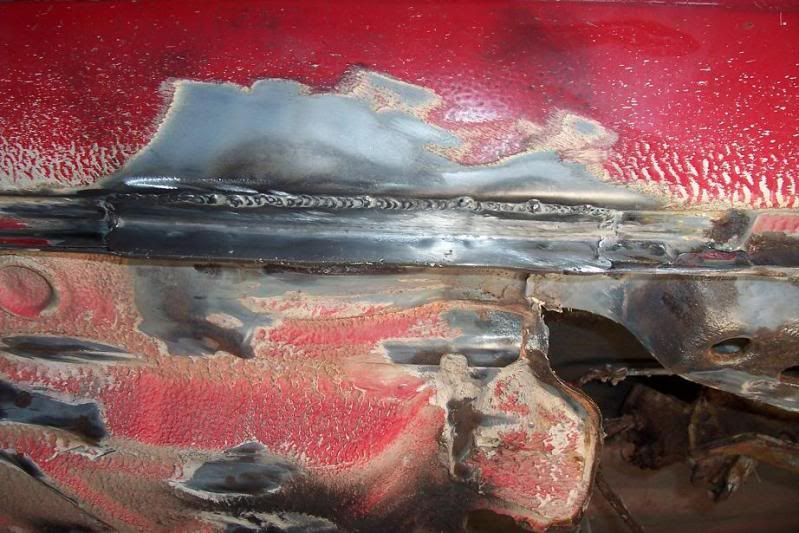
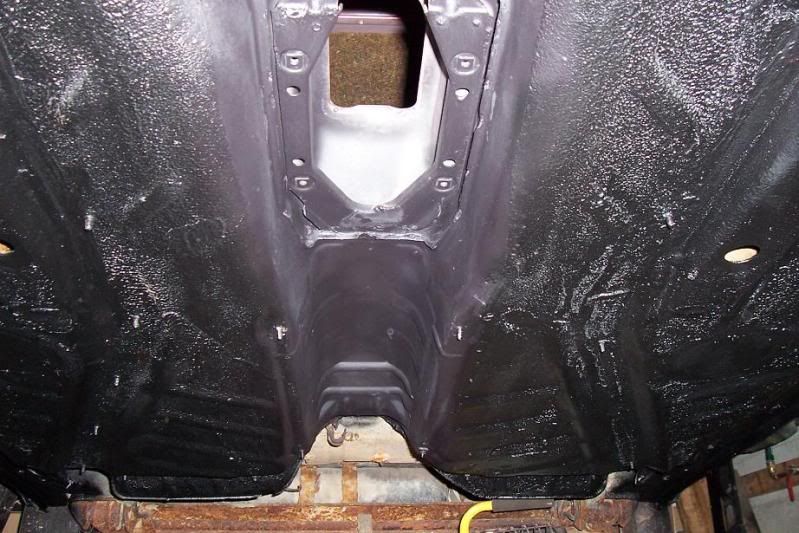
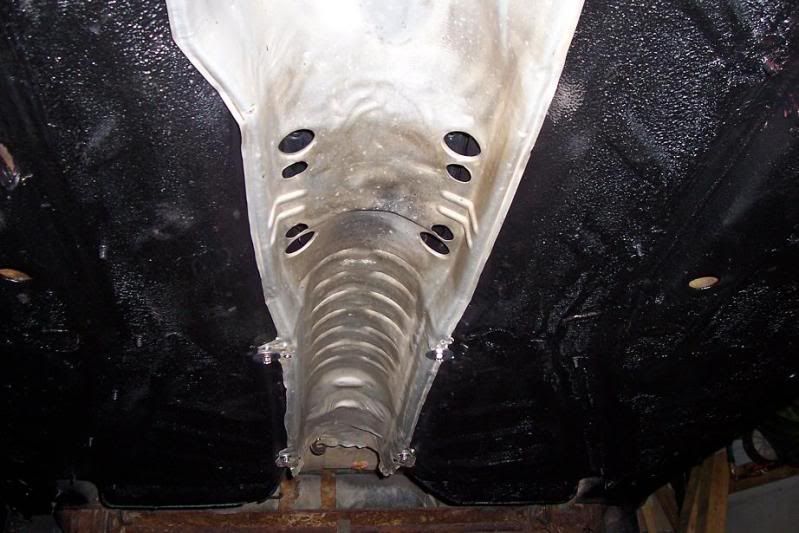
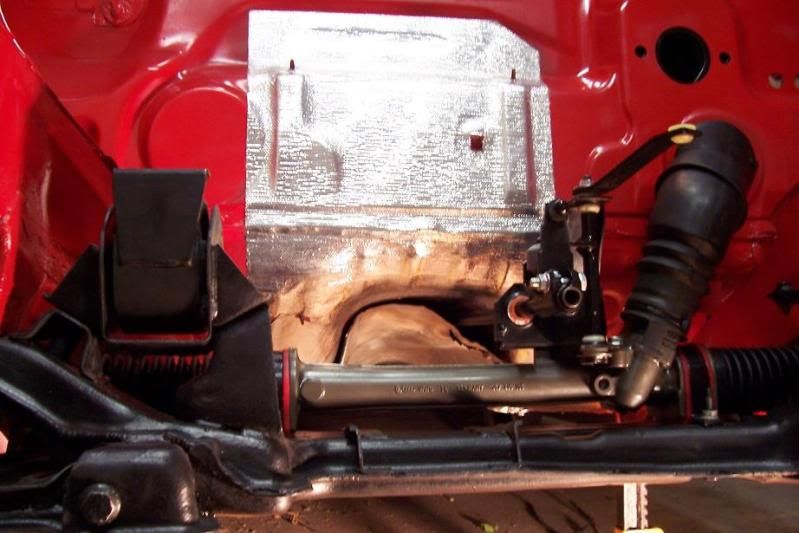
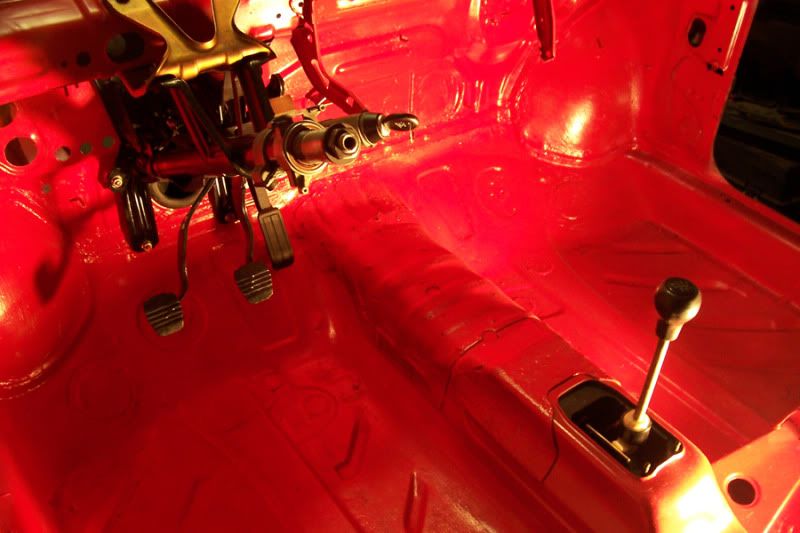
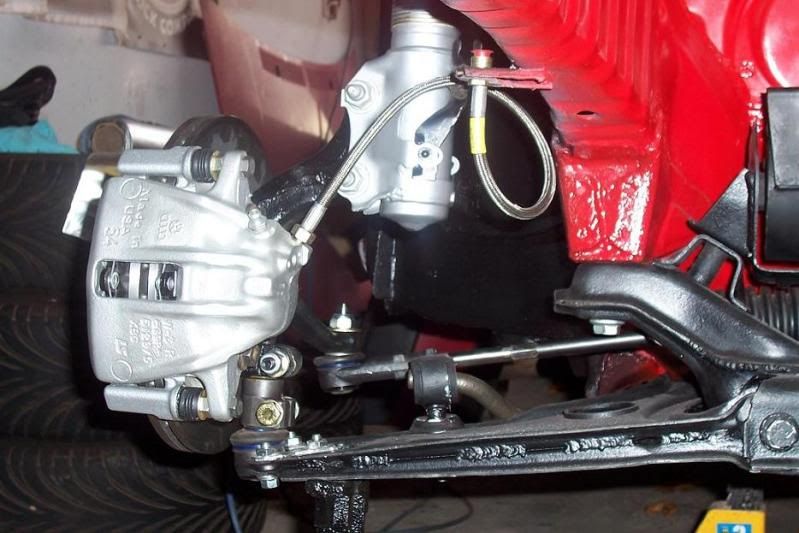
The motor/tranny were gone. The interior was ripped apart, all the seats and headliner smelled like mold from sitting outside for so long. Both rear drums were seized, the rear quarters needed replacing, the subframe/suspension/rear beam/brakes all looked like they come off the titanic. I was told the main fuel pump and the intermediate pump were dead. None of the door latches worked and the rear hatch was rotted along the window seal.
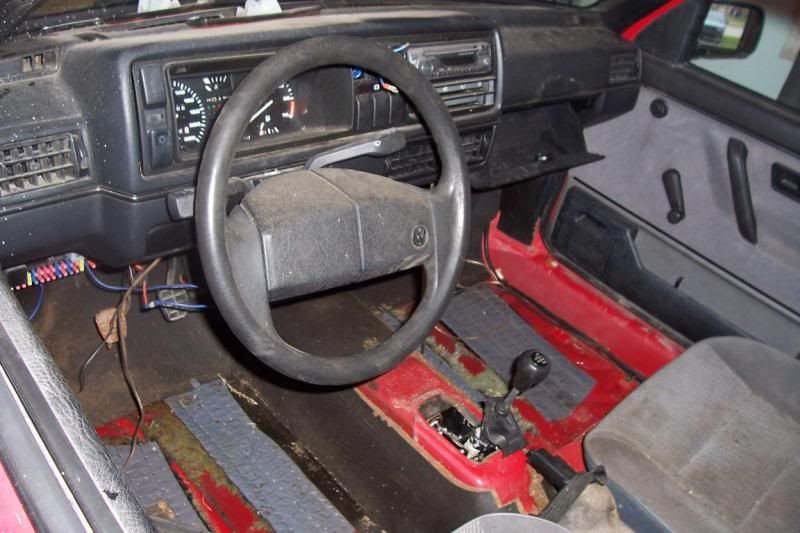
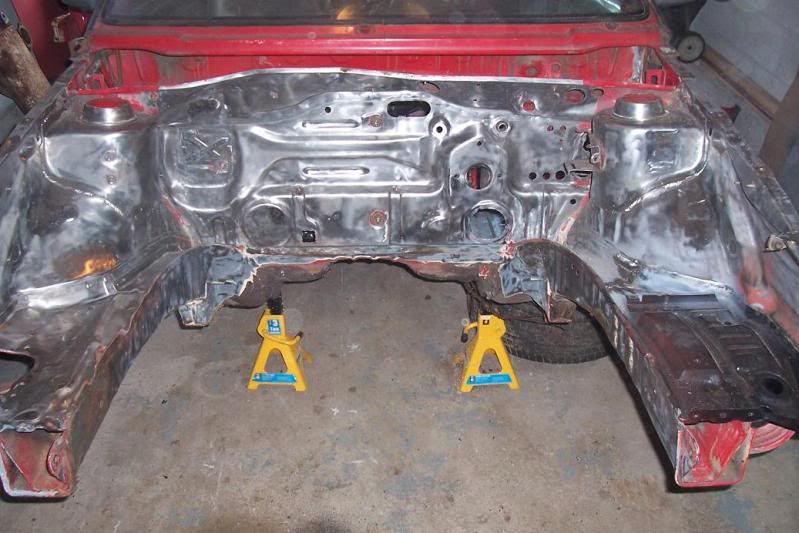
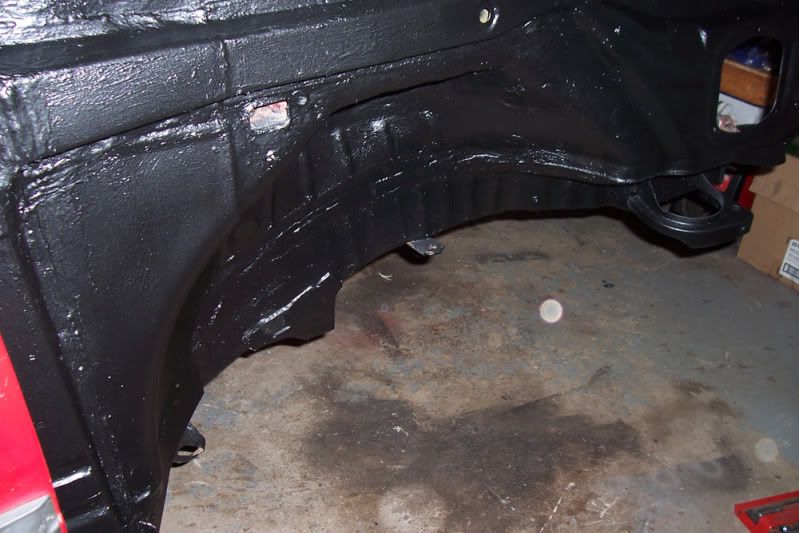
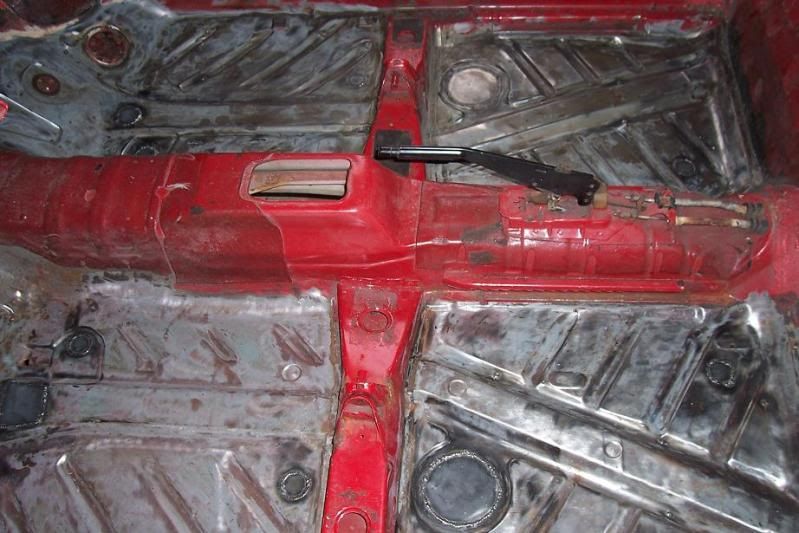
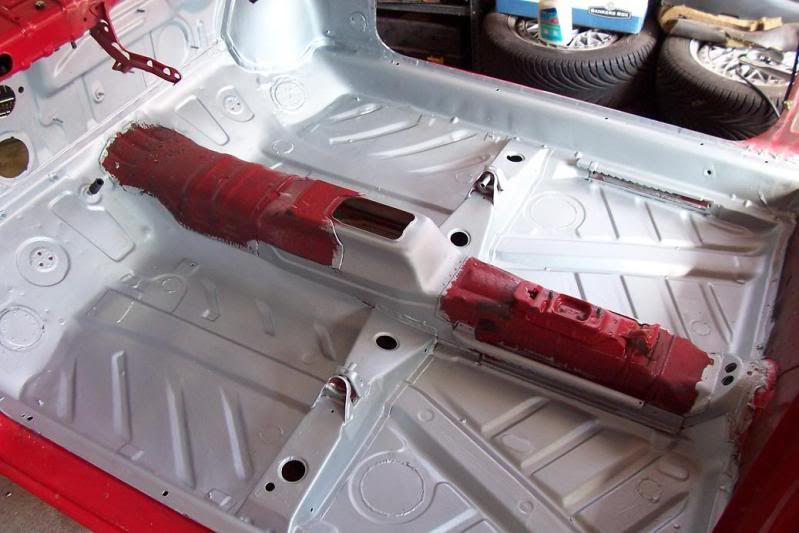
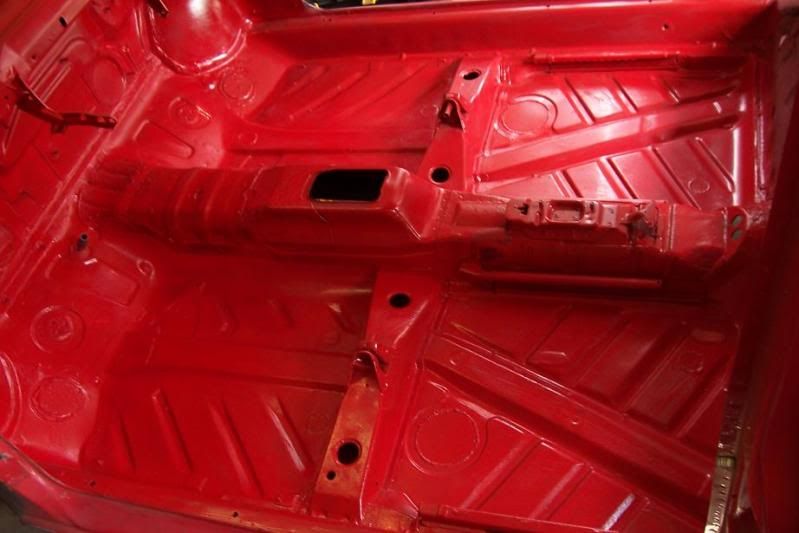
However it was a two door, it had no power steering, no ac, no sunroof. All the things I wanted. The floors were solid and it didn't have the famous mk2 windshield surround rot.
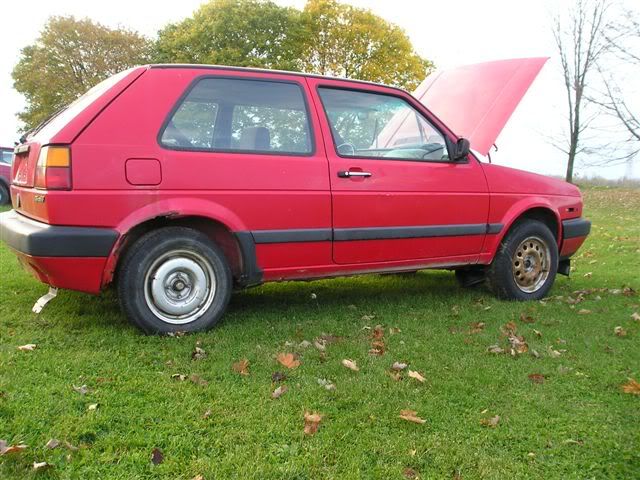
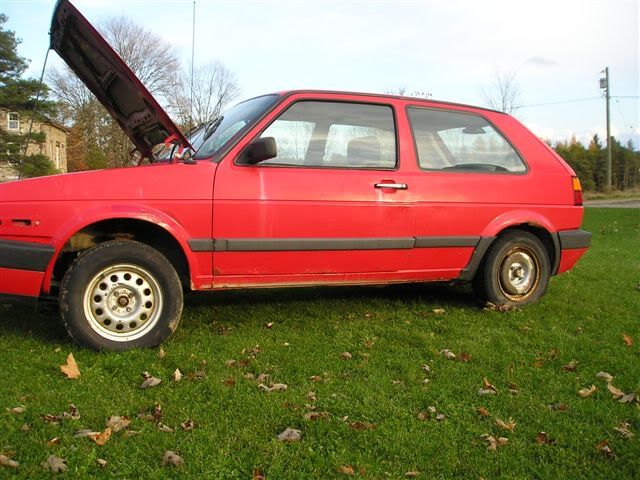
The guy said if I didn't buy he was going to send it off to get scrapped. You see less and less of these on the road here so I bought it. The owner had a flatbed and for a small gas fee was able to tow it to my place the next week.
Con't
|
|
|
|
01-08-2011, 07:25 PM
|
#2
|
|
StanceWorks Regular
- Join Date: Jan 2011
- Location: Canada
- Posts: 294
- User Status:
Offline
|
These are the initial engine bay shots.
Interior
Started with removing the hood, taking off the rotted front crossmember and rad support.
Bolt heads for the front rebar/crossmember were severely rusted, it was a real pain in the ass to get them off you had to continually downsize the size from metric to imperial and hammer the socket on before trying it again. Forget air tools.
Removed more stuff from the bay, brake booster, cables, bay harness, brake hardlines etc.
Rusted battery tray
Found this when I took off the fenders. You can see the hood support bracket there too. Not too safe.
Removed the Dash, HVAC box, fusebox, meters worth of ghetto speaker wiring.
|
|
|
|
01-08-2011, 07:41 PM
|
#3
|
|
StanceWorks Regular
- Join Date: Jan 2011
- Location: Canada
- Posts: 294
- User Status:
Offline
|
Last edited by renngolf; 01-10-2011 at 12:16 AM.
|
|
|
|
01-08-2011, 07:58 PM
|
#4
|
|
StanceWorks Regular
- Join Date: Jan 2011
- Location: Canada
- Posts: 294
- User Status:
Offline
|
Last edited by renngolf; 01-08-2011 at 08:01 PM.
|
|
|
|
01-08-2011, 07:58 PM
|
#5
|
|
Spock
StanceWorks OG
- Join Date: Aug 2009
- Location: Space
- Posts: 2,796
- User Status:
Offline
|
mmm i like, hope you have done alot of progress. that means alot of pictures, we all like pictures you know.
__________________
- Jón
Stretchsaurus and Pokemon.
|
|
|
|
01-08-2011, 08:05 PM
|
#6
|
|
StanceWorks Visitor
- Join Date: Dec 2010
- Location: Perth, Western Australia
- Posts: 83
- User Status:
Offline
|
^^that
and great work so far. at this rate its gonna be very tidy
|
|
|
|
01-08-2011, 08:14 PM
|
#7
|
|
StanceWorks Regular
- Join Date: Jan 2011
- Location: Canada
- Posts: 294
- User Status:
Offline
|
Quote:
Originally Posted by Zic
mmm i like, hope you have done alot of progress. that means alot of pictures, we all like pictures you know.
|
Hopefully enough to satisfy interest until I can start working on it again when it warms up.
Scrap
A bit more progress on the floors. Looking back I wouldn't do this again but its the I might as well's that get you. Rear portions were easily cracked and removed with a chisel. The front's were a gummy kind of tar shit that was a nightmare.
Rust Bullet
Seeing Red
Not such an eyesore anymore
|
|
|
|
01-08-2011, 08:23 PM
|
#8
|
|
StanceWorks Visitor
- Join Date: Dec 2010
- Posts: 41
- User Status:
Offline
|
im likin this! im a hugh vw fan!
|
|
|
|
01-08-2011, 08:53 PM
|
#9
|
|
StanceWorks Regular
- Join Date: Jan 2011
- Location: Canada
- Posts: 294
- User Status:
Offline
|
I am backtracking posting the progress there is a good chance I might forget certain steps or details. Sorry about that.
Took a break from the body to refurbish the steering rack.
Centered and buttoned up.
Mk3 10.1" Spindles, new bearings, hubs, balljoints, rod ends.
Balljoints are coupled with PMW balljoint extenders. The spindle tie rod arm was drilled out to accept a taper sleeve allowing the running of the rod end underneath as opposed to the top to keep the bumpsteer in check.
Out with the old..in with the not as old.
Stitched the front crossmember and repainted it. Its fitted with 4 powerflex bushings and a Bahn Brenner solid front mount.
I got a mk2 subframe with control arms that was in far better shape than the original one.
It was still cleaned up, had the seams stitch welded and repainted along with the control arms. Control arms were fitted with R32 rear bushings and poly front. New balljoint hardware.
The sway is the OEM 17mm with new links/energy bushings.
The tranny mount is G60, rear engine is non-hydro TT heavy duty.
The shifter bracket was sourced from another car repainted and fitted with all new bushings. Missing Linkz UHMW relay ball.
If you're ever pressing these at home. Use your old strut top hats.
The one piece I saved of the old subframe were the sway brackets. The bolts snapped off in the nuts. I had to grind them down and weld on some new nuts.
So far all the hardware is new 10.9. Nothing better than new bolts.
Restored a crappy rad support with new latch.
Last edited by renngolf; 01-10-2011 at 12:23 AM.
|
|
|
|
01-09-2011, 11:11 AM
|
#10
|
|
StanceWorks Regular
- Join Date: Jan 2011
- Location: Canada
- Posts: 294
- User Status:
Offline
|
Some more pics of the progress.
I didn't get any pics of this but the exhaust tunnel heatshield was removed and the shifter box dropped disassembled with a full rebuild kit. While all that stuff was out any spots of rust were wire wheeled away, covered in rust bullet, seam sealer, a ton of rocker guard. It's a pain in the ass without a rotisserie and crawling underneath it with a grinder and painting after licks bag.
Drivers side rocker guard
Bottom of the floors. You can see just how rusted the beam is in the back along with the tank straps.
Shifter box went back in a long with the tunnel shield. Had to reuse it because it would be impossible to locate one in better shape.
With the shifter box in put up the subframe, bolted it up according to spec.
Also threw in a adhesive backed heatshield since you won't find an oem one and I didn't want to use an enormous mk3 one. The exhaust runs so close to everything there its a piece of mind.
Before throwing in the steering column I replaced the ignition switch in it. Gave it a quick spray in black and regreased the ujoints.
Clutch return spring piece snapped on me
I was too lazy to go to the dealer so I just fabbed up a steel one.
Mk3 22mm master cylinder, new reservoir.
|
|
|
|
01-09-2011, 11:22 AM
|
#11
|
|
StanceWorks Regular
- Join Date: Sep 2010
- Location: Norway
- Posts: 211
- User Status:
Offline
|
Very nice work! Love mk2's
__________________

1994 VW Passat B4 1.8i sedan
1996 VW Passat B4 2.0i wagon
|
|
|
|
01-09-2011, 11:23 AM
|
#12
|
|
Eh?
StanceWorks Addicted
- Join Date: Oct 2010
- Location: West Chester, PA
- Posts: 896
- User Status:
Offline
|
So much work.
__________________
Fuck teams and crews. Do your own shit for yourself.
|
|
|
|
01-09-2011, 11:46 AM
|
#13
|
|
StanceWorks Regular
- Join Date: Jan 2011
- Location: Canada
- Posts: 294
- User Status:
Offline
|
|
|
|
|
01-09-2011, 12:09 PM
|
#14
|
|
StanceWorks Visitor
- Join Date: Oct 2010
- Location: Waco / Dallas
- Posts: 27
- User Status:
Offline
- Contact this user:
|
awesome work!!
my buddy has a 92 that he bought in pretty rough shape to and is in the process of restoring, hopefully like this.
props dude, i'm excited to see this "resurrection"
|
|
|
|
01-09-2011, 12:10 PM
|
#15
|
|
StanceWorks Visitor
- Join Date: Mar 2010
- Location: Turku, Finland
- Posts: 89
- User Status:
Offline
|
Looking good! I totally LOVE builds where everything gets renewed and theres loads of pictures. Keep it up.
__________________
|
|
|
|
01-09-2011, 12:22 PM
|
#16
|
|
The German
StanceWorks OG
- Join Date: Apr 2010
- Location: Berlin, Germany
- Posts: 2,701
- User Status:
Offline
|
My eyes like what they are looking at.
__________________
Quote:
Originally Posted by Oxer
I dont know why, but I love your car.. Its OEM cleanness makes me happy in the genitals.
|
|
|
|
|
01-09-2011, 12:29 PM
|
#17
|
|
The French Connection
StanceWorks OG
- Join Date: May 2010
- Location: Deuce Oh Four
- Posts: 3,178
- User Status:
Offline
|
im loving this. I had a 91 JEtta Coupe that was written off cause i had the infamous rot around the windshield. I should have fixed it.
|
|
|
|
01-09-2011, 12:36 PM
|
#18
|
|
StanceWorks OG
- Join Date: May 2010
- Location: Bulgaria / EU
- Posts: 2,426
- User Status:
Online
|
amazing work! attention to every single detail = win! love this built, cant wait to see this mk2 finished!
|
|
|
|
01-09-2011, 12:55 PM
|
#19
|
|
StanceWorks Regular
- Join Date: Jan 2011
- Location: Canada
- Posts: 294
- User Status:
Offline
|
Thanks guys. Questions, comments, advice are always welcome.
In the midst of the build I picked up a MK3 rear beam off a friend. It uses the same brackets that the mk2 uses it will push out the width around half an inch on each side. Everything else is the same. The main difference is it uses 56mm dia bushings while the mk2 uses skinnier 44.5mm bushings.
VW decided to use an 8mm allen head on the carrier bolts. 3 out of 4 were stripped out before I got to them. I had to weld a nut onto the allen heads and turn them out.
Proportioning valve spring
The prop valve also uses long thin allen type bolts that have an acorn seat so they sit flush when they are tightened to the driver side beam braceket into some welded on nuts.
As usual these were seized, heads broke off. I had to cut off the welded nuts on the bracket to take off the prop valve which probably stopped functioning like it should years ago.
This picture is going back in time but the beam and brackets were treated to a wire wheel to get the rust off the welds. It was covered in rust bullet and painted. You can also see the shifter box here.
The the beam was really the only thing I could use out of everything that came with it. I took apart the rear calipers and found the coating on the pistons was pretty pitted so a rebuild kit was useless. They're good for cores at least. Stub axles had deep scratches in them. It looked like the bearings grenaded in the past. Rotors were also trash.
The bushings were a real treat. Chances are if your mk2 or 3 has never had these changed out the rubber is just floating around in its metal sleeve. You have to make a relief cut in the sleeve to get them to budge.
Once the beam was painted and bare I threw in a bildon motor sport style torsion bar to keep it from twisting. I will never drill one out again.
Makeshift bearing press I made.
Almost there. You want the metal collar to extend 8mm past the socket. Spec is the same for mk2 and 3.
|
|
|
|
01-09-2011, 03:58 PM
|
#20
|
|
StanceWorks Regular
- Join Date: Aug 2010
- Location: detroit, michigan
- Posts: 342
- User Status:
Offline
|
nice work..............you dont mess around!
__________________
|
|
|
|
01-09-2011, 05:50 PM
|
#21
|
|
Banned
StanceWorks Visitor
- Join Date: May 2010
- Posts: 58
- User Status:
Offline
- Contact this user:
|
Looking good.
|
|
|
|
01-09-2011, 10:56 PM
|
#22
|
|
StanceWorks Regular
- Join Date: May 2010
- Location: Oshawa/Peterborough Ontario
- Posts: 360
- User Status:
Offline
|
Wow awesome work, at first i was like nahhh that thing is to far gone, but obviously have the required mad skills to prove me wrong.
"I was too lazy to go to the dealer so I just fabbed up a steel one."
__________________
|
|
|
|
01-09-2011, 11:35 PM
|
#23
|
|
StanceWorks Regular
- Join Date: Jan 2011
- Location: Canada
- Posts: 294
- User Status:
Offline
|
Haha thanks.
It kinda got out of control since it wasn't supposed to a full resto. I've had a few 'what the hell was I thinking?' moments.
Bolting things back on is the fun part
Edit: Added a few missing pics to their respective sections.
Last edited by renngolf; 01-10-2011 at 12:24 AM.
|
|
|
|
01-10-2011, 12:35 AM
|
#24
|
|
StanceWorks Visitor
- Join Date: Oct 2010
- Location: Oregon
- Posts: 114
- User Status:
Offline
|
Love where this is going!
Keep us updated, I wanna see how this turns out.
__________________
Volkswagen Jetta, MKiii (Daily)
BMW 320i, E21 (FOR SALE)
|
|
|
|
01-10-2011, 02:51 AM
|
#25
|
|
Creativity breaks rules
StanceWorks OG
- Join Date: Aug 2010
- Location: Malinwa
- Posts: 15,347
- User Status:
Offline
|
props for even starting on that rust bucket
__________________
|
|
|
|
 |
|
| Thread Tools |
|
|
| Display Modes |
Linear Mode
|
Posting Rules
|
You may not post new threads
You may not post replies
You may not post attachments
You may not edit your posts
HTML code is On
|
|
|
All times are GMT -5. The time now is 01:02 AM.
|