 Tweet
Tweet
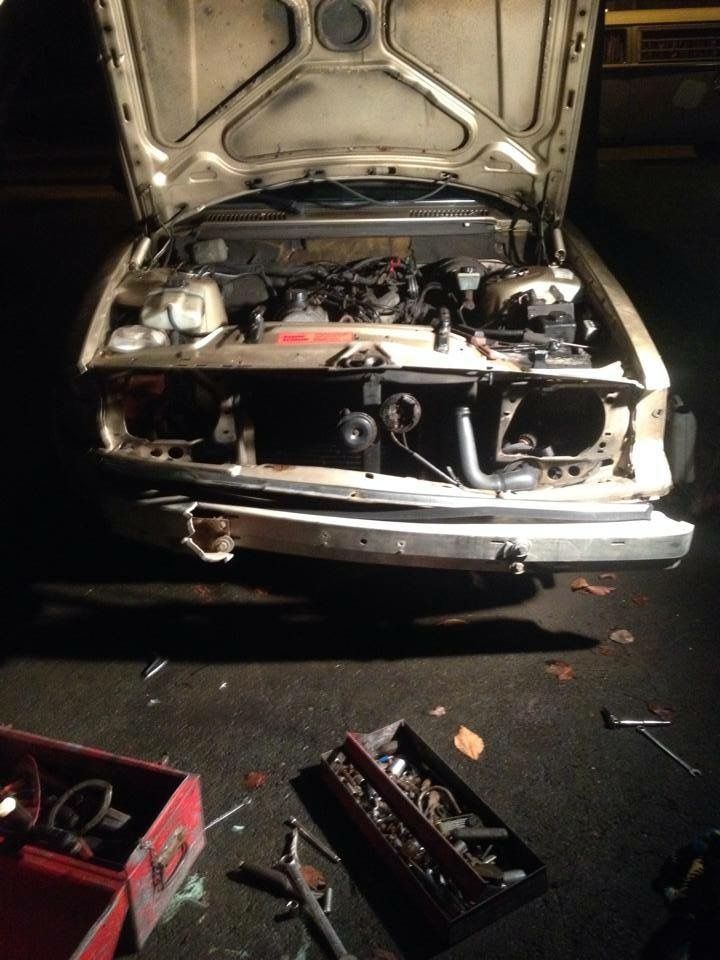
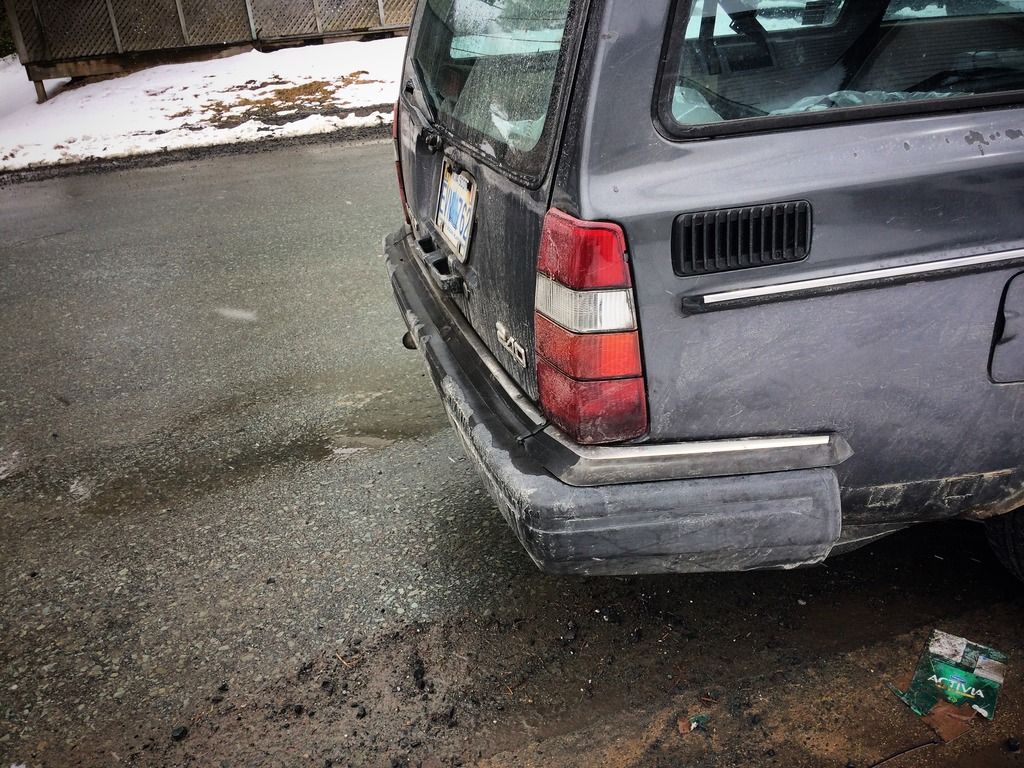
So before everyone gets upset, I've owned this car for awhile, and have a lot of progress pictures from some time ago, i'll start with that and slowly document the current LS plan. I just pulled the engine and its sitting until spring time when i can start on the work. If you were hoping to see an in depth swap thread right way, I'm sorry to disappoint, but stay tuned, what was all talk before, is finally starting to look like so reality now.
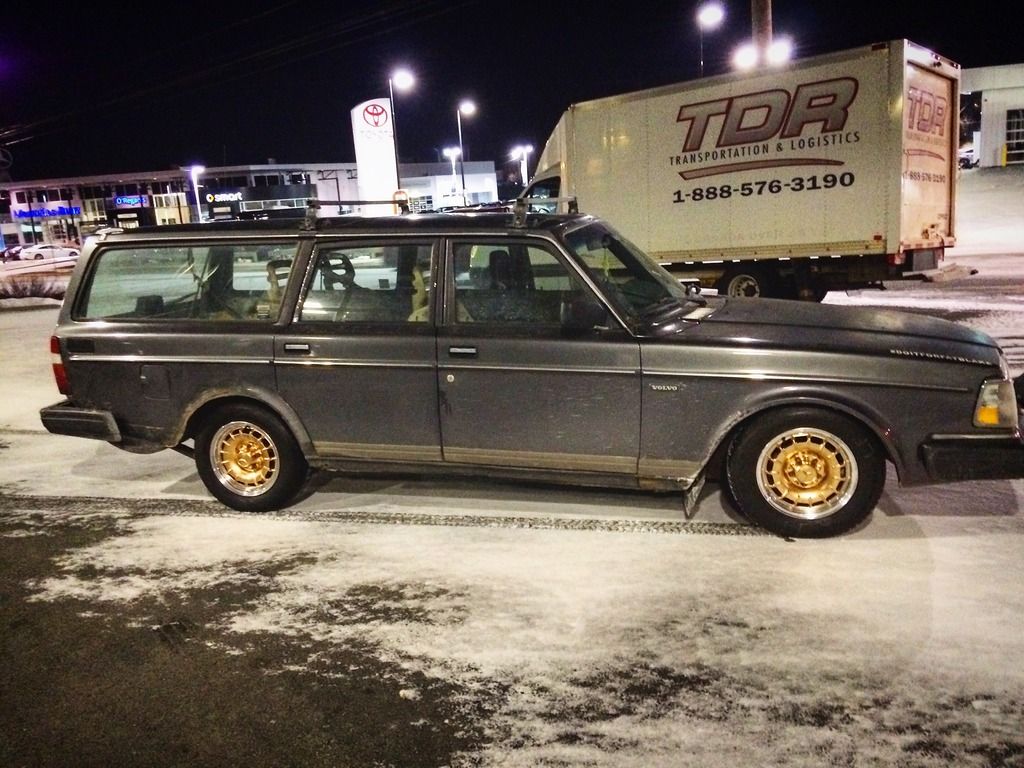
anyways on to the car. the car in question is a 1991 volvo 245 with a 2.3l 4 banger and a stock 5 speed. The story on the car is after getting into a hit and run accident where the other guy took off, My first volvo wagon was destroyed, So i went on the hunt and found this one. i was skeptical at first, i got a response to a "wanted" ad i posted on my local kijiji (canada's craigslist) I went to go look since the seller didnt have a camera or didnt know how send photos. when i get there its buried up to the rims in dirt in a field with grass mowed around it. they were actually using it as a green house and had little saplings in the small pots growing in the trunk section.
this is what happened to the first one, and the only picture i had of the day i boght the new one
bent the frame rails way out of whack
on the way home from buying it the shifter linkage exploded on me, so first thing to do was turn some new brass bushings to replace the worn out nylon ones
i spent a few months on and off wrenching on it to get it road worthy and once i did i had a little fun with it

in the spring i took a weekend, and put some short shocks in and put some stiffer springs. I cut a few coils off the springs for some cheap low
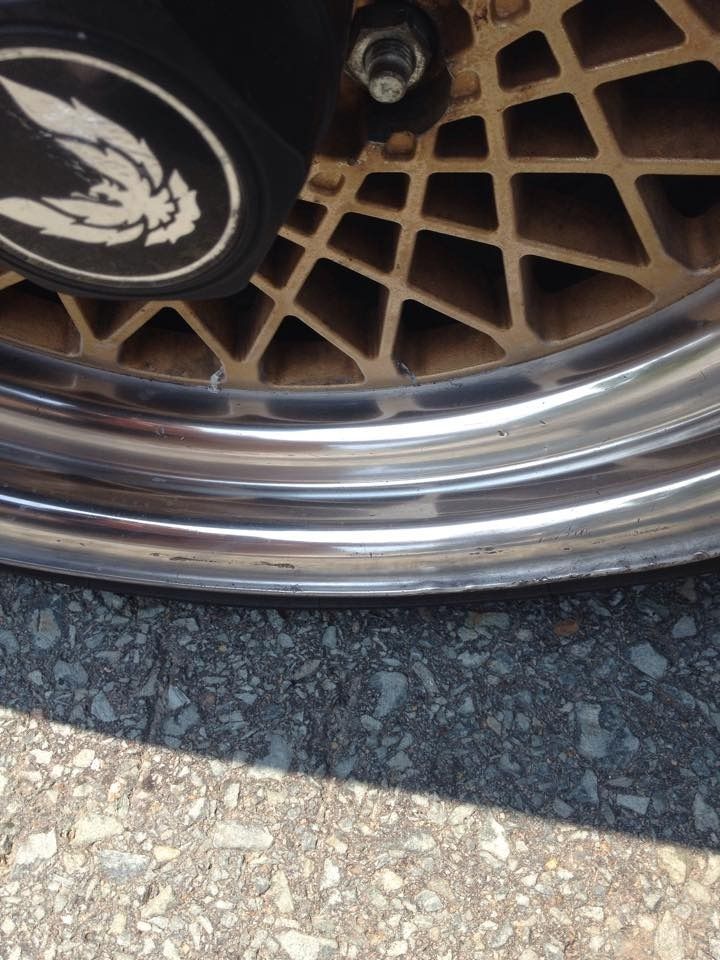
got a wicked deal on these pontiac trans am wheels 16x8 staggered offsets. they were pretty rough but shined up nice after a lot of wet sanding and polishing
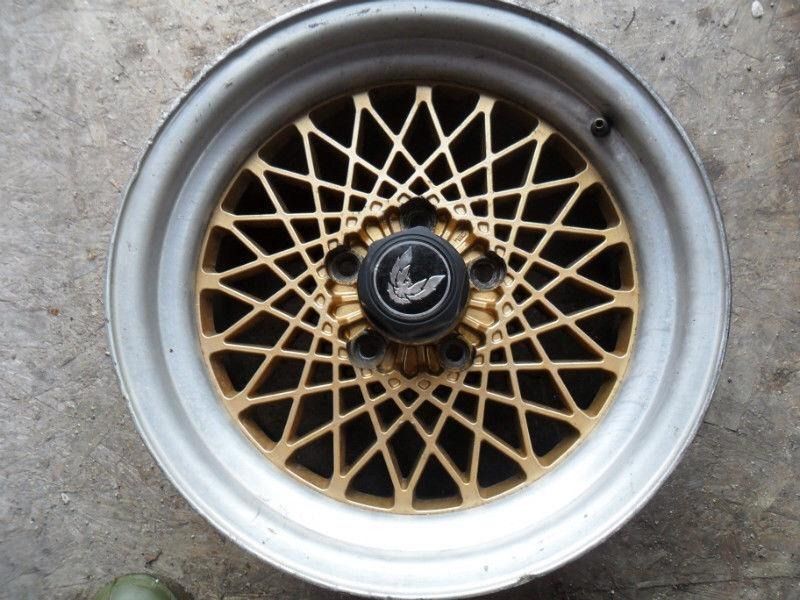
this was one of the first ones i did, but they got better as i took more time with them
got them mounted and an alignment done.
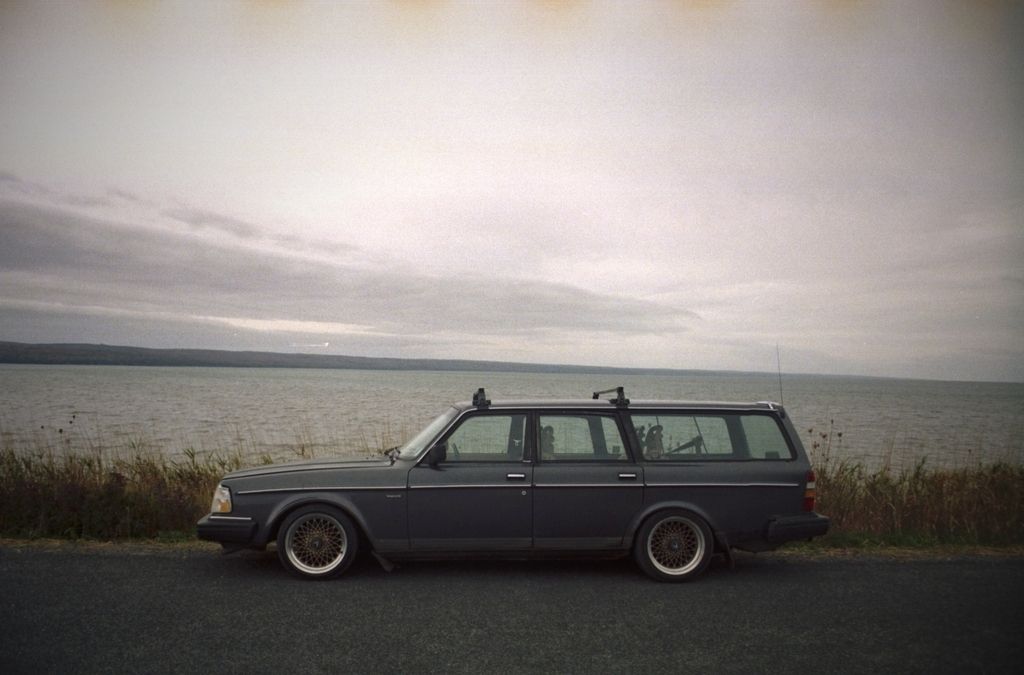
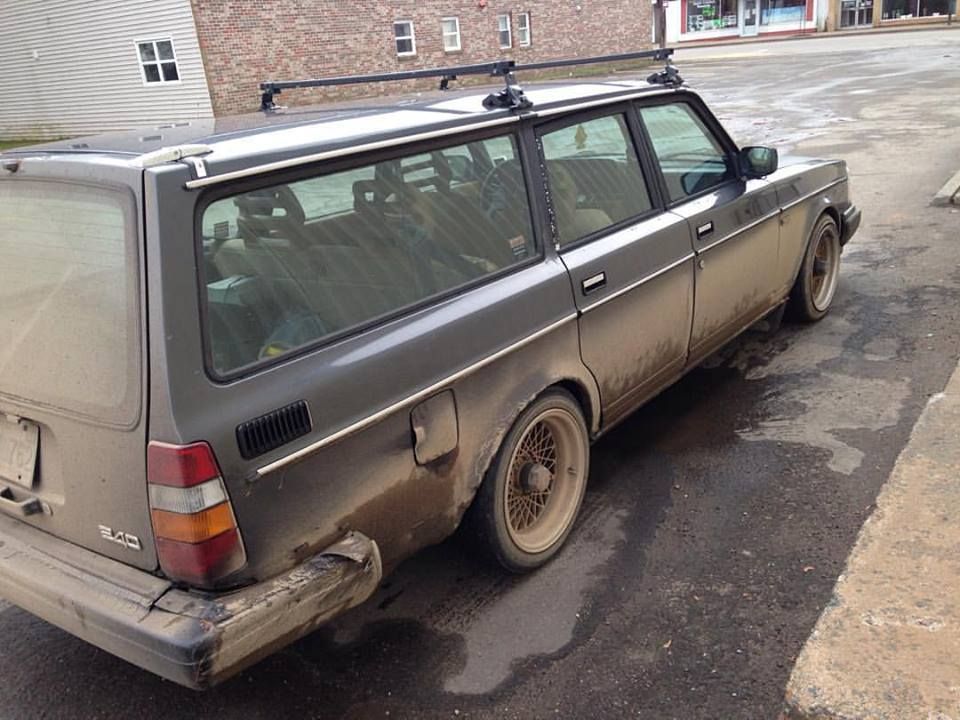
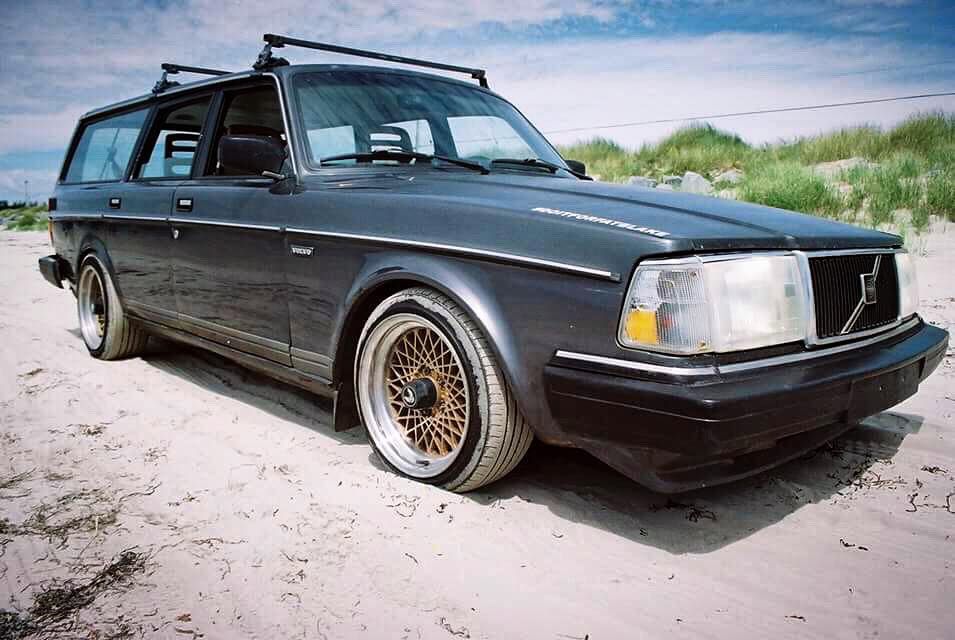
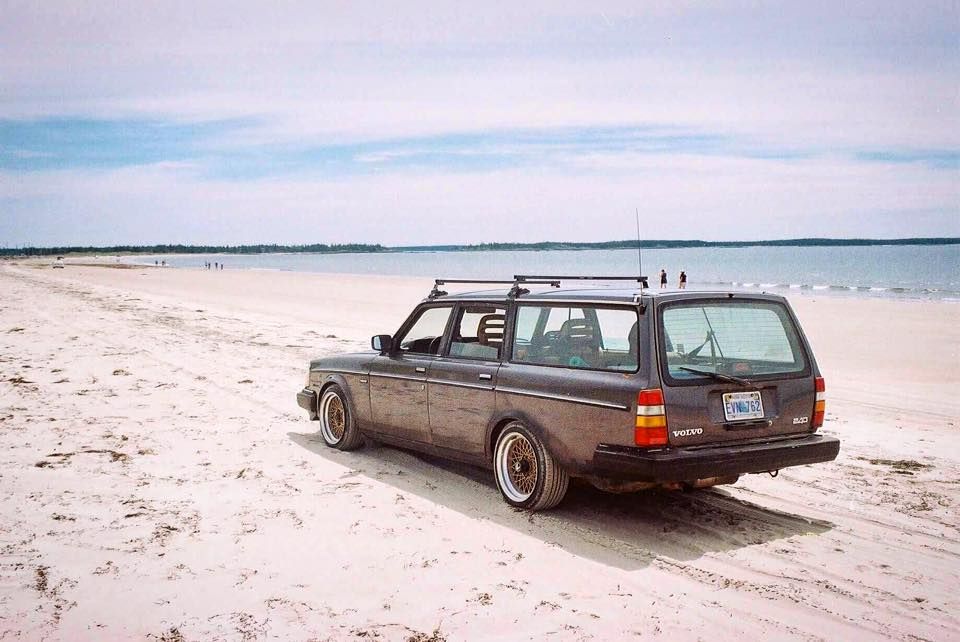
drove it like this for summer and loved every minute of it, its my first RWD car, and its been a blast having one fun with it. at this point it was a bone stock 20 something year old car with a set of wheels and lowered haha. definitely turned some heads though!
I've never been one to baby my vehicles, so i snapped a pic after some "rally" driving on some farm roads haha
fast forward to fall, and a season of abuse, its maintenance time.
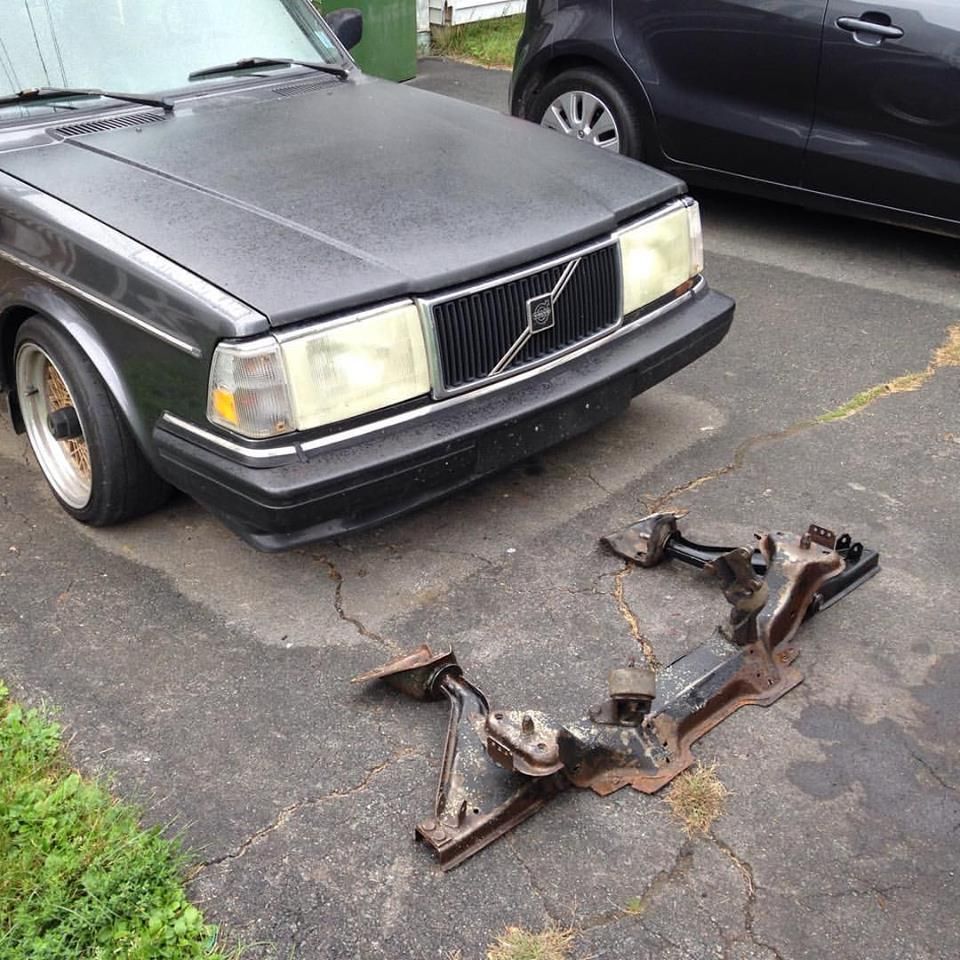
beat the hell out of the sub frame all year, so i found a used but good one to replace
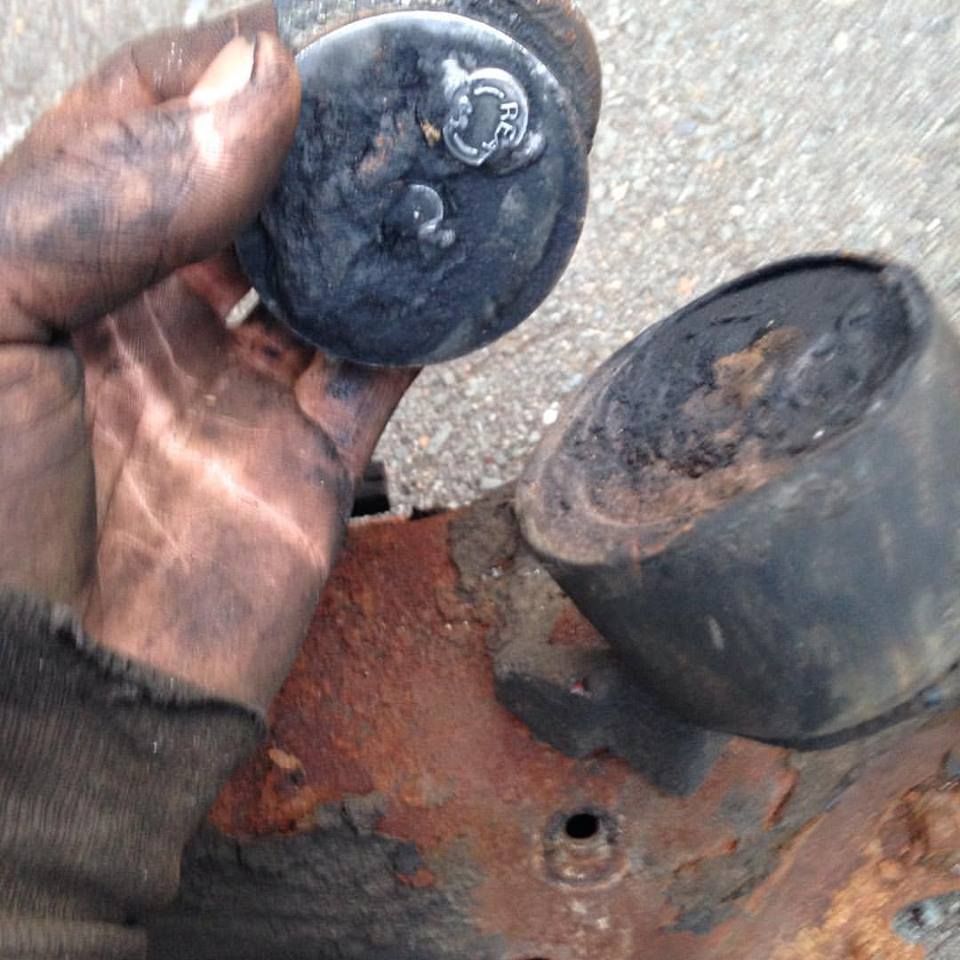
during that time i found a completely snapped engine mount... guess it had more torque than i thought
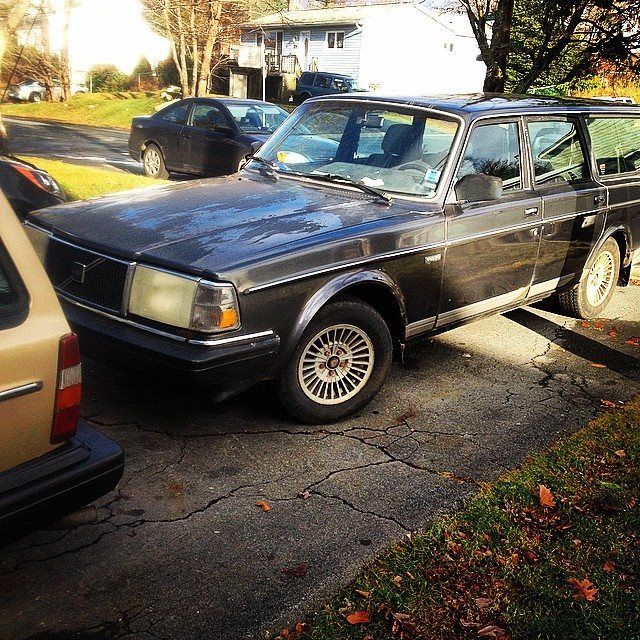
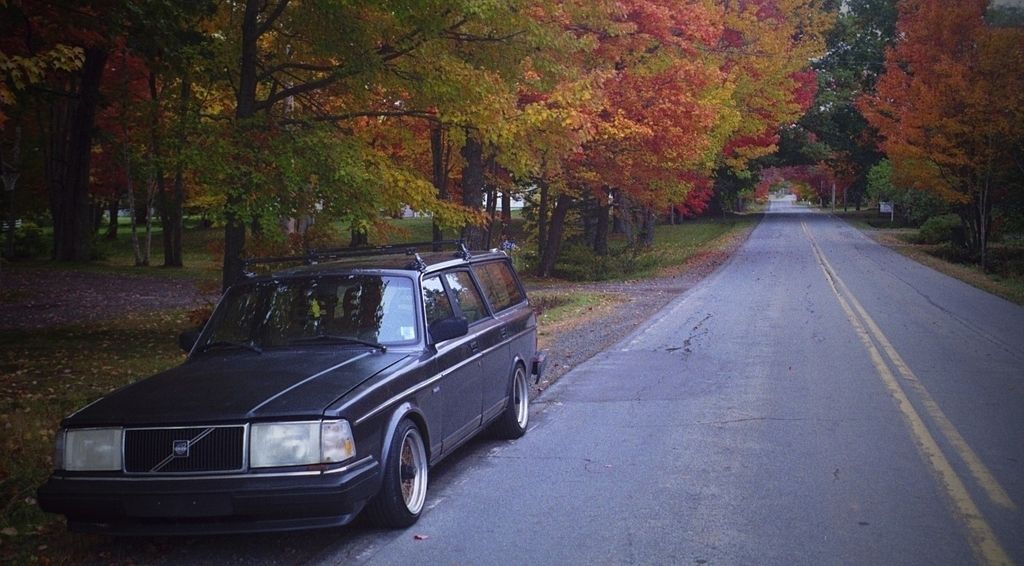
got her back together and freshened up the front end just in time for the fall colours pictures
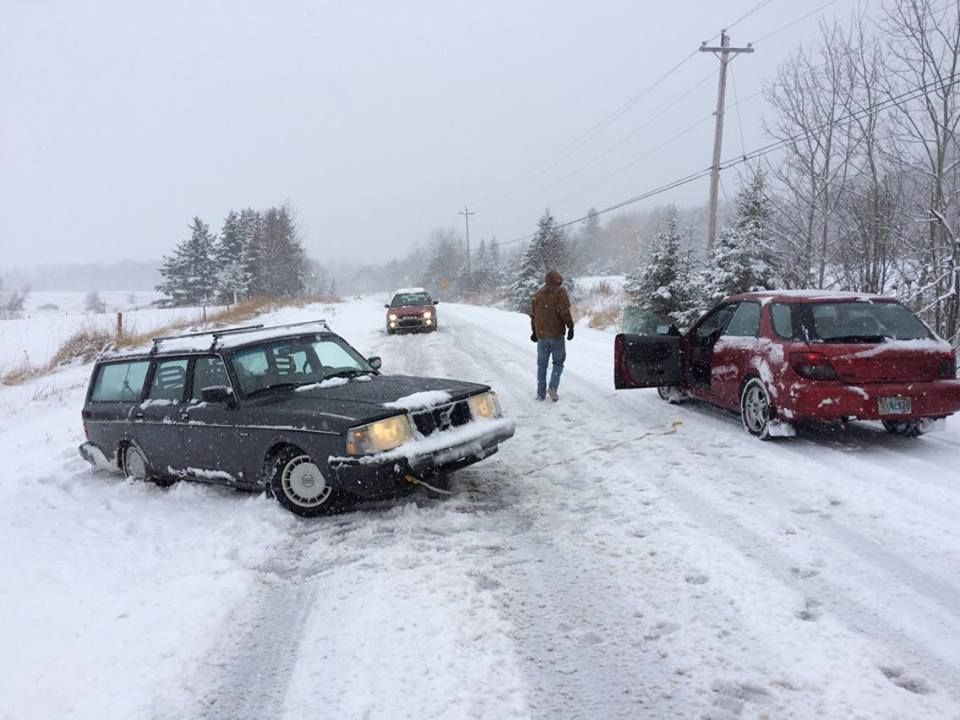
of course after fall comes winter.. threw some new winters on the old steelies and spent more time sideways than i did straight.
i only ended up in the ditch once, but thankfully my friends drive subarus... so they pulled me out.
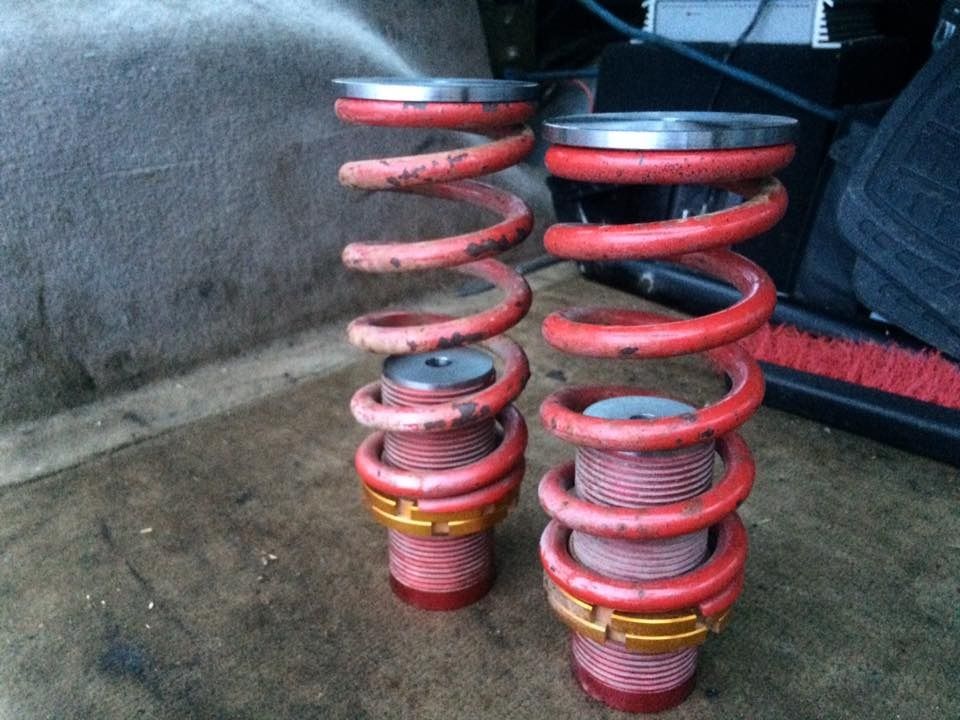
spring came again, and i put the GTAs back on, which was nice and refreshing, Also put some adjustable perches and 2.5ID springs in the back. the old cut ones would rub all the time with any weight in the car, this solved that problem
yes i know my arch is beat to hell like i said it rubbed a lot.

so as time rolled on, and i learned more, and broke more stock parts i started really modding it.
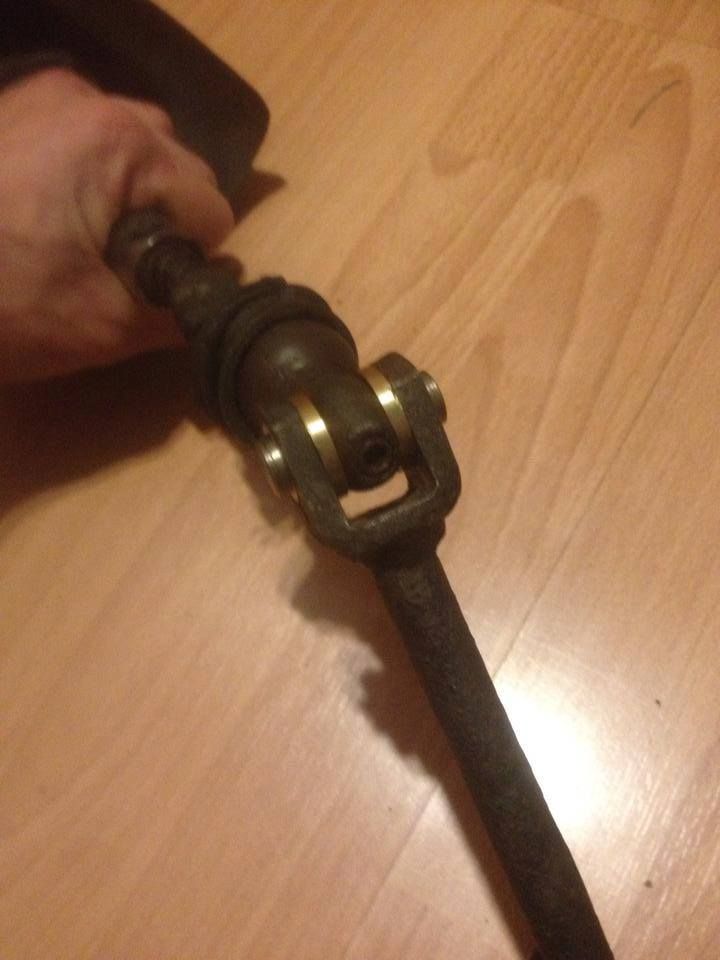
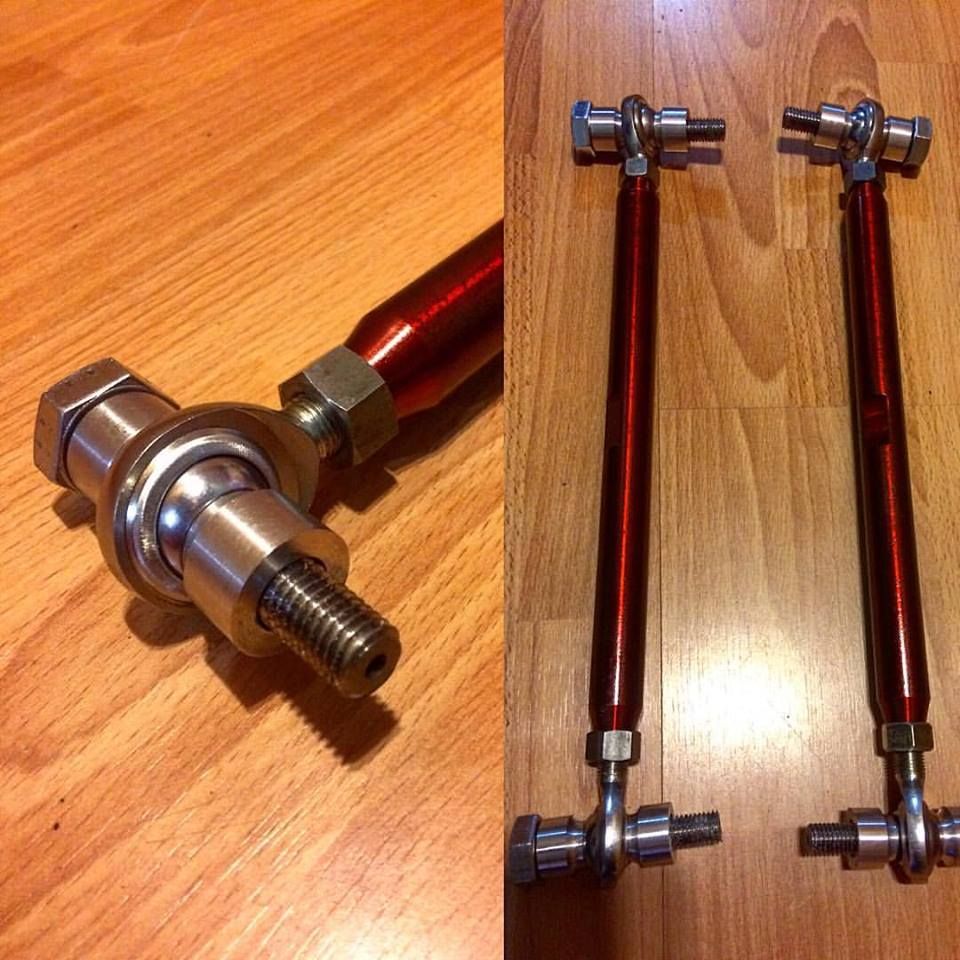
i kept destroying torque rod bushings (upper links in a 4 link) so i built some adjustable rods with heim joints at each end. All the heim joints i use have a teflon liner in them for maintaince free care, and durable life span. I also used LH threads at one end and RH threads at the other. this way they can be adjusted with out removing them from the car.
next were some adjustable sway bar links with poly upper bushings to lower the bar back down.

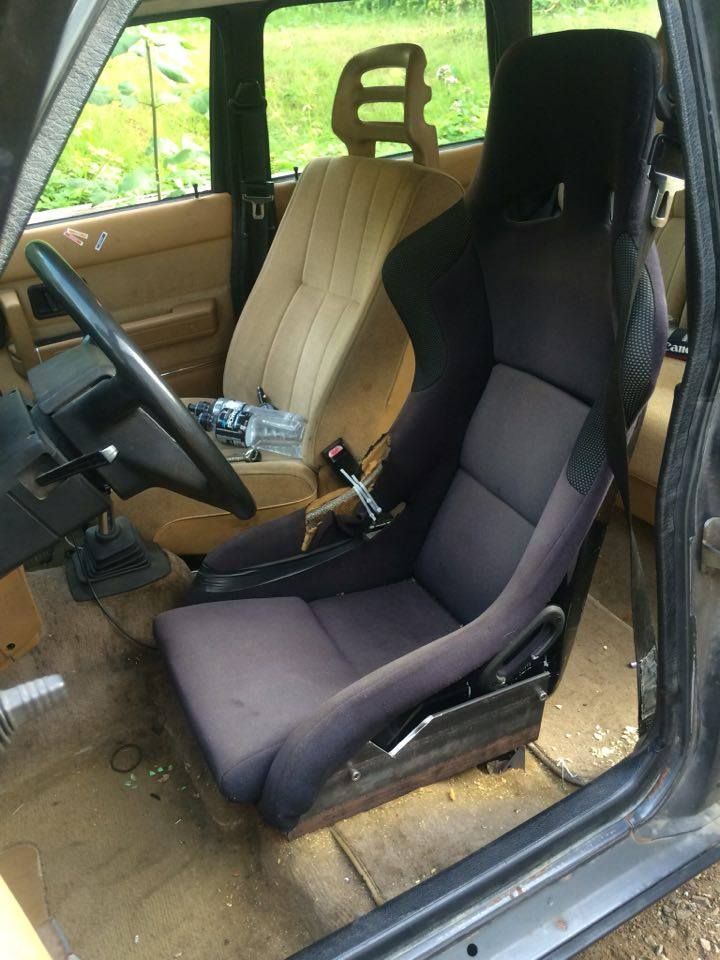
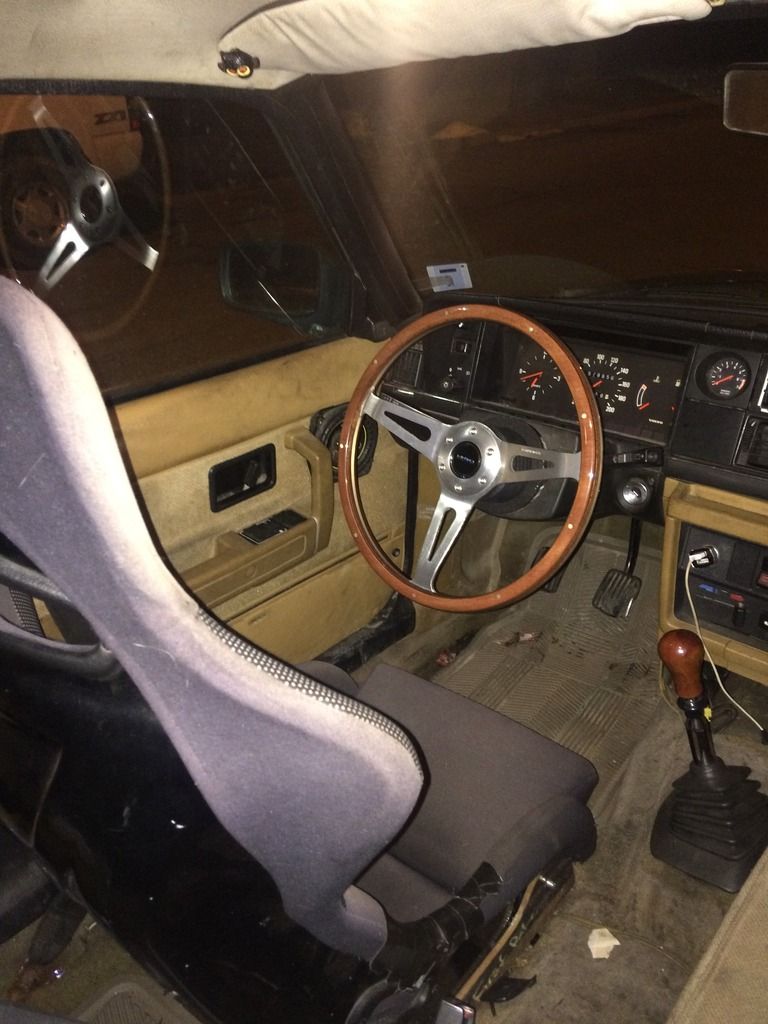
I also picked up this cheap fixed back race seat from a friend, its nothing special, but its probably my favourite thing I've done to the car so far, so much better feel for the road and corners. a lot more feel to the cars input.
summer was fun
fall came again, and it looked pretty.

got a free set of these (not my pic)

so i decided to clean them up on the lathe, and paint the paint faces
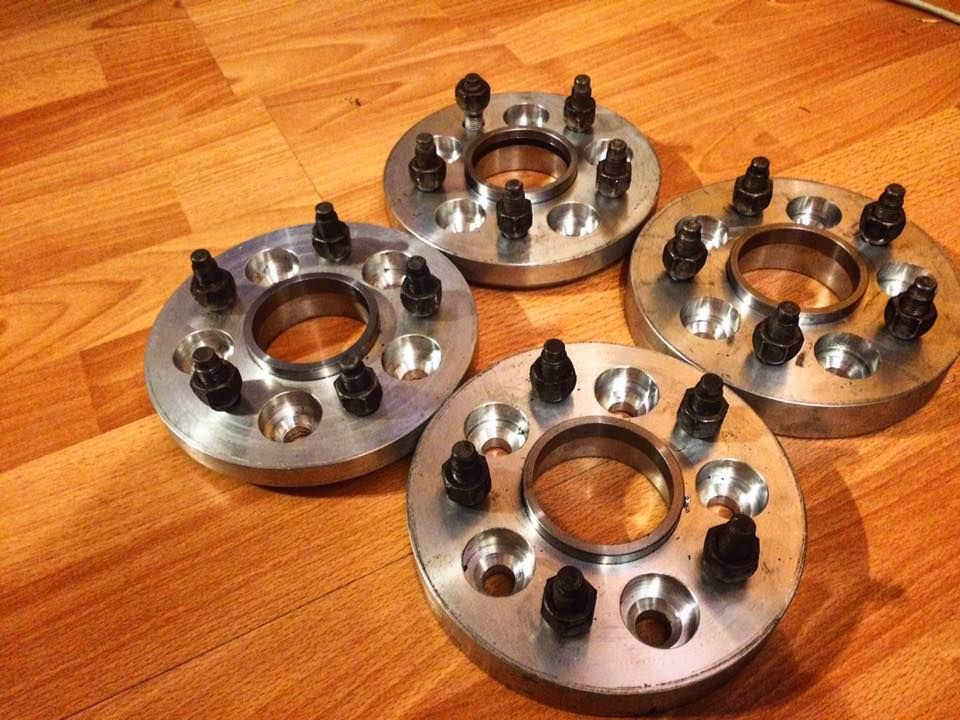
we had a slow day at work, so i made some adapters to fit, and re used the studs from my GTA adapters.
and viola! new winter wheels
now this is more present day. this winter has been harsh on the old girl.
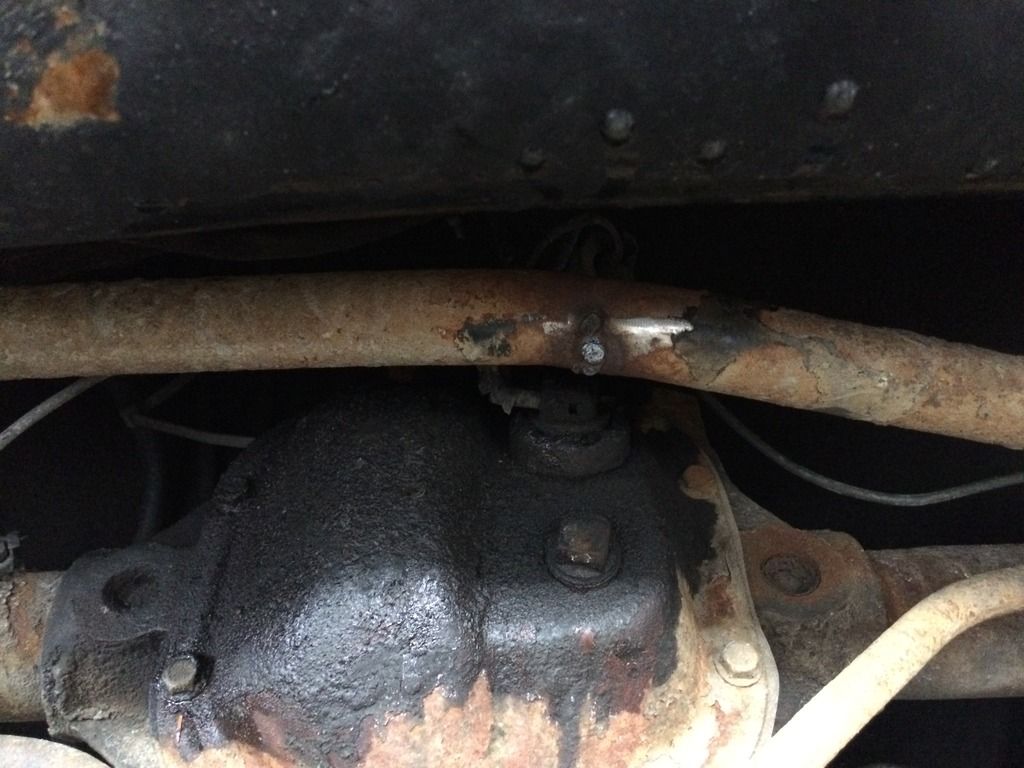
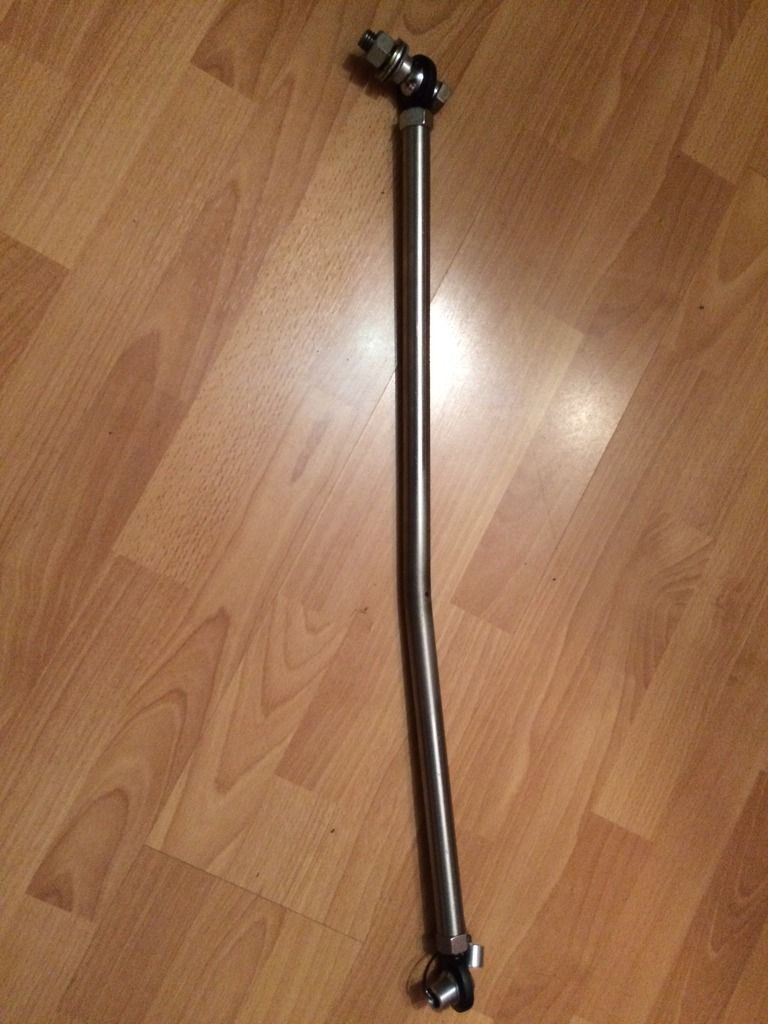
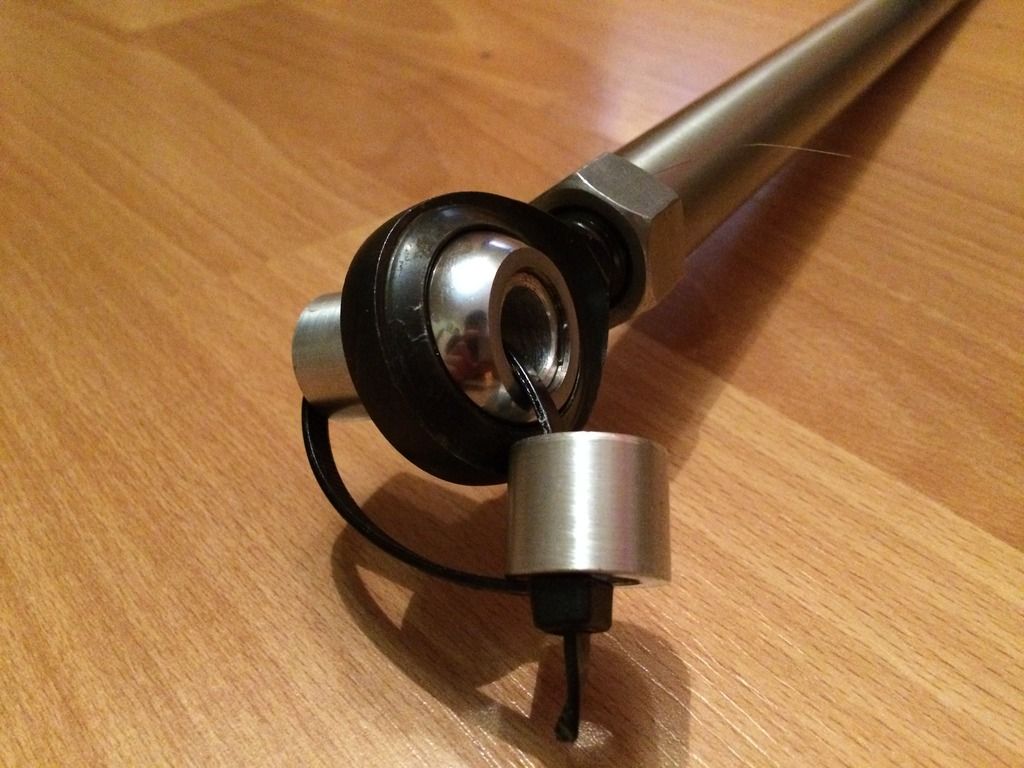
the old pan hard rod got rusty, and decided to crack at the spot where it kinks to clear the diff. to get me home i just welded the crack. that didnt last long, but it gave me time to build a new stainless rod with adjustable heims.
then one day i felt a big clunk in the rear, turns out my rear axle bushings exploded. so for now i just replaced with stock ones
i also picked up a new wheel, and turned a wooden shift knob (first time machining wood, came out pretty nice)
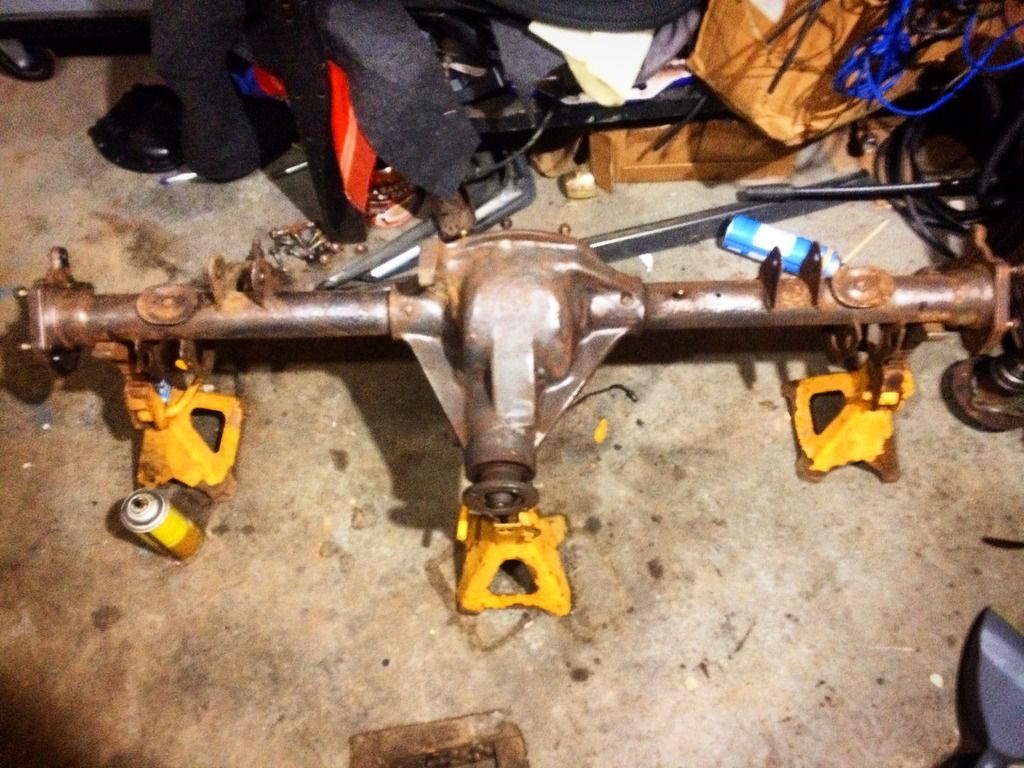
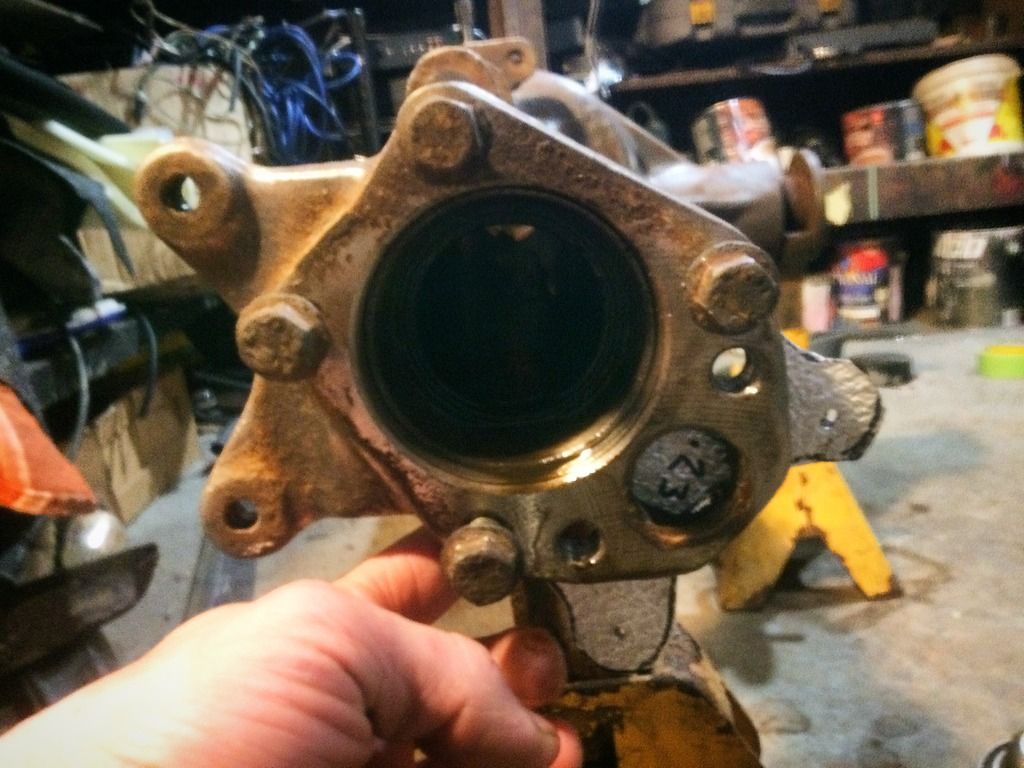
heres where the fun stuff started happening. picked up this rusty rear axle and everything attached to it. The plan for this was to have something out of the car I could do work on. I also planned to weld the diff. but wanted a back up incase it wasn't gonna work for daily use.
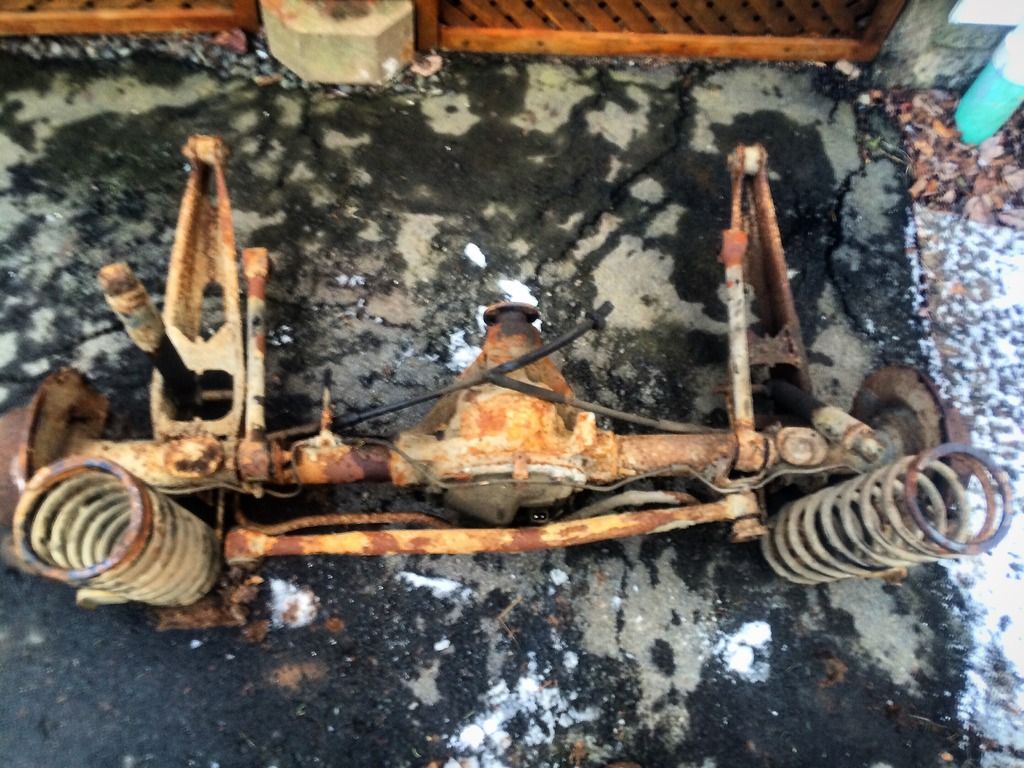
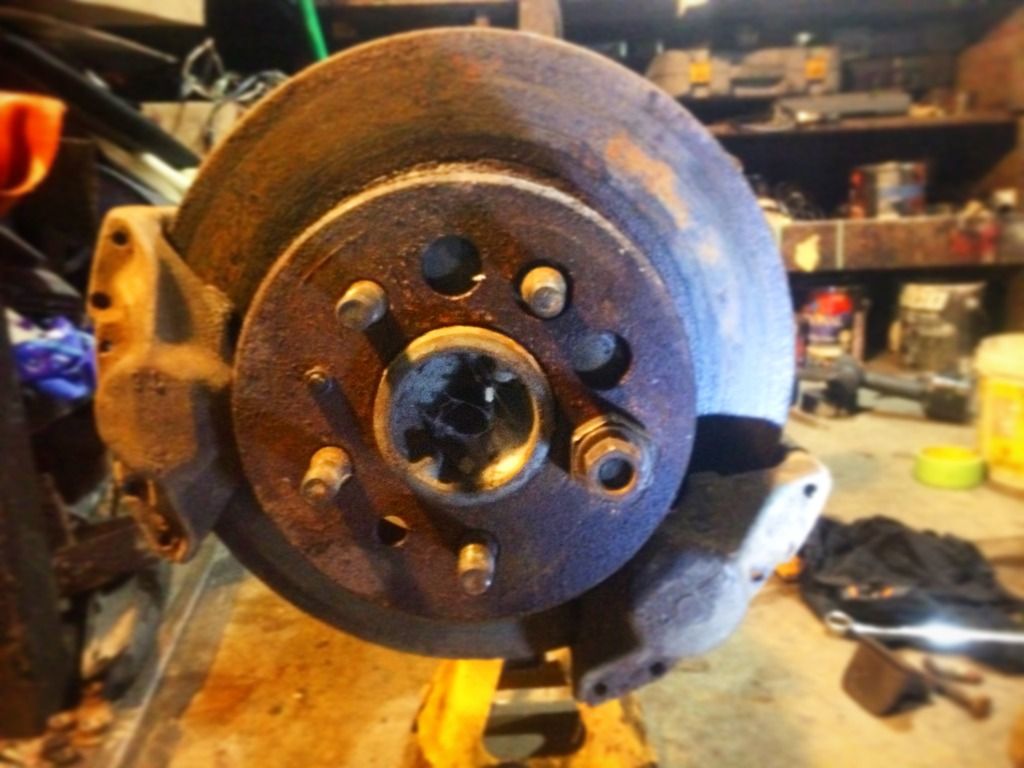
stripped it down and opened it up

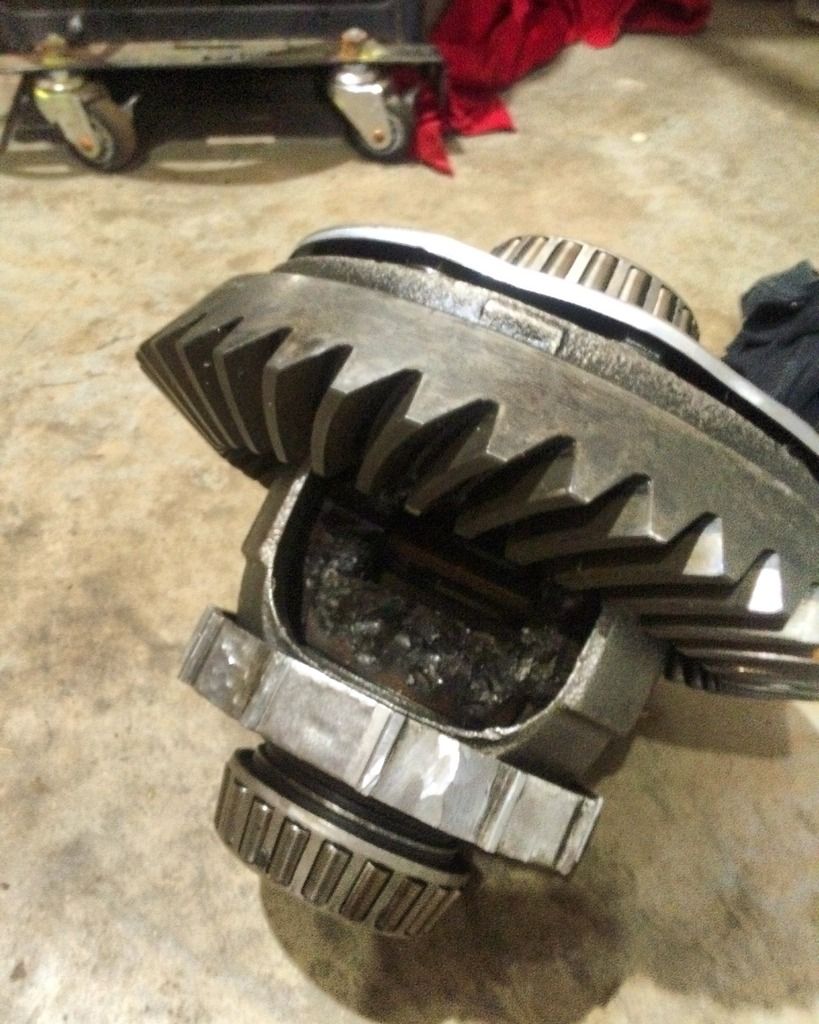
welded it up. its ugly, but those spiders will never move again
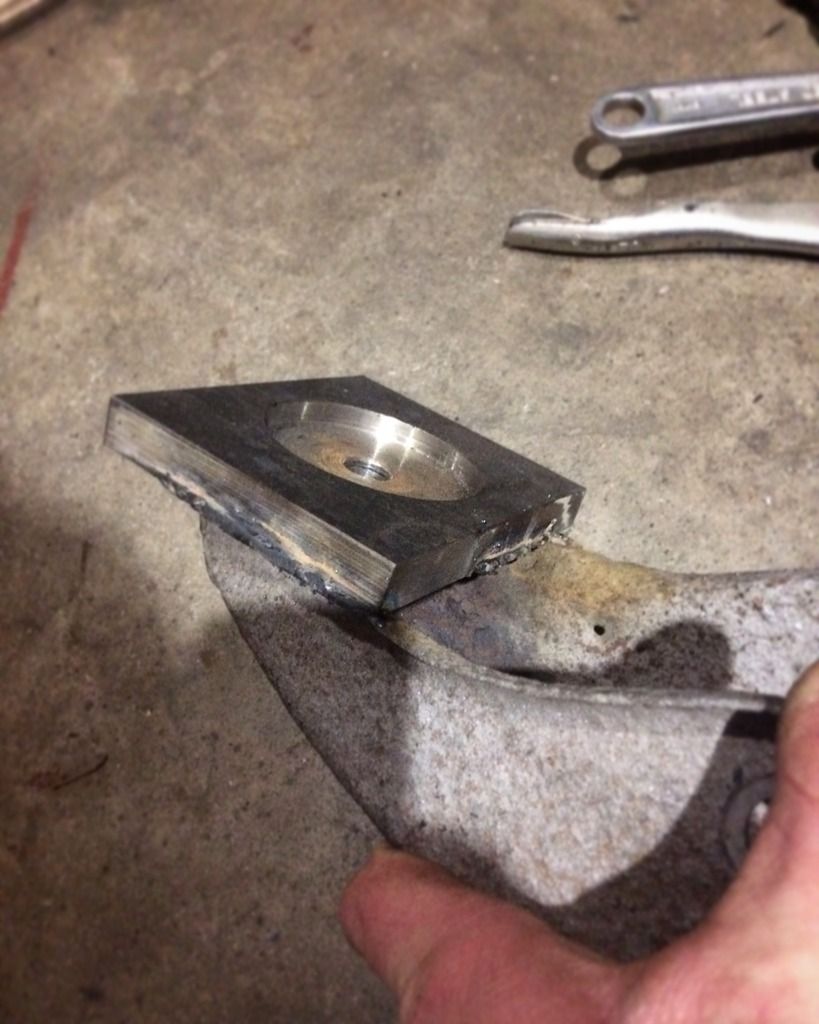
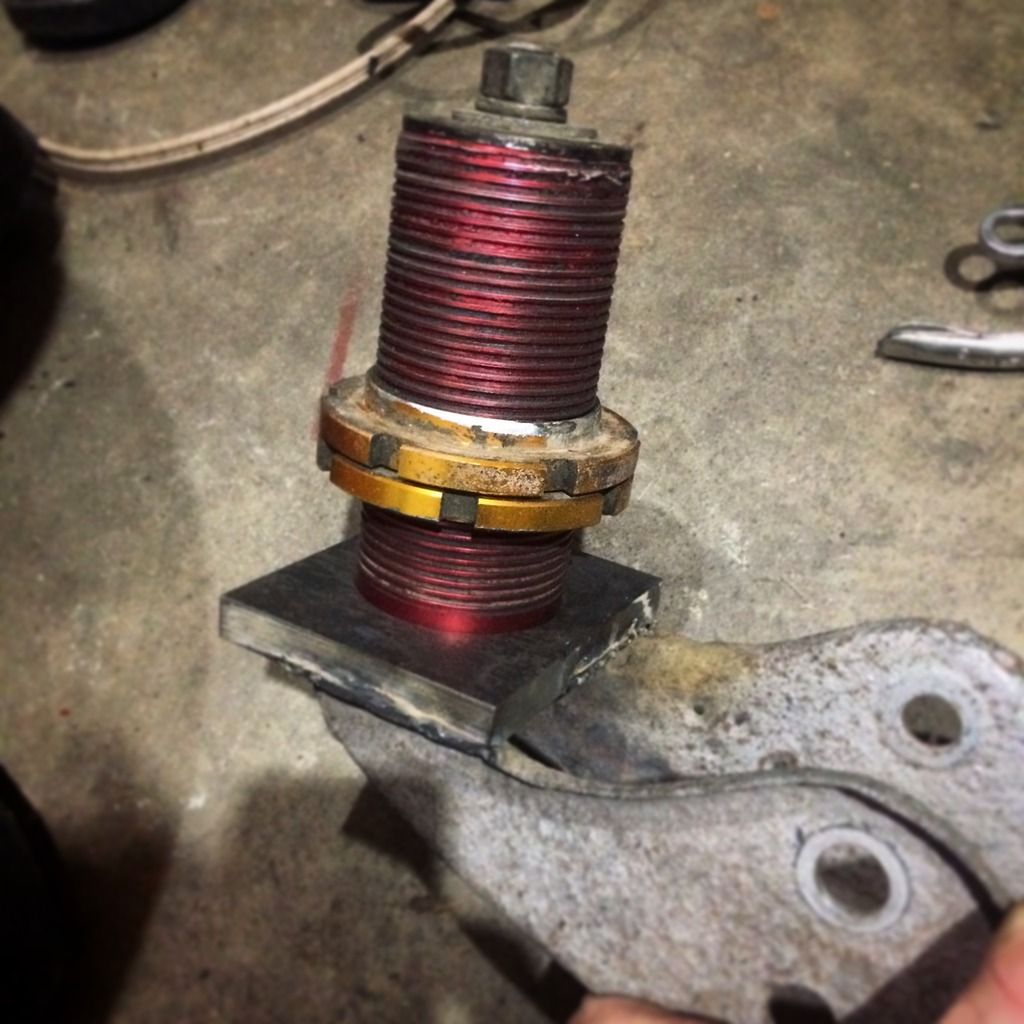
here's my fix to the axle bushings. I machined an aluminum housing that presses in. with a spherical bearing in the middle held in with a snap ring. the plan is to eliminate any rubber bushings in the rear of the suspension, and replace with heim joints and spherical bearings.
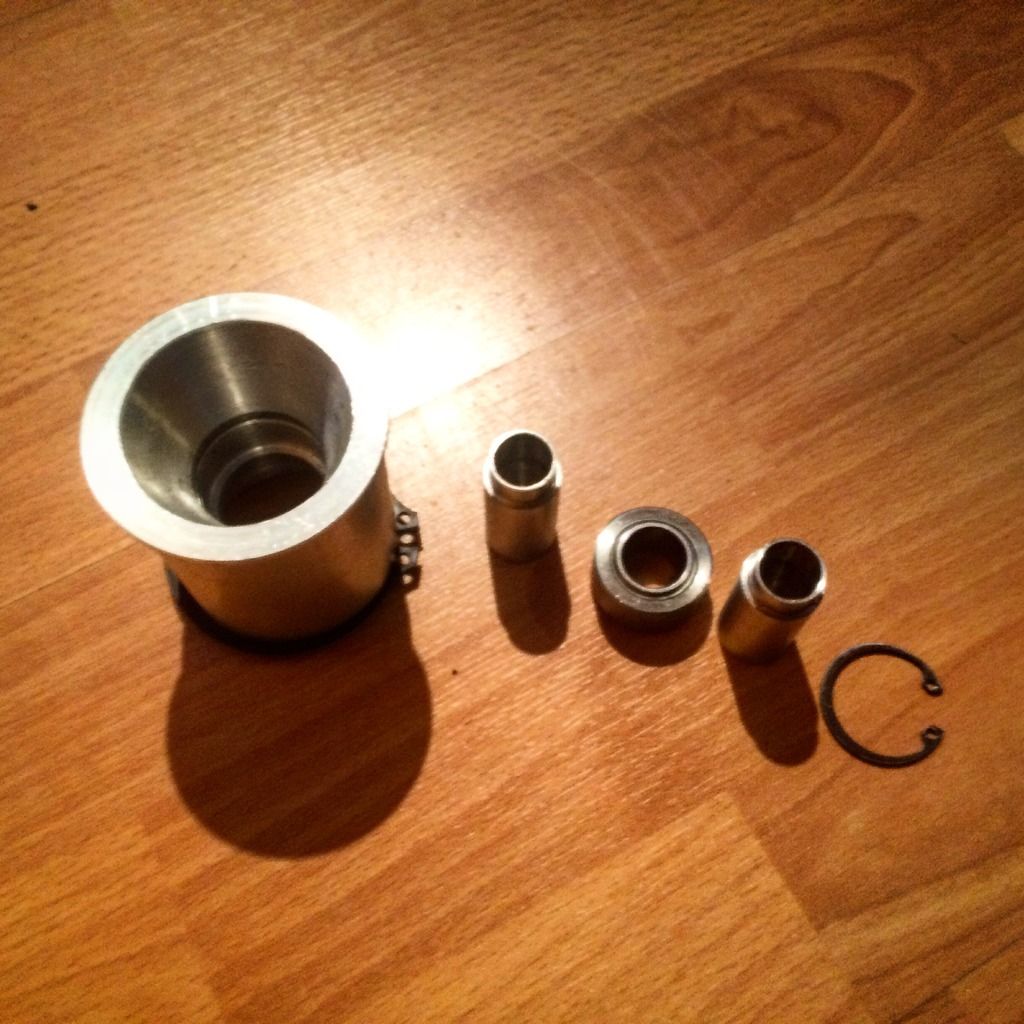
heres the new ones next to a stock one
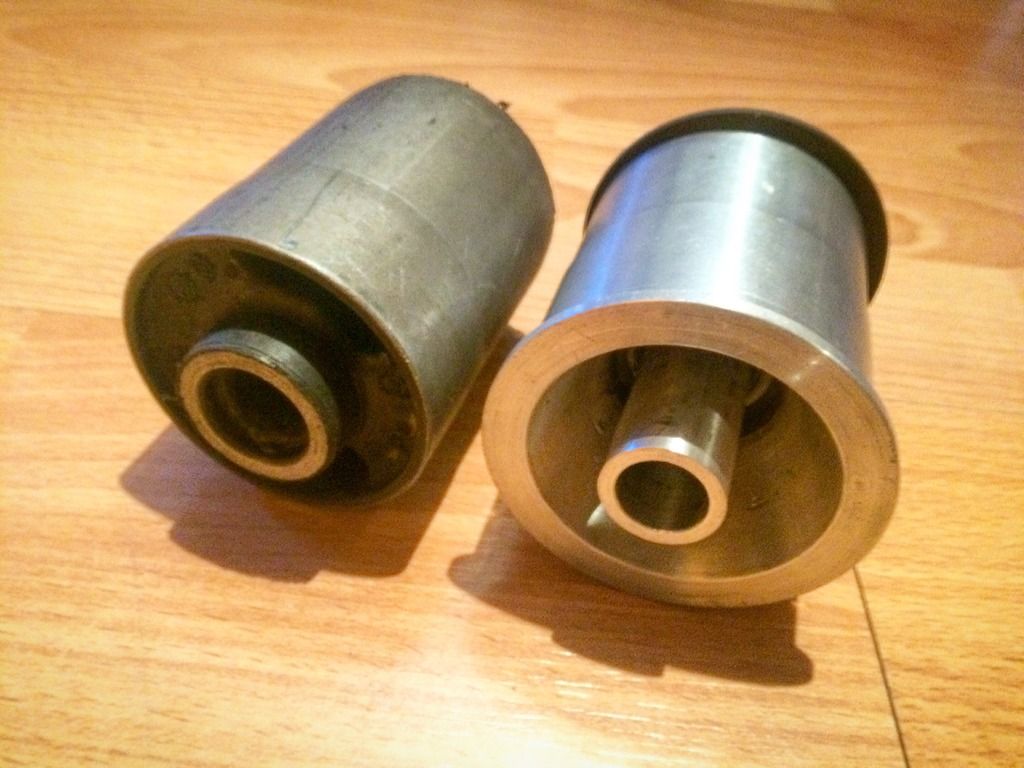
cleaned up the housing
I plan to run dual callipers for a hydro hand brake. the volvo factory brake system is very complicated, and would rather leave it un-touched. so using a separate res. and hydro lever to feed separate lines to secondary callipers will be the route I'm going.
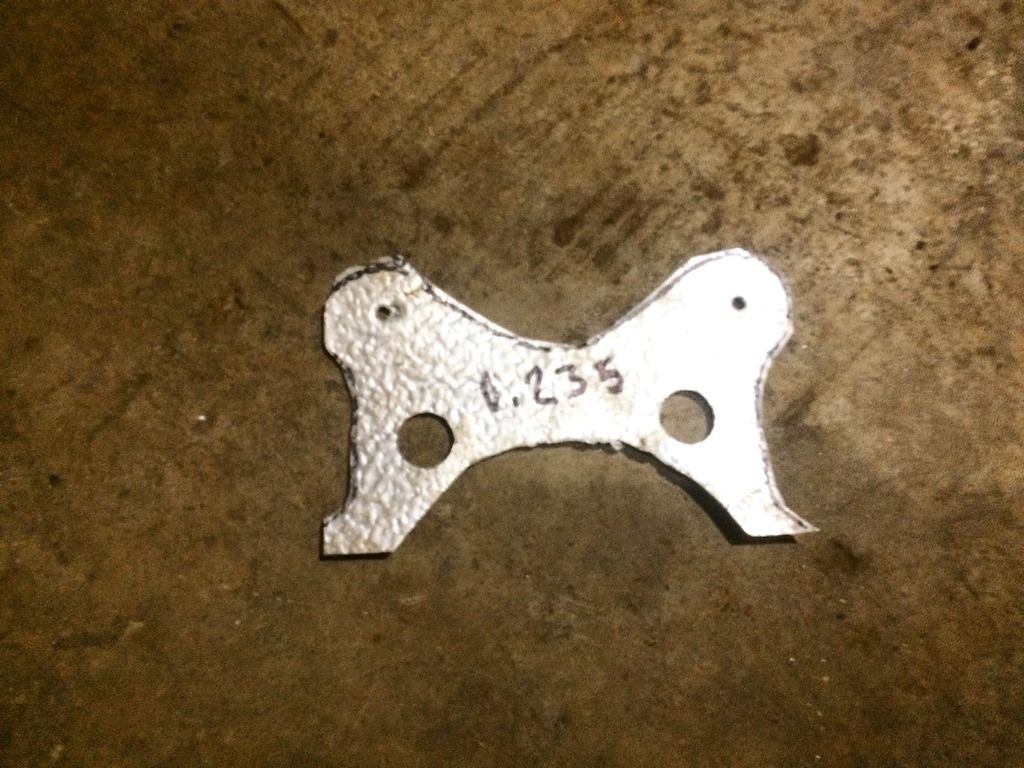
to start, i took some measurements and made a template.
the bracket will mount to the existing holes the factory park brake cable uses to mount to the housing
never got any pics of the brackets i made at work, but heres a final mock up
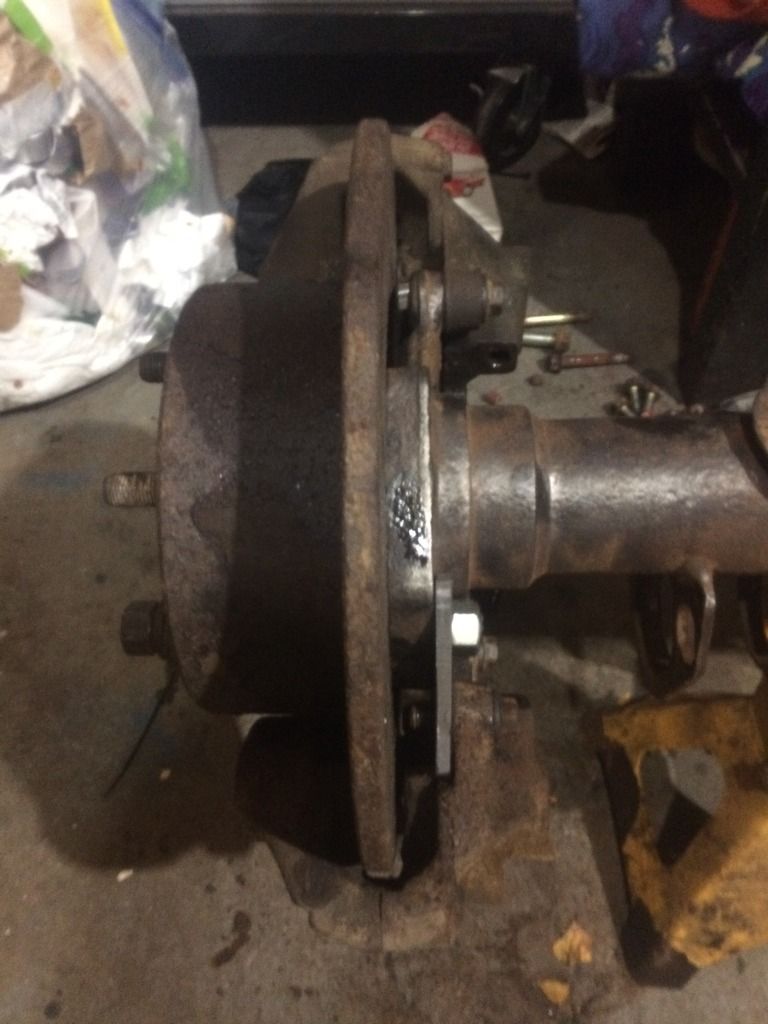
put the diff back in, and painted the housing. also rebuilt and painted the spare callipers
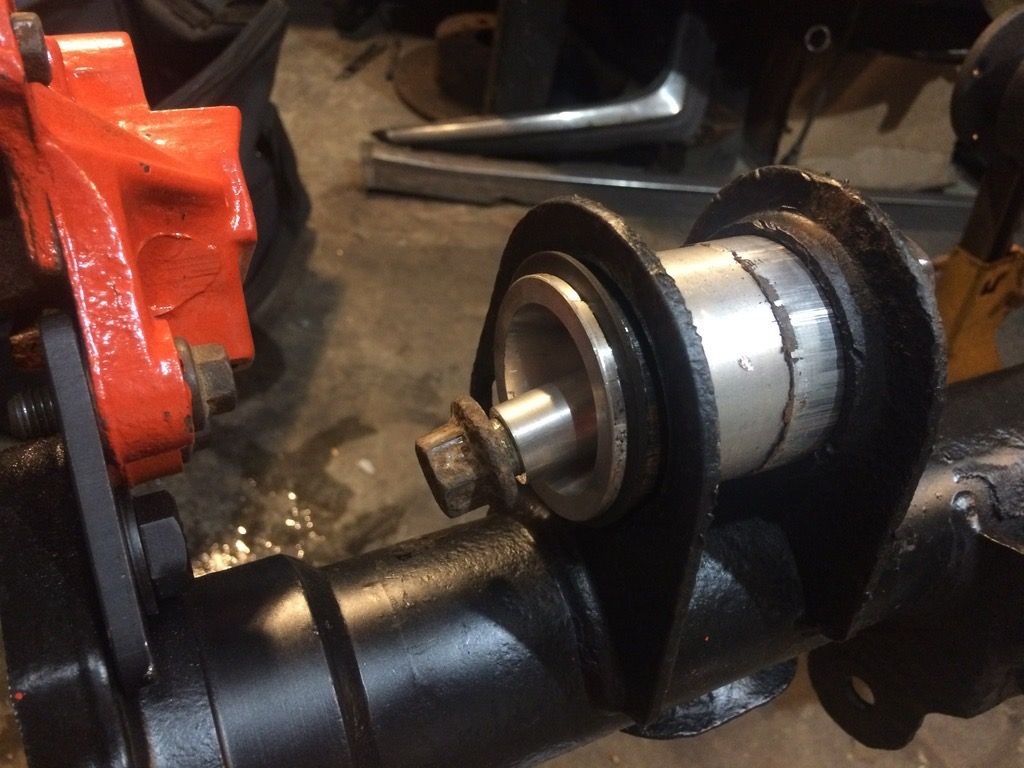
heres a shot of the new axle bearings installed
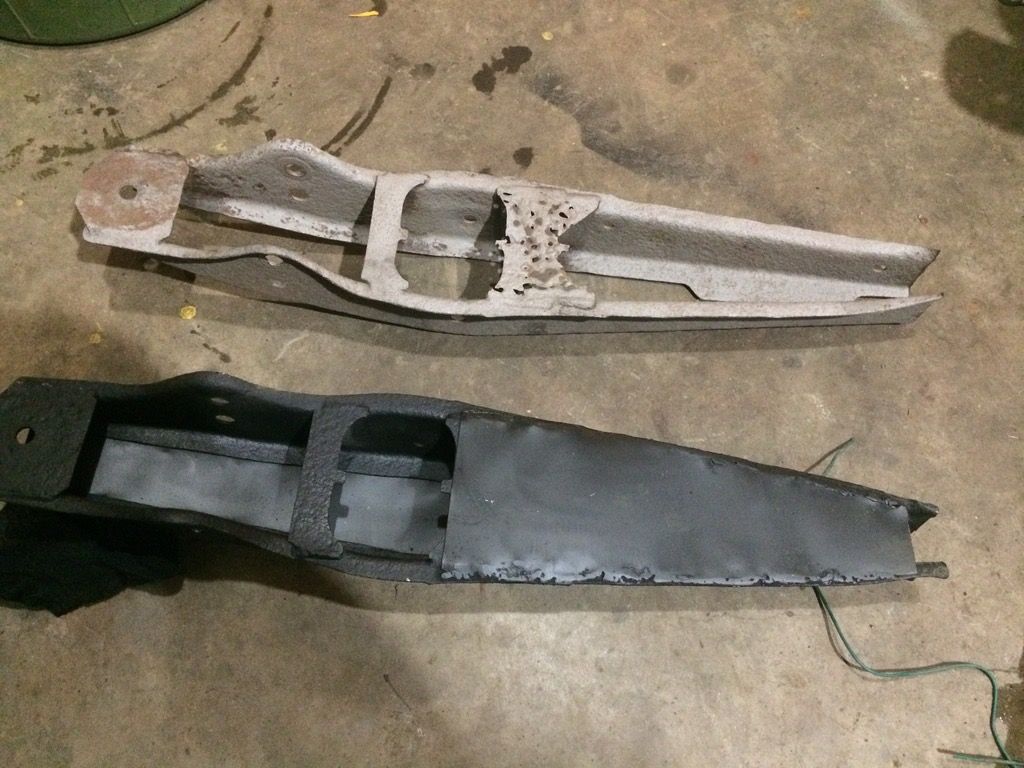
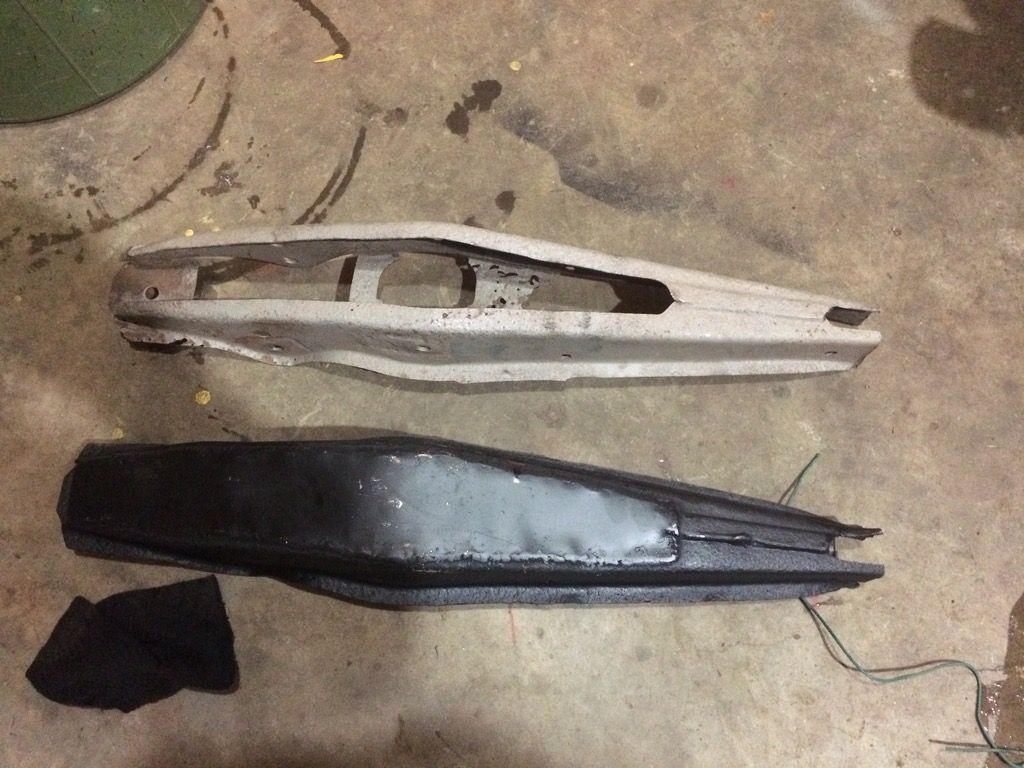
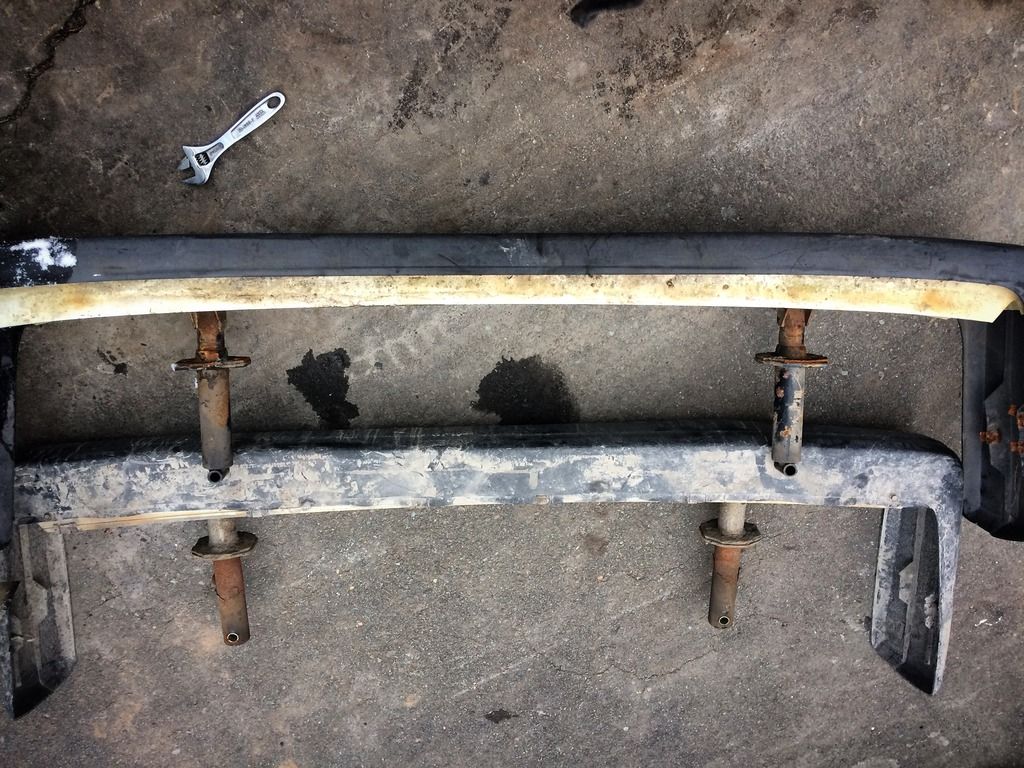
sand blasted the old lower control arms and started boxing them in with new metal
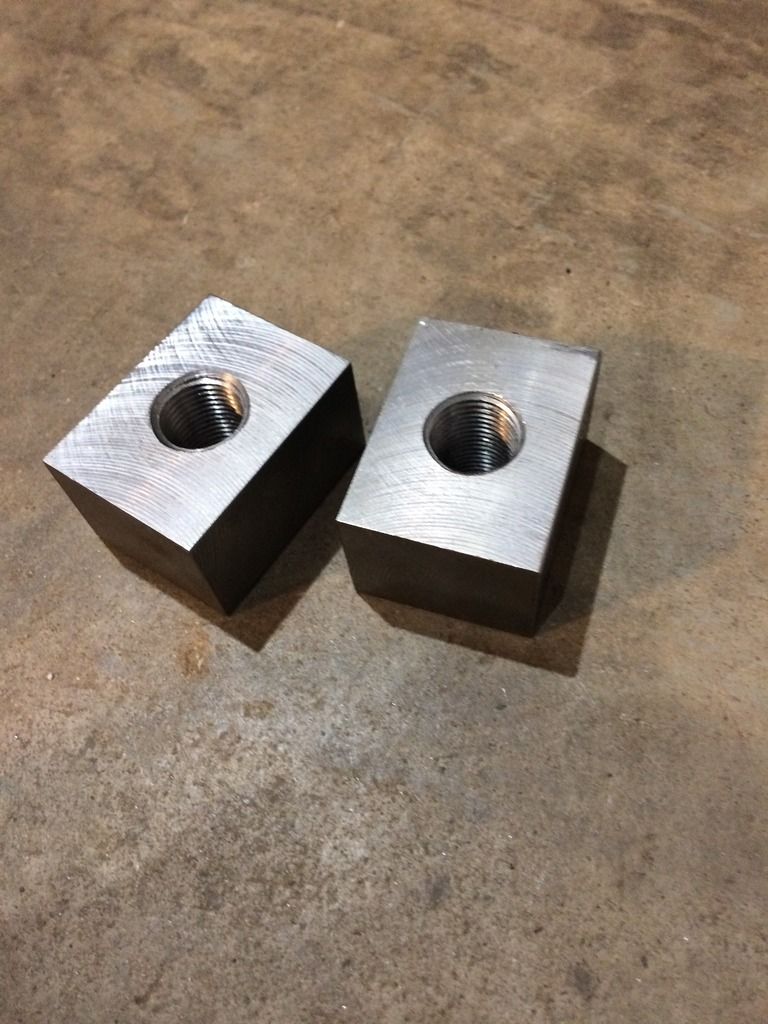
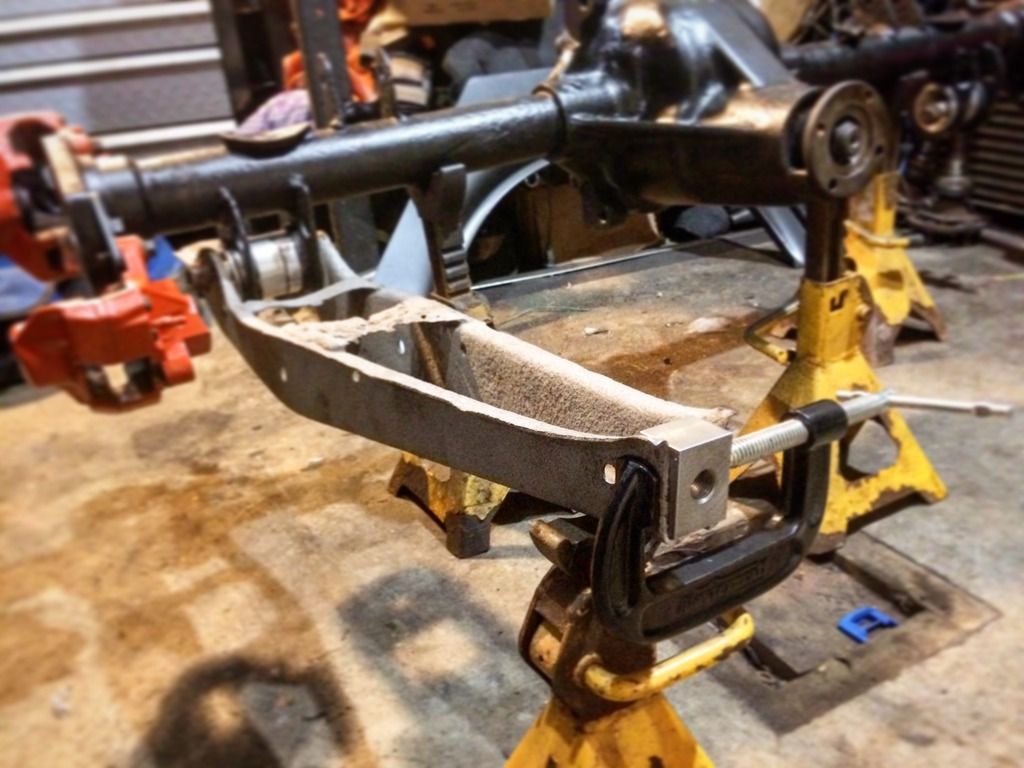
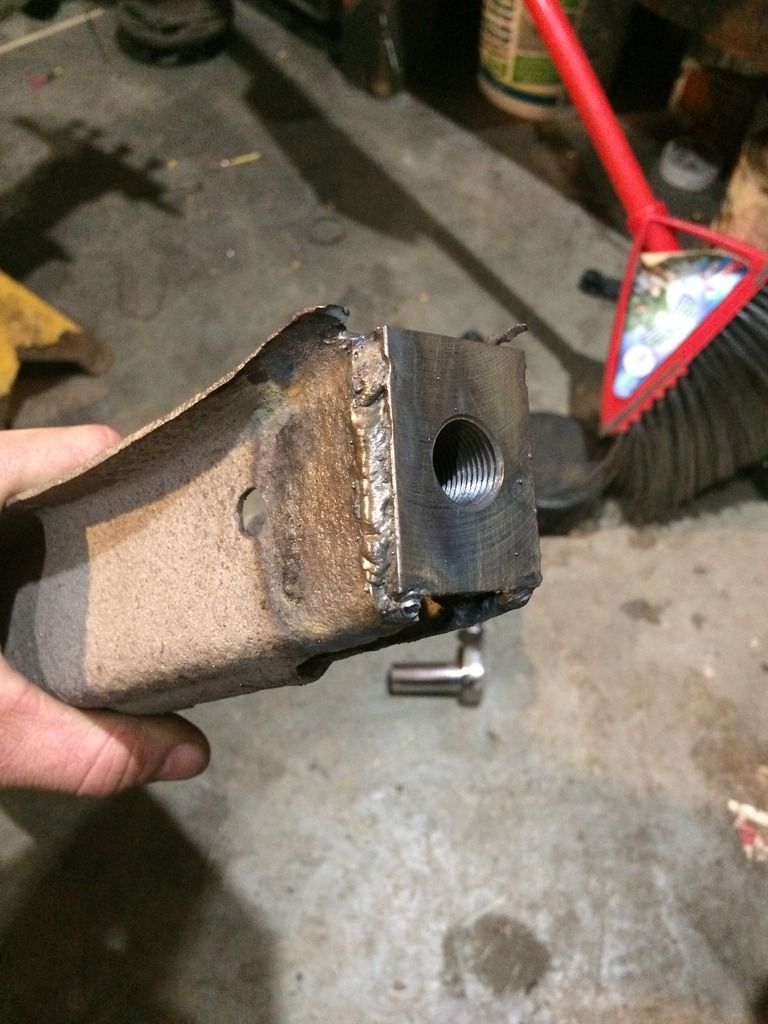
i cut the bushings off the front and made up these blocks to weld in

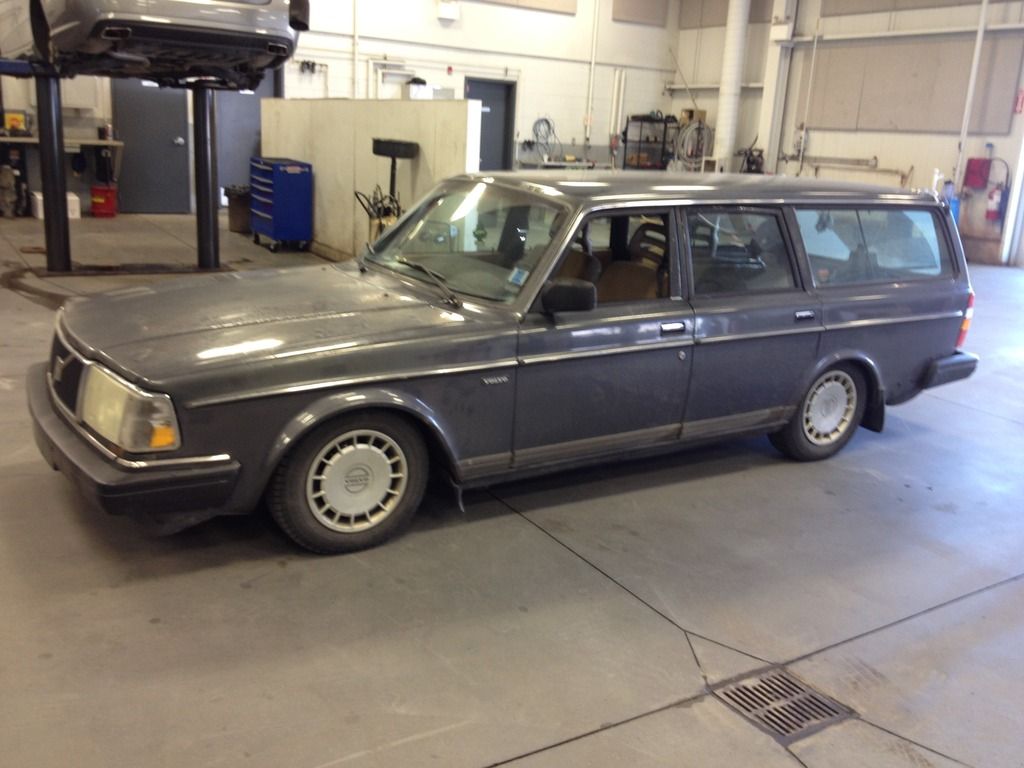
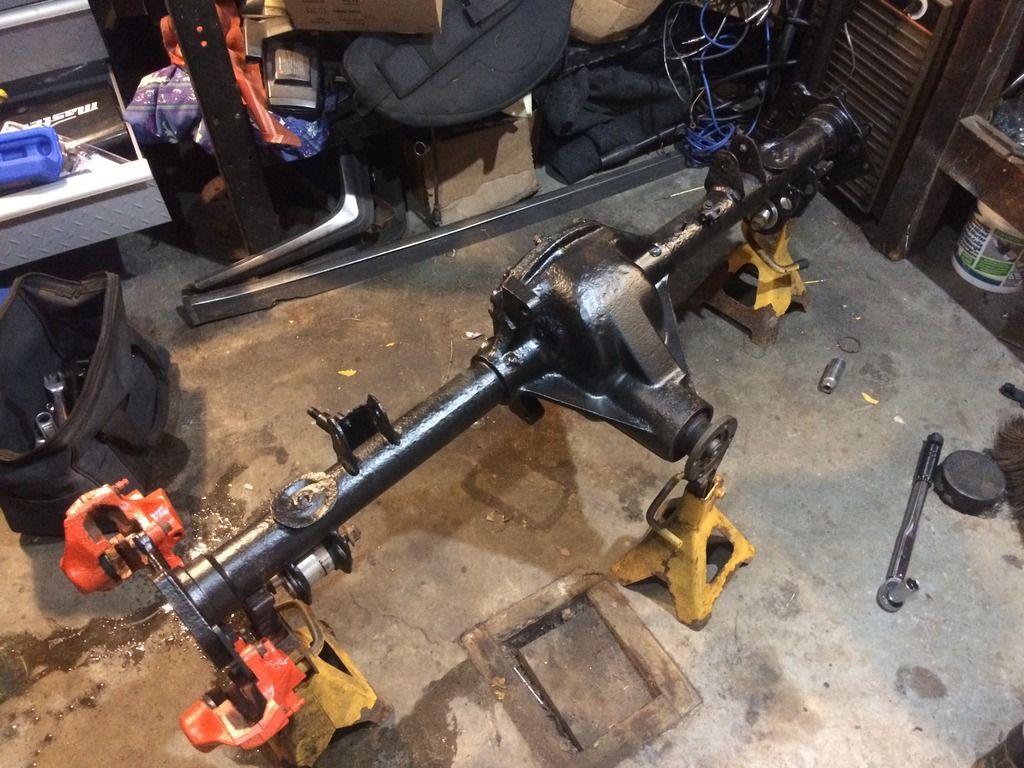
which brings me to now. I'm still picking away at the suspension parts for the rear. i plan to install the rear end and all the new control arms and axle bearings as soon as the snow is gone.
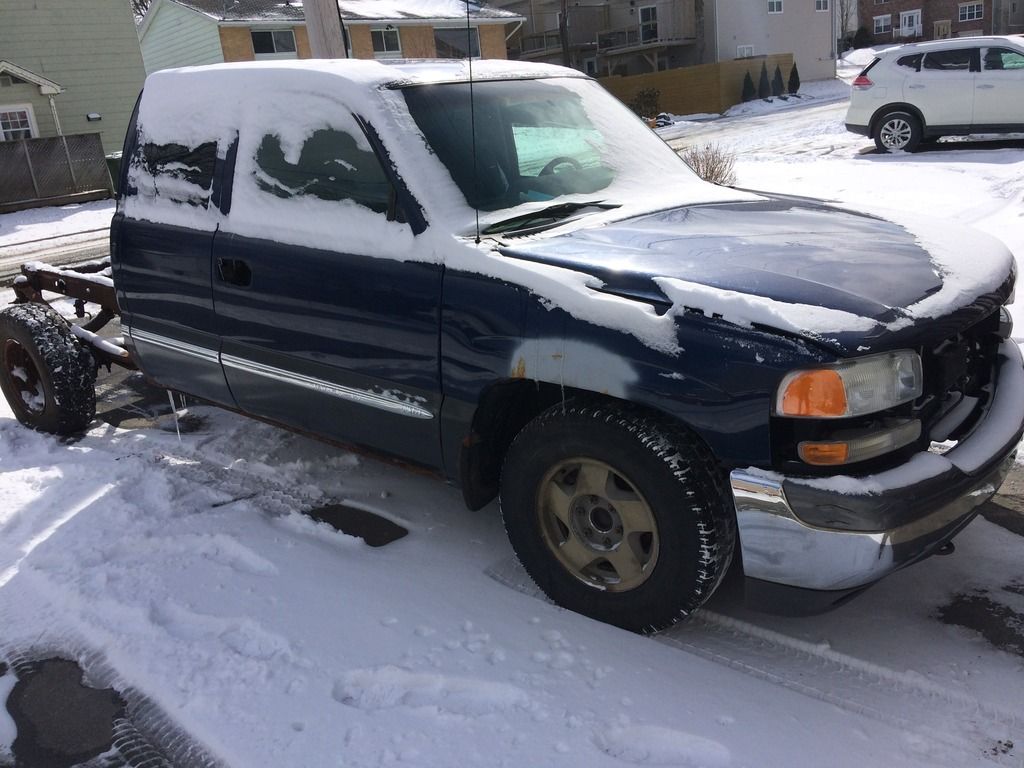
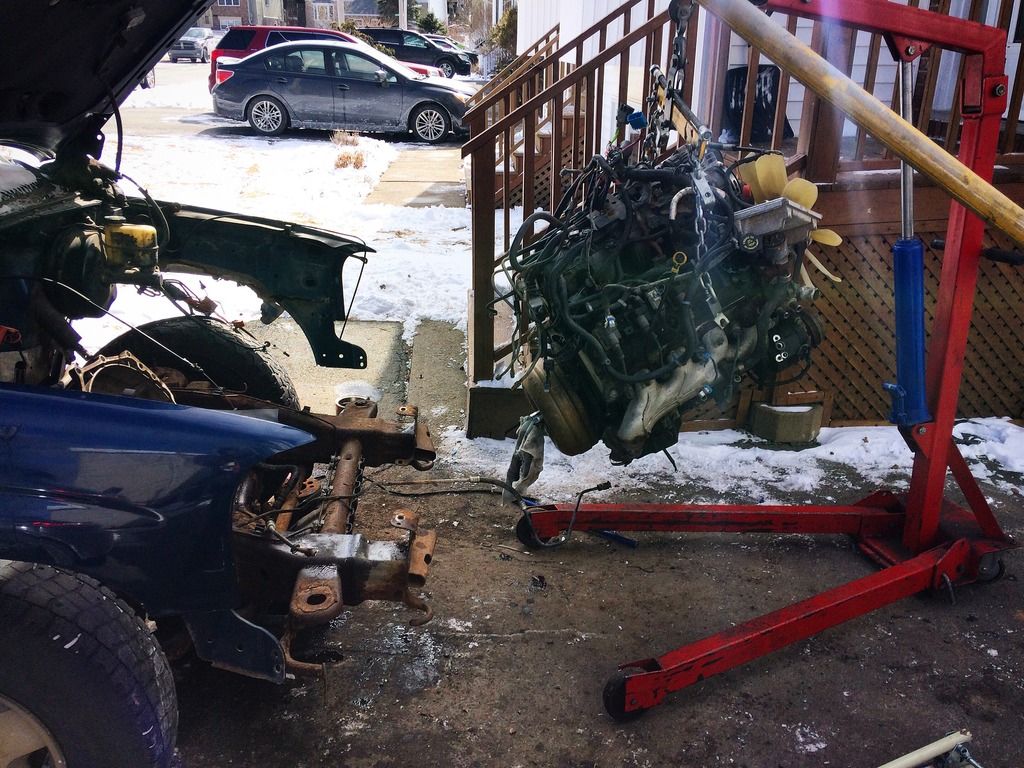
the real fun stuff is the power plant i just acquired. picked up this low KM 4.8l gmc truck for next to nothing.
went to work at it and stripped the bay
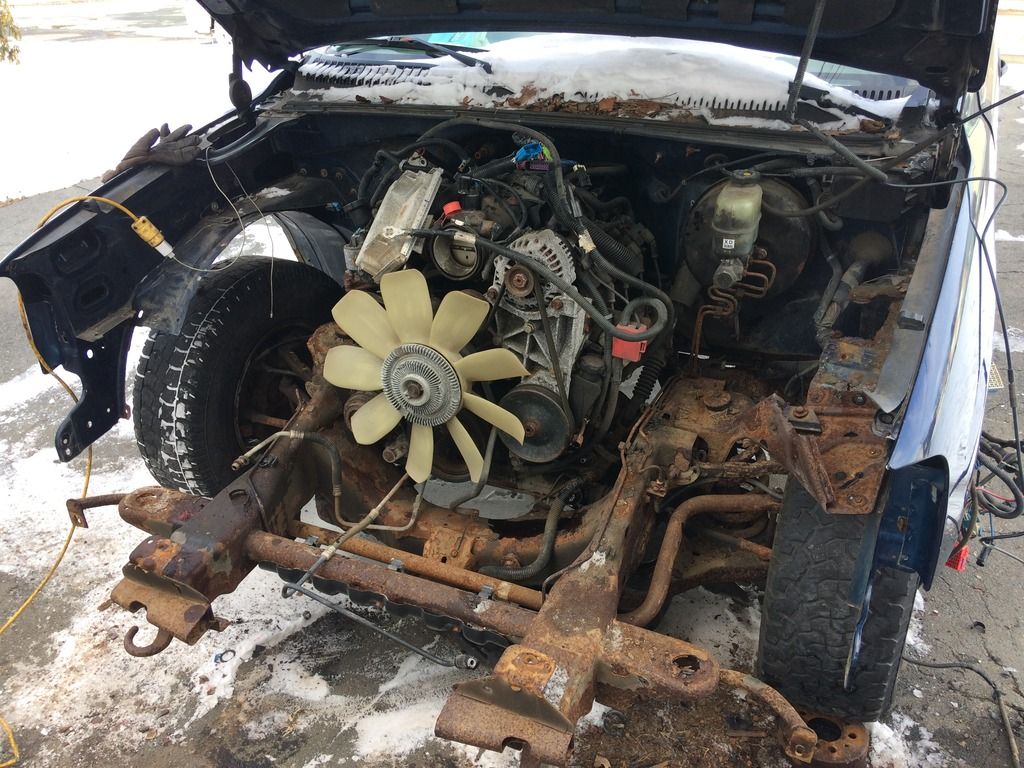
pulled her out
so far I've just been reading non stop on the swap, i can't really do anything until i sell my bay window vw bus and free up some space and cash. plan is to use the cash to buy a practical daily drive and get hacking at the wagon ASAP.
figured id make this thread to start documenting the really cool stuff now
anyways on to the car. the car in question is a 1991 volvo 245 with a 2.3l 4 banger and a stock 5 speed. The story on the car is after getting into a hit and run accident where the other guy took off, My first volvo wagon was destroyed, So i went on the hunt and found this one. i was skeptical at first, i got a response to a "wanted" ad i posted on my local kijiji (canada's craigslist) I went to go look since the seller didnt have a camera or didnt know how send photos. when i get there its buried up to the rims in dirt in a field with grass mowed around it. they were actually using it as a green house and had little saplings in the small pots growing in the trunk section.
this is what happened to the first one, and the only picture i had of the day i boght the new one
bent the frame rails way out of whack
on the way home from buying it the shifter linkage exploded on me, so first thing to do was turn some new brass bushings to replace the worn out nylon ones
i spent a few months on and off wrenching on it to get it road worthy and once i did i had a little fun with it
in the spring i took a weekend, and put some short shocks in and put some stiffer springs. I cut a few coils off the springs for some cheap low
got a wicked deal on these pontiac trans am wheels 16x8 staggered offsets. they were pretty rough but shined up nice after a lot of wet sanding and polishing
this was one of the first ones i did, but they got better as i took more time with them
got them mounted and an alignment done.
drove it like this for summer and loved every minute of it, its my first RWD car, and its been a blast having one fun with it. at this point it was a bone stock 20 something year old car with a set of wheels and lowered haha. definitely turned some heads though!
I've never been one to baby my vehicles, so i snapped a pic after some "rally" driving on some farm roads haha
fast forward to fall, and a season of abuse, its maintenance time.
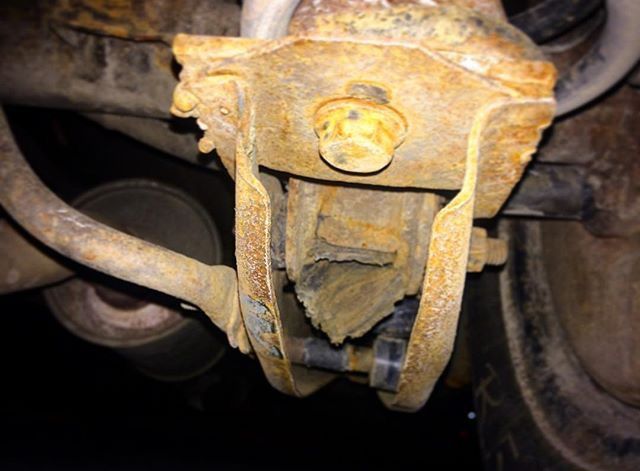
beat the hell out of the sub frame all year, so i found a used but good one to replace
during that time i found a completely snapped engine mount... guess it had more torque than i thought
got her back together and freshened up the front end just in time for the fall colours pictures
of course after fall comes winter.. threw some new winters on the old steelies and spent more time sideways than i did straight.
i only ended up in the ditch once, but thankfully my friends drive subarus... so they pulled me out.
spring came again, and i put the GTAs back on, which was nice and refreshing, Also put some adjustable perches and 2.5ID springs in the back. the old cut ones would rub all the time with any weight in the car, this solved that problem
yes i know my arch is beat to hell like i said it rubbed a lot.
so as time rolled on, and i learned more, and broke more stock parts i started really modding it.
i kept destroying torque rod bushings (upper links in a 4 link) so i built some adjustable rods with heim joints at each end. All the heim joints i use have a teflon liner in them for maintaince free care, and durable life span. I also used LH threads at one end and RH threads at the other. this way they can be adjusted with out removing them from the car.
next were some adjustable sway bar links with poly upper bushings to lower the bar back down.
I also picked up this cheap fixed back race seat from a friend, its nothing special, but its probably my favourite thing I've done to the car so far, so much better feel for the road and corners. a lot more feel to the cars input.
summer was fun
fall came again, and it looked pretty.
got a free set of these (not my pic)
so i decided to clean them up on the lathe, and paint the paint faces
we had a slow day at work, so i made some adapters to fit, and re used the studs from my GTA adapters.
and viola! new winter wheels
now this is more present day. this winter has been harsh on the old girl.
the old pan hard rod got rusty, and decided to crack at the spot where it kinks to clear the diff. to get me home i just welded the crack. that didnt last long, but it gave me time to build a new stainless rod with adjustable heims.
then one day i felt a big clunk in the rear, turns out my rear axle bushings exploded. so for now i just replaced with stock ones
i also picked up a new wheel, and turned a wooden shift knob (first time machining wood, came out pretty nice)
heres where the fun stuff started happening. picked up this rusty rear axle and everything attached to it. The plan for this was to have something out of the car I could do work on. I also planned to weld the diff. but wanted a back up incase it wasn't gonna work for daily use.
stripped it down and opened it up
welded it up. its ugly, but those spiders will never move again
here's my fix to the axle bushings. I machined an aluminum housing that presses in. with a spherical bearing in the middle held in with a snap ring. the plan is to eliminate any rubber bushings in the rear of the suspension, and replace with heim joints and spherical bearings.
heres the new ones next to a stock one
cleaned up the housing
I plan to run dual callipers for a hydro hand brake. the volvo factory brake system is very complicated, and would rather leave it un-touched. so using a separate res. and hydro lever to feed separate lines to secondary callipers will be the route I'm going.
to start, i took some measurements and made a template.
the bracket will mount to the existing holes the factory park brake cable uses to mount to the housing
never got any pics of the brackets i made at work, but heres a final mock up
put the diff back in, and painted the housing. also rebuilt and painted the spare callipers
heres a shot of the new axle bearings installed
sand blasted the old lower control arms and started boxing them in with new metal
i cut the bushings off the front and made up these blocks to weld in
which brings me to now. I'm still picking away at the suspension parts for the rear. i plan to install the rear end and all the new control arms and axle bearings as soon as the snow is gone.
the real fun stuff is the power plant i just acquired. picked up this low KM 4.8l gmc truck for next to nothing.
went to work at it and stripped the bay
pulled her out
so far I've just been reading non stop on the swap, i can't really do anything until i sell my bay window vw bus and free up some space and cash. plan is to use the cash to buy a practical daily drive and get hacking at the wagon ASAP.
figured id make this thread to start documenting the really cool stuff now


Comment