 Tweet
Tweet
Over the course of the past two years of owning my mkV, the car never sat right with me. Even with the bags - there was no satisfaction. I yearned for that low-LOW feeling I once had driving around in my previous mkIII's with the subframe stupid close to the ground. Perhaps the feeling stemmed from winding down the collars on my coilovers a little bit more every week, eventually having to notch the unibody, the transition to air suspension, or modifying strut mounts, etc. No matter what sparked the feeling - I have been longing for it ever since. I threw air suspension on my mkv, notched the passenger side frame rail, got the subframe on the ground, looked at the car and thought to myself, "that's it?" I knew I would never be satisfied. I needed to go lower.
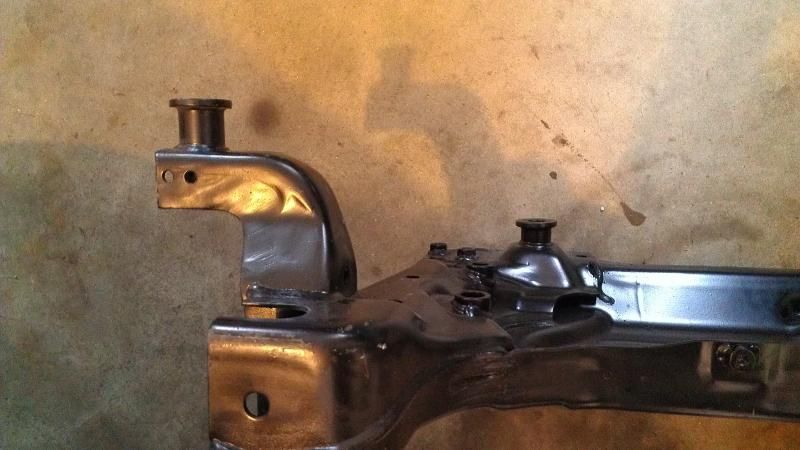
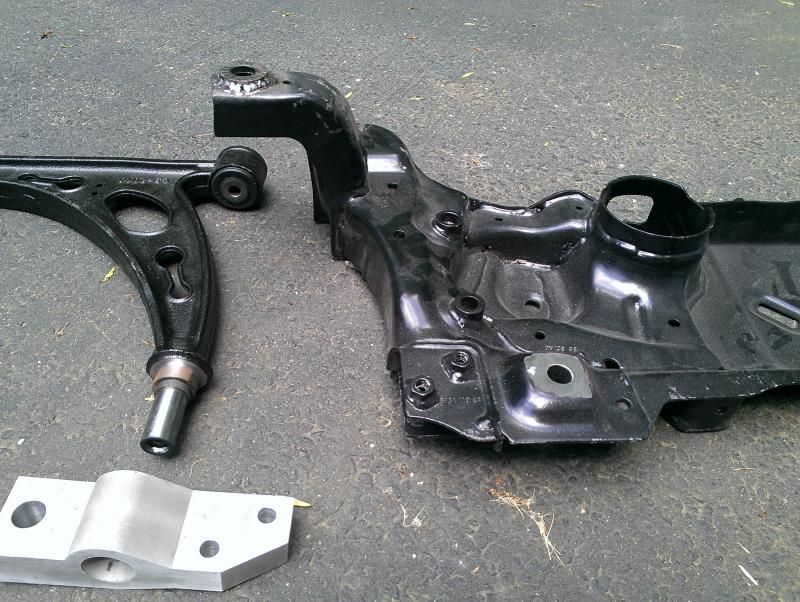
I had heard about mkIV's sectioning their subframes to gain an additional inch of clearance but I had hardly a clue what else was involved. After looking into it a little further, I discovered the mkIV subframes were stamped steel and could be fabricated quite easily. Unfortunately, most mkV's, including my car, have a cast aluminum subframe and would have to be machined if I ever wanted to gain an inch of clearance (turns out there isn't even enough material to machine the stock subframe anyways.) After some searching, I came to find out that baseline jetta's (the one's with the rear swing arm) came equipped with a stamped steel subframe that accepts my car's power steering and lined up with the lower motor mount. So I went ahead and sourced the jetta stamped steel subframe. Awesome!.. Not really. Turns out, the control arms, which are fastened to the subframe, have individual mounts themselves that bolt into the unibody. Therefore, not only would I have to section the subframe's mounting points, but I would need to come up with a solution to gain an inch of clearance on the aluminum control arm mounts in order to move everything in the assembly up as one. As you can see from the picture, these mounts can not be easily fabricated to give me an extra inch.

stamped steel subframe reference (notice how straight forward it is to section these mounting point "stalks".)
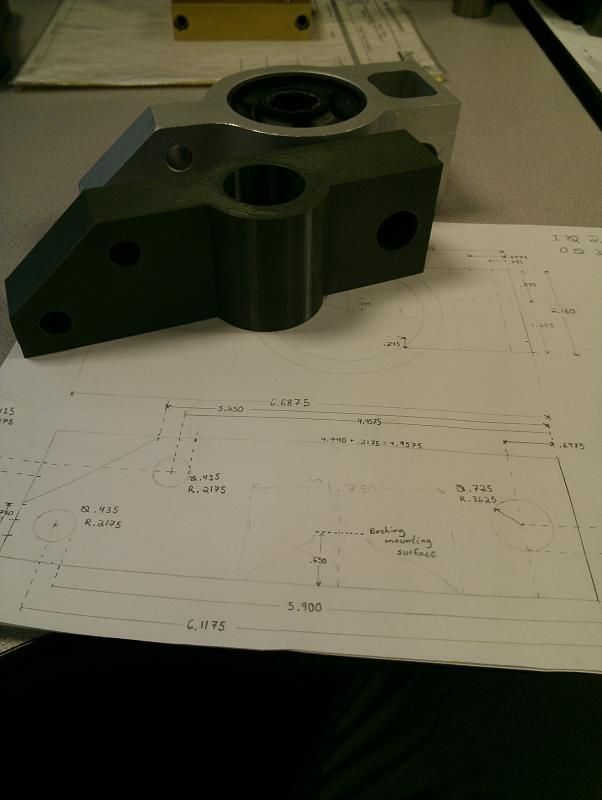
OK, fine. Seeing as the control arm mounts were not highly complicated parts and I have a good deal of CAD experience working as a mechanical engineer, I set off to redesign the control arm mounts. After working through the dimensions on the stock control arm mount, I modeled the mounts to give me an extra inch of clearance while also utilizing a spherical bearing instead of the stock rubber bushings. I purchased the bearings and was able to 3d print my new design to get a feel for how things will work down the line.
In order for the control arms to work with the spherical bearings in the new mounts, I designed hardened tool steel sleeve's to be pressed onto the end of the control arms after a little bit of machining.
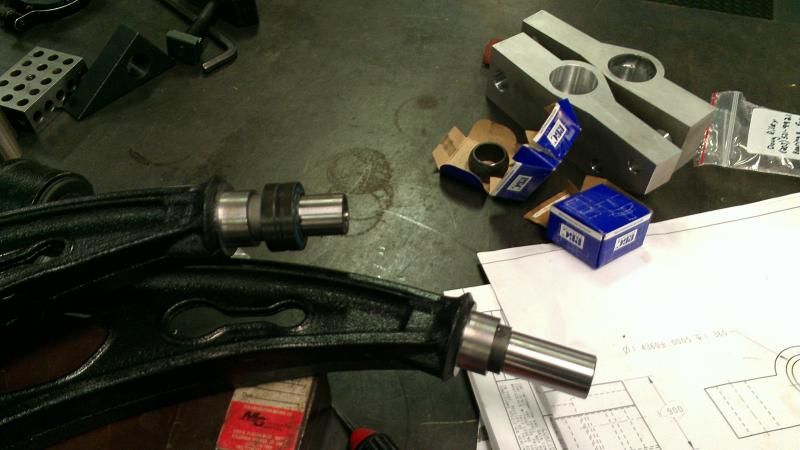
And at this point, I encountered my hugest set back. From the picture above, you'll notice I had the new control arm mounts, sleeves, and the control arms themselves all machined at the same time. I had the shop press the spherical bearing's into my new mounts and I was on my way. As soon as I got home from the shop, I threw everything together in my garage with the stamped steel subframe. At this point I wanted to rip all the hair out my head... Somehow I was dimensionally off with the redesigned control arm mounts. The rotating axis of where the control arm mounts to the subframe was off to the point where I did not feel comfortable moving forward with my machined parts. I blame the rubber bushing in the OEM mounts that I had dimensioned off of (hahah). To move forward, the control arm mounts would have to be reworked and machined from scratch. The machine shop had done the work for me as a one-time favor and having them machine new mounts would cost me and arm and a leg. So there I was, sitting on my garage floor with a bunch of scrap metal, scratching my head how I could have been so stupid to not utilize the 3d printed control arm mounts to test fitment and functionality before I sent the drawing's to the machine shop. At this point, I even doubted that if I had redesigned the control arm mounts and got them working perfectly with my subframe outside the car, that somehow the stamped steel subframe would be off when it came time to bolt everything up to the unibody.
I cut my losses and turned to plan B. I knew all along that I could section the actual unibody mounting points themselves to bring the entire subframe assembly up an inch, but I didn't have faith in my fabricating/welding abilities to carry out such a job. I searched around for local fabricator's that might be up for the job. As I searched around the internet, I came across Greg (Swoops) out on Long Island. He was very diligent in all of his work and had a good deal of experience with modifying/fabricating the frame rails on a number of different cars. I hit him up and inquired about having the unibody sectioned for the subframe assembly to move up an inch. We went back and forth through a number of emails to discuss any possible issues we may encounter carrying out the job. He felt comfortable tackling the job so we scheduled a date for surgery at his new shop.
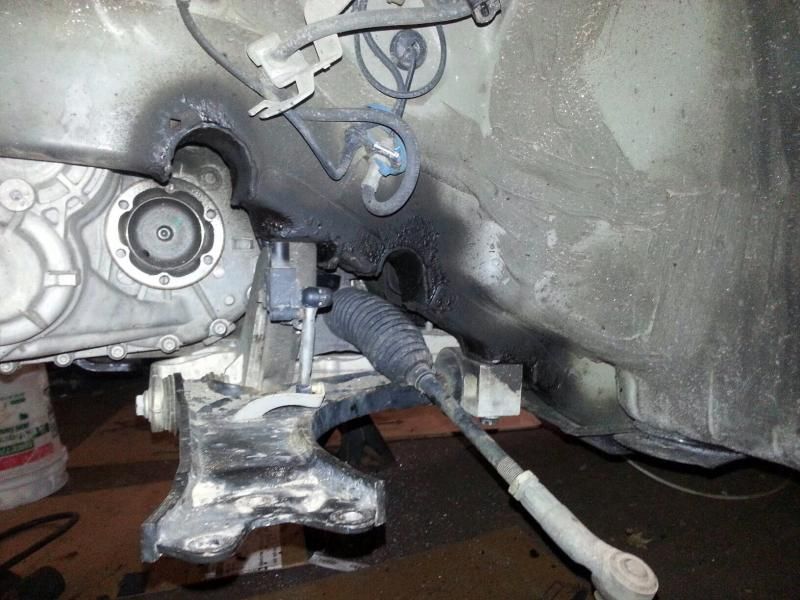
With the aid of 1" motor mount spacers I had designed and machined for the job to lift the motor an inch with the subframe assembly, I dropped the car off at Greg's shop. Greg had sectioned the 4 subframe mounting points, both of the control arm mounting points, notched for both the driver and passenger side axles and tie rods, and sectioned the body to clear for the power steering rack to move up (we had a feeling that either the power steering rack might hit the body or the steering column would have to be shortened.)
So now with the work all done - I'm sitting here waiting until the roads clear up a bit before I throw my wheels on. As of right now, my car is being help up by the tires on my winter wheels with the subframe about 3/4" from the pavement.
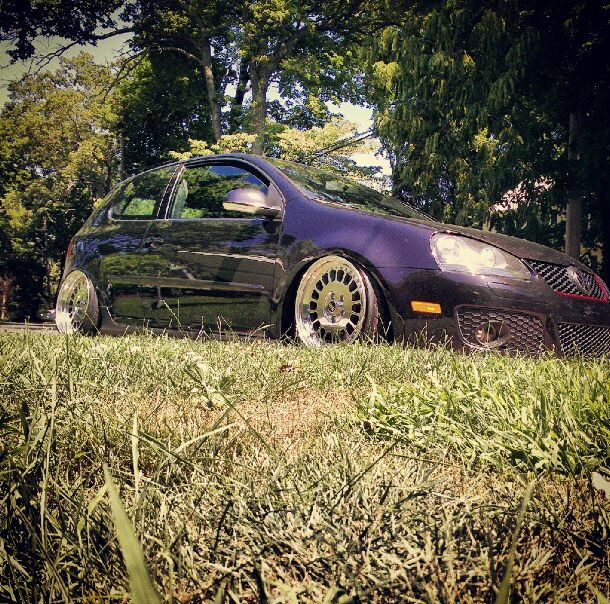
My car before all the work last summer...
TL;DR: I spent a whole lot of time and money on raising my subframe a measly inch.
Thanks for looking guys. I will be back to update everyone with some pics when I put on my Image's.
-Doug
I had heard about mkIV's sectioning their subframes to gain an additional inch of clearance but I had hardly a clue what else was involved. After looking into it a little further, I discovered the mkIV subframes were stamped steel and could be fabricated quite easily. Unfortunately, most mkV's, including my car, have a cast aluminum subframe and would have to be machined if I ever wanted to gain an inch of clearance (turns out there isn't even enough material to machine the stock subframe anyways.) After some searching, I came to find out that baseline jetta's (the one's with the rear swing arm) came equipped with a stamped steel subframe that accepts my car's power steering and lined up with the lower motor mount. So I went ahead and sourced the jetta stamped steel subframe. Awesome!.. Not really. Turns out, the control arms, which are fastened to the subframe, have individual mounts themselves that bolt into the unibody. Therefore, not only would I have to section the subframe's mounting points, but I would need to come up with a solution to gain an inch of clearance on the aluminum control arm mounts in order to move everything in the assembly up as one. As you can see from the picture, these mounts can not be easily fabricated to give me an extra inch.
stamped steel subframe reference (notice how straight forward it is to section these mounting point "stalks".)
OK, fine. Seeing as the control arm mounts were not highly complicated parts and I have a good deal of CAD experience working as a mechanical engineer, I set off to redesign the control arm mounts. After working through the dimensions on the stock control arm mount, I modeled the mounts to give me an extra inch of clearance while also utilizing a spherical bearing instead of the stock rubber bushings. I purchased the bearings and was able to 3d print my new design to get a feel for how things will work down the line.
In order for the control arms to work with the spherical bearings in the new mounts, I designed hardened tool steel sleeve's to be pressed onto the end of the control arms after a little bit of machining.
And at this point, I encountered my hugest set back. From the picture above, you'll notice I had the new control arm mounts, sleeves, and the control arms themselves all machined at the same time. I had the shop press the spherical bearing's into my new mounts and I was on my way. As soon as I got home from the shop, I threw everything together in my garage with the stamped steel subframe. At this point I wanted to rip all the hair out my head... Somehow I was dimensionally off with the redesigned control arm mounts. The rotating axis of where the control arm mounts to the subframe was off to the point where I did not feel comfortable moving forward with my machined parts. I blame the rubber bushing in the OEM mounts that I had dimensioned off of (hahah). To move forward, the control arm mounts would have to be reworked and machined from scratch. The machine shop had done the work for me as a one-time favor and having them machine new mounts would cost me and arm and a leg. So there I was, sitting on my garage floor with a bunch of scrap metal, scratching my head how I could have been so stupid to not utilize the 3d printed control arm mounts to test fitment and functionality before I sent the drawing's to the machine shop. At this point, I even doubted that if I had redesigned the control arm mounts and got them working perfectly with my subframe outside the car, that somehow the stamped steel subframe would be off when it came time to bolt everything up to the unibody.
I cut my losses and turned to plan B. I knew all along that I could section the actual unibody mounting points themselves to bring the entire subframe assembly up an inch, but I didn't have faith in my fabricating/welding abilities to carry out such a job. I searched around for local fabricator's that might be up for the job. As I searched around the internet, I came across Greg (Swoops) out on Long Island. He was very diligent in all of his work and had a good deal of experience with modifying/fabricating the frame rails on a number of different cars. I hit him up and inquired about having the unibody sectioned for the subframe assembly to move up an inch. We went back and forth through a number of emails to discuss any possible issues we may encounter carrying out the job. He felt comfortable tackling the job so we scheduled a date for surgery at his new shop.
With the aid of 1" motor mount spacers I had designed and machined for the job to lift the motor an inch with the subframe assembly, I dropped the car off at Greg's shop. Greg had sectioned the 4 subframe mounting points, both of the control arm mounting points, notched for both the driver and passenger side axles and tie rods, and sectioned the body to clear for the power steering rack to move up (we had a feeling that either the power steering rack might hit the body or the steering column would have to be shortened.)
So now with the work all done - I'm sitting here waiting until the roads clear up a bit before I throw my wheels on. As of right now, my car is being help up by the tires on my winter wheels with the subframe about 3/4" from the pavement.
My car before all the work last summer...
TL;DR: I spent a whole lot of time and money on raising my subframe a measly inch.
Thanks for looking guys. I will be back to update everyone with some pics when I put on my Image's.
-Doug


Comment