 Tweet
Tweet
Ever wondered what it takes to put E60 M5 brakes on an E38? Well, wonder no more!
The fabrication side of Fluid has been quite busy over the last few days working on this brake swap. A long-time client of ours, his E38 has been through this shop for many previous modifications. Instead of going fast, though, this time is all about slowing down, as we�re swapping out the E38�s stock brake rotors and calipers for a set from an E60 M5. The size difference in both caliper and rotor is not unsubstantial, so this car should have absolutely no problem dodging all the loonies on the freeway. Plus, they�ll look menacing as hell when poking out from behind his stock wheels. Provided the new brakes even fit behind the stock wheels�.cue suspenseful music.
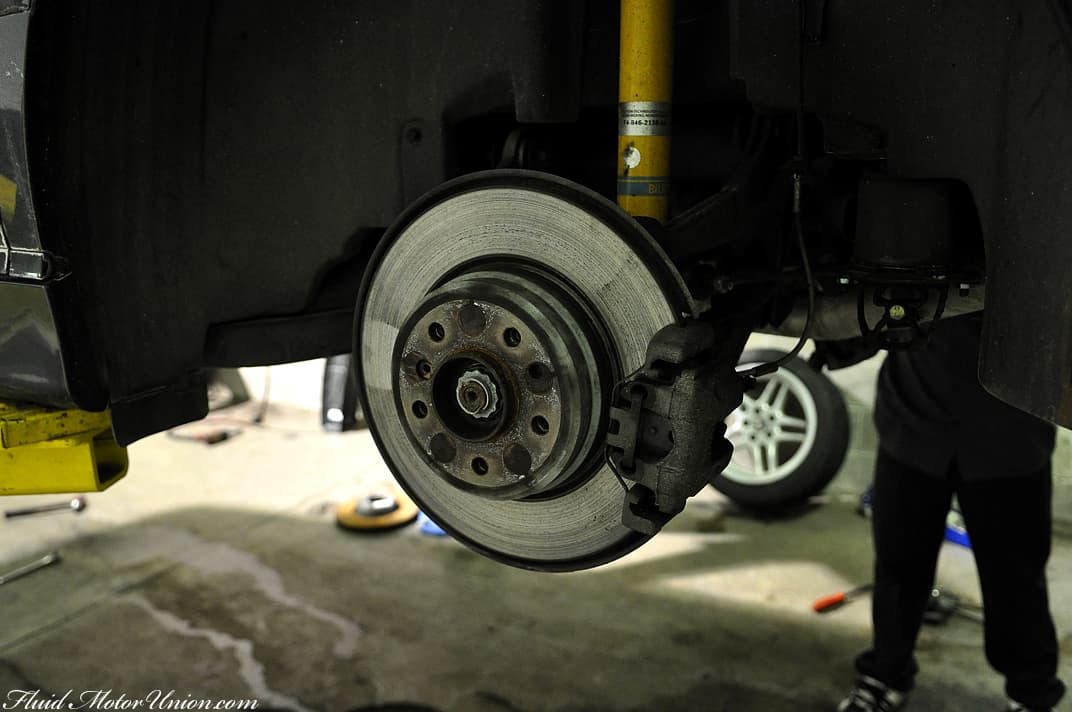
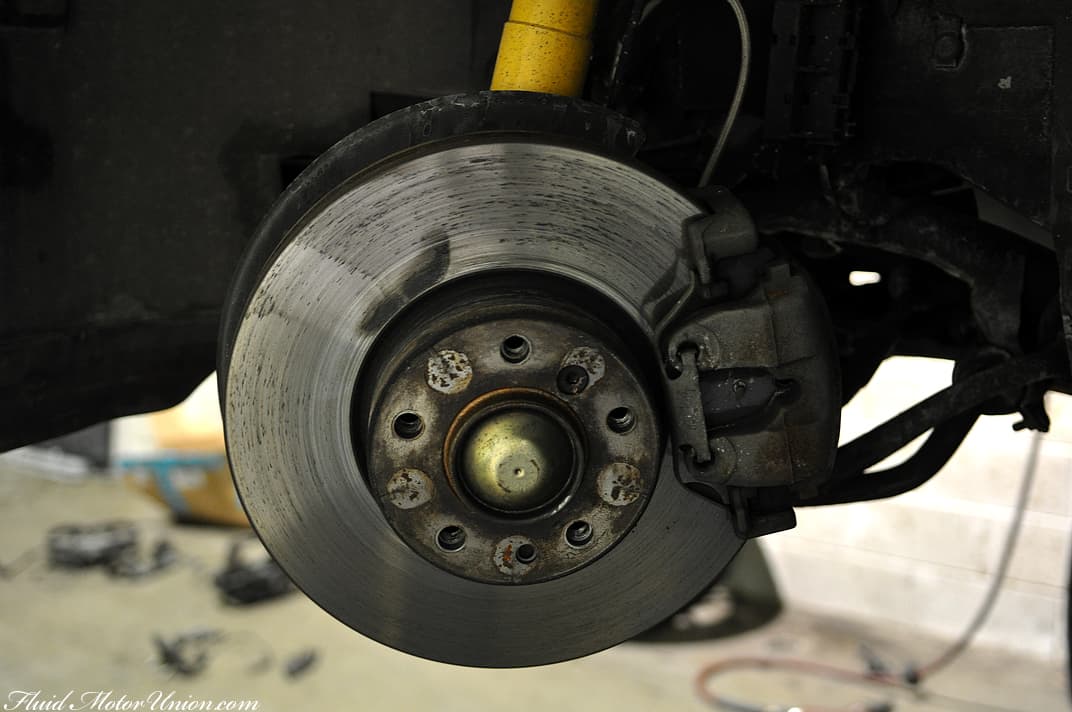
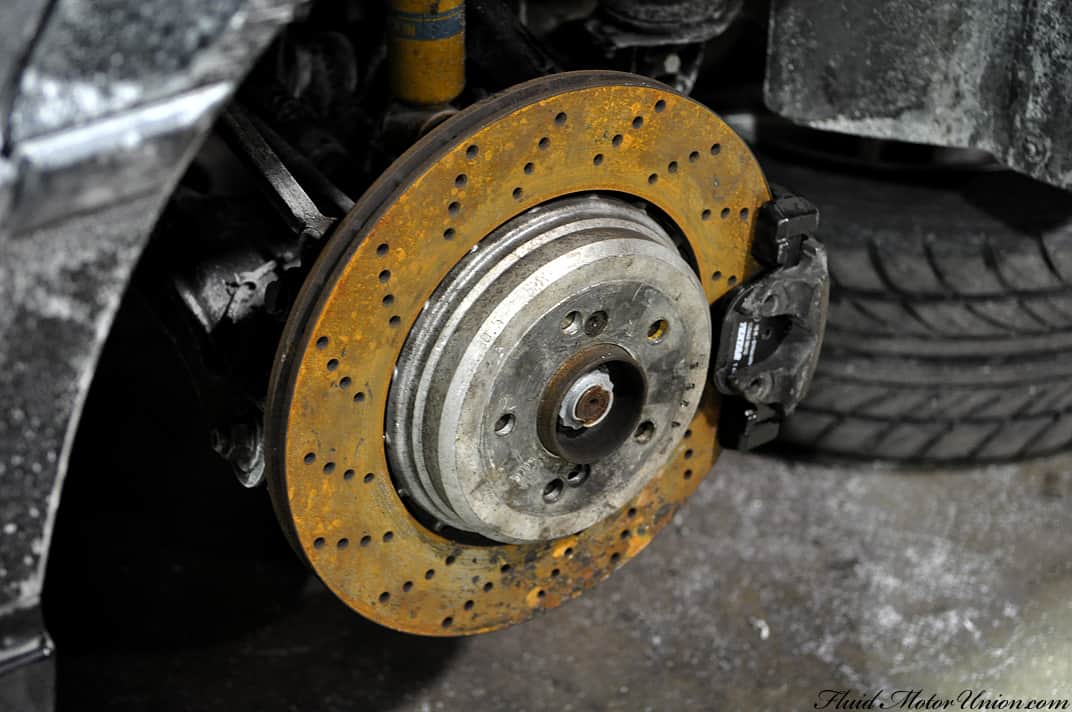
Here�s two shots of the size of the stock E38 rear brakes:
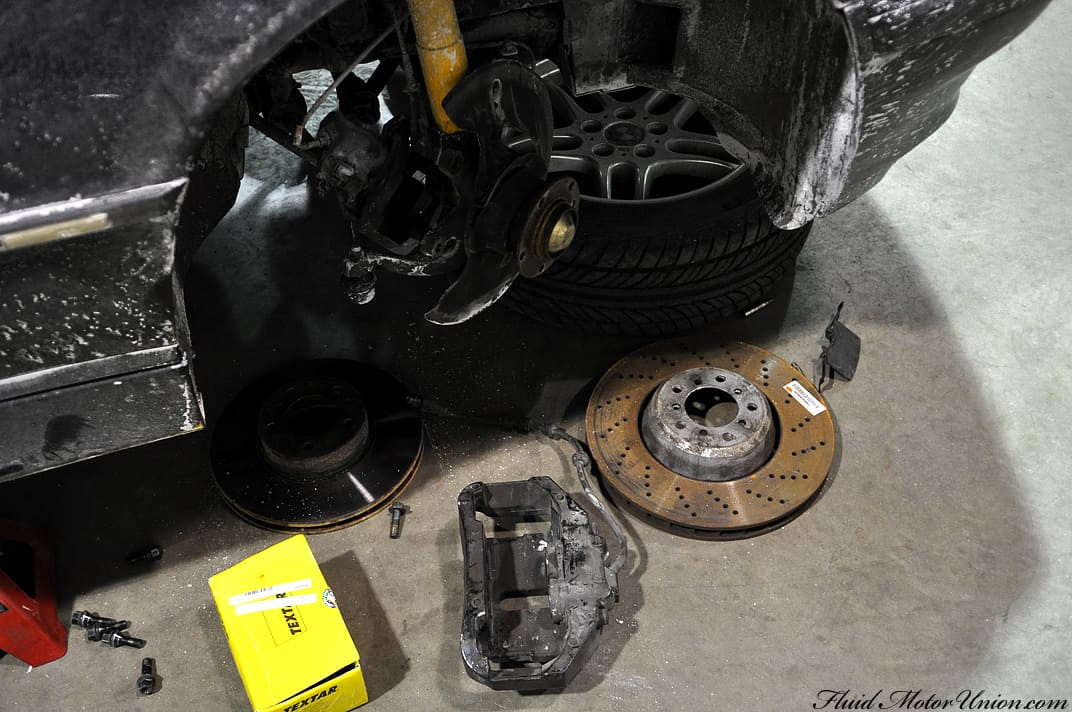
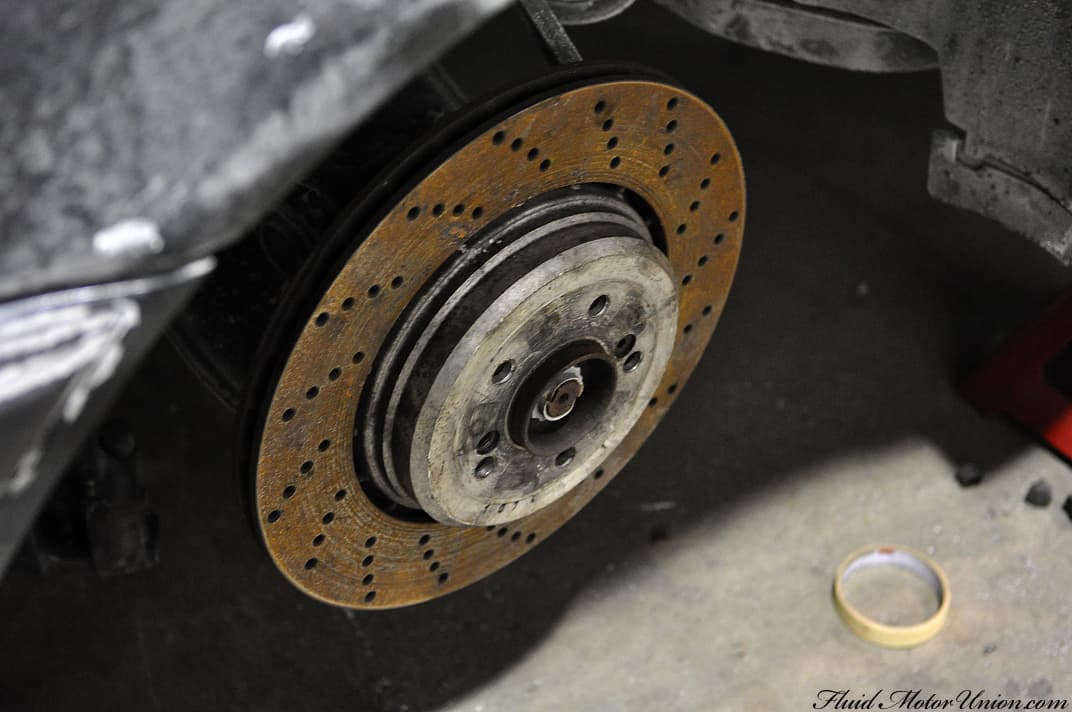
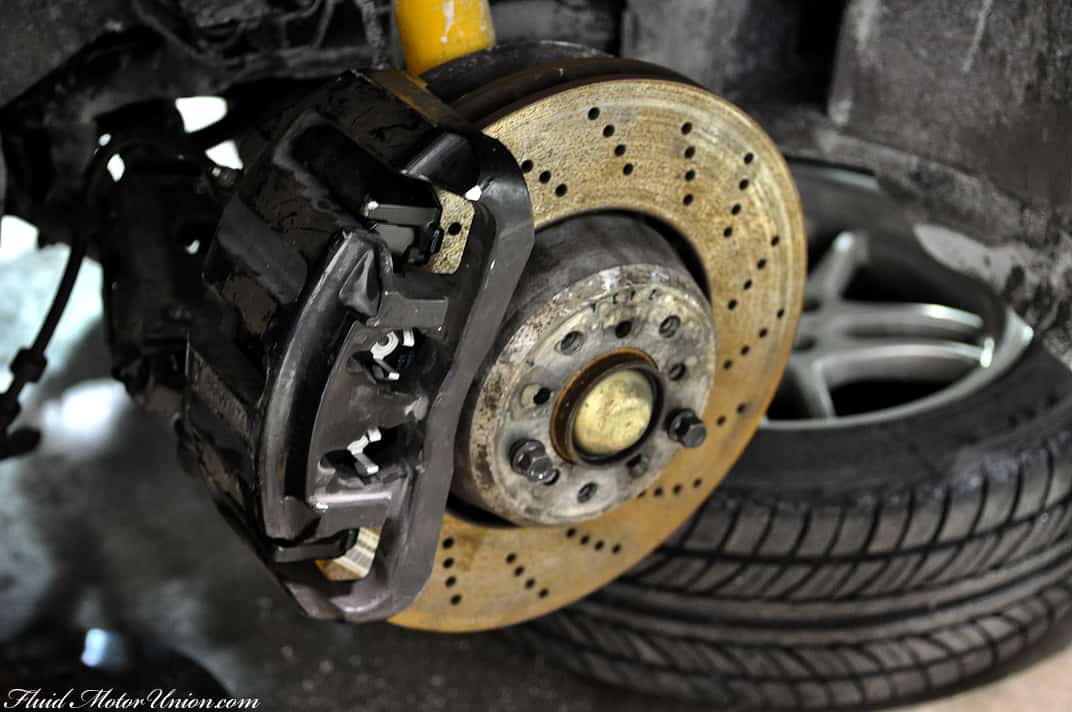
And now, the project begins! You can see the difference between the two rotors on the ground. That front caliper is absolutely massive!
Now, this is not an easy job. A lot of stuff went into getting these to fit. Here's the list that Craig put together while working on the brake swap:
M5 Brake Fitting (Rear)
-Did not come with spring clips
-Removed wheels
-Removed OEM rear brake calipers, pad, caliper brackets and rotors
-Removed parking brake to test-fit M5 caliper bracket
-Had to trim outer edge of dust shield to get M5 rotors to fit
-M5 rotor fits, adjusted parking brake to fit the M5 rotor
-Had to find 4 new bolts for M5 rear caliper bracket
-Removed rear hub to drill out eyelets for larger diameter caliper bolts
-Needed to mill down M5 caliper bracket to 7-series OEM thickness (1/2")
-More room was needed, so ground down faces of the mounting eyelets for M5 bracket to fit the M5 rotors
-Test-fitted rear assembly with new pads to ensure proper clearances
-Swapped SS brake line over to M5 calipers and bled rear brakes
Front brakes were a little trickier. Here's Craig's so-far partial list for the fronts:
M5 Brake Fitting (Front)
-Removed wheels
-Removed OEM brake calipers, pads, caliper brackets and rotors
-Test-fitted front rotors and caliper bracket
-Minor dust shield trimming needed for caliper bracket to fit
-Distance between caliper bracket bolts is 1" difference
-Took M5 caliper brackets and MIG welder around the mounting face to create a new mounting face
-Had to mill the weld down to create the new mounting face
-Found the difference between OEM + M5 caliper bracket mounting bolts
-Drilled and tapped new holes in M5 caliper bracket to mount up to front hub
Things we may have to do for the front brakes:
-Mill face of caliper bracket or space out to fit centered on M5 rotor
-Space out front wheel to fit calipers
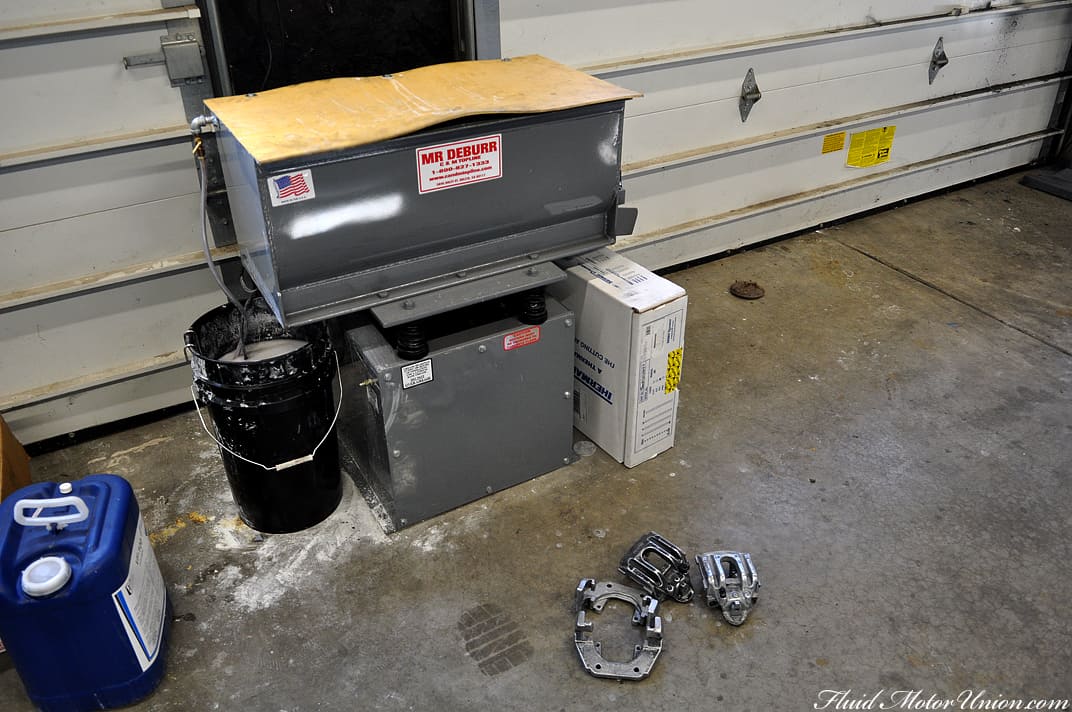
Finally, once the test-fitting was (mostly) complete, we removed all the caliper-related parts and put them in the vibratory finisher to remove the old coat of paint and get the surfaces ready to be painted a new coat of gloss black. This car is going to be so stealth, it�s not even funny.
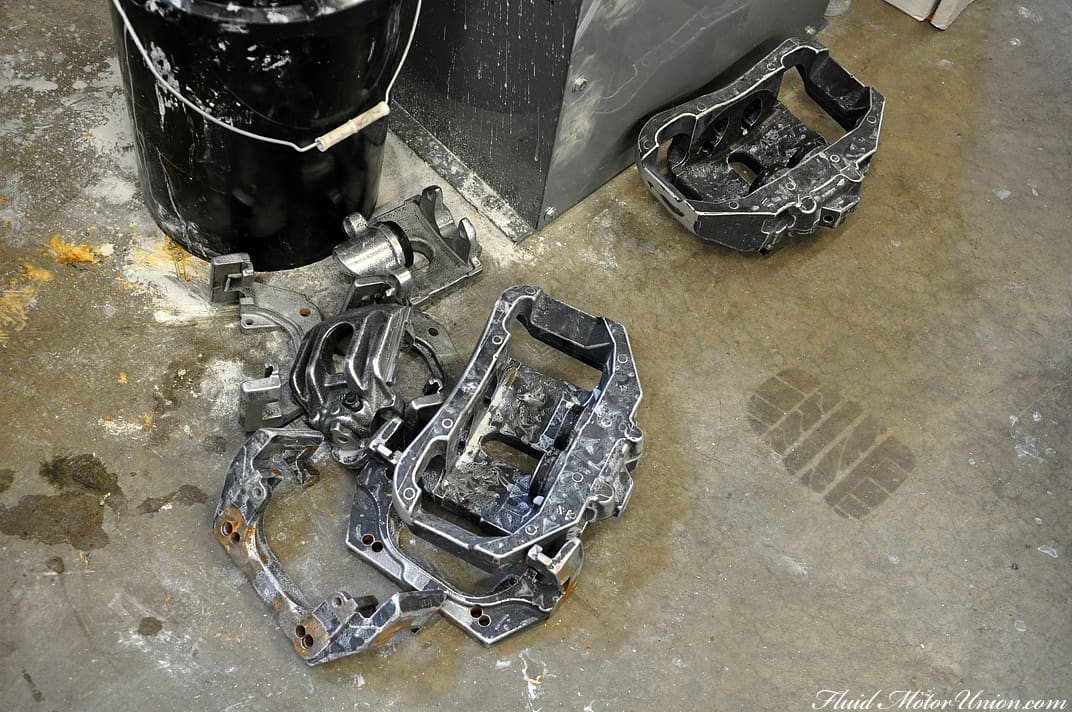
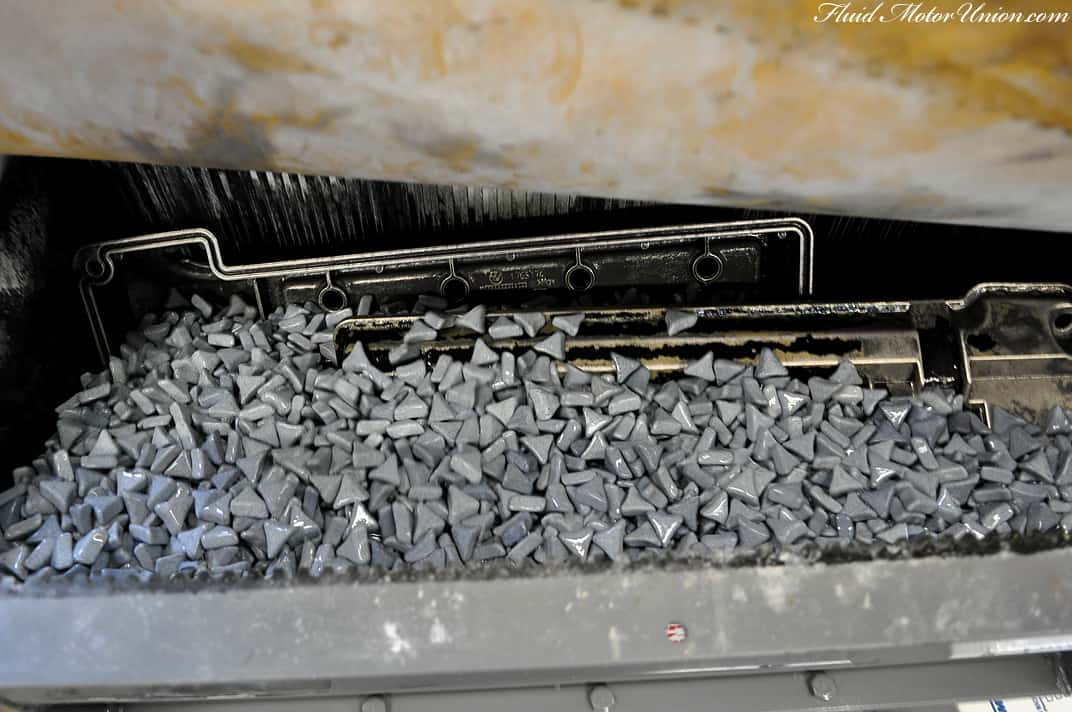
Oh yeah, we are powdercoating the valve covers, too. This is just a really good excuse to get a shot from inside the finisher. For somebody with little to no machinery experience, this is an interesting thing to watch.
Have a good weekend!
The fabrication side of Fluid has been quite busy over the last few days working on this brake swap. A long-time client of ours, his E38 has been through this shop for many previous modifications. Instead of going fast, though, this time is all about slowing down, as we�re swapping out the E38�s stock brake rotors and calipers for a set from an E60 M5. The size difference in both caliper and rotor is not unsubstantial, so this car should have absolutely no problem dodging all the loonies on the freeway. Plus, they�ll look menacing as hell when poking out from behind his stock wheels. Provided the new brakes even fit behind the stock wheels�.cue suspenseful music.
Here�s two shots of the size of the stock E38 rear brakes:
And now, the project begins! You can see the difference between the two rotors on the ground. That front caliper is absolutely massive!
Now, this is not an easy job. A lot of stuff went into getting these to fit. Here's the list that Craig put together while working on the brake swap:
M5 Brake Fitting (Rear)
-Did not come with spring clips
-Removed wheels
-Removed OEM rear brake calipers, pad, caliper brackets and rotors
-Removed parking brake to test-fit M5 caliper bracket
-Had to trim outer edge of dust shield to get M5 rotors to fit
-M5 rotor fits, adjusted parking brake to fit the M5 rotor
-Had to find 4 new bolts for M5 rear caliper bracket
-Removed rear hub to drill out eyelets for larger diameter caliper bolts
-Needed to mill down M5 caliper bracket to 7-series OEM thickness (1/2")
-More room was needed, so ground down faces of the mounting eyelets for M5 bracket to fit the M5 rotors
-Test-fitted rear assembly with new pads to ensure proper clearances
-Swapped SS brake line over to M5 calipers and bled rear brakes
Front brakes were a little trickier. Here's Craig's so-far partial list for the fronts:
M5 Brake Fitting (Front)
-Removed wheels
-Removed OEM brake calipers, pads, caliper brackets and rotors
-Test-fitted front rotors and caliper bracket
-Minor dust shield trimming needed for caliper bracket to fit
-Distance between caliper bracket bolts is 1" difference
-Took M5 caliper brackets and MIG welder around the mounting face to create a new mounting face
-Had to mill the weld down to create the new mounting face
-Found the difference between OEM + M5 caliper bracket mounting bolts
-Drilled and tapped new holes in M5 caliper bracket to mount up to front hub
Things we may have to do for the front brakes:
-Mill face of caliper bracket or space out to fit centered on M5 rotor
-Space out front wheel to fit calipers
Finally, once the test-fitting was (mostly) complete, we removed all the caliper-related parts and put them in the vibratory finisher to remove the old coat of paint and get the surfaces ready to be painted a new coat of gloss black. This car is going to be so stealth, it�s not even funny.
Oh yeah, we are powdercoating the valve covers, too. This is just a really good excuse to get a shot from inside the finisher. For somebody with little to no machinery experience, this is an interesting thing to watch.
Have a good weekend!


Comment