Announcement

Collapse
No announcement yet.

DIY 1989 W124 Wide Body Build

Collapse
X
 
  • Filter
  • Time
  • Show
Clear All
new posts

  • DIY 1989 W124 Wide Body Build

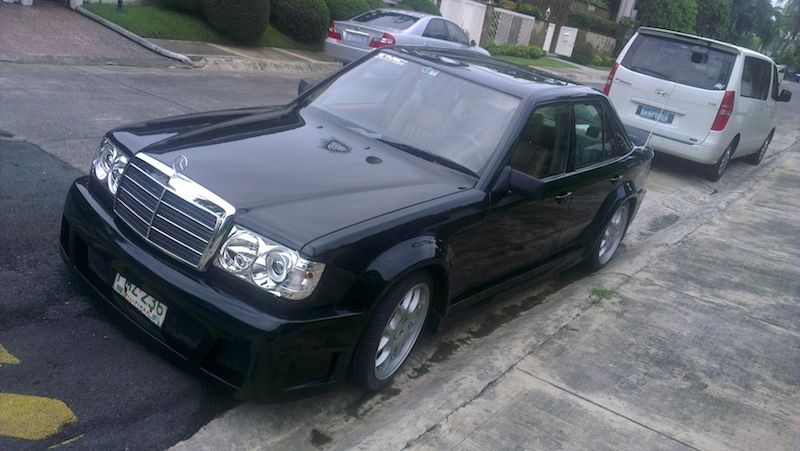
    Hi Stanceworks!! I have a build and i want to put it here because I am now planning on stancing my car. Here is my build about a year ago:

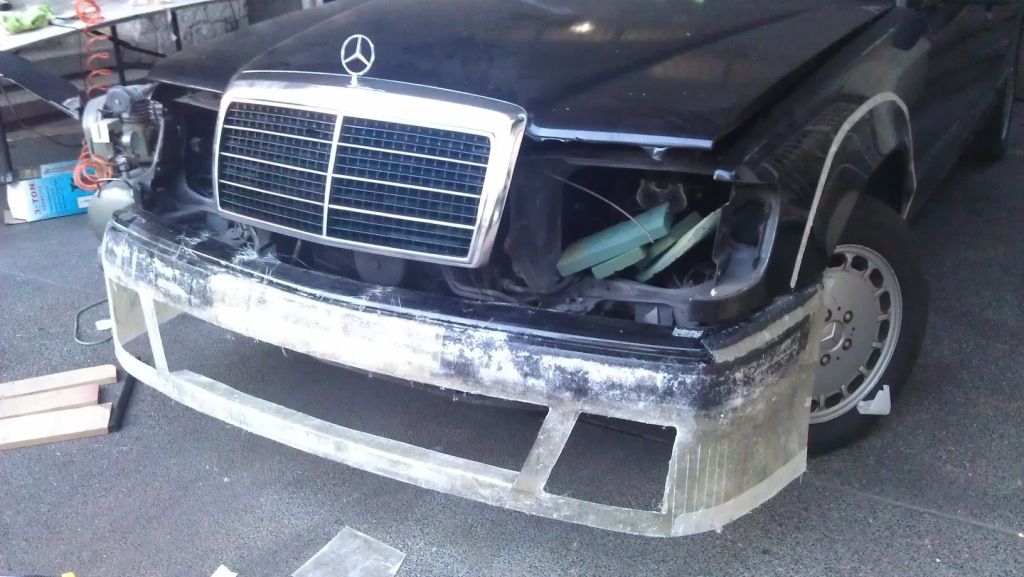
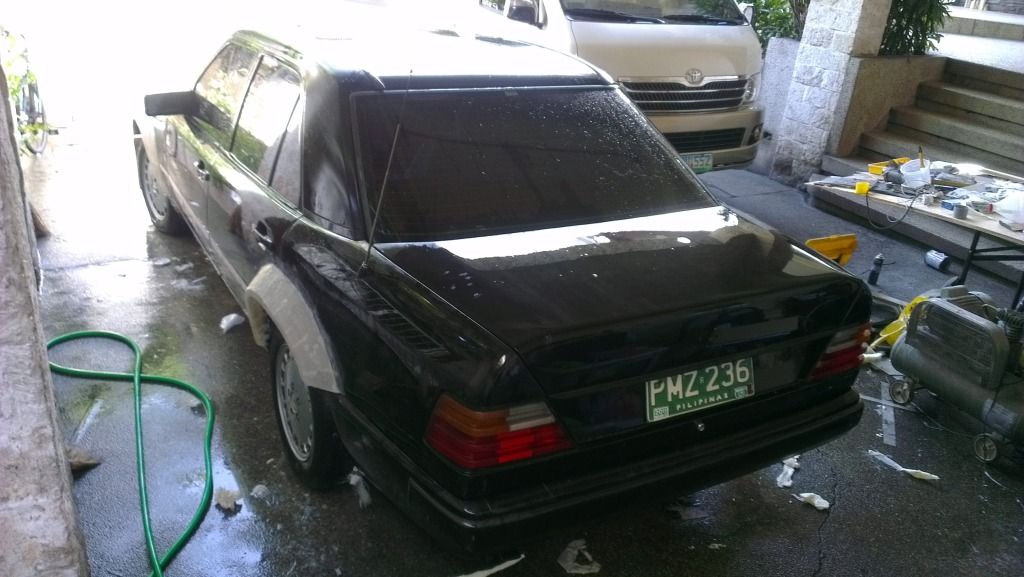
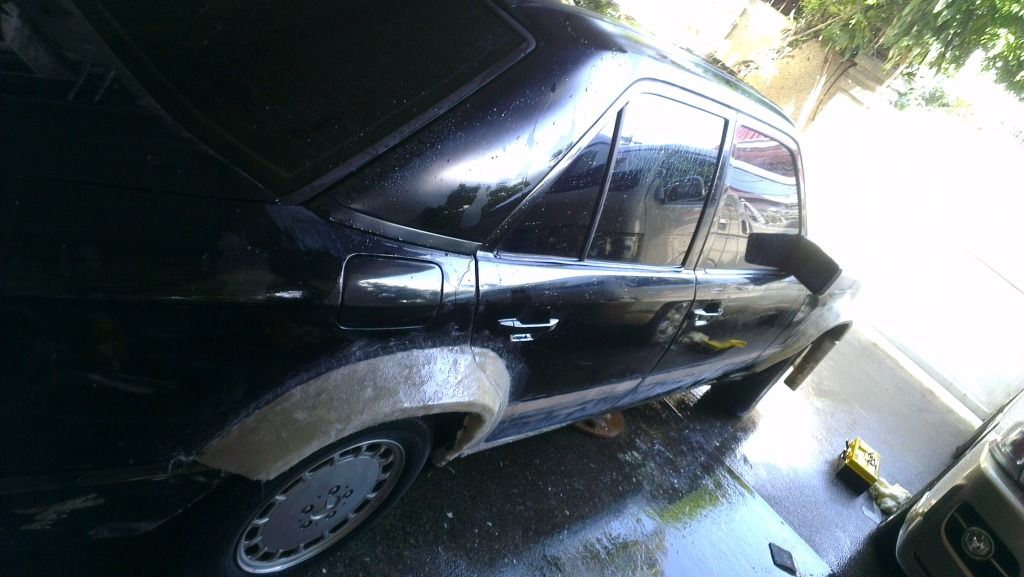
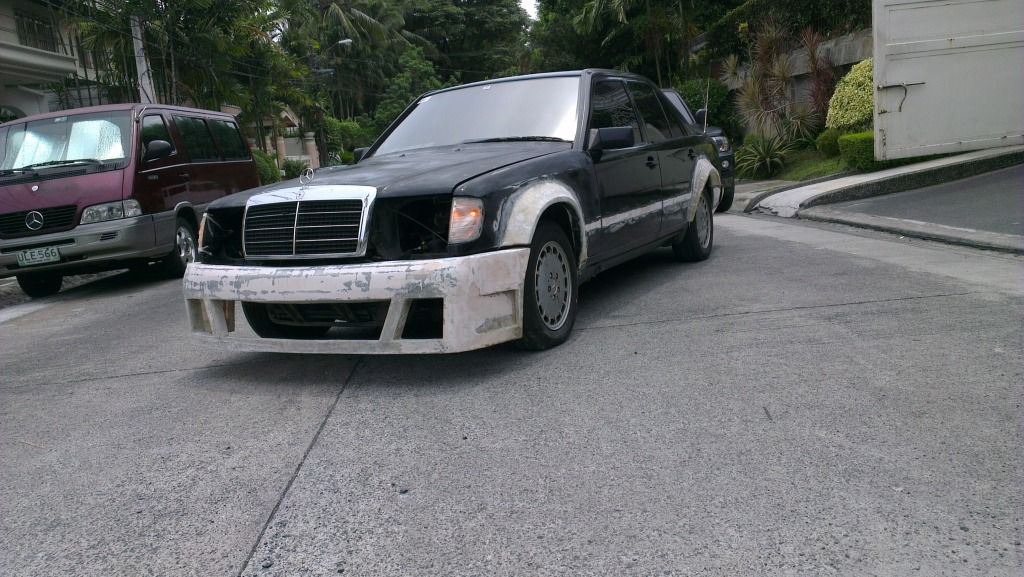
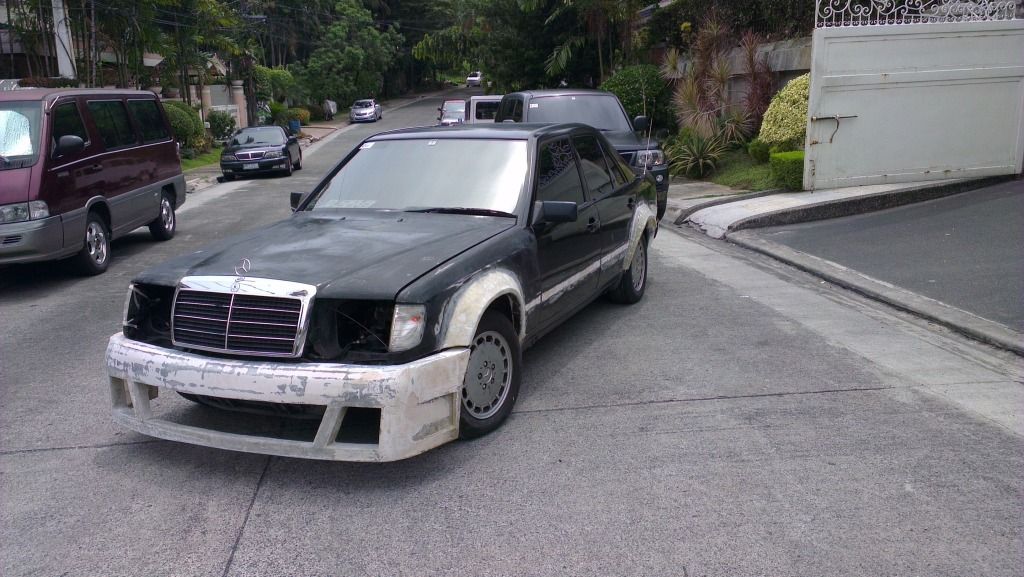
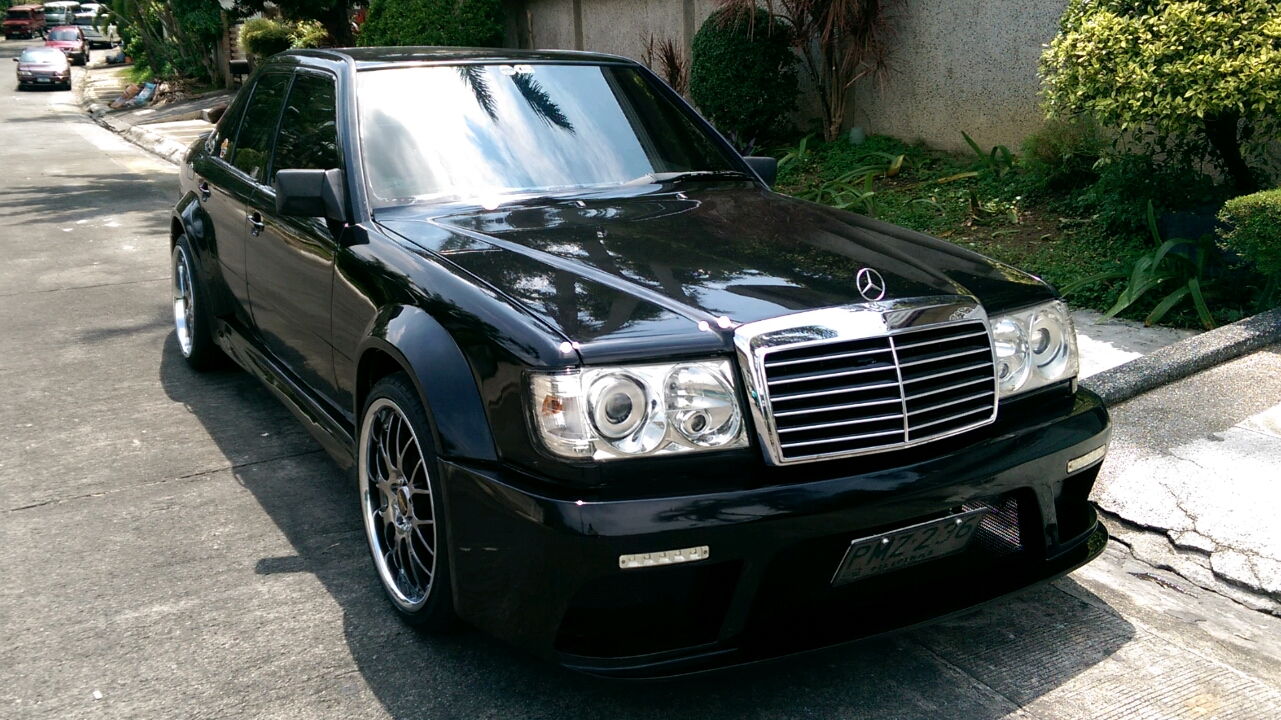
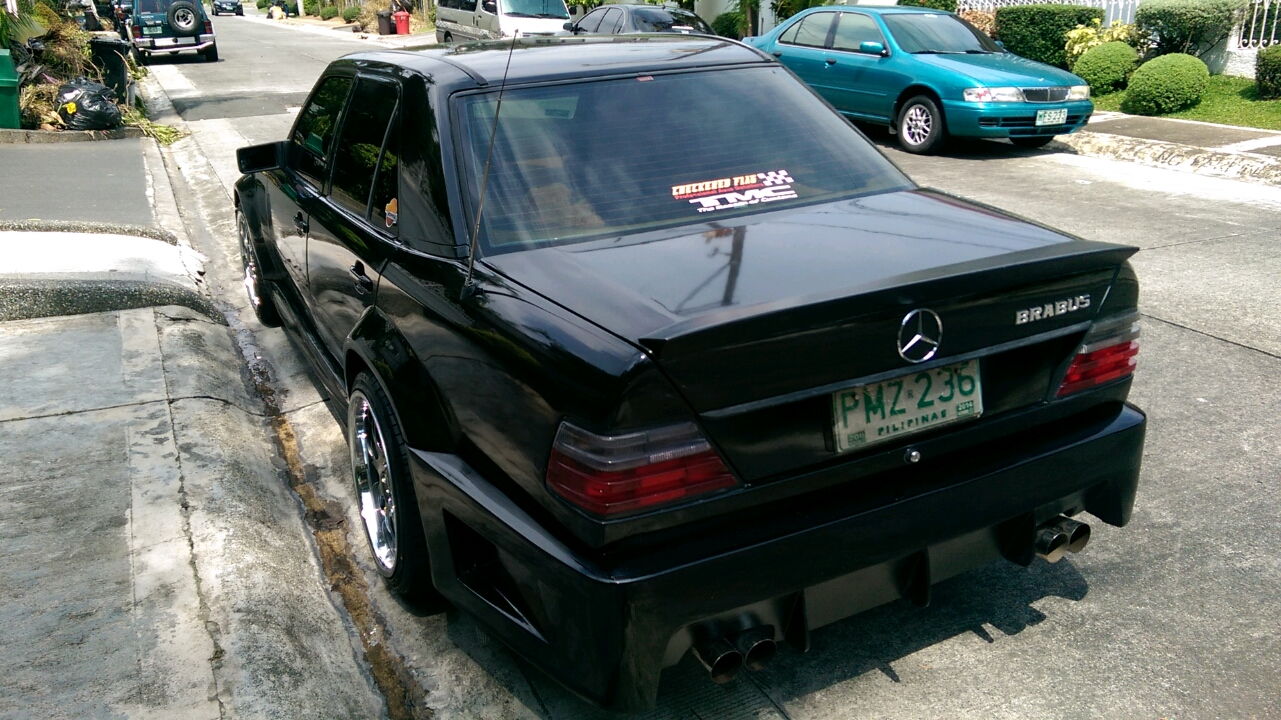
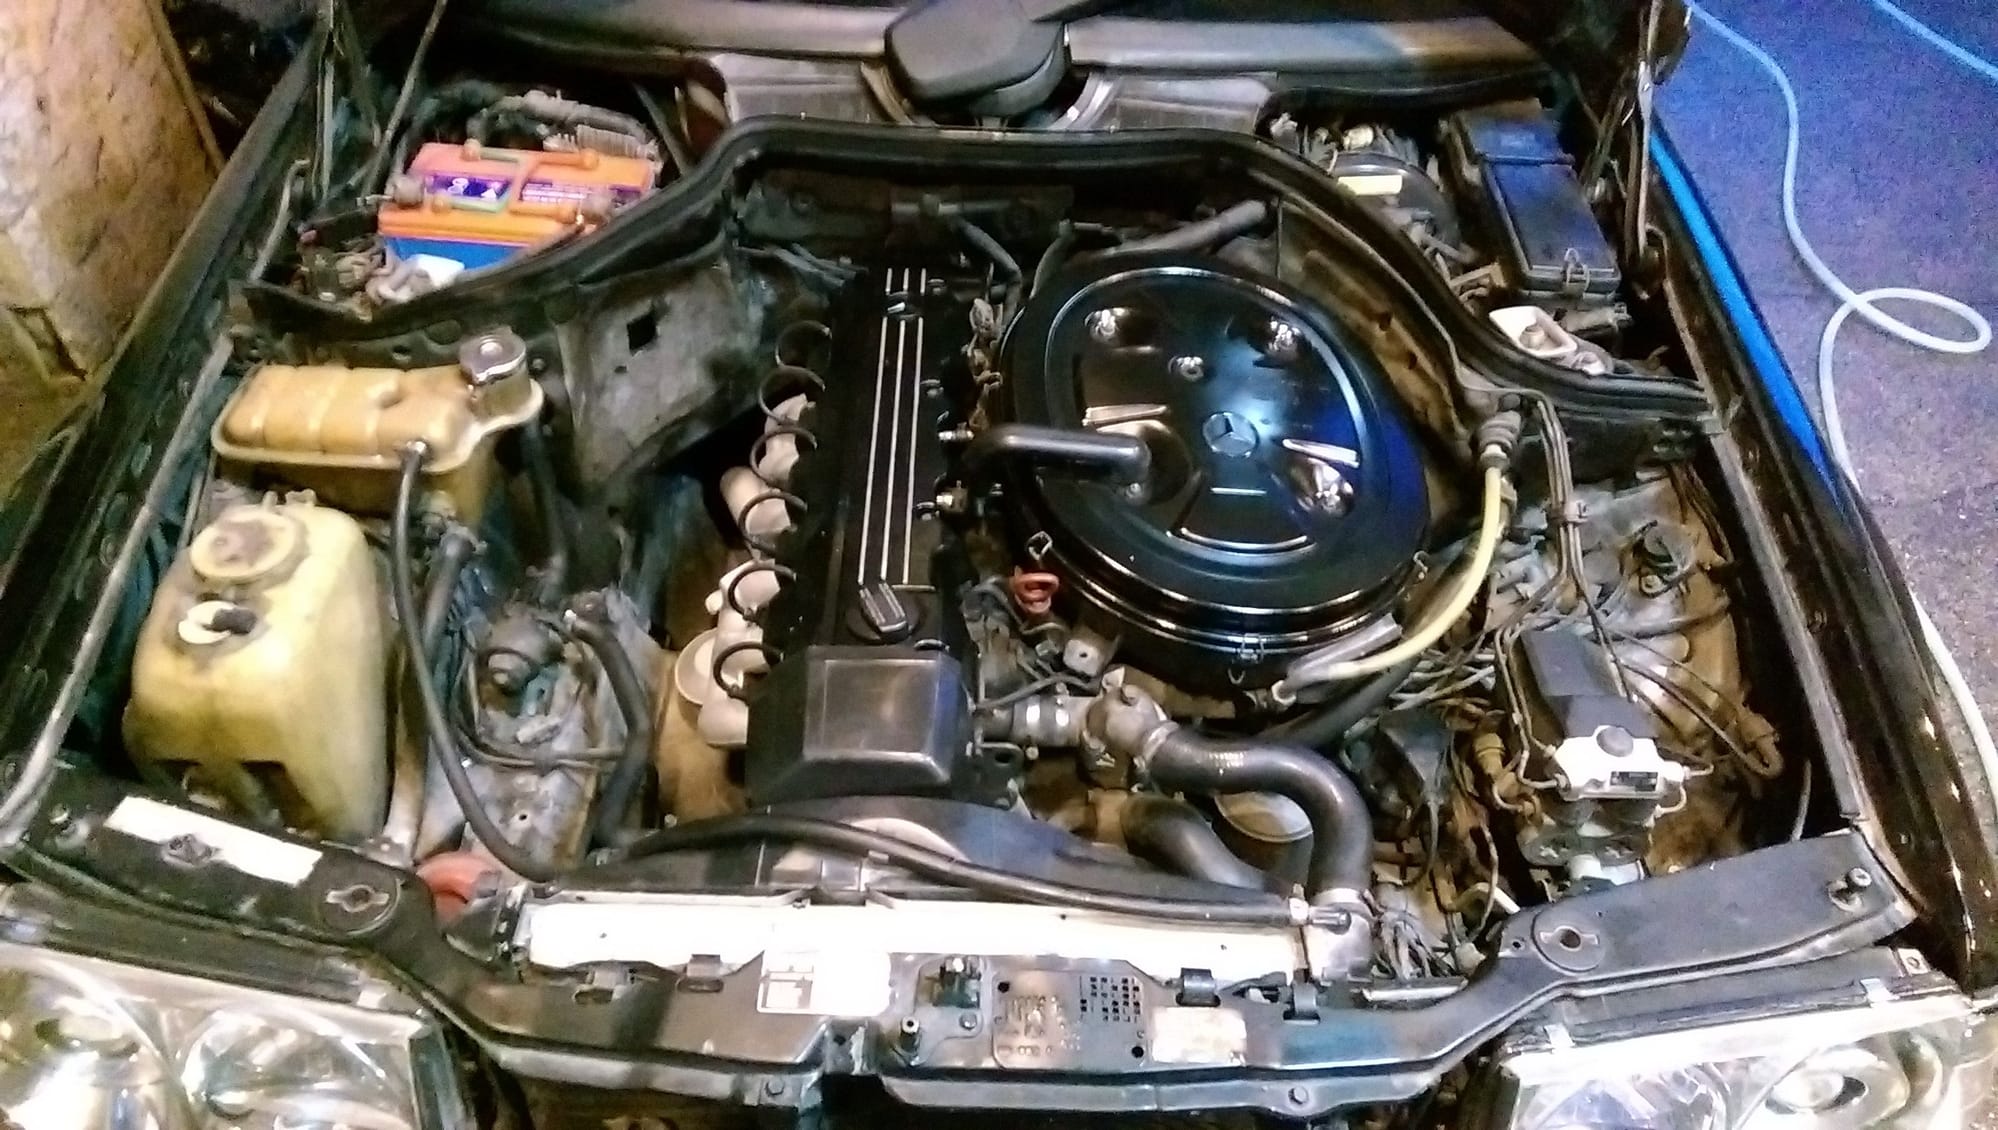
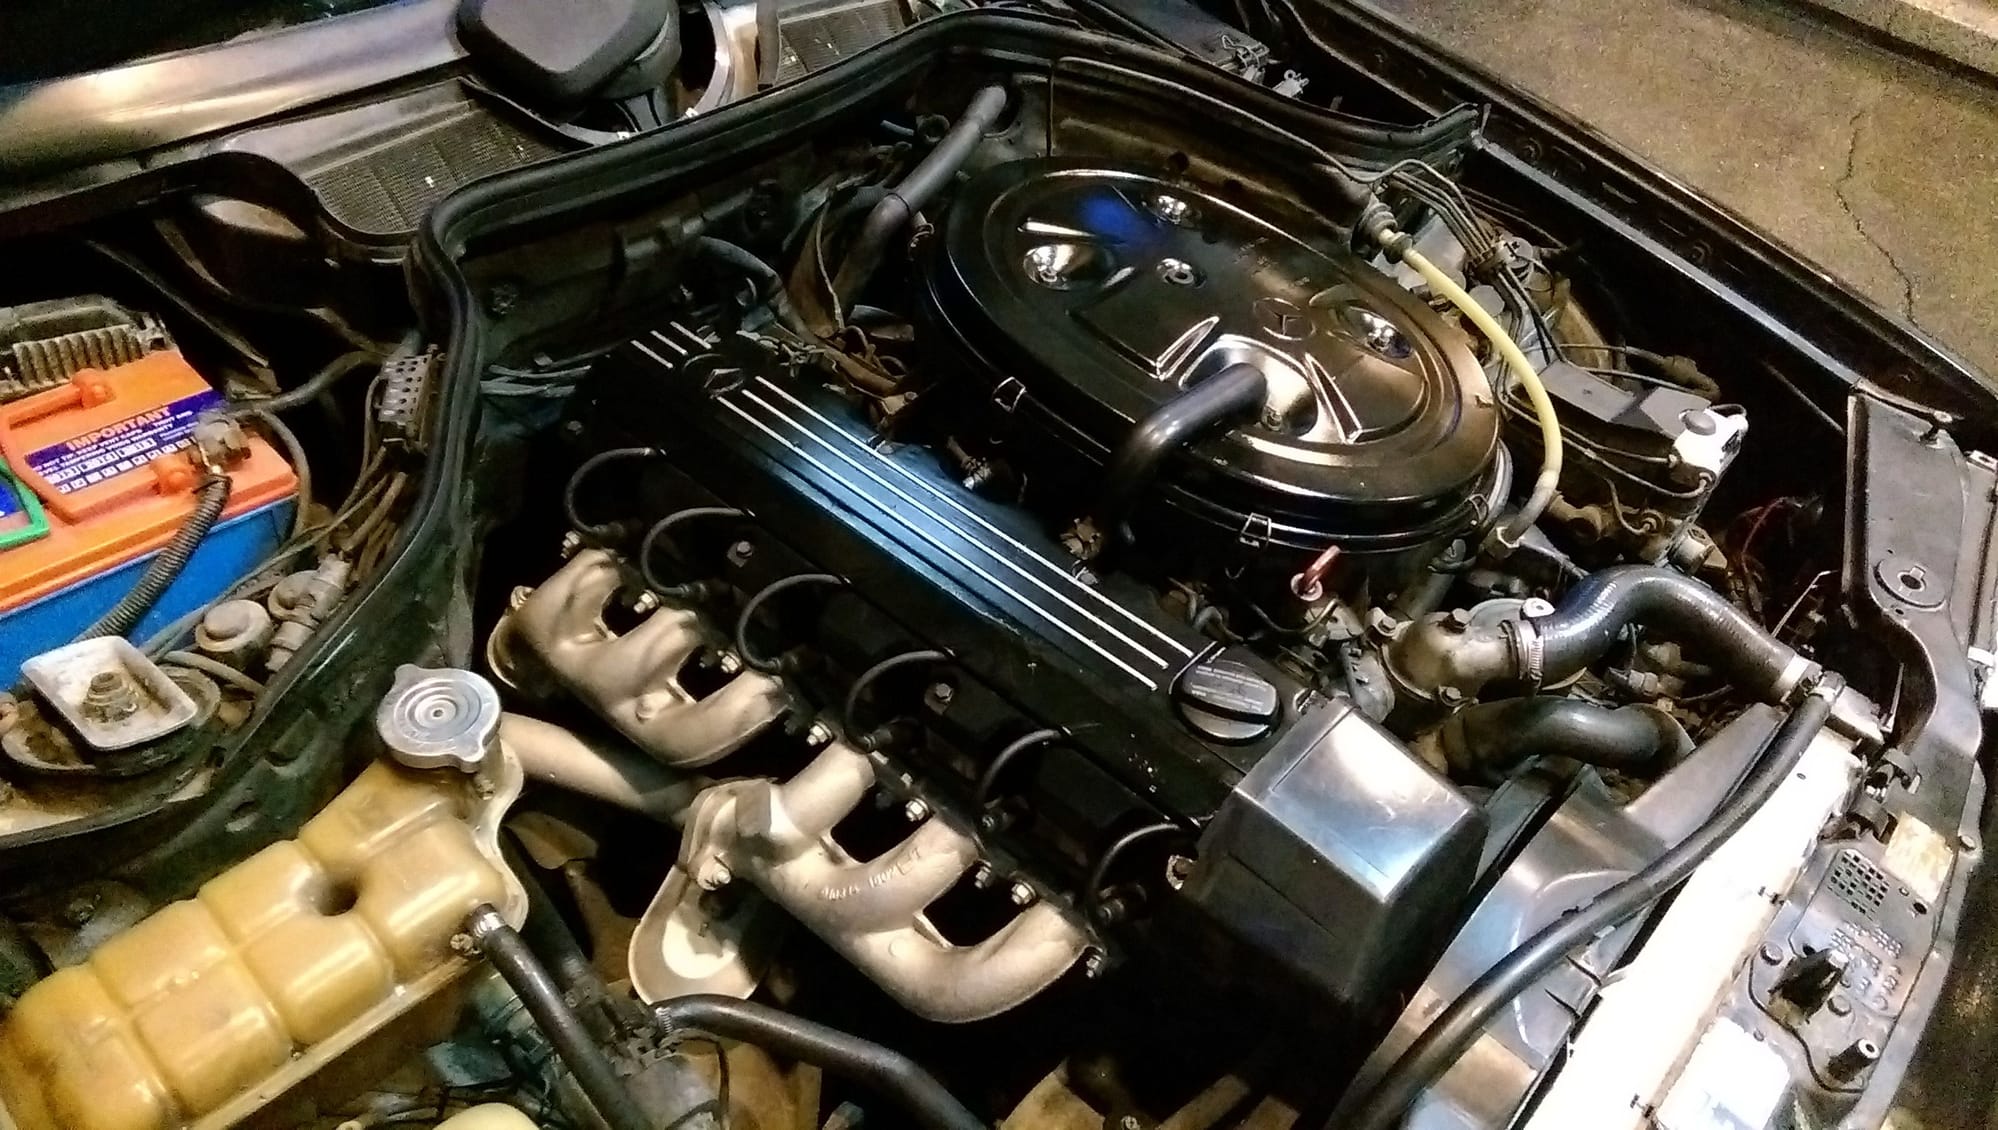
    I have a 1989 W124 206E just stuck outisde my house. We never used it cause it was so crappy already) so I decided to bring it back to life. Im making my own wide body kit (custom fron and rear bumper, side skirts, fender flares, and rear spoiler) to change the look, make it sportier, and make it sexy again.


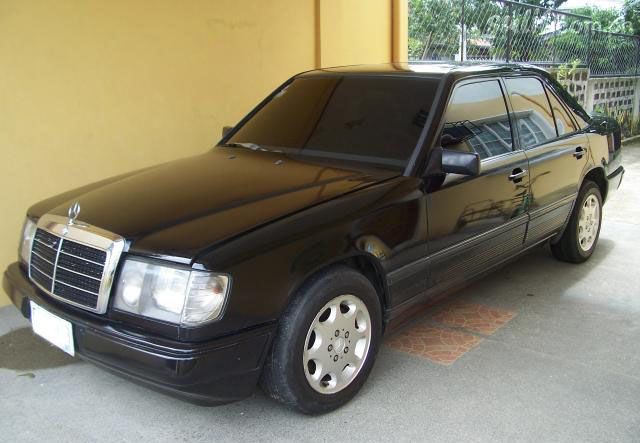
    Here's the photo of it before everthing happened.(this is not my car, I forgot to take a picture before starting the project! haha this is just a sample picture of what it loked like)
    *note: the front bumper was busted, the paint was faded)


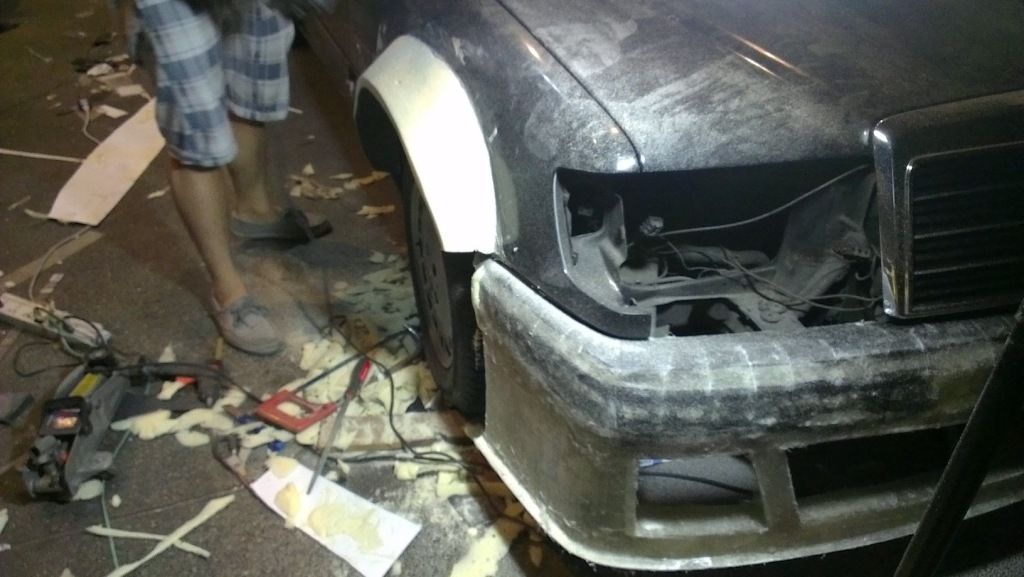
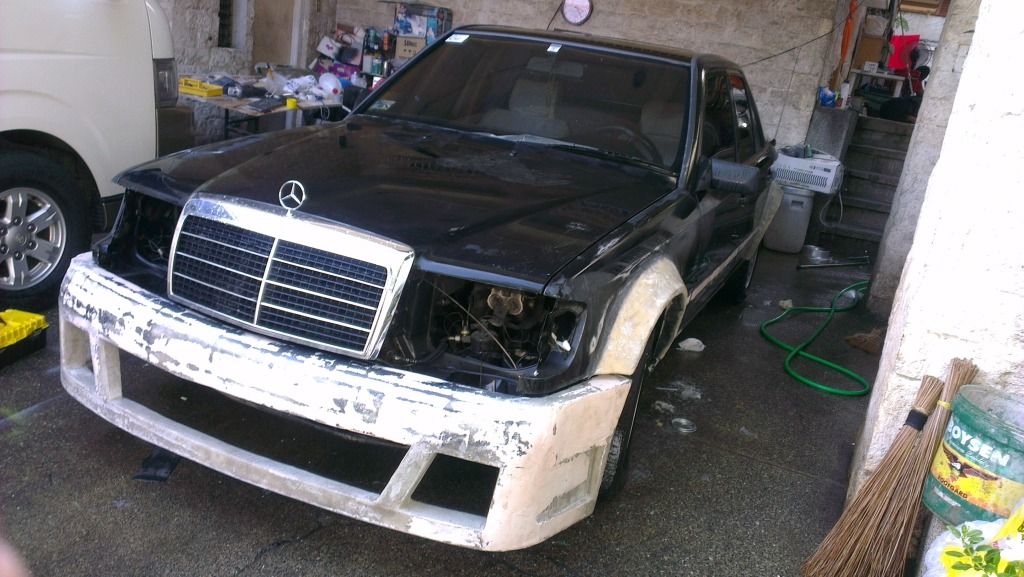
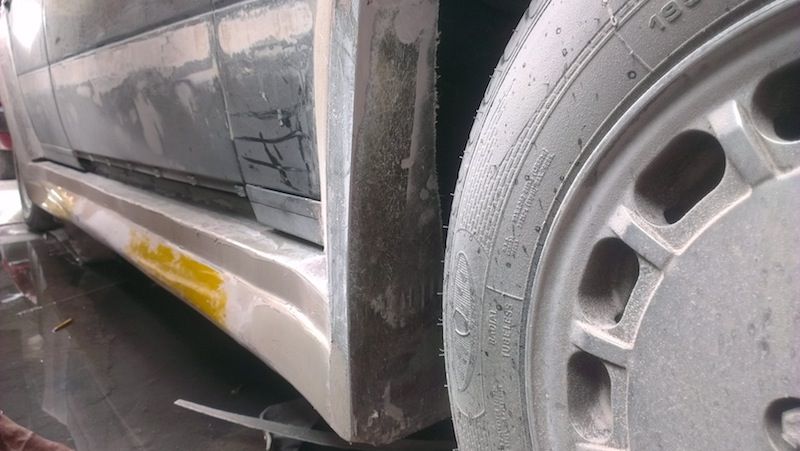
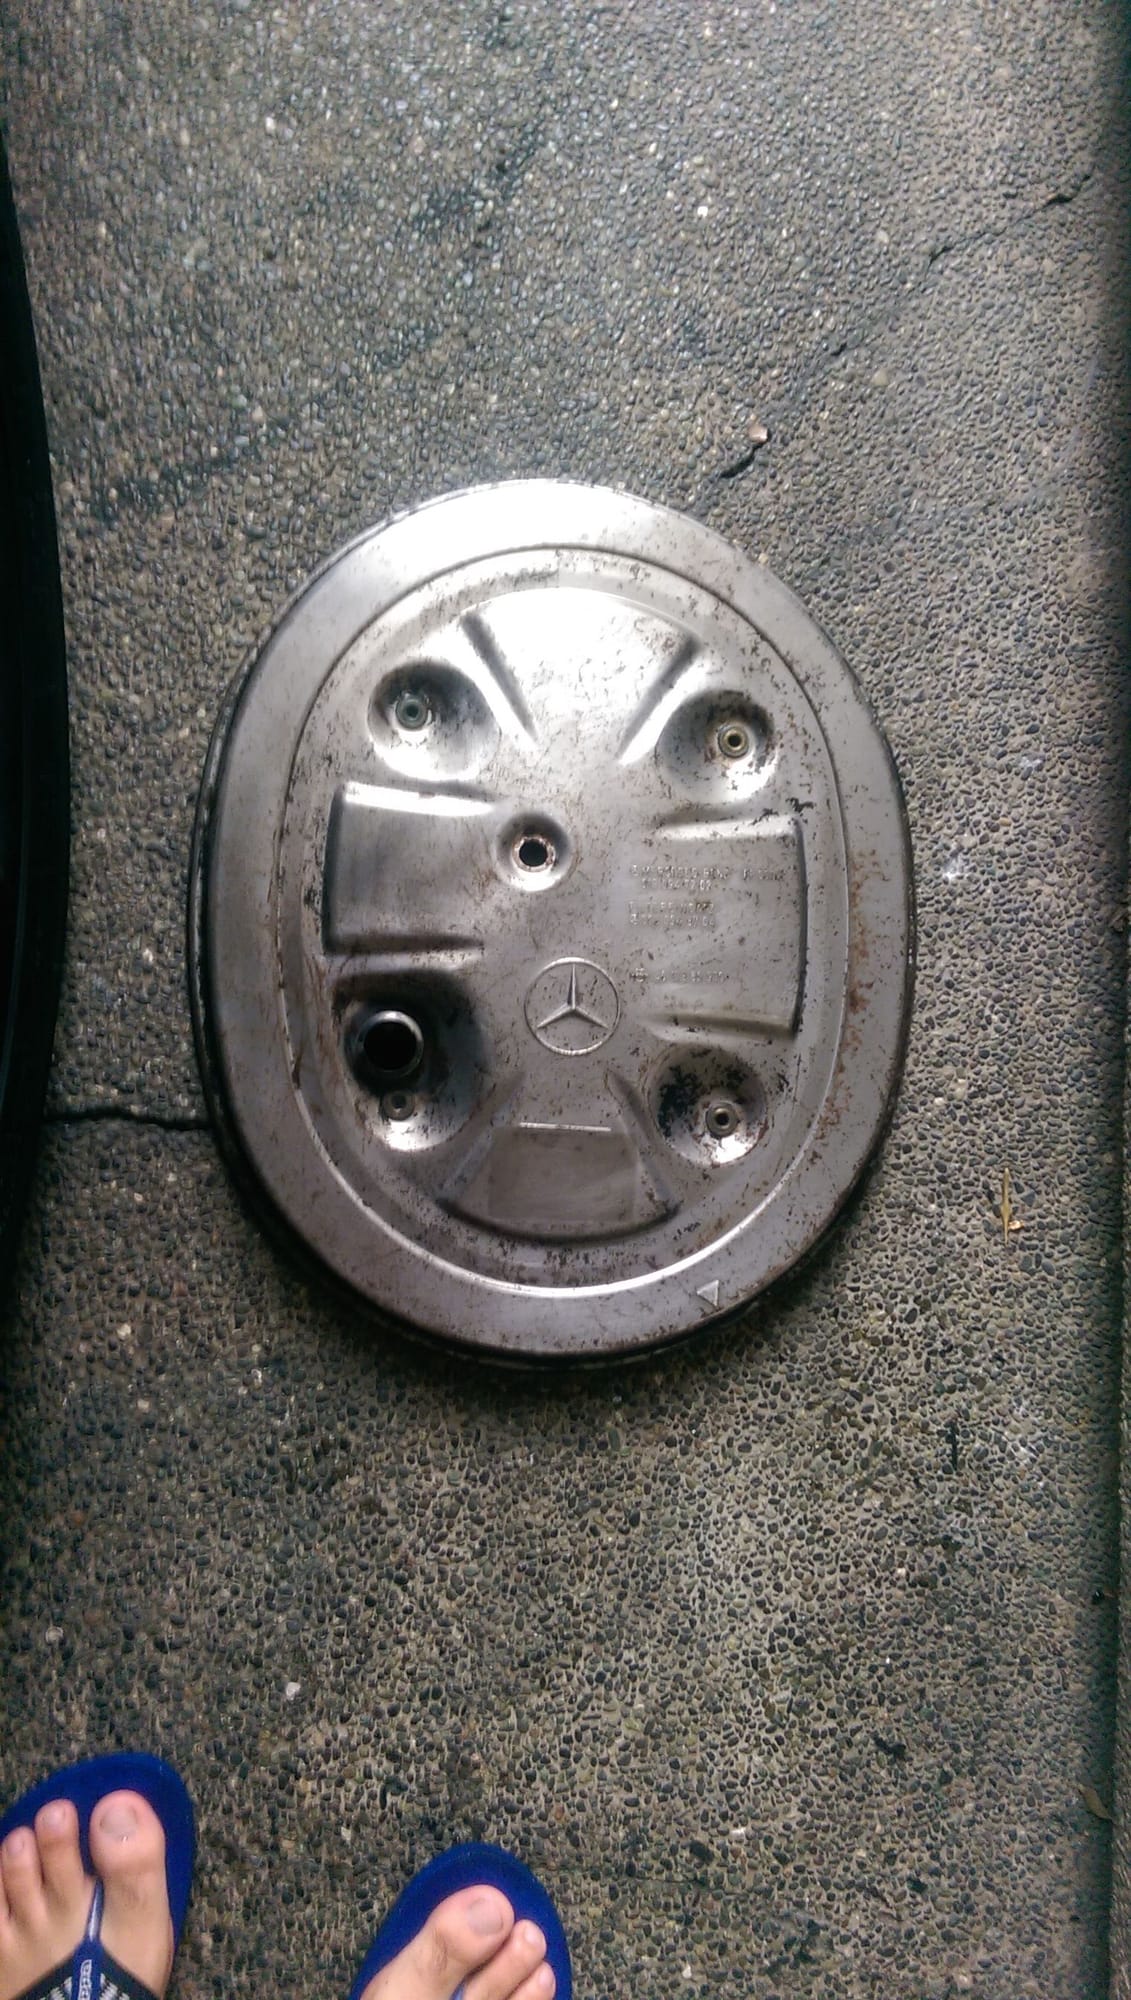
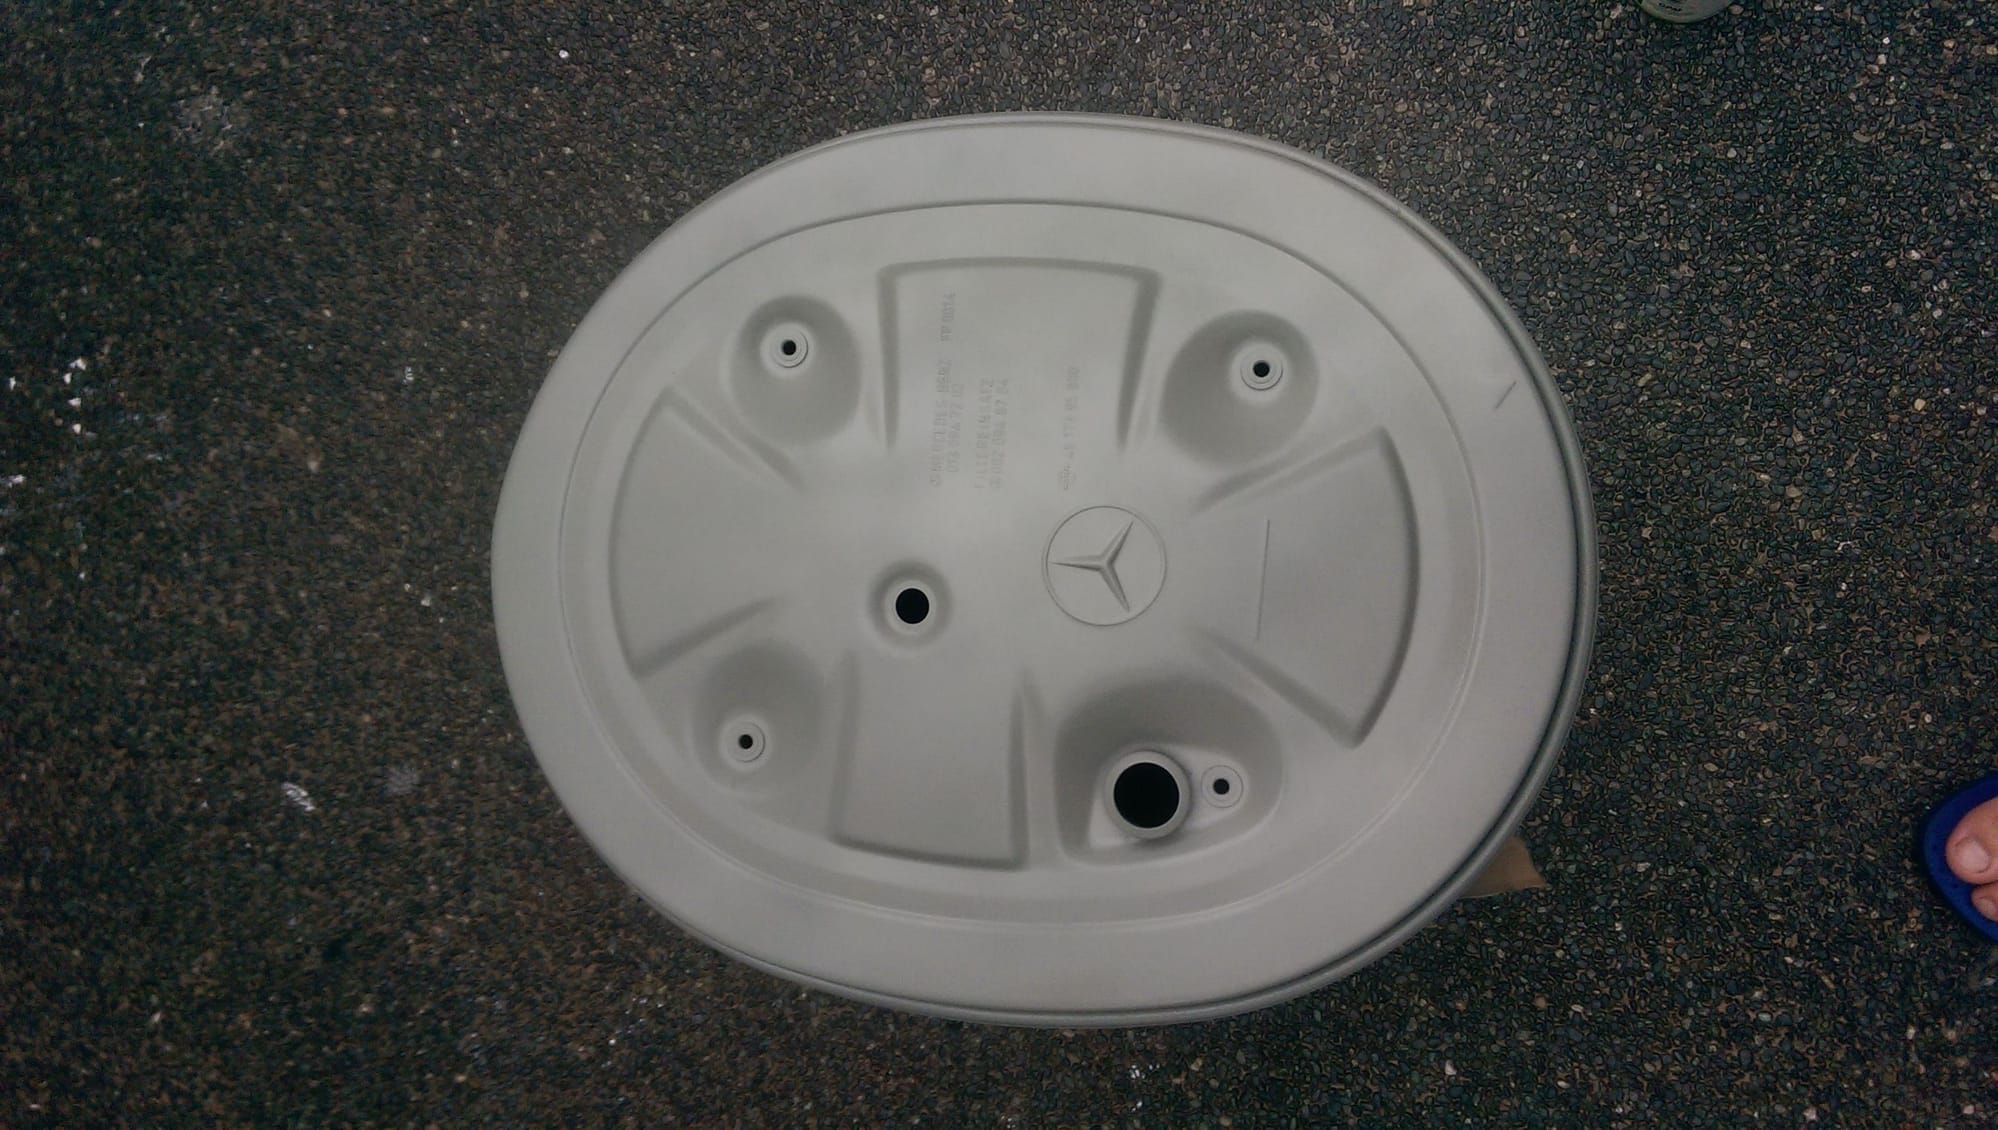
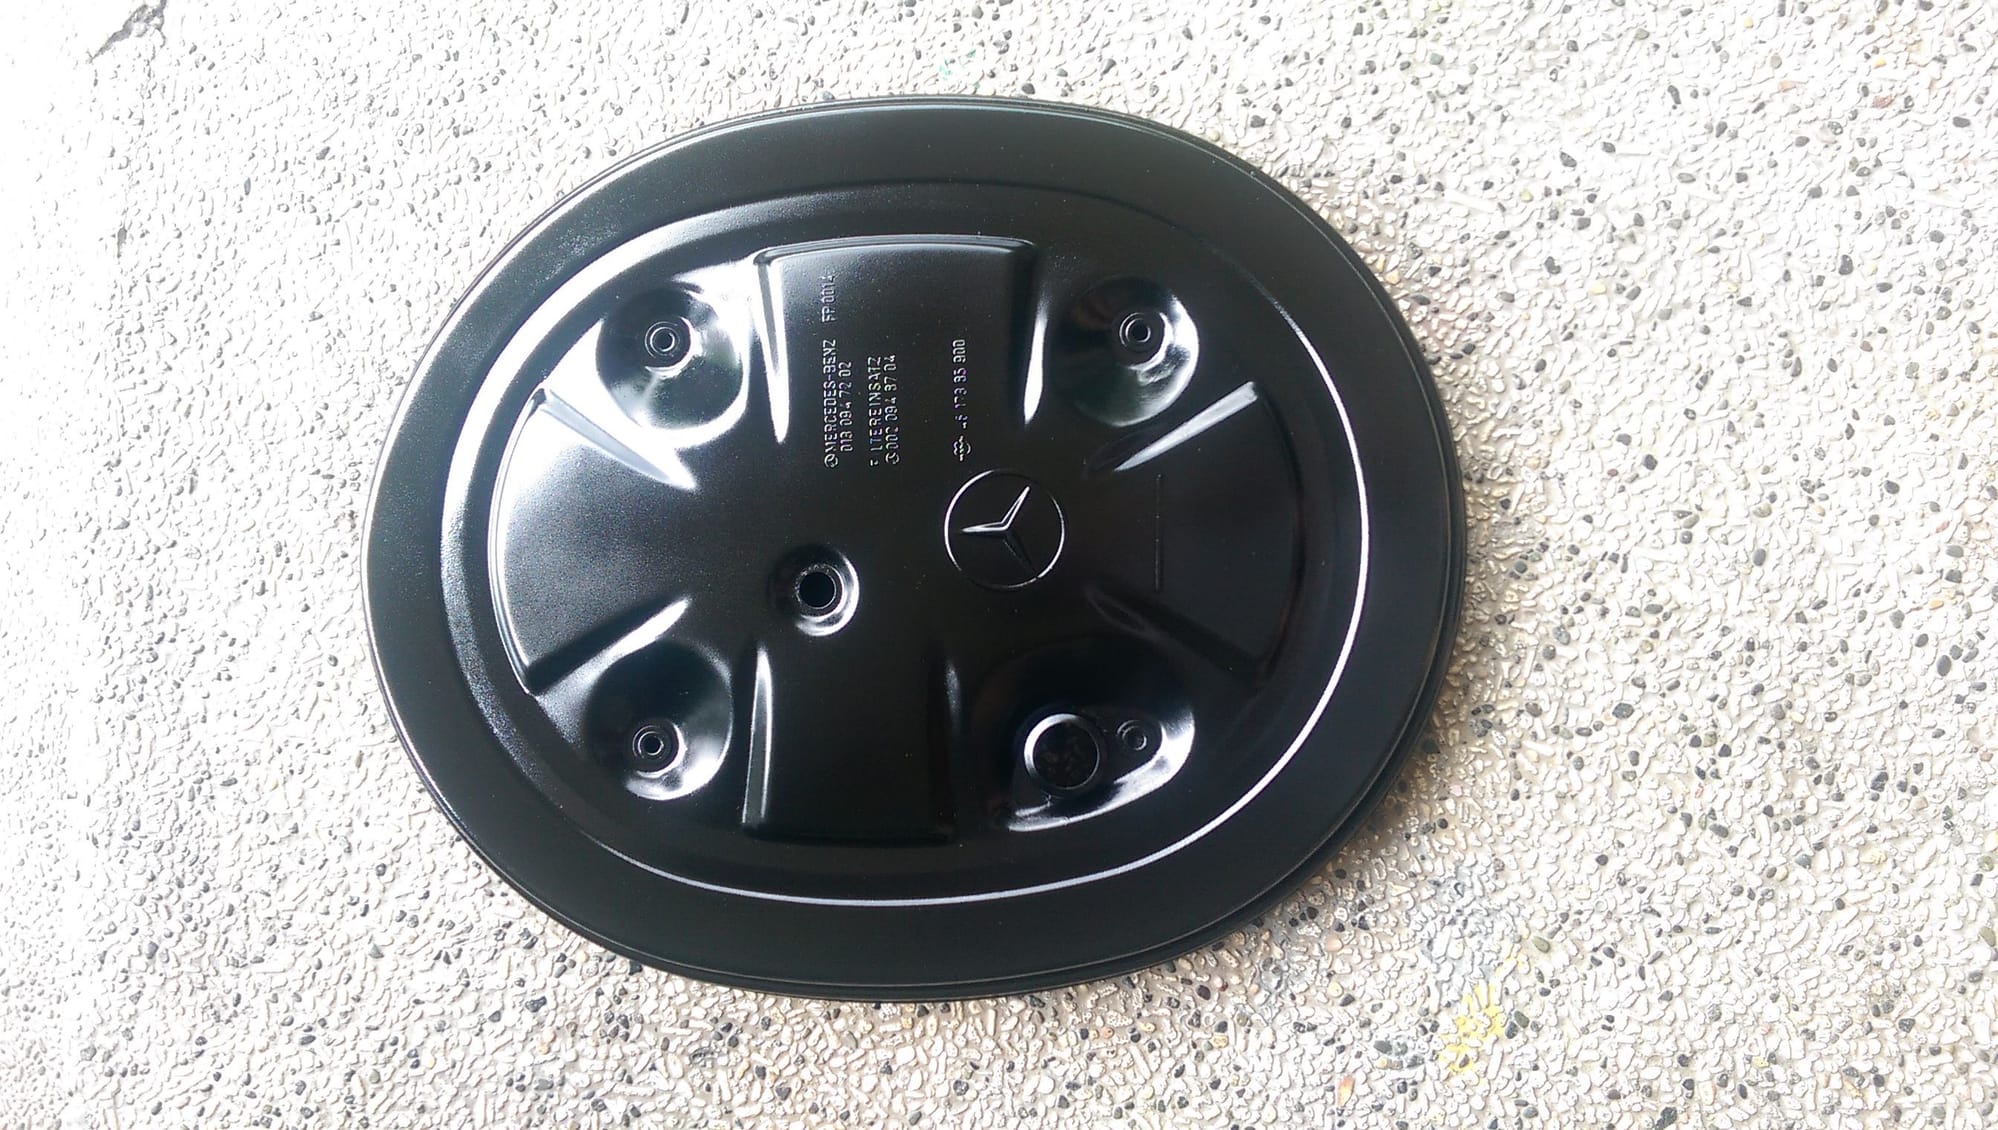
    Here, I glassed the plate holder to make it even and flat:


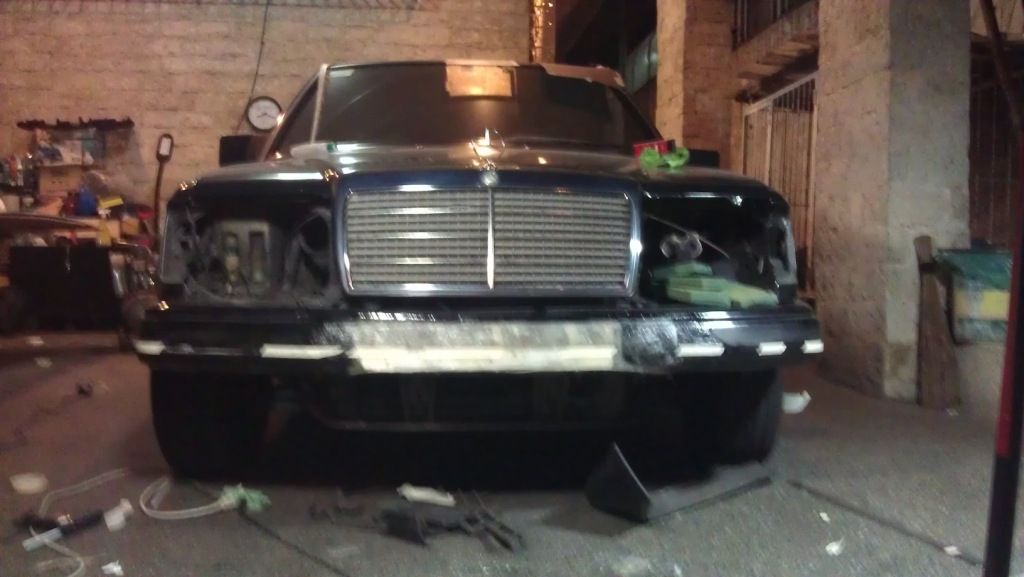
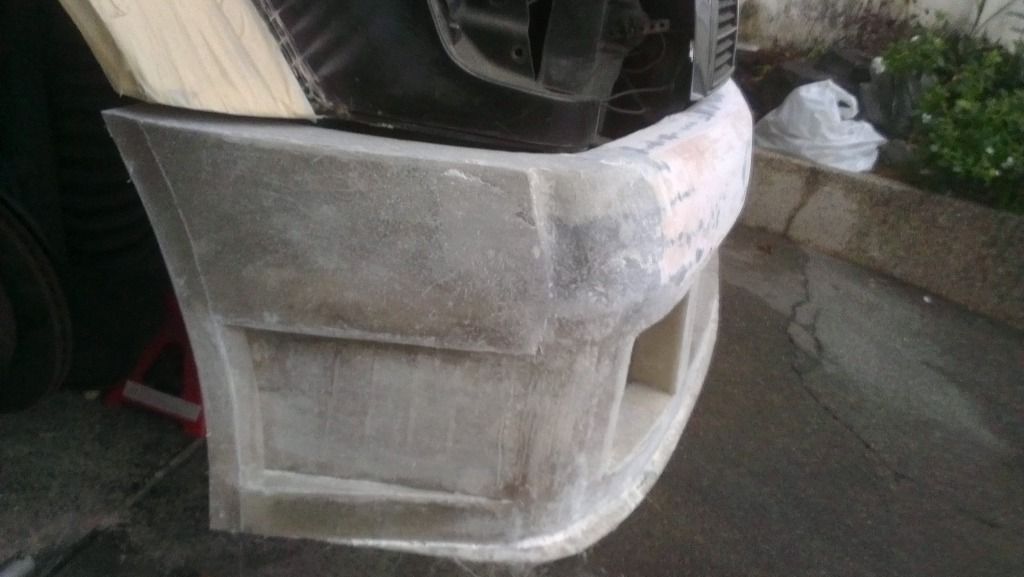
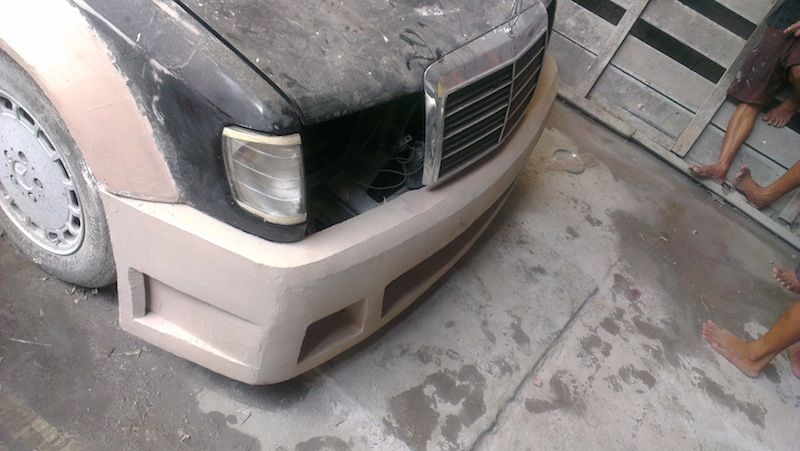
    Then I used a sheet of fiberglass I made to make the "base" or template of the bumper.


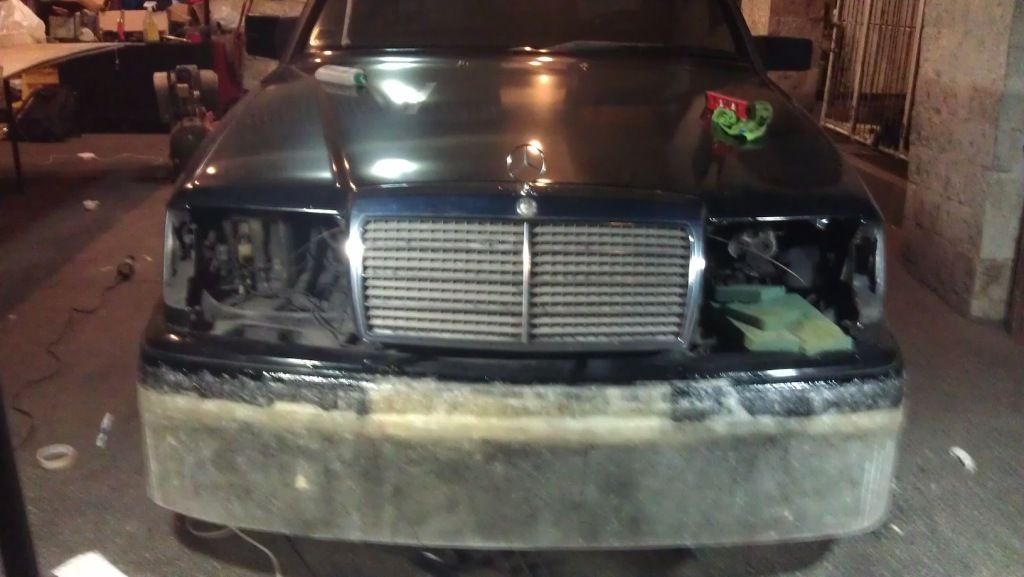
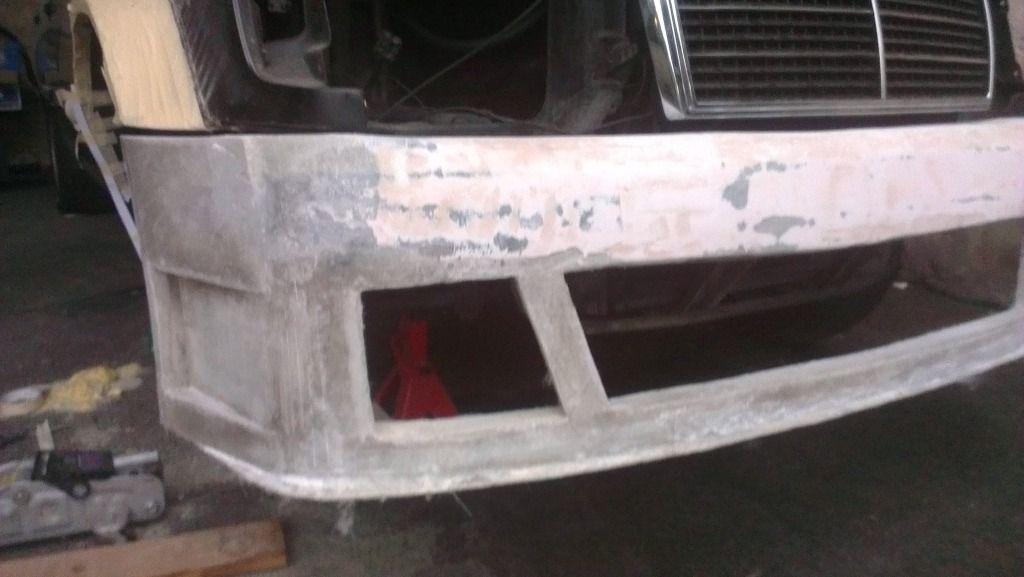
    Then I cut off the holes with a dremel.


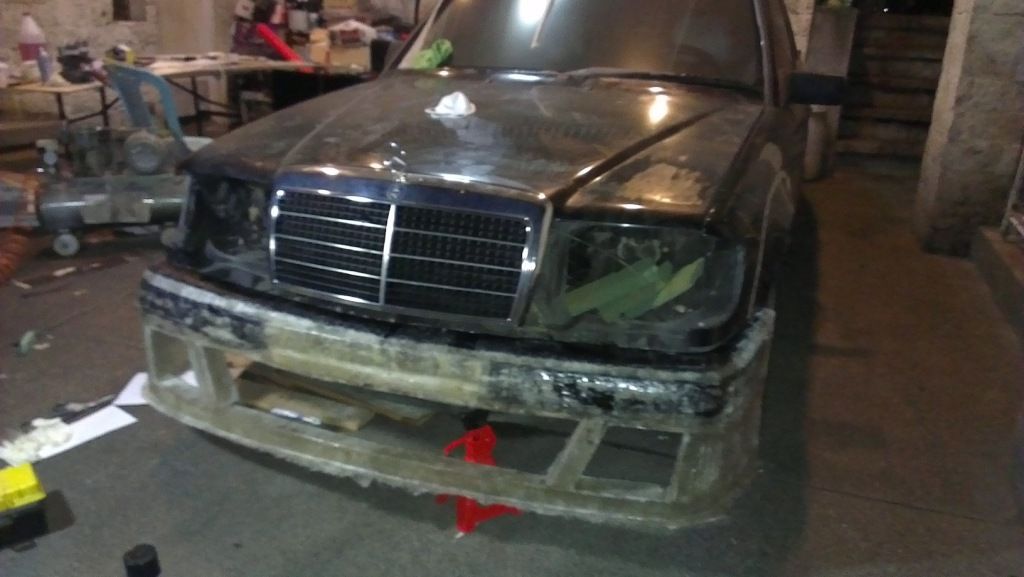
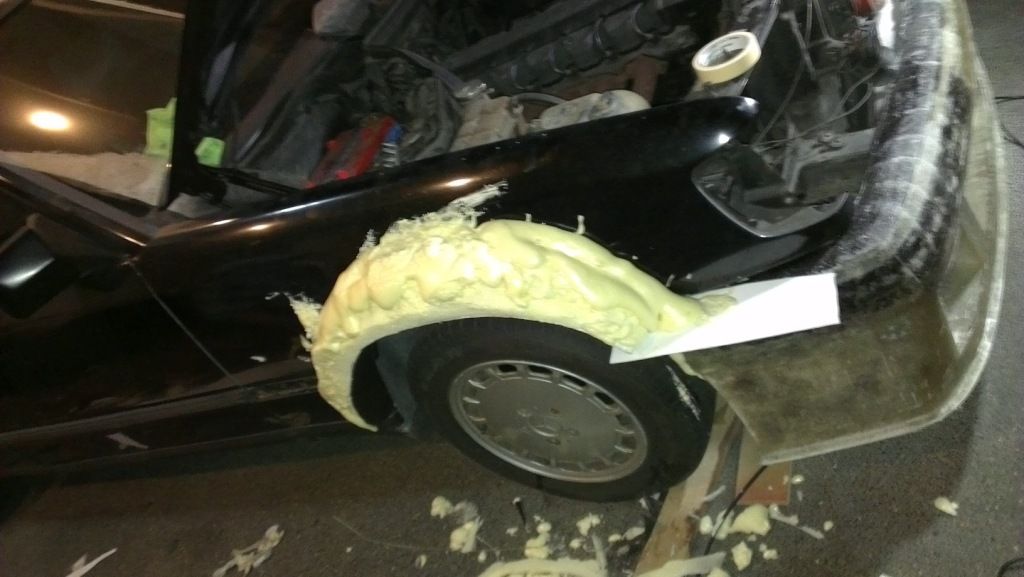
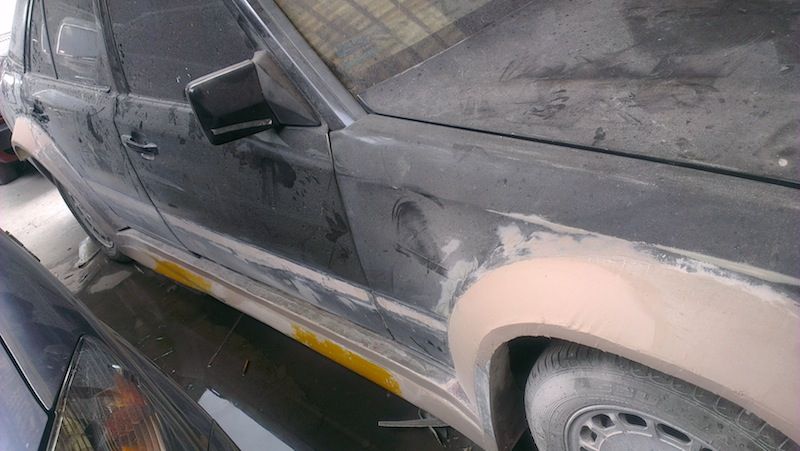
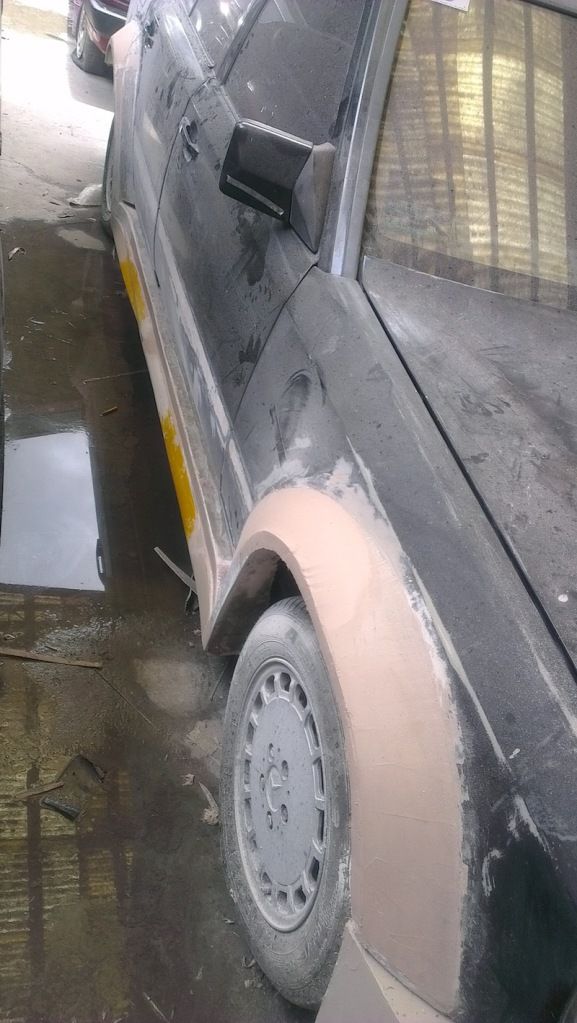
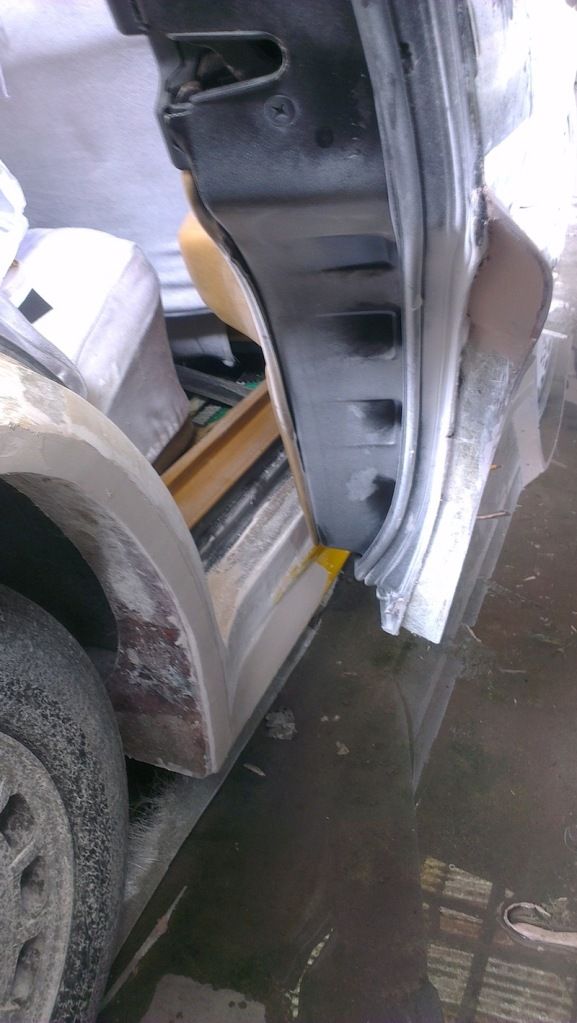
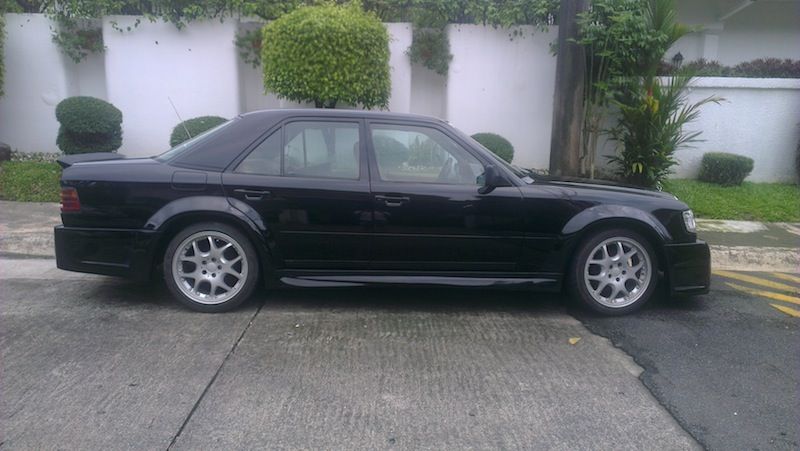
    Then off to make the wide fender flares! I used the expandable foam to make the shape of the fender:


    Then I trimmed it with a cutter, then further shaped it with a sander


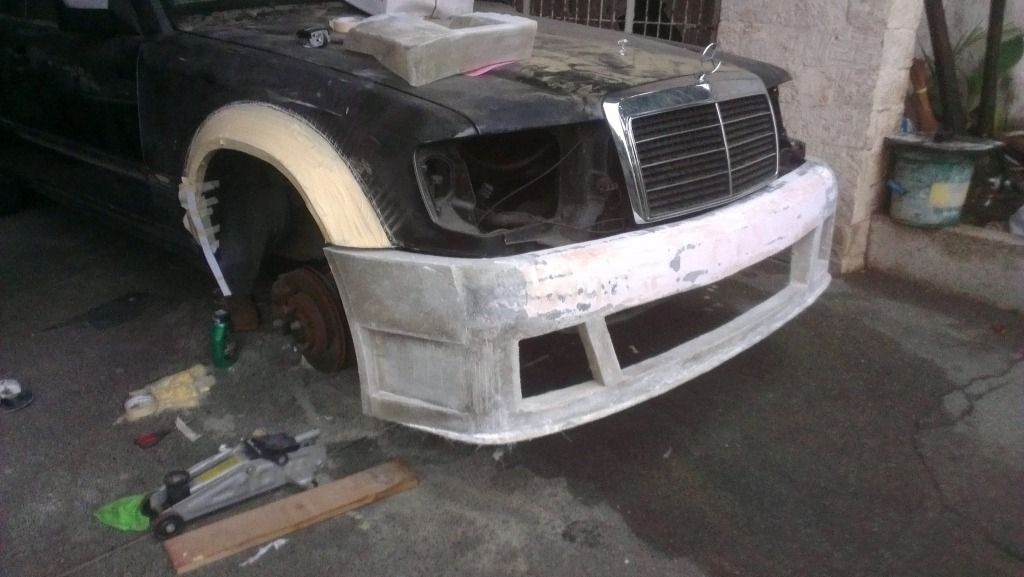
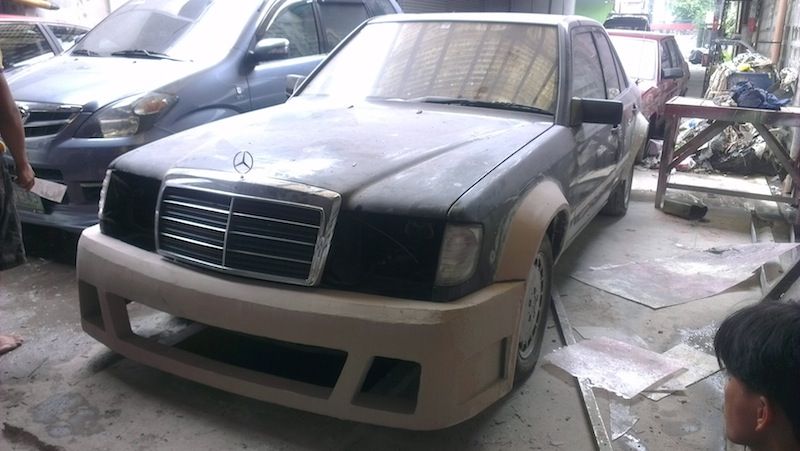
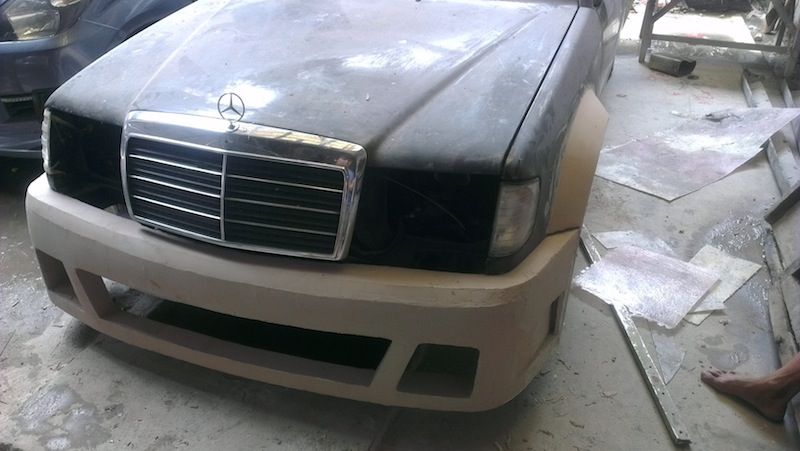
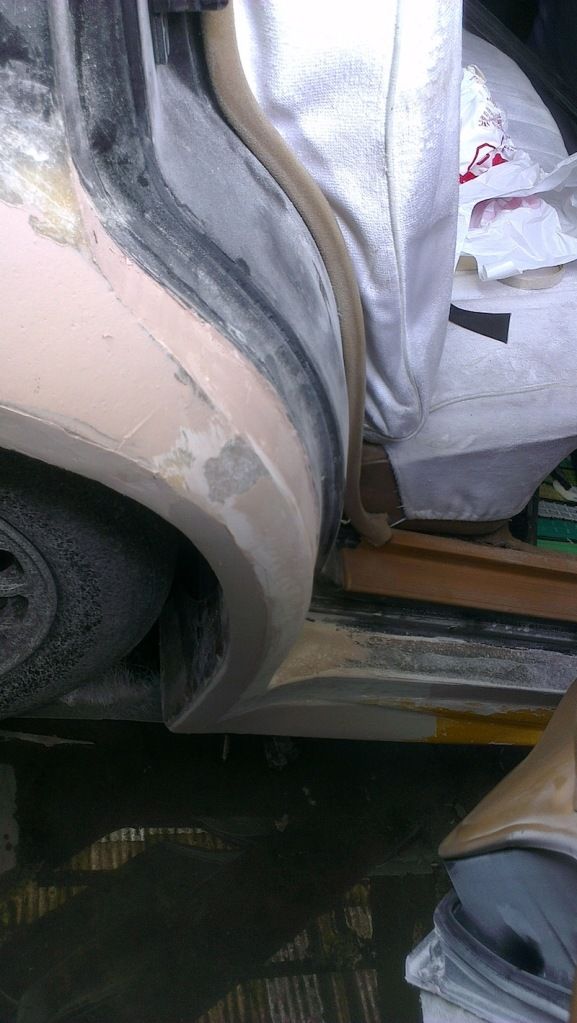
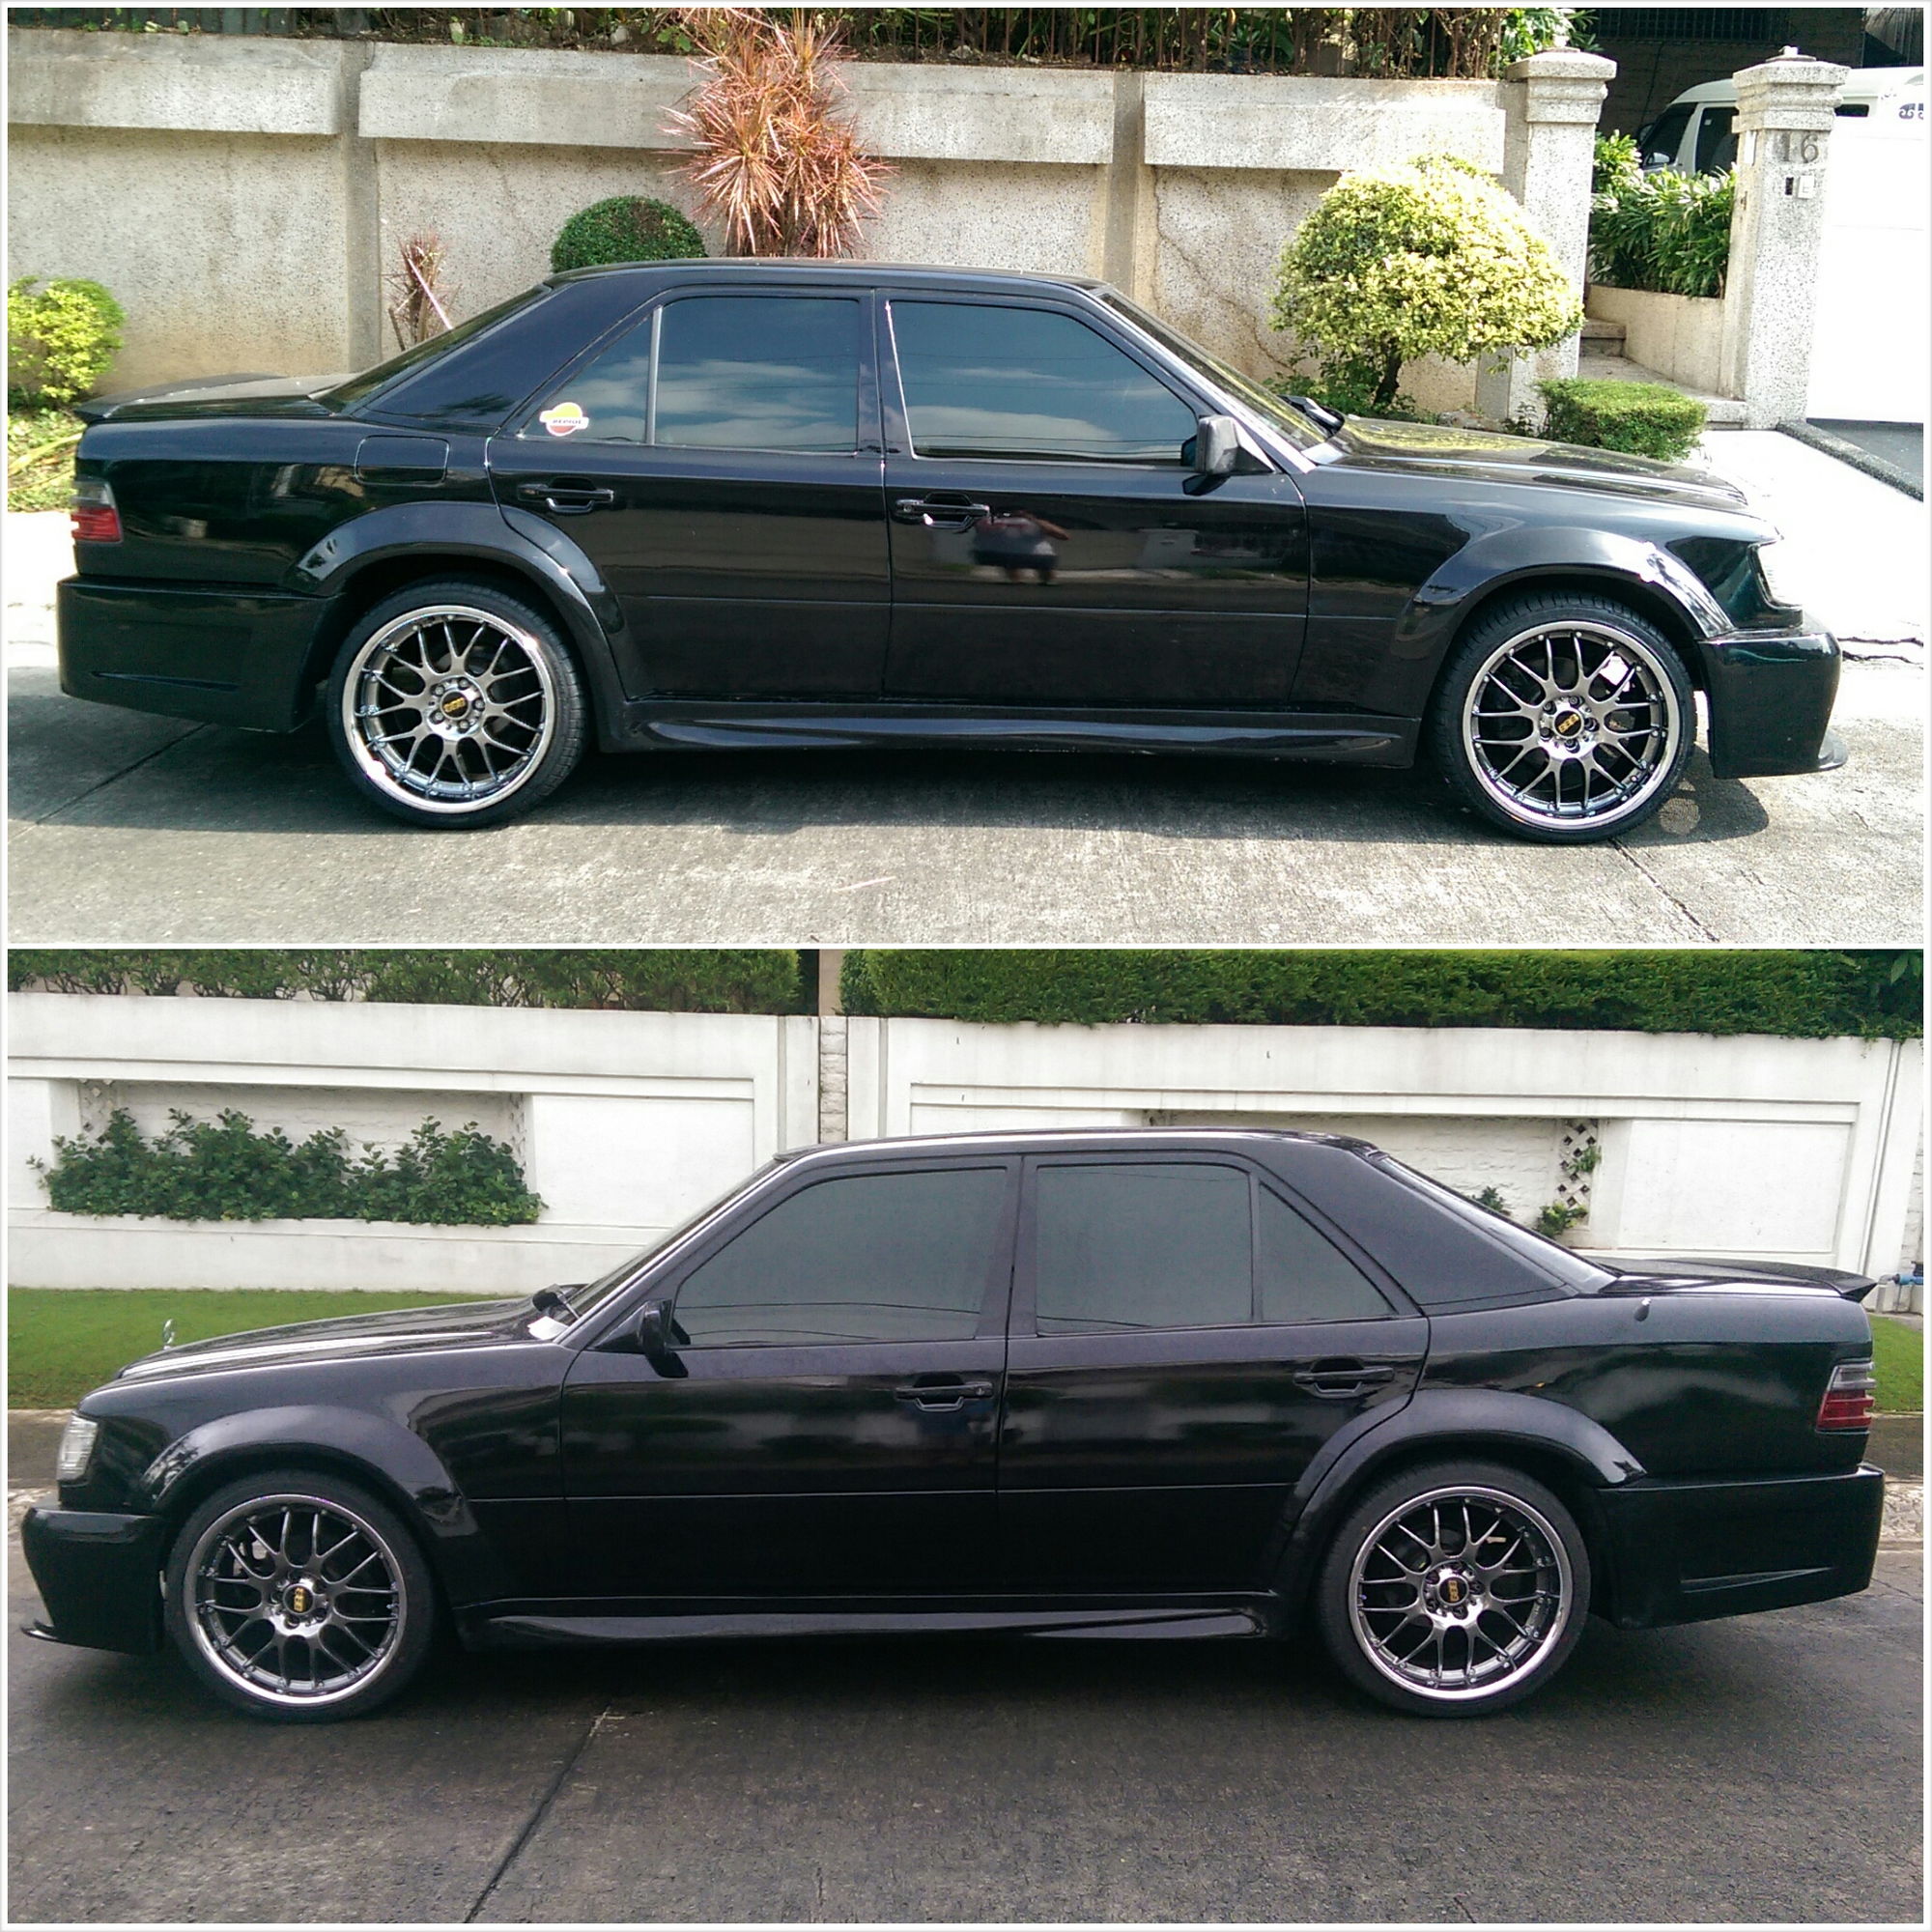
    Glassed the fender flares and also made a vent on the bumper to make it wider, and fit well with the new wider fenders. Looking sexxy!!


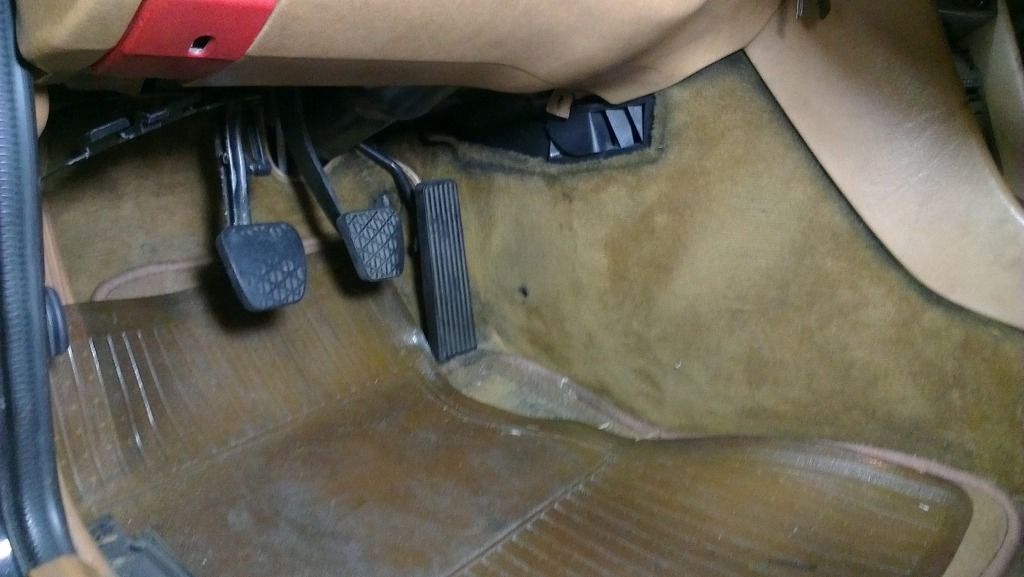
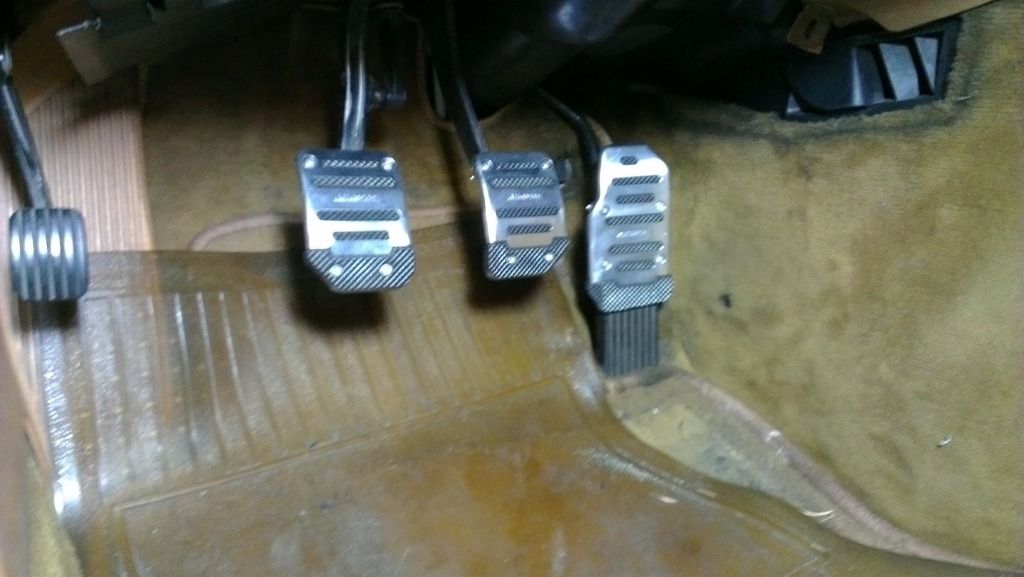
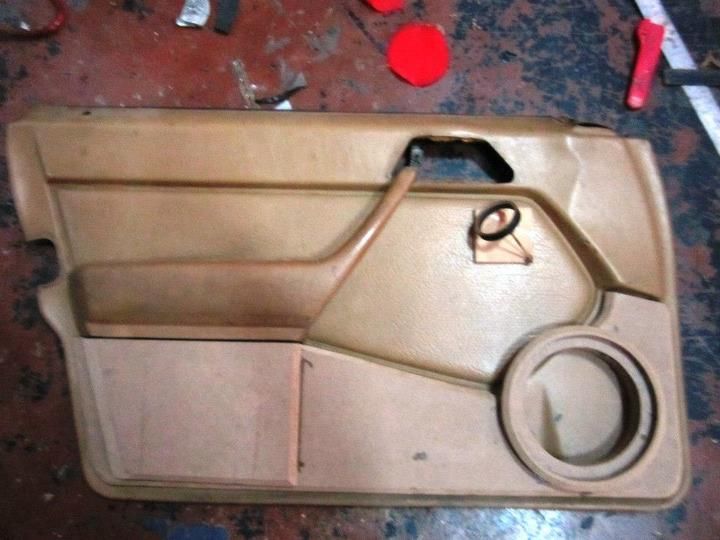
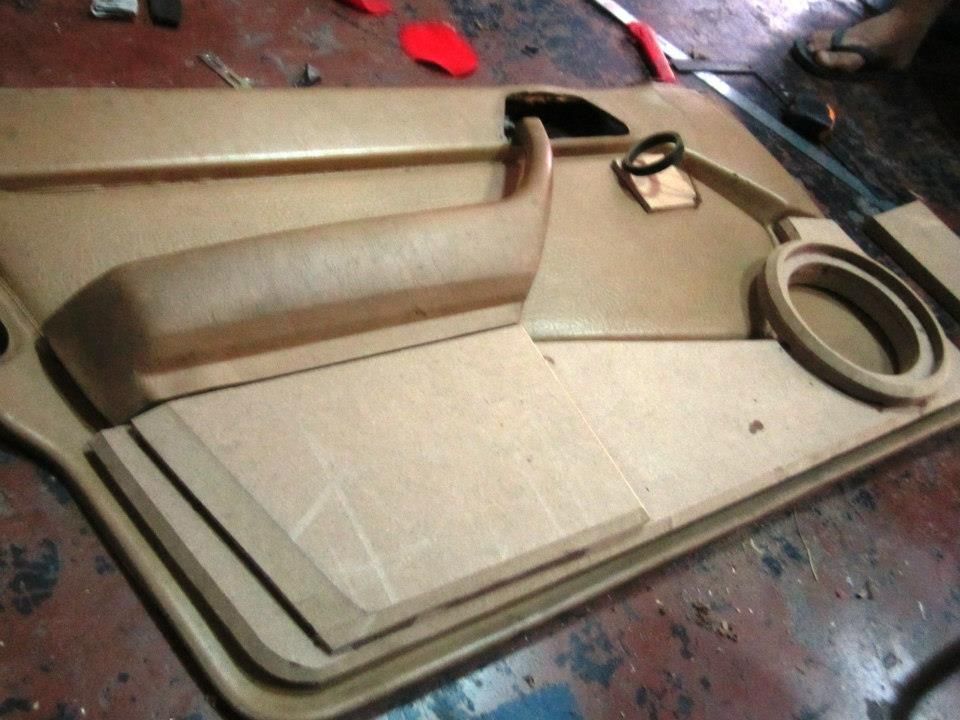
    Also tried to fix up the interiors also.. bought cheap pedals to make the existing ones look a BIT better) (gas pedal is too long. it looks weird...)

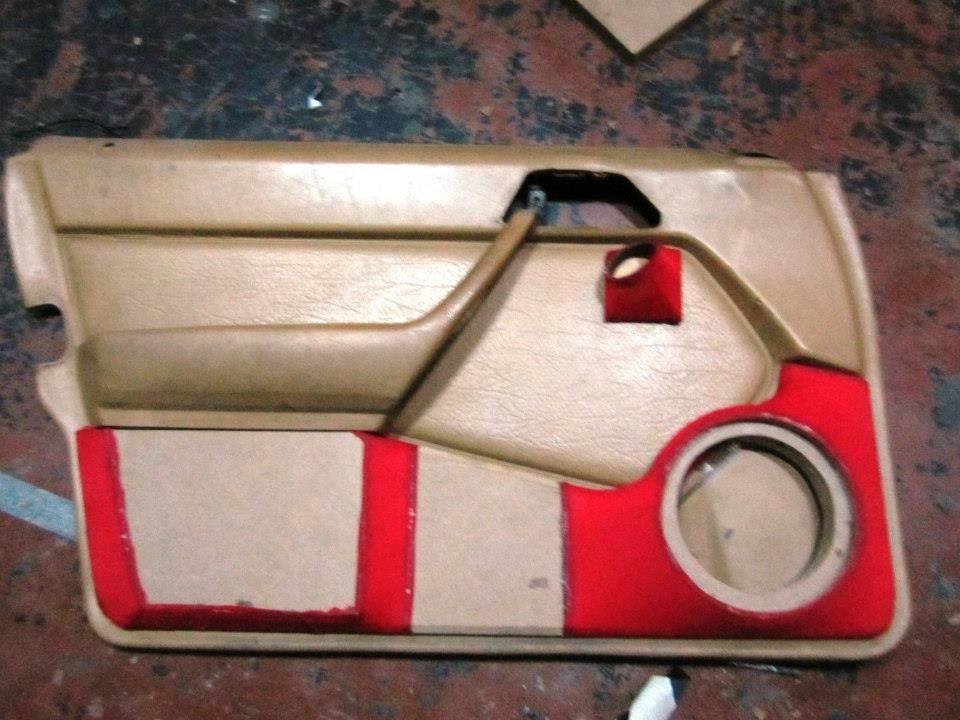
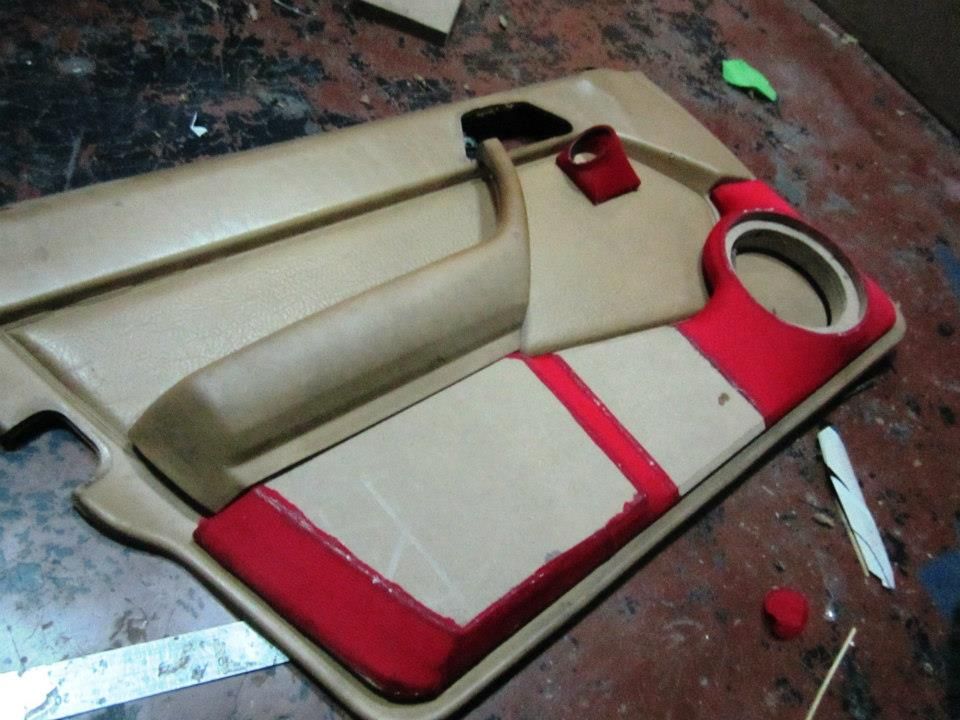
    Bought this to make it look better:

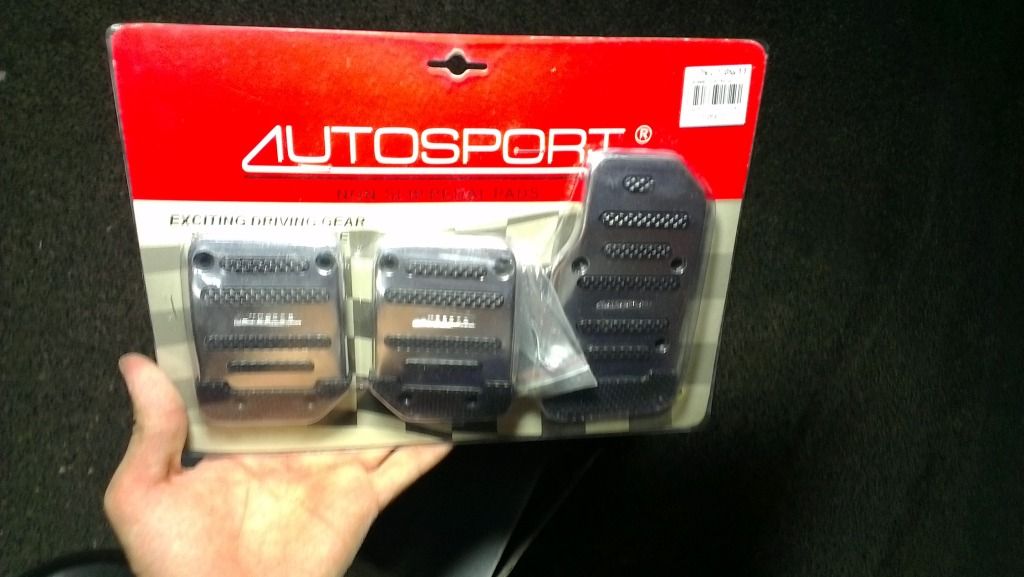
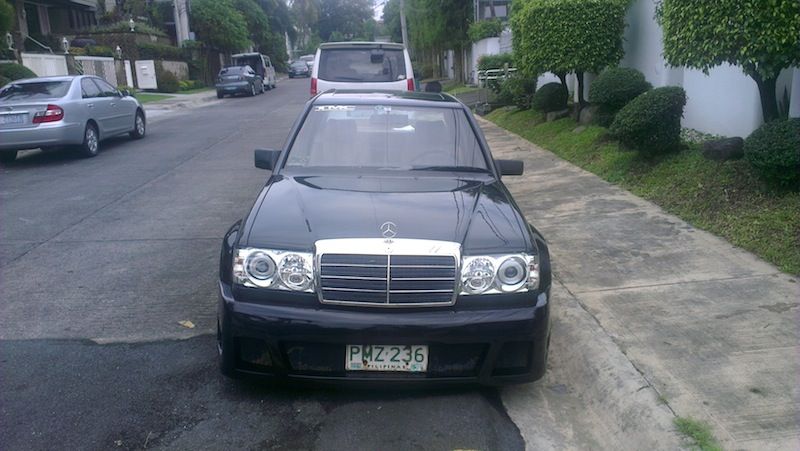
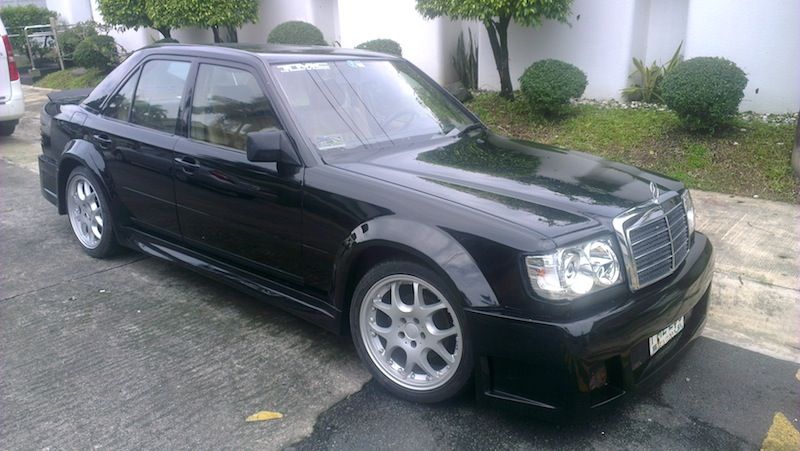
    The result: not that bad..


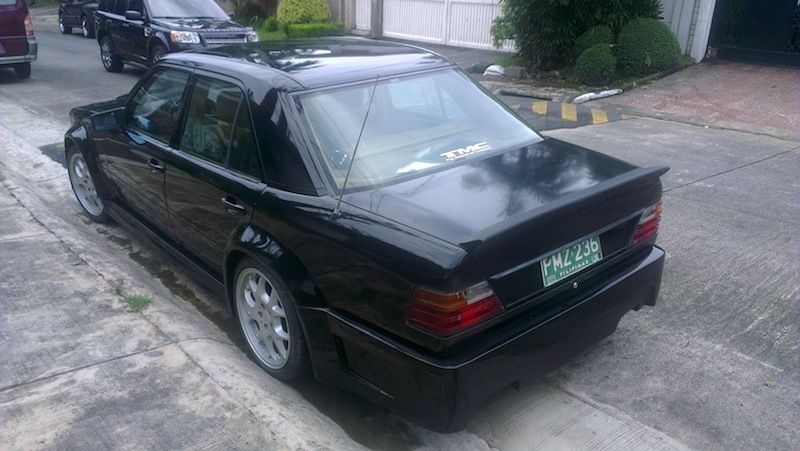
    Im doing the rear fenders and bumper now, and i havnt taken pics of it yet, will update soon!!

    Please comment and give sugestions on how to make things better Im not a pro. also, this is my first time glassing)

  • #2
    Okay so ive finished the rear fender lares too. just gotta clean it up a bit.

    Next step is the Rear bumper and skirts! But first, ima buy a new battery for this thing.


    I also removed the things on the side. I think those are the cladding things to make it more modern and sleeker. I just removed it, and filled the space with some fiber and bondo. I like the look! looks clean!


    its looking beter than ever! I washed the car to clean up the dust and dirt.

    Comment


    • #3
      Moving the car to a friend's shop! Im having some trouble with the rear fenders and bumper. hehe

      So far here's how it looks! The bumper is sittn pretty low. I dont think ill be lowering the car anymore. I wouldnt want it scraping the ground the whole time! Considering the road here in the Philippines sucks ass...


      Comment


      • #4
        Here's some updates on how the benz is looking right now! the fiberglass was smoothen out with some bondo. also the flarings were fixed, and the side skirts are done! Looking sick!!


        I really like the skirts!


        Here's the flarings for the rear.


        its going there... slowly but surely!

        Comment


        • #5
          Here are the pics of the finished build:


          Front:


          Side:


          Rear: Need to get em Brabus badges now!


          And here's a picture at night with the projector lights turned on. I gotta say its REALLY bright and it has a nice cut off. I would recommend these headlights to anyone who wants to upgrade or change their existing ones.


          The exterior's DONE!

          Now I need to work on the interior. I started out with fixing the sound system of the benz so I had my door panels fabricated. Here's how it looks like so far(will be putting in a set of Cadence ZRS6km on the doors):


          with fleece to fix the gaps:


          Any of you have ideas on what color the interior should be? As of now its Tan and it looks okay. But I will be upholstering EVERYTHING from the seats, to the ceiling to the carpets and dash. Any ideas? I'd love for it to look classy and stylish at the same time. I dont want it to look ricey or cheap in any way. hehe Please, If you have any ideas share em with me!

          Thank you!

          Comment


          • #6
            So here are the pictures of the interior! Its looks orange on some of the pictures because of the sunlight.


            but if you look at these photos, you can see the real color of the leather. its actually Tan. So the whole interior including the roof seats panels everything is covered in that tan colored leather. The dashboard is covered in black leather. Some plastic parts were painted the same color as the seats because they couldnt be wrapped with leather.


            Then I got the exhaust done. I removed the muffler and the second resonator and replaced it with a free flow muffler and had a dual exhaust fabricated with dual stainless tips. I like the look and sound of it! Sounds Beefy and sexy hehe


            Aaaand here's the subs that i will be putting in the trunk! 6 10" Mohawk subwoofers. hehe thats gonna be a lot of fun!


            Also i decided to restore the cluster gauge because it doesnt light up anymore and it was ugly as hell. I painted it black then retrofitted a strip of LED lights to give it some life.


            Comment


            • #7
              Then i got sponsored by Liqui-Moly for the Manila Auto Show or MAS for short. Its one of the biggest carshows in Manila, Philippines and i was invited! I was sooooo happy and excited about this! its a 4-day event and it was awesome! So my benz was wrapped in a matte balck camo design with a bad-ass skull. hehe i liked the look of it. Also, I had my rear bumper redone because it was too plain. I added some fins to make it more sporty and nicer.

              And the sound system is finished!
              heres whats inside:

              -JVC Headunit with ipod dock
              - Cadence 3 way raw drivers(trunk)
              - Cadence 6KN Seps (doors)
              - Sound magus 160.4 amplifier for seps
              - RE XT1600.4 amplifier for raw drivers
              - Sound Magus V1500.1 mono amp for the subs

              hope you'll like it!


              Also, checkout the BBS LM rims! it looks so good on the benz! Unfortunately, its not mine. A company just sponsored me for the show. tskk.


              I didnt win any award but its all good! Just being there is good enough to me!

              Comment


              • #8
                Just some updates!

                New rims! I decided to replace the old Brabus monoblock 18s when someone wanted to buy them for a good deal. I got these 19" BBS LM-Rs 8.5 front and 9.5 rears. Wrapped with achelles tires 235-35-19 up front and 245-35-19 for the rear. Slight stretch at the back but I think it's perfect 👌


                Here's the front. I changed the front bumper and copied the one from the C63. Also updated the grille to the avant garde. I'm planning to blackout all the chrome much like zorroAMG'S sexy w124. Also smoke the headlights. I really regret these headlights. I'm looking for one's similar to zorroamg's. Or the original with clear lenses. Gotta save up for it tho. Maybe in the future.


                Here's the side view. Lookin good! Thinking of dropping them an inch or two. Let's see.


                Here's the rear. Check out the fitment of the rims! I like it a lot. thanks to the 2" spacers back there. I moved the 1" up front and now I'm happy.


                Comment


                • #9
                  Decided to fix up the engine bay. It needed some cleaning and new paint.

                  I started off with the air filter housing. it was rusty and ugly. The paint was horrible.

                  Here's how it looked like before repainting it.


                  I decided to strip it to metal using some paint stripper. The paint came off real quick with this stuff!


                  Then some primer:


                  Then finally, the paint. I Decided to keep it stock looking so I stuck with the gloss black finish. Looked great! Would look better with the yellow sticker tho. I'll try to look for one of those.


                  After painting the air filter cover, I decided to repaint the valve cover. It was old and ugly anyways so I did.

                  I removed it and didn't think about replacing*the gasket cause it was newly replaced some time Ago.


                  Here it is while applying the paint stripper:


                  Forgive the mess. Haha


                  After stripping the paint, I realized that there were so many imperfections on it. I was sure that it was like that from the factory cause we never replaced it or repaired it. I then desicded to sand it down to bare maetal and found that there were fillers everywhere. I didn't want to sand it all the way down because it was a lot of work so I decided to just try to even it out. I tried my best....


                  Here's what it looked like after the paint remover:


                  It looks like a badly paved road. So many uneven surfaces and pot holes..

                  Here's what it looked like after my attempt of evening it out:


                  Here's what it looked like. I used a dremel and a sanding block to even it out. It's not perfect but it will do.

                  I then painted it gloss black to make it look clean and to compliment the air filter, I also decided to shave the ridges to add contrast.


                  Here's the finished product!


                  Here's the finished engine bay: I tried cleaning it up a little to make it look more presentable. I also painted the headers silver because it was rusting already. All paint used was VHT high temp engine paint. So it's all good.


                  **yes the tube from the headlight to the air filter is missing. It cracked and disintegrated a long time ago, I tried to look for a replacement but still no luck..**


                  Headers looking gooood! Hopefully, nexttime,these would be stainless already �� and maybe a little turbo somewhere in there hahaha

                  Comment


                  • #10
                    Just a quick update!

                    Brought my car to the shop a few days back to get my tie rod and center link replaced and ended up replacing a whole lot more! It's been more than 5 years since this car had a checkup under there and I think it's about time!

                    Here are the things that were replaced:

                    1. Tie rods
                    2. Center link
                    3. Ball Joints
                    4. Stabilizer link
                    5. Idler
                    6. Bushings for front and rear

                    $$$ down the drain!

                    But she now drives like a charm!

                    I was also able to replace the speedometer cable and get new air vents for my aircknditioning system. Now my dashboard looks complete and I am very happy!

                    While replacing the suspension parts, I asked the shop to remove the bump pads I had on. I had bump pads #4 on the front and back and that lowered the car a little but noticeably. I like it but I think I need to lower it abit more!

                    Here are the before and after shots of the car.


                    W124 from bump pads #4 to none!

                    Looking good! I am now looking for a stock bumper so I can lower the car even more. It's the only thing stopping me from going lower because the front bumper I created was way too low. Time to search everywhere!

                    Comment


                    • #11
                      Amazing work, but it's need alot wider wheels, and alot more low.

                      Comment


                      • #12
                        Originally posted by DutchStance View Post
                        Amazing work, but it's need alot wider wheels, and alot more low.
                        Thanks man, but yeah. I need wider wheels, and more low. Im still on stock springs and shocks. Will lower once i find a stock OEM bumper.

                        Comment


                        • #13
                          pretty cool project and I respect the DIY body kit - how did you keep all wheel arches with similar curves? Also how did you make your side-skirts?

                          In for my lows and evolution of this MB.


                          "Never argue with an idiot; they'll drag you down to their level and beat you with experience"

                          Comment


                          • #14
                            At first I was like but then you really made some good progress! I think you should change the headlights back to the OEM, wider wheels and more low. Other than that this car really looks good for a homemade body kit! Keep up the good work.
                            The Oldschoolers: https://www.facebook.com/TheOldschoolersAD/

                            Instagram: @TheOldschoolers

                            #MrBenz's Audi B5 project

                            #MrBenz's Audi 100LS 1976

                            Comment


                            • #15
                              Not to be rude, but this is a great misuse of fabrication skills. I respect Your work, but You should've gone a 500E route with the look.

                              Comment

                              Working...
                              X