Announcement

Collapse
No announcement yet.

A faster grocery getter - 04 WRX Wagon

Collapse
X
 
  • Filter
  • Time
  • Show
Clear All
new posts

  • A faster grocery getter - 04 WRX Wagon

    Hey everyone. I thought I would bring my build thread from NASIOC. Doing build journals and interacting with people within the car community helps to keep me motivated to push forward. As I get further along into the project, I think It'll be really beneficial to expand my horizons past what's going on in the Subaru community and see what else is going on out there.

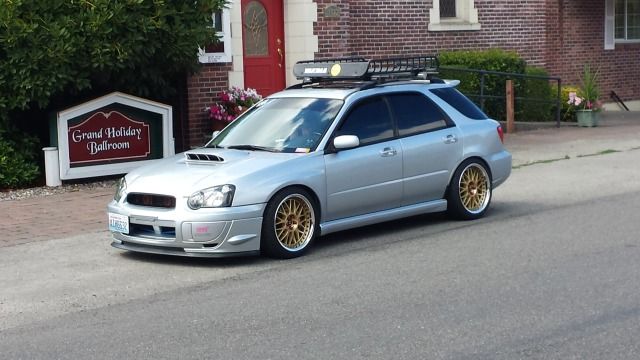
    I purchased this car in April of 2011 with 69,000 miles on the odometer. The car was bone stock on the day I drove it away, and has spent most of it's life since then (very) lightly modified. Here is our story!

    First thing is first, here is the list of parts/modifications I have for the car so far:

    Power:
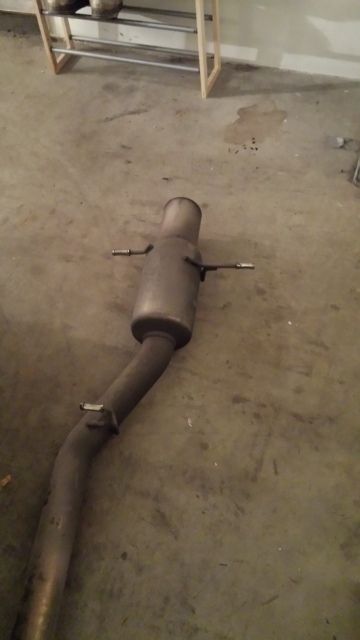
    Blitz Nur Spec cat-back
    Grimmspeed up pipe (38mm EWG Plumbed)
    Invidia V2 down pipe
    Tial 38mm EWG
    Mishimoto Radiator
    Chase Bays coolant overflow [not installed]
    04-07 STI TMIC
    Grimmspeed silicone Y pipe kit
    Gimmick silicone 2.4" turbo inlet
    Cobb SF short ram intake
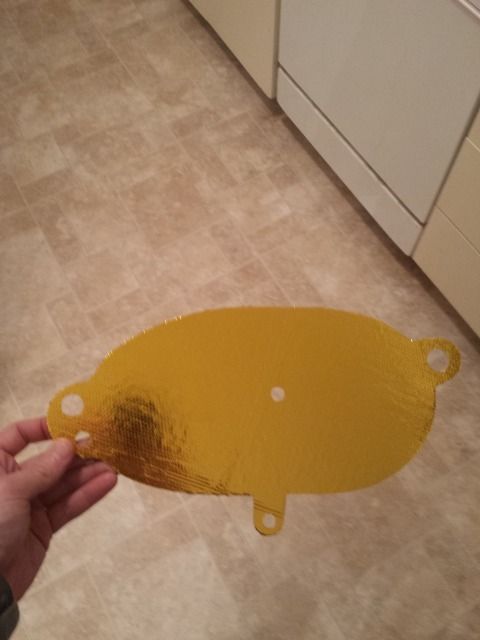
    Custom fender block off plate
    Motiv composite TGV deletes
    Deatschwerks 65c fuel pump
    Denso OSC spark plugs
    Injector Dynamics 1,000 cc injectors
    Boomba fuel rails
    Blouch 18G XT-R (8cm hotside - coated)
    Grimmspeed 3 port EBCS
    Gates timing belt kit w/ water pump
    Mishimoto silicone hose kit
    Cobb post MAF silicone hose
    Grimmspeed gaskets (misc)
    Grimmspeed Alternator shroud
    JNA oil cap
    Cobb Accessport V3

    Suspension and Drive train:
    Kartboy short shift kit (with bushings)
    Flossy heavy weight griptape knob
    Fortune Auto 500 Coilovers
    Fortune Auto roller bearings
    Fortune Auto Camber plates
    Whiteline front strut tower bar
    Whiteline rear strut tower bar (quick release)
    Whiteline 22mm front sway bar
    Whiteline 24mm rear sway bar
    Kartboy front/rear endlink combo
    Kartboy 'whiteline' front sway bar spacers
    Cusco front power brace

    Wheels, tires and brakes:
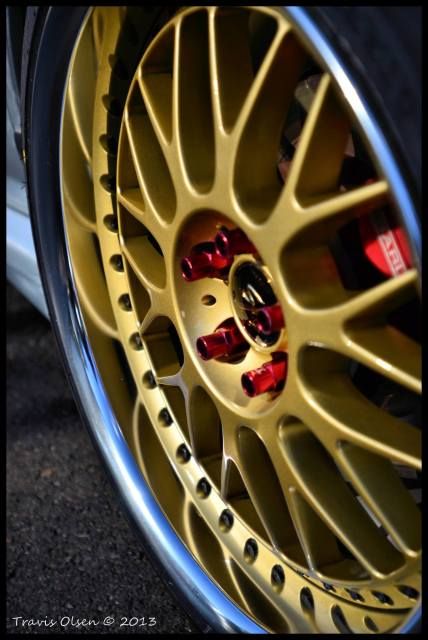
    Work VS-XX Gold with polished lip 18 x 9.5 +39
    Bridgestone Potenza RE-11 235/40r/18
    Work open ended lug nuts-Red
    OEM Subaru 4/2 pot brakes and rotors

    Exterior:
    JDM rain guards
    JDM front bumper beam
    JDM multi-colored foglights
    JDM foglight bezels
    OEM 04/05 STI front bumper
    OEM 04/05 STI hood scoop
    OEM 04/05 STI fenders
    OEM 04/05 STI headlights [Not installed]
    OEM 04/05 WRX sideskirts paint matched
    JNA hella horn bracket
    Bayson r sideskirt aeroguards [Not installed]
    V7 replica front lip
    15% tint all side/rear glass
    5% tint windshield strip/sunroof

    Interior:
    OEM 2005 STI console/dash swap
    Kenwood DDX8019 with Garmin GPS/IPOD compatability
    JDM red hazard button
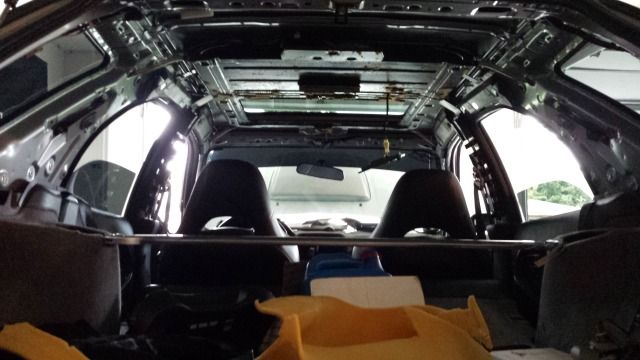
    OEM Mitsubishi Evolution 9 Recaro seats
    Planted (425 motorsports) Recaro brackets
    Weathertech digital cut/measured floor mats
    OEM 05 STI e-brake handle

    Misc:
    Yakima Load Warrior basket with fairing
    Hella Supertones

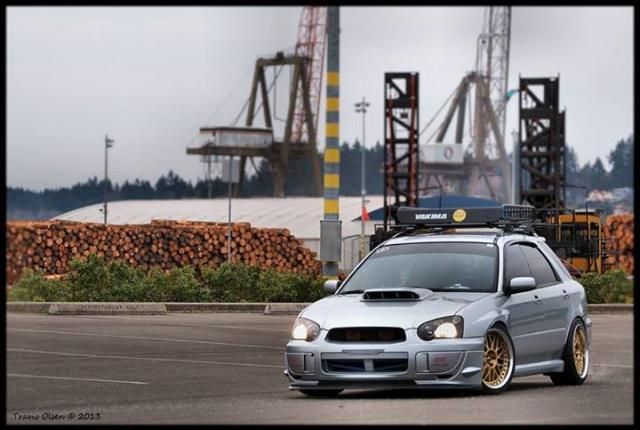
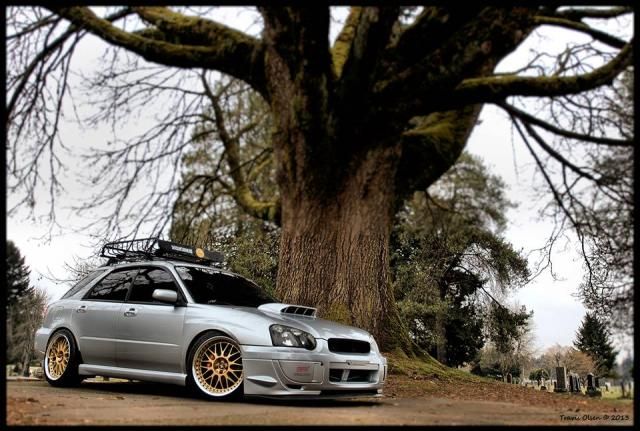
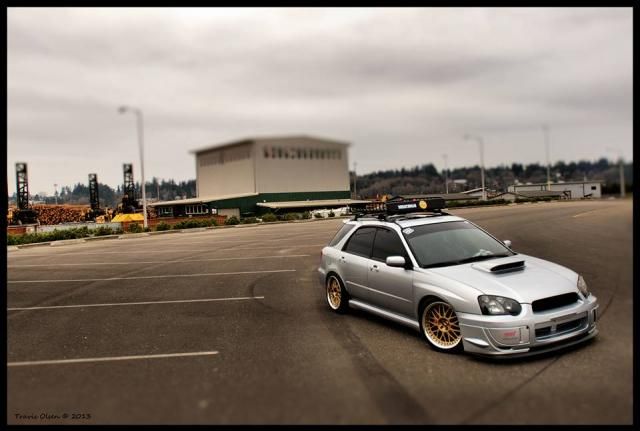
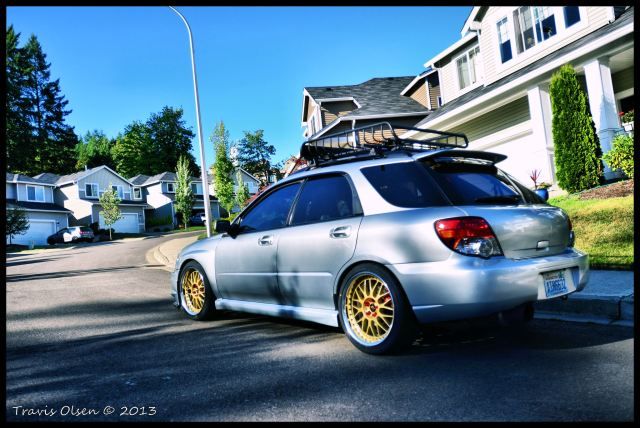
    The car was tuned by Mike at Pacific Import Auto this summer. 331AWHP/289TQ.


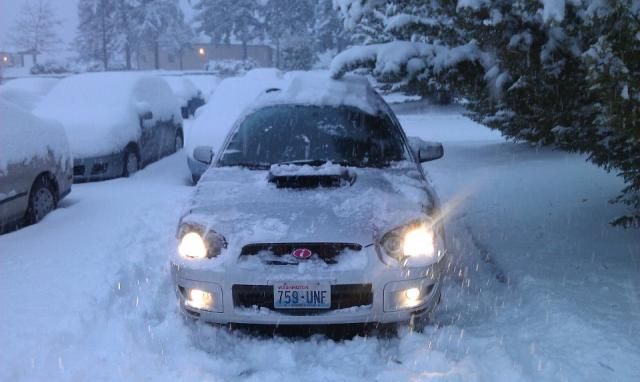
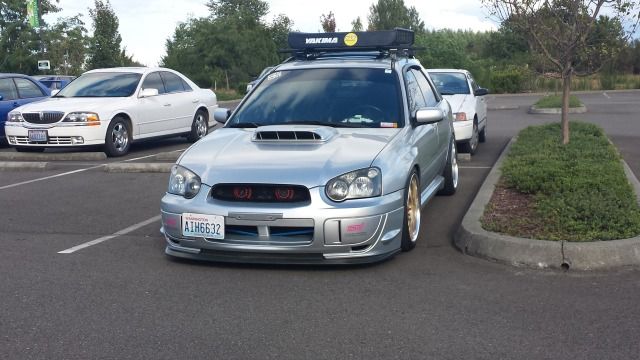
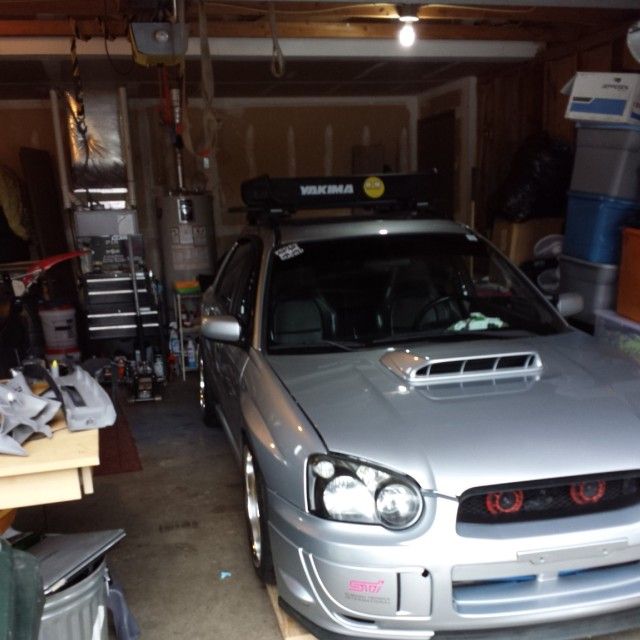
    April 2011 - Sitting bone stock


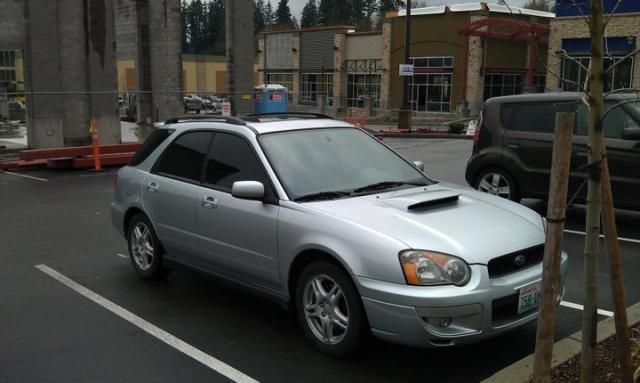
    Shortly after purchasing the car, I went through every Subaru fanboy's first steps and purchased some Rally Armor Mud Flaps and a catback exhaust. I spent hours on youtube listening to cell phone recordings of various exhaust set ups. I stumbled across a clip of an STI with a Blitz Nur Spec installed, and I was sold! I know a lot of people don't like the exhaust, as it's painfully loud. Even to this day, I still enjoy it and haven't heard anything else I'd rather have. I started my search on the local North West Impreza Club (NASIOC) classifieds, and found one shortly thereafter.


    My car has sat like this for the better part of over two years. I barely washed it, and did terrible things like leaving it out in the snow.


    In spring of 2012, I was notified that my unit was slated to deploy to Afghanistan during the following summer. I was given the option to extend my contract and deploy. My new wife and I talked it over, and I decided to pack my stuff up and go. Knowing the cash flow would soon increase, I started dreaming up plans for my beloved car. I purchased an Accessport, put the car in storage, and grabbed my rucksack and got on a plane to lovely trashcanistan.

    A few months after arriving in Afghanistan, I had a decent down payment for a house saved, but no more wife!(:diaf After thinking through how to proceed with my life, I decided that down payment would be much happier spent on my Subaru - so it was. With the help of some awesome friends I was able to order a ton of parts. These guys stored, drove around and picked up the parts and received them in the mail for me. Thanks for all the help gents!

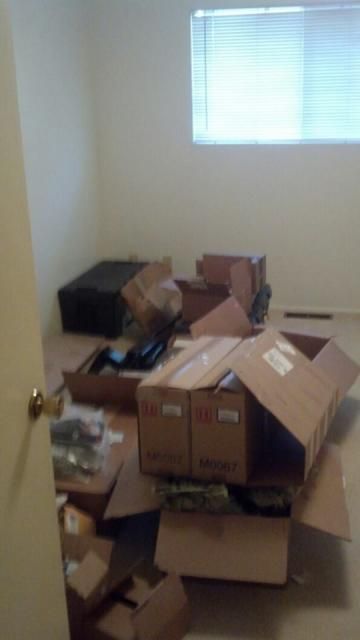
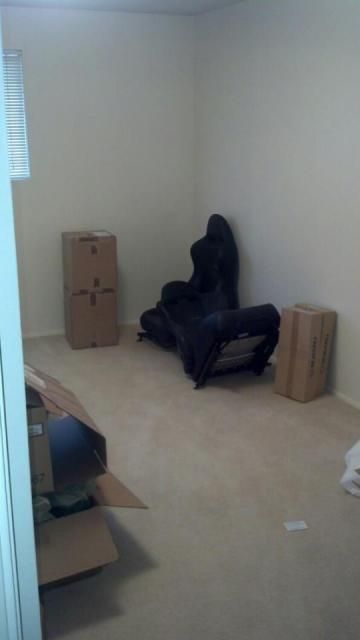
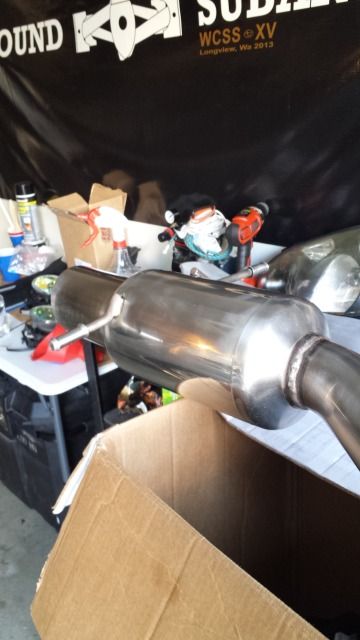
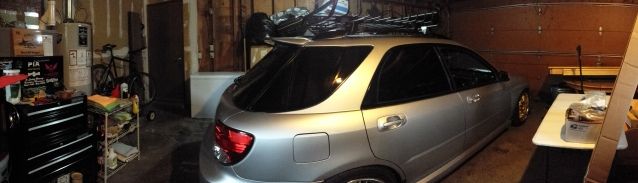
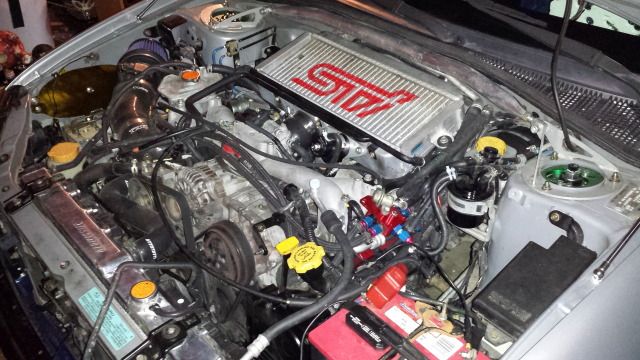
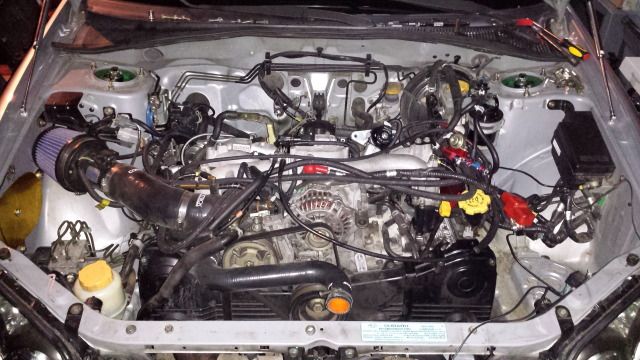
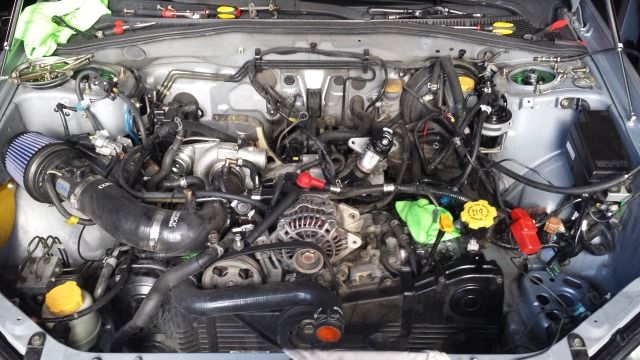
    Upon arriving back stateside, I had a mountain of parts ready to install.
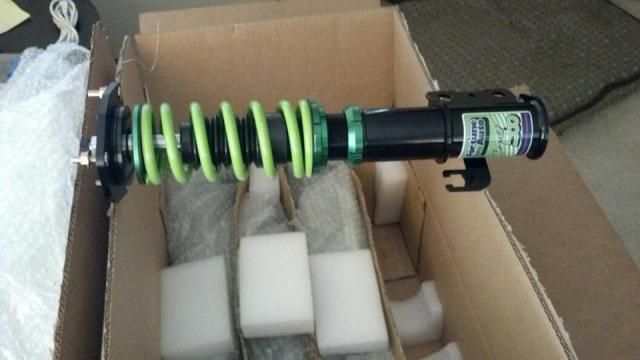
    Fortune Auto Coilovers

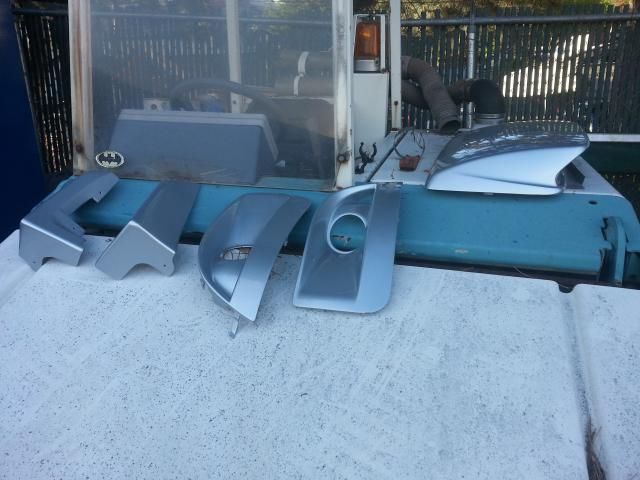
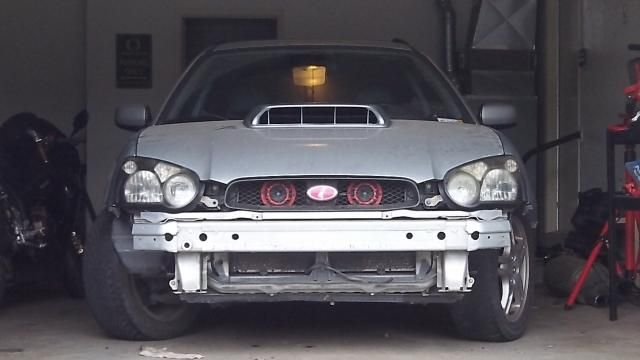
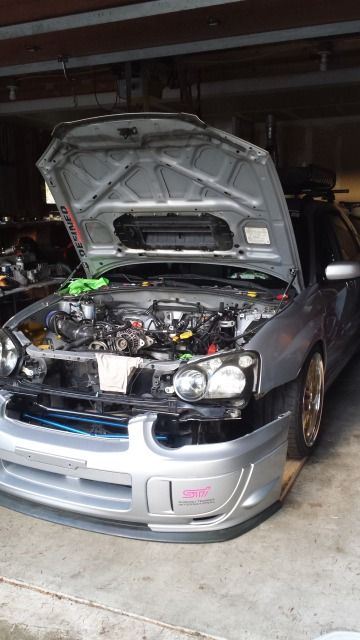
    STI hoodscoop/bezels/aeroguards
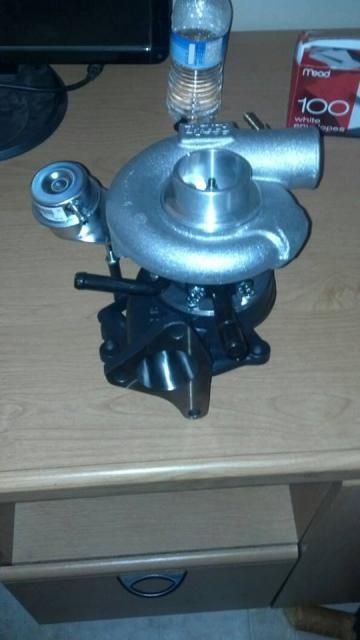
    Blouch 18g XT-R

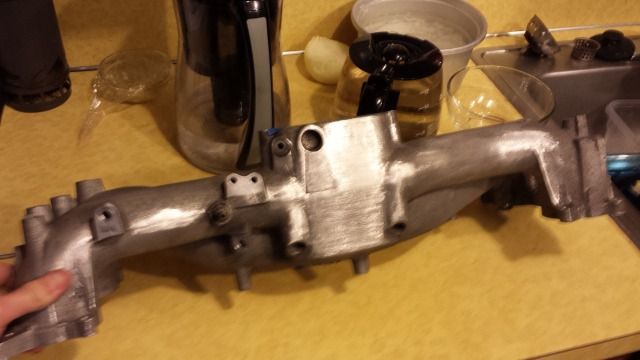
    Parts, parts and more parts!


  • #2
    After about 36 hours of travel, which took me across Afghanistan, Kuwait, Germany and the United States, I finally arrived back in Seattle. My room mate and I immediately started tearing into my car and as it usually goes, running into snags and hiccups at every turn.

    Before tearing into the power mods of the build, I wanted to make sure the body and suspension were set. I decided that the good place to start was getting rid of the USDM bumper beam, and replacing it with the JDM bumper beam that I had ordered.


    As I was wrenching on the bolts that hold the bumper beam on, I noticed that one was, for lack of a better term, really stuck. No problem, right? My room mate grabbed his air tools an cutting wheel and we proceeded to cut that thing off. About half way through grinding through the nut, his compressor coughed a couple times and died. Great. Defeated, I bolted the rest of it back up, kept the bumper cover off and parked it in the garage for the night.

    I woke up the next morning, and took the car up to PIA to have them cut the nut off. I was a little embarrassed to say the least. Mike at PIA pulled the car onto the lift and had it off in about 30 seconds. I had him change the oil, and gap me some new spark plugs while the car was there. Here is the culprit! You can see how close we were to just cutting it off before the compressor died on us.


    Crisis averted, I brought the car back home, and yanked the USDM bumper beam off. The JDM one is considerably lighter. I also attached my Cusco front power brace. I love the look of this mod.


    Next step for me was to yank the fenders off, and replace them with the STI ones I had freshly painted. I turned the wheels all the way to one side, unfastened the fender liners at all the points, and then took it out. I really don't like that piece, and I've seen a couple times where it's been ripped out, and thrown behind cars. Luckily, it was all at low speeds, and no one was injured. I've opted to keep them out, and take my chances! You can really see how skinny the stock tires and wheels are in this picture.


    I was able to get the fenders on without incident. After the fenders, I put my JDM rain guards on, and had a 5% tint strip added across the front of the windshield.


    It was time to get that bumper and side skirts onto the car. Although the fenders were fairly easy to put on, the bumper was a nightmare. The first thing we did was flip the bumper upside down, and attach the splitters, and the ebay lip. We attached the lip with a variety of the OEM push clips, zip ties and self tapping screws. It's on there! Probably too well.


    Once everything was together, we mocked it up. We quickly noticed that there was some fitment issues with the Cusco brace. My room mate coaxed me into it, and I worked up the courage to start cutting into my brand new painted bumper. I placed a few notches so the bumper could slide on and still retain the brace.


    Comment


    • #3
      Finally everything fit on, and we placed and fixed the bumper to the front of the car


      Suspension day did not go as planned! (of course) :


      I drove a few hours south to meet with another NWIC member and purchase a set of WORK Giallo wheels off of him. The plan was to use those until my WORK VS-XX showed up from Japan. Who knew when that would be. After a long day of driving, I got home around two in the afternoon and decided that my room mate and I could knock out the suspension.

      Front coilovers and four pot brakes went on no problem!


      After the two front coilvers and brakes were on, I crawled under the car to tackle the sway bars and endlinks. No bueno. After removing the o2 bung and heat shield from the header, I still couldn't get one of the two bolts holding the C clamp around the sway bar off. I soaked it in PB blaster, and yanked on it as hard as I could. Finally I leveraged myself under the car, put my closed end wrench on there and pulled. Ah! It broke loose! Outstanding. Upon closer inspection, I must have slipped off because my nut is no longer a nut, and now more of a circle. :furious:

      We weren't able to get the rear 2 pots done. Our friend that knew how to do the parking brake was busy, so rather than risk it, we saved the hub swap and the rear 2 pots for another day. So we bled the brakes real quick and placed the wheels on.

      Upon closer inspection, the WORK wheels sold to me did no clear the 4 pots in the front. I was incredibly pissed off to have driven six hours, spent hundreds of dollars to not have something fit that I was told would! But, in retrospect, I should have done some more research rather than trust someone I didn't know. Luckily, my room mate's bug eye was under the knife right, so he was kind enough to let me borrow his ROTA wheels until mine show up in the mail. The car had tons of toe up front, and looked like a monster truck.


      After that, I ran down to Firestone and pony'd up the $160.00 for lifetime alignments, and got the first alignment on the vehicle.

      Comment


      • #4
        My buddy Travis came over and gave me a hand knocking out installing the rear hubs from an 06 WRX and 2 pot brakes.

        Here's a comparison shot between the old rotors and the new (to me) ones.


        Bolting up the 2 pot brake


        I also put on my roof basket and cruised over to a friends house to pick up these XXR wheels and tires. He was kind enough to let me use them until my WORK wheels showed up. My roommate's bugeye was almost ready to hit the road again, so I took off the white Rotas that are on the car in the photo, and stacked them back on his side of the garage.


        started working on the EVO 9 Recaro seats to swap out with my stock limited WRX ones. These Recaros are very comfortable. I recommend them to any Subaru owner who want's to get rid of the stock seats and go with something that's not a full on race bucket.


        I took the car up to PIA a few days later and had my rear fenders slightly pulled and rolled.


        I was able to link up with a friend of mine and get this Chase Bays coolant reservoir tank for a great price. Thanks, Justin!


        After I got the car home, I let it sit for a few hours and cool down. In the mean time, I went down to Auto-napa-oriley's-zone and got a few things I needed to start the tear down.

        My buddy Travis stopped by and we started to take everything apart.


        This went very smoothly, except for one incident. One of the connectors on the harness broke, so I took it up to PIA during a lunch break the following week and had a new one crimped back on.

        After we got the intake manifold off, we installed the Injector Dynamics 1,000 CC injectors, the Boomba fuel rails and the Motiv TGV Deletes.


        As it always happens, we hit a brick wall after we had everything but the turbo out. One of the bolts (of course) to the down pipe got stripped. It was stripped so badly that I wasn't able to get it off with a damaged bolt/nut remover, so we set into cutting it off.


        We went through a cutting disc and a half before getting about half way through the bolt/nut.


        I decided to call it a night there and give the dremel a rest.

        Comment


        • #5
          Wheels showed up, finally! 6 months can really seem like a long time to wait!


          Photo cred to my buddy Travis.

          I few weeks after the wheels showed up this happened!


          Disclaimer: I didn't take any of these photos. Credit goes to the various awesome photographers that were at WCSS!

          Much to my surprise, my wagon took best GG wagon at WCSS. I really had no expectation to win anything. I just wanted to show it, because that's part of the registration process.
          I woke up rather hung over Saturday morning and had no motivation to even move my car over to the show area. I took a nap and woke up about 30 minutes before the judging started. I reluctantly dragged my ass over to the show area, and wiped down the car, cleaned the wheels, glass and plastic trim.
          Once I had everything wiped down and looking reasonable, I cased the show a couple times and checked out other peoples cars. Lots of cool stuff going on. I went back to my tent and took another nap, because I'm super lame.


          Winning was inspiring, and really motivated me to get serious about the interior on the car. For a while.

          Comment


          • #6
            I decided to gut out the interior, remove all the plastics and order 3 yards of jet black alcantara from JPM Coachworks.


            I finished up my time in the army a few days after gutting out the car.

            drove it around without any interior for a while


            After that, I put it up on jack stands in the garage for a month or so and yanked my exhaust off, polished it and reinstalled it. I went from this:


            To this:


            It's not perfect, but the best I could achieve with what I had available.

            With the NW Toy run approaching, I decided to take the car down off jacks and drive it up. You know, for the kiddos.


            I also picked up a new DD (91 Legacy SS) and moved to the next town over after doing the exhaust.

            Comment


            • #7
              I got moved into the new place last Sunday. I spent the beginning part of the week arranging my work space, my tool box and unpacking. After I got the WRX settled nicely in the garage, I just couldn't resist tearing into it again.


              I spent a lot of time working on some engine bay stuff. I took the bumper off, and uninstalled my hella horns, my coolant over flow tank, and my alternator cover.

              This bumper probably won't go back on the car. The mounting points are all almost destroyed from it scraping on the ground. I figure I'll take the opportunity, and get a fresh bumper that I can shave the license plate mounting spot off and install flush mounted dzus clips into.

              My friend Brad was cool enough to cut me a block off plate for my passenger side fender. Because I don't have fender liners, I opted to block it off. Better safe than sorry. I wrapped it in DEI gold heat wrap.


              I also spent quite a while shaving down this intake manifold in preparation for powder coat.


              And the AC is gone!


              Progress:


              Here's how she's sitting right now.


              I also spilt the turbo coolant reservoir in half, cleaned it, and put it in the pile of things to be powder coated. The corresponding bolts went into a ziplock, and into the pile of things to be anodized.

              I'm reading up on how to drill out the battery mounting tray and brackets I don't need anymore right now. If any of you have some advice or tips, feel free to share.

              In the interest of staying organized and not losing any of my parts, I cleared off my work space, and got everything spread out nicely.


              All my parts to be anodized have been moved into a box, as well as the parts that need to get off to powder coat. I'm waiting on a new dipstick from IAG before all everything is ready to ship off to anodizing. My goal is to have it out by the first week of February.

              Next task at hand is breaking down that throttle body a little further without ruining the seals on the flapper arm. I also have to take off the AN fittings on fuel lines and find out if they can be anodized or if it's worth my money to just buy new ones in the correct color. The alternator support/AC compressor bracket needs to be shaved down and have some of the bolt holes I'm not using any more filled and filed down smooth to be ready for powder coat.

              My girlfriend was rad enough to get me a Dewalt 12v 3/8" impact driver, so I'm looking forward to using that when all the hard parts get reassembled. Should make things a lot faster.

              Lots of work ahead. Thanks for checking it out.

              Comment


              • #8
                love the detail going into this build. ant pics of the interior? I'm really interested in doing my evo headliner, pillars and door inserts in alacantra to match my seats.

                Comment


                • #9
                  Looks great! The quality of this build is awesome, and I love to see some JDM goodies on a JDM deprived platform.

                  No more wife? Did she leave you because of your decision to go to Afghanistan, or the car?

                  𝔣𝔬𝔩𝔩𝔬𝔴 𝔪𝔢
                  @𝔳𝔦𝔳𝔢_𝔪𝔢𝔪𝔬𝔯_𝔩𝔢𝔱𝔦

                  Comment


                  • #10
                    Originally posted by dubs&boost View Post
                    love the detail going into this build. ant pics of the interior? I'm really interested in doing my evo headliner, pillars and door inserts in alacantra to match my seats.
                    Thanks a lot for the kind words.
                    I wish I could say that I did. Other than test wrapping a pillar or two, I haven't messed with the interior since gutting it. I'm having a hard time getting motivated to finish it up. Hopefully while stuff is away at powder coat/anodizing, I can muster up some will power to do some. Shoot me a PM if you have any questions about adhesive or anything, though. I will recommend up front that you spend $50.00 and buy a fabric steamer on Amazon. It'll help loads when it comes to getting the wrinkles out, and getting the fabric to adhere to tight corners.

                    Originally posted by rice4life View Post
                    Looks great! The quality of this build is awesome, and I love to see some JDM goodies on a JDM deprived platform.

                    No more wife? Did she leave you because of your decision to go to Afghanistan, or the car?
                    Thanks man. It's encouraging to hear stuff like that.
                    Yeah, not to start a sob story, but the ex sent me an email on Christmas morning last year (while I was out on a mission, to boot) saying she wanted a divorce. Shortly following that, she changed her number, grabbed half the money out of our joint accounts and said see ya!

                    I don't miss her anyway.

                    Comment


                    • #11
                      such a great build so far, looking forward to see where its going currently

                      Comment


                      • #12
                        Originally posted by Belvader View Post
                        such a great build so far, looking forward to see where its going currently
                        That makes two of us, man. I appreciate it.

                        Comment


                        • #13
                          You're making me miss having a Subaru lol love the wagon man I can't get over that boxer rumble.

                          My Intro Here:http://www.stanceworks.com/forums/showthread.php?t=50512
                          My E34 Build Thread:http://www.stanceworks.com/forums/showthread.php?t=54494
                          My '78 CB750 Build Thread:http://www.stanceworks.com/forums/showthread.php?t=56809

                          Comment


                          • #14
                            Originally posted by dirty_thirty View Post
                            You're making me miss having a Subaru lol love the wagon man I can't get over that boxer rumble.
                            I feel you. I know for the amount of money I have under the hood, I could have made a LOT more power on another platform, but I just really enjoy the way Subarus sound and feel when driving them. I'm a sucker for them for sure.

                            For fun, here's the daily driver:
                            It's a 91 Legacy SS. EJ20G swap, 93 SS 5sp swap, V7 STI pink struts, trim and interior swap, blah blah blah.

                            Comment


                            • #15
                              lovin the car! VS-XX's really do look good on anything
                              @dudestuffsucks

                              Comment

                              Working...
                              X