Announcement

Collapse
No announcement yet.

Fiona: A 1975 2002

Collapse
X
 
  • Filter
  • Time
  • Show
Clear All
new posts

  • Fiona: A 1975 2002

    Hey guys,

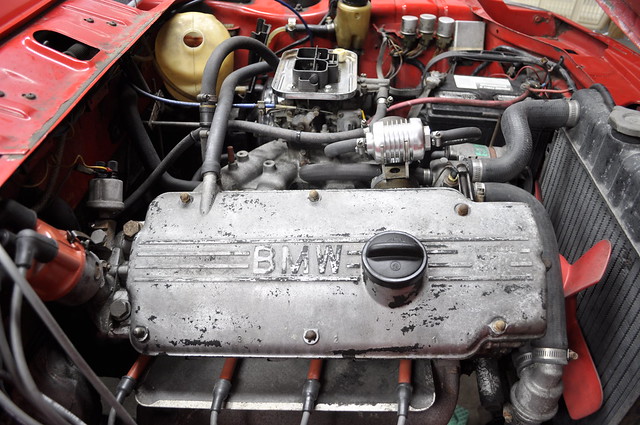
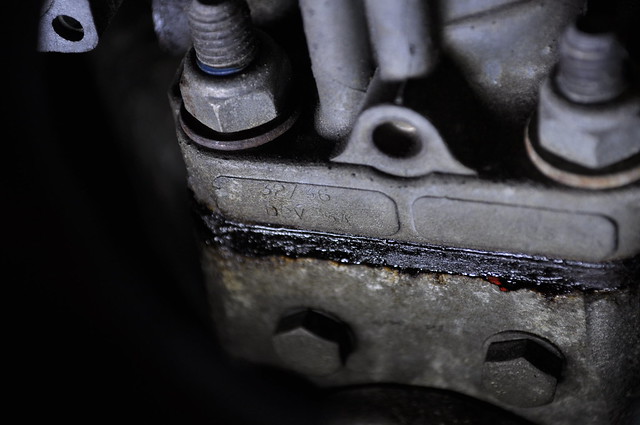
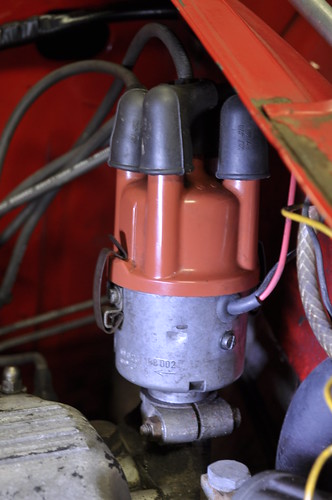
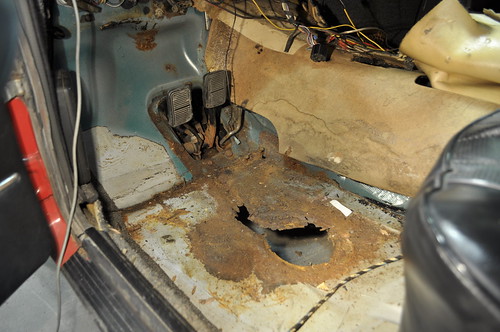
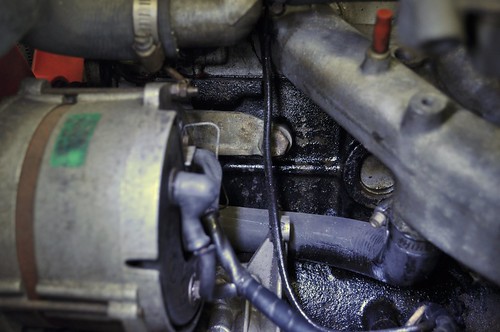
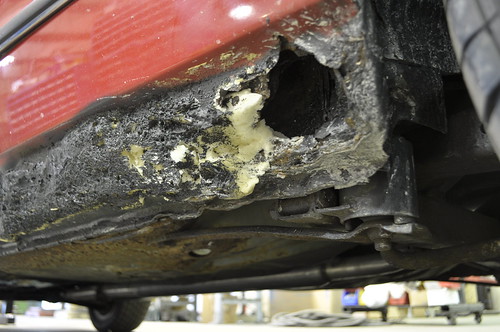
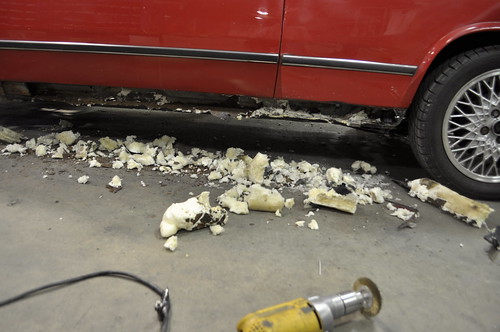
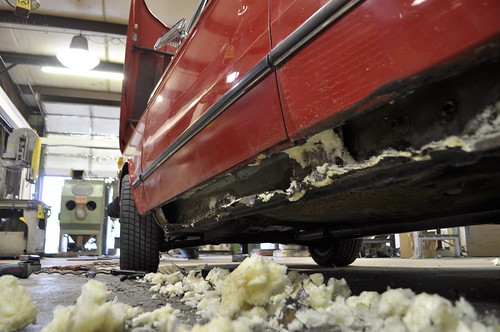
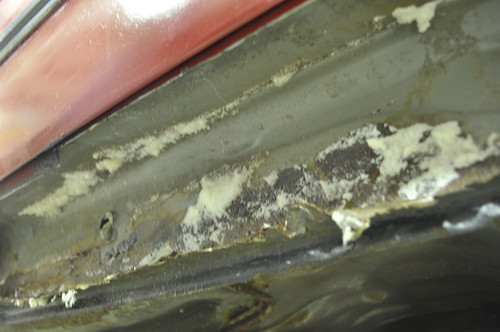
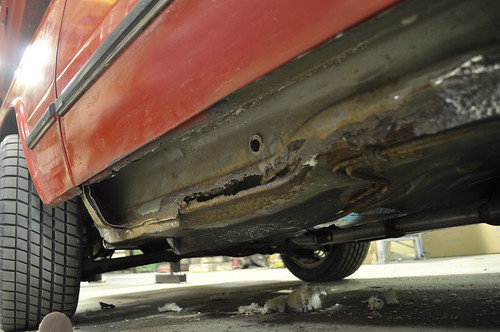
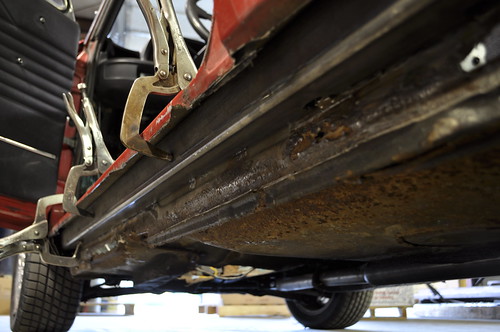
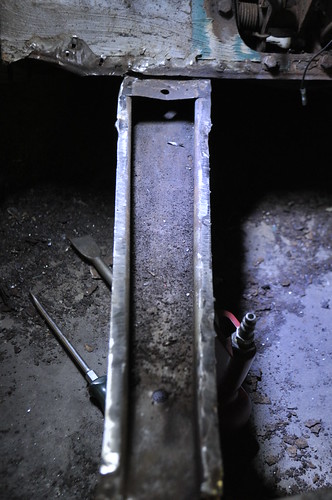
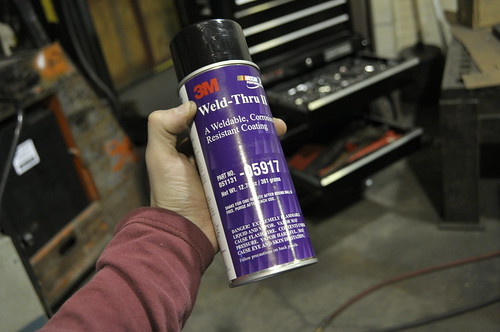
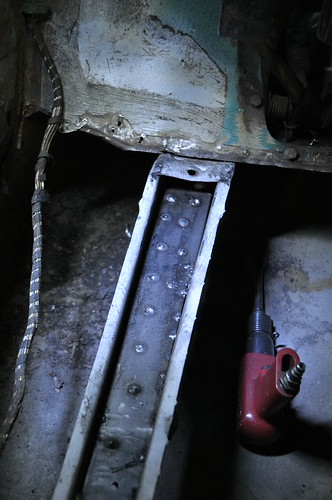
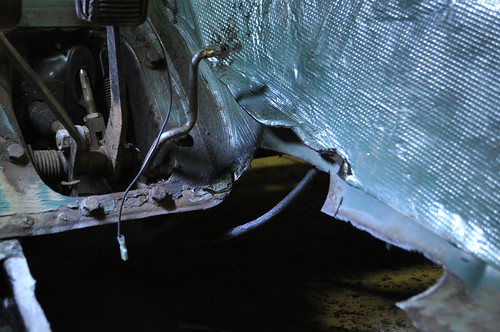
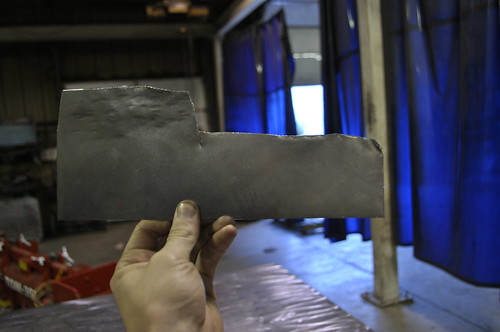
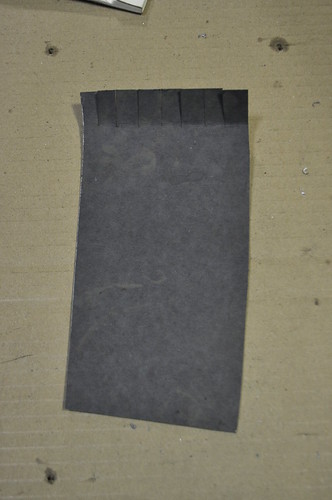
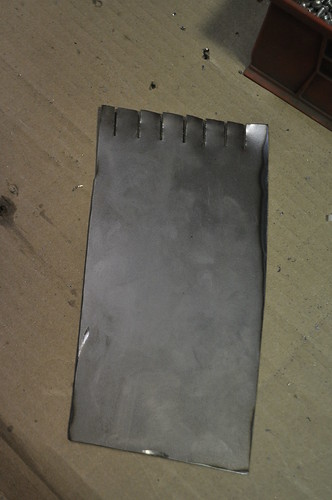
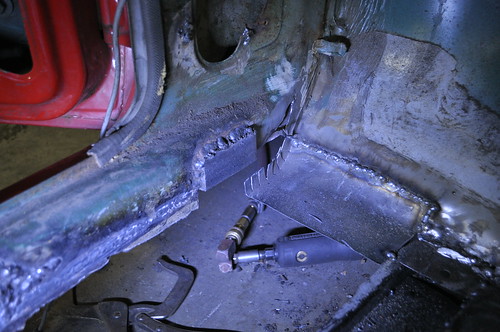
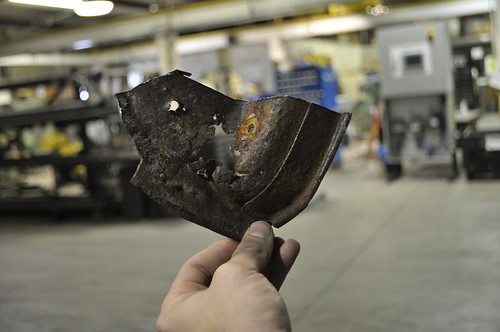
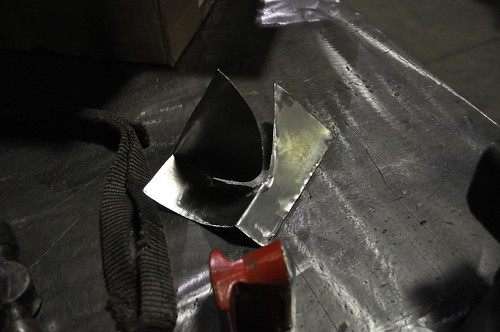
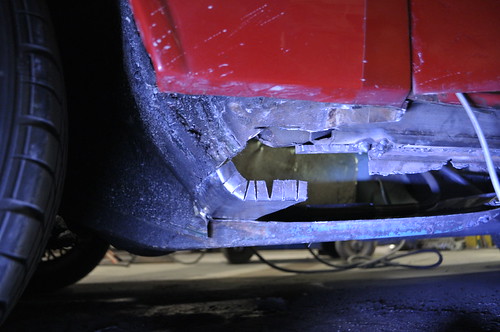
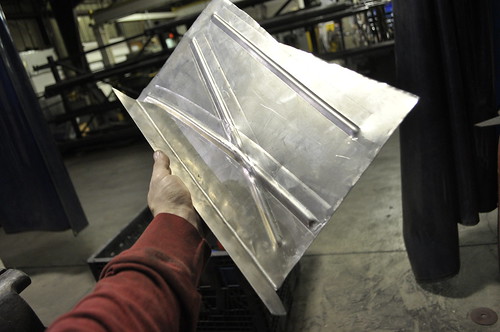
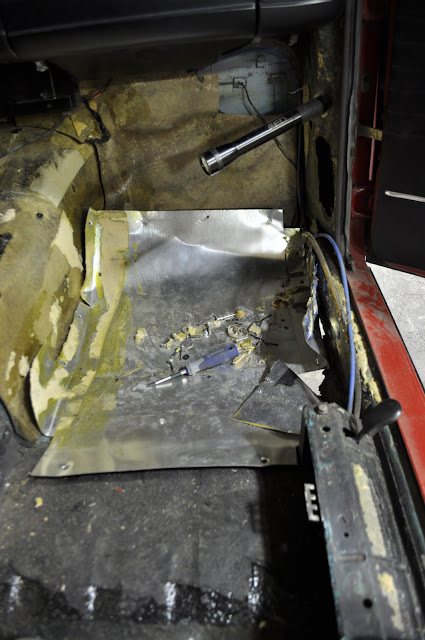
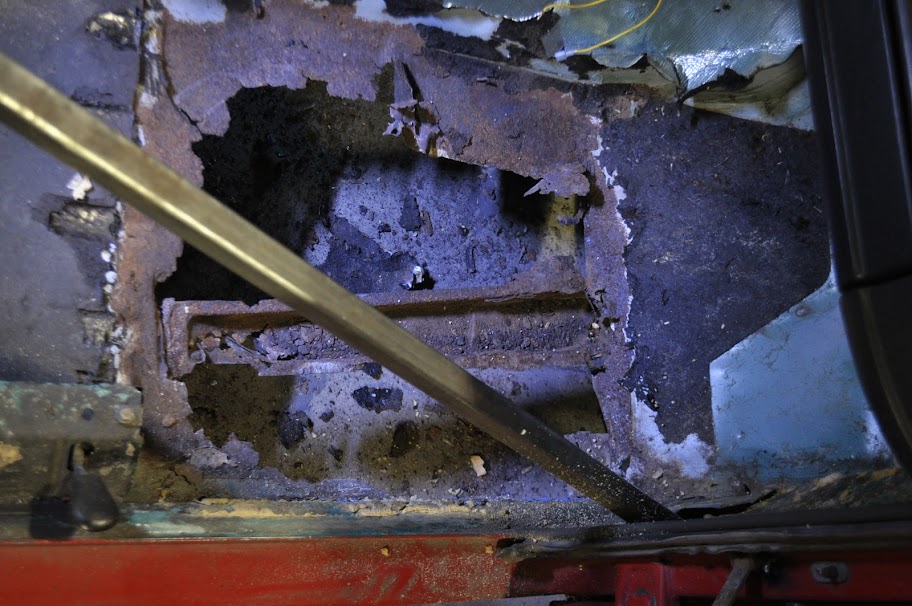
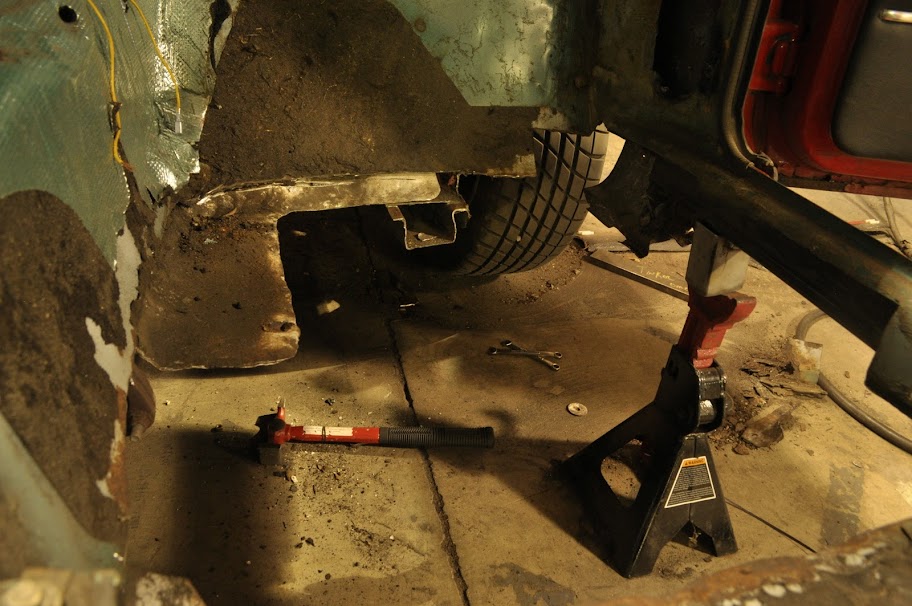
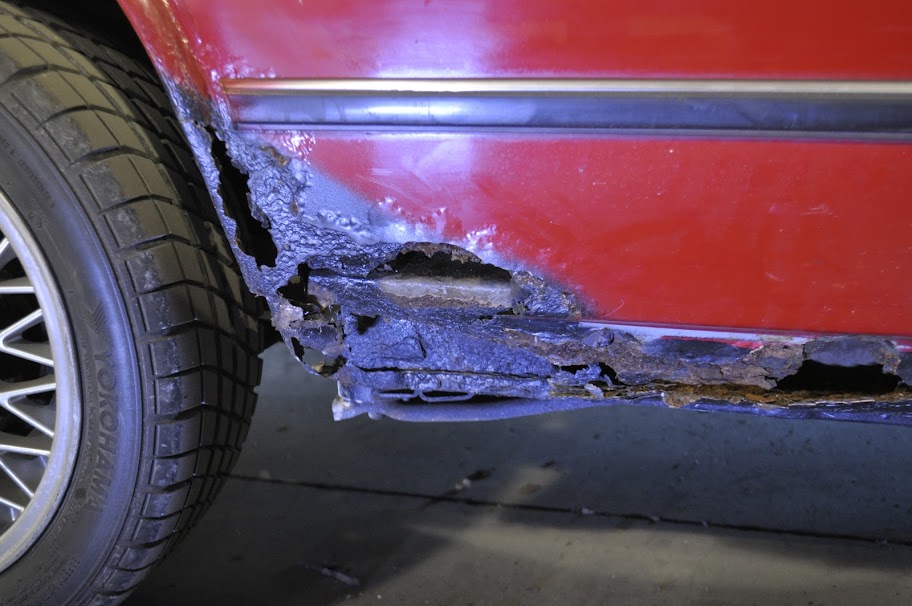
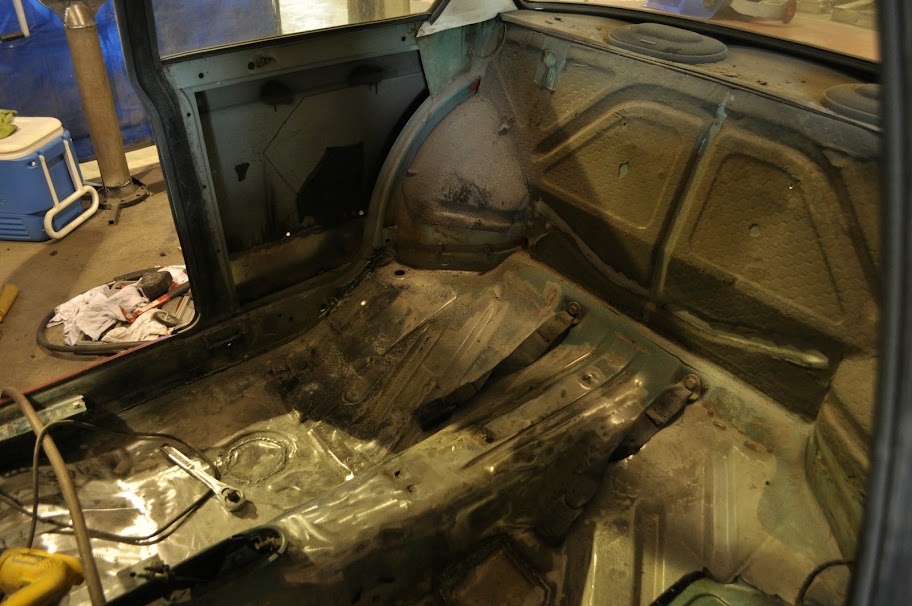
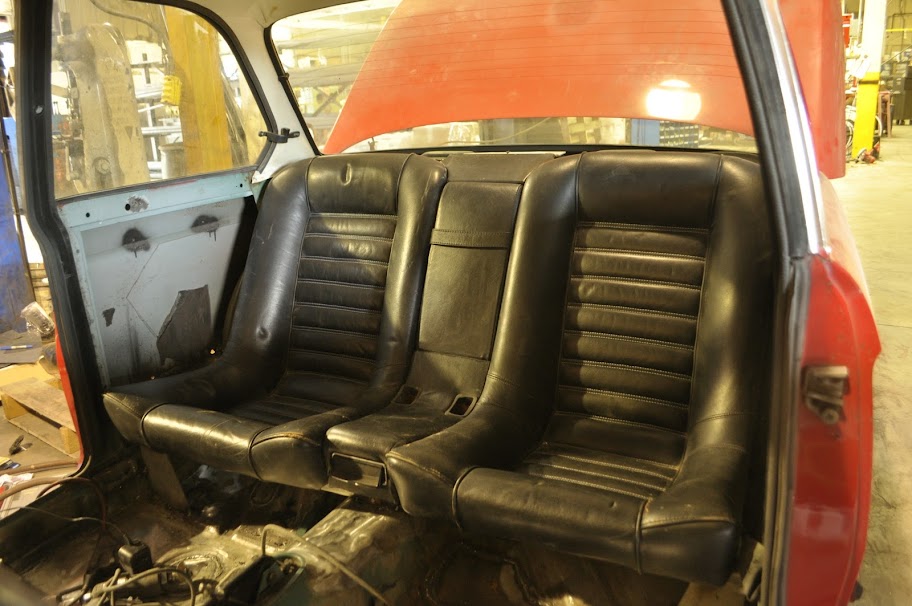
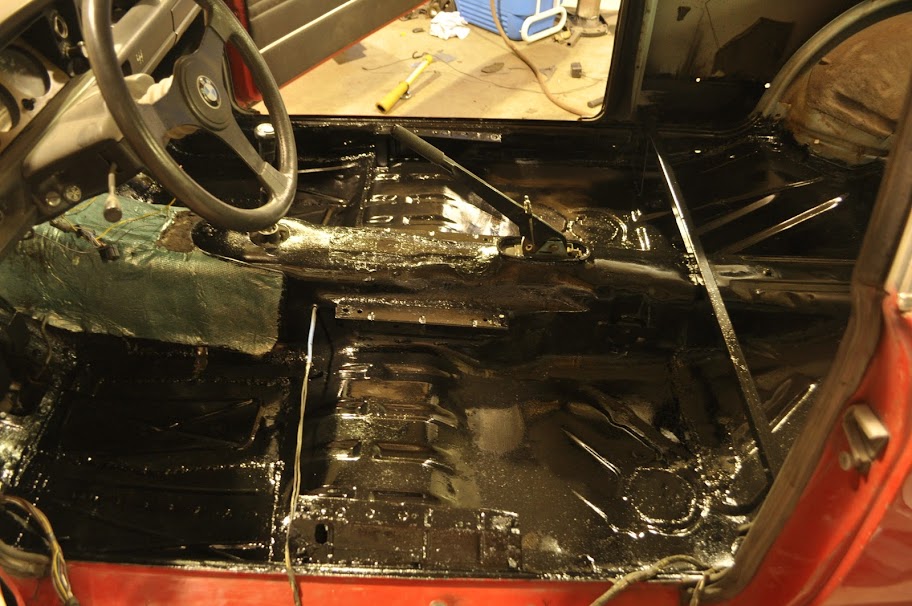
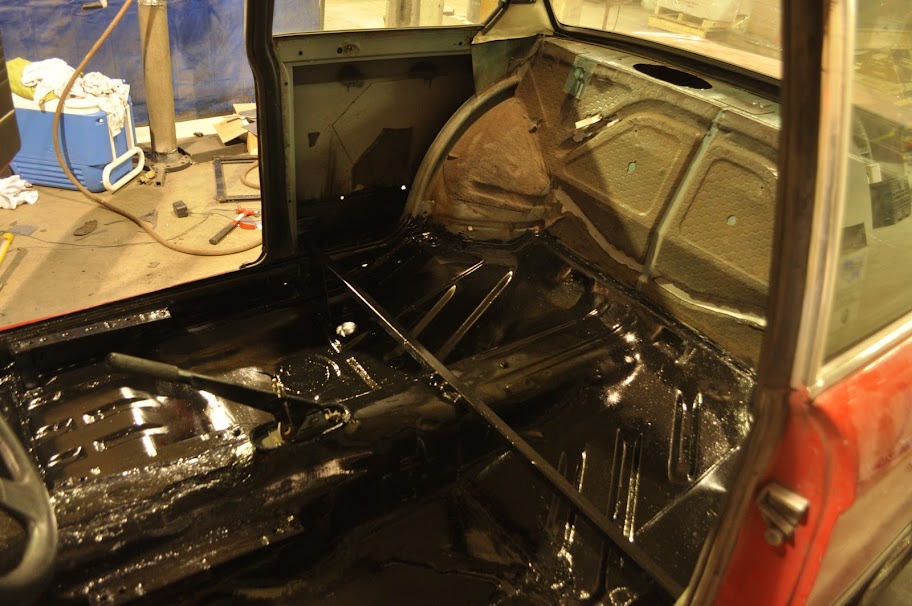
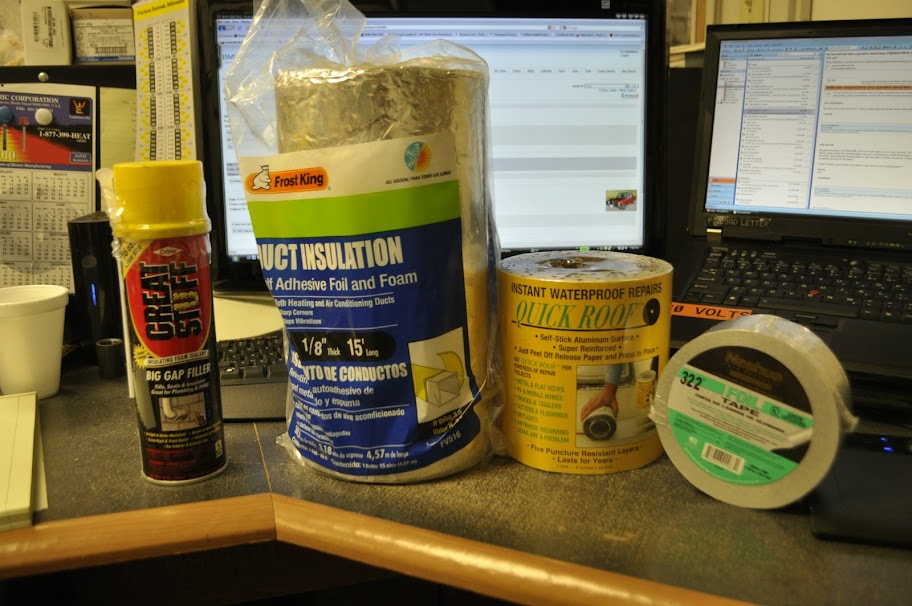
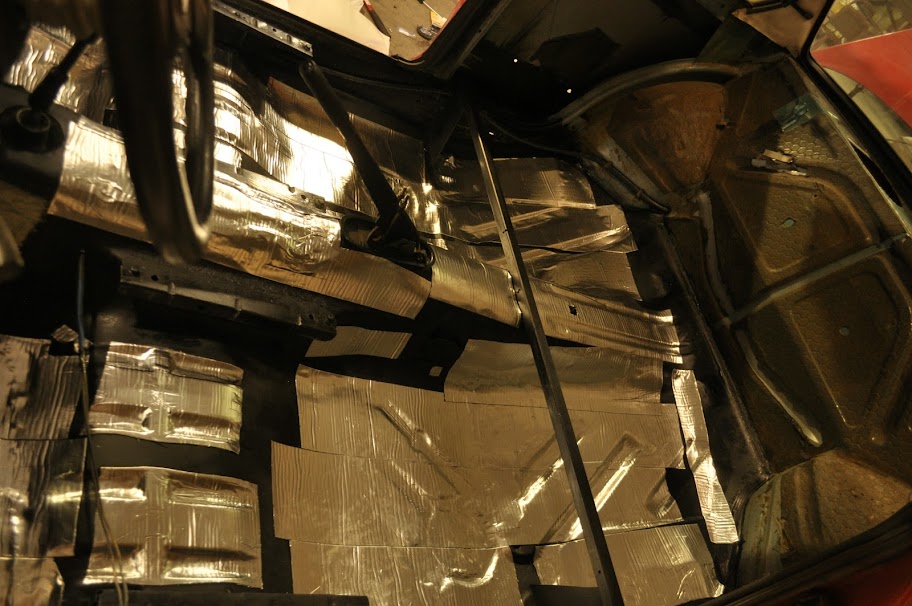
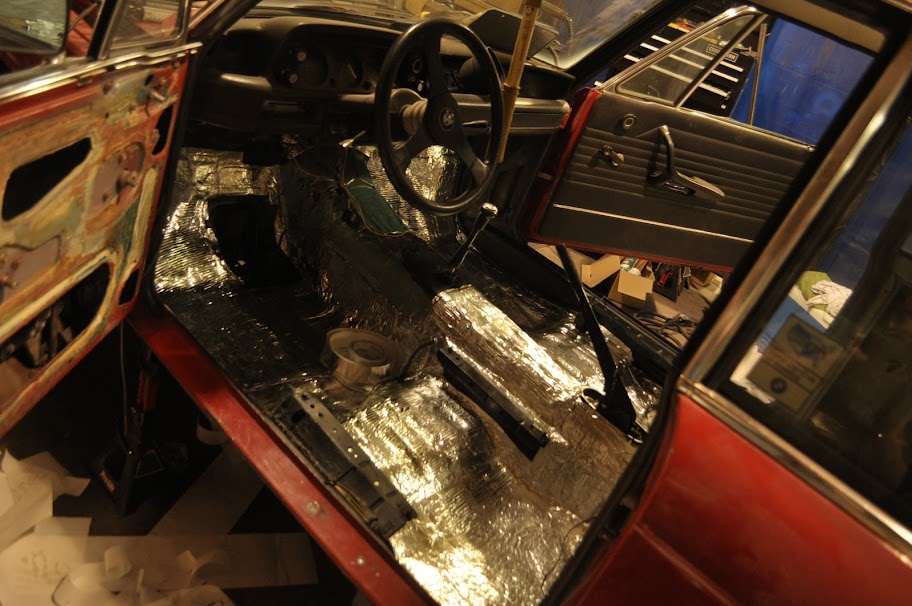
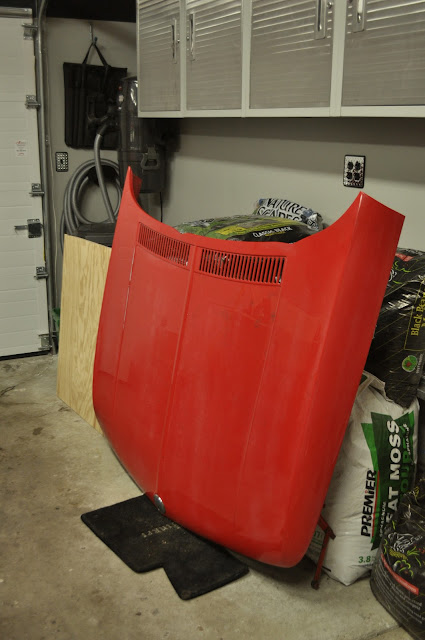
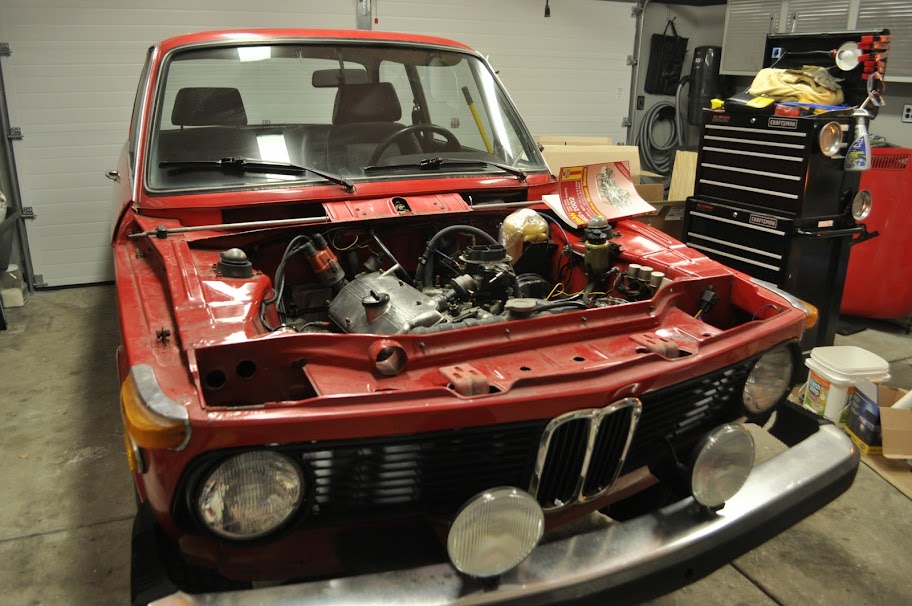
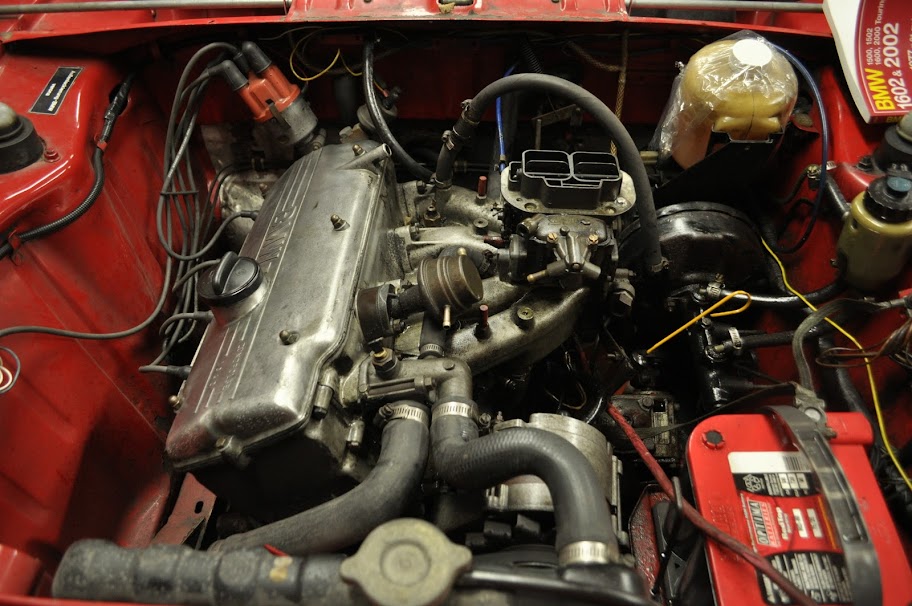
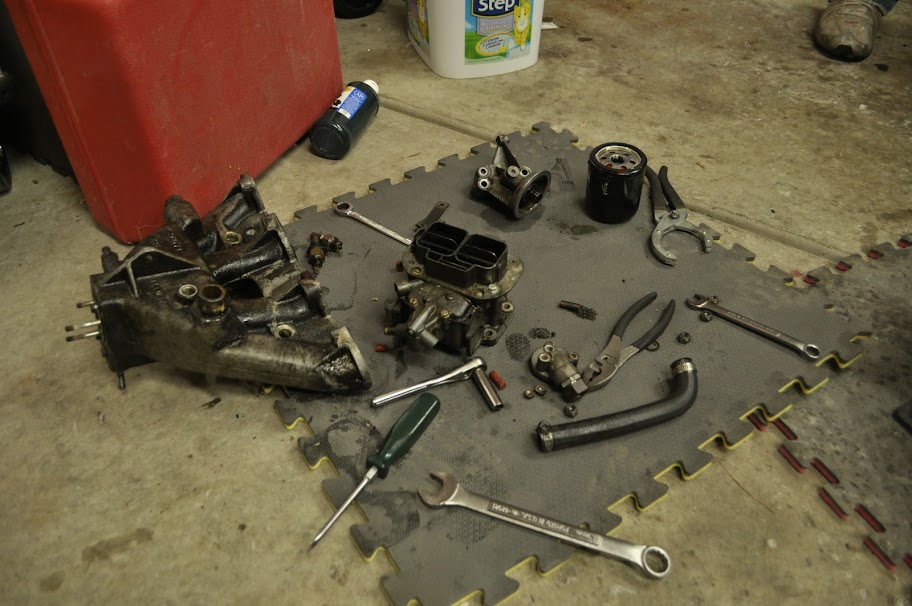
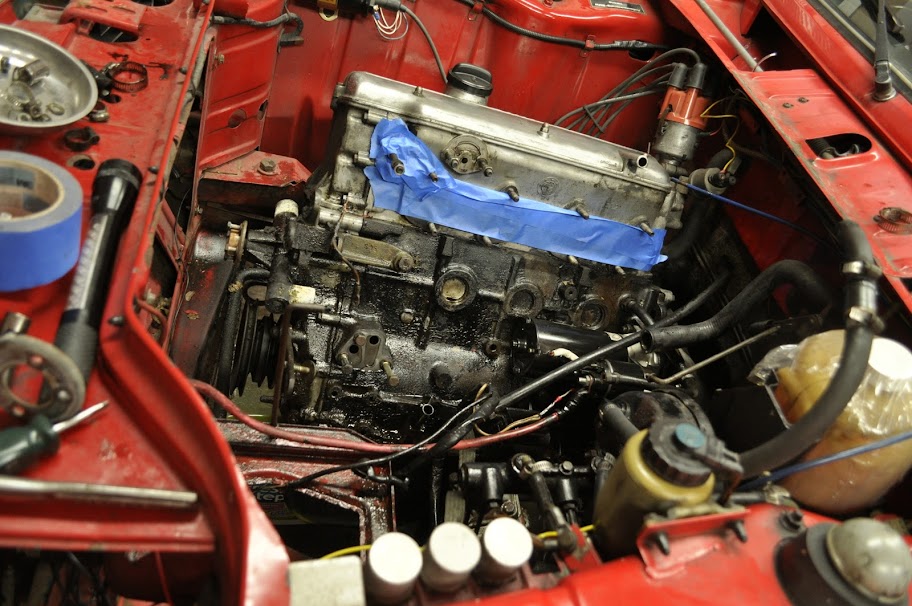
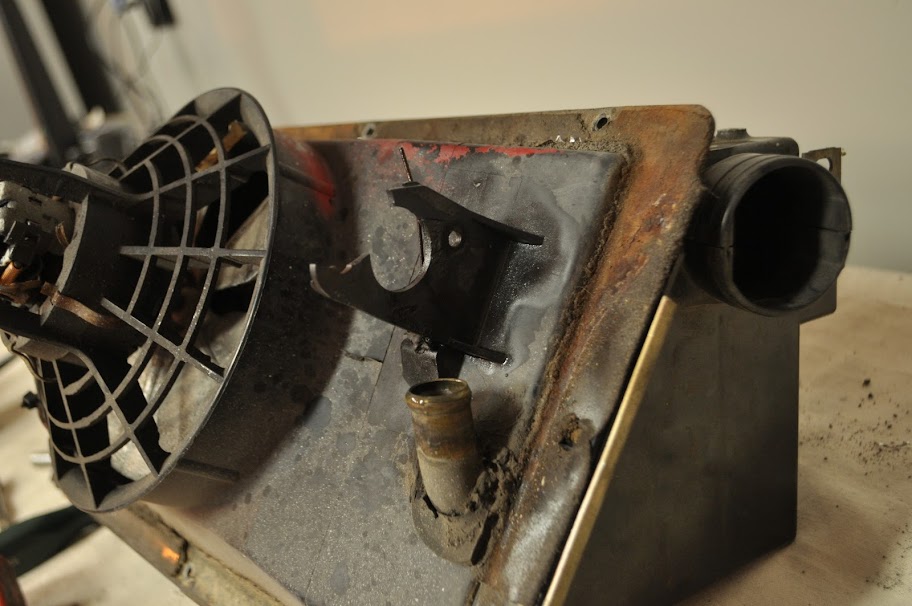
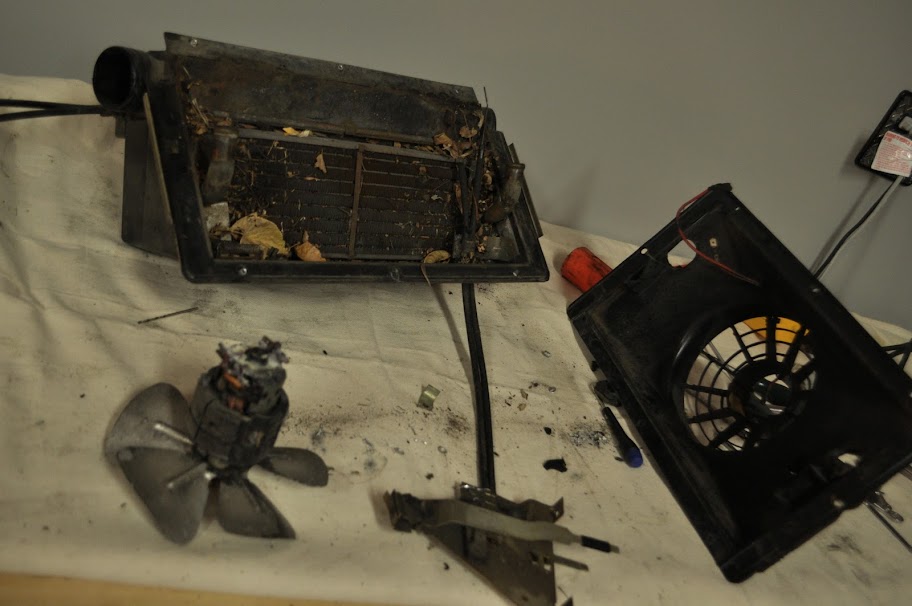
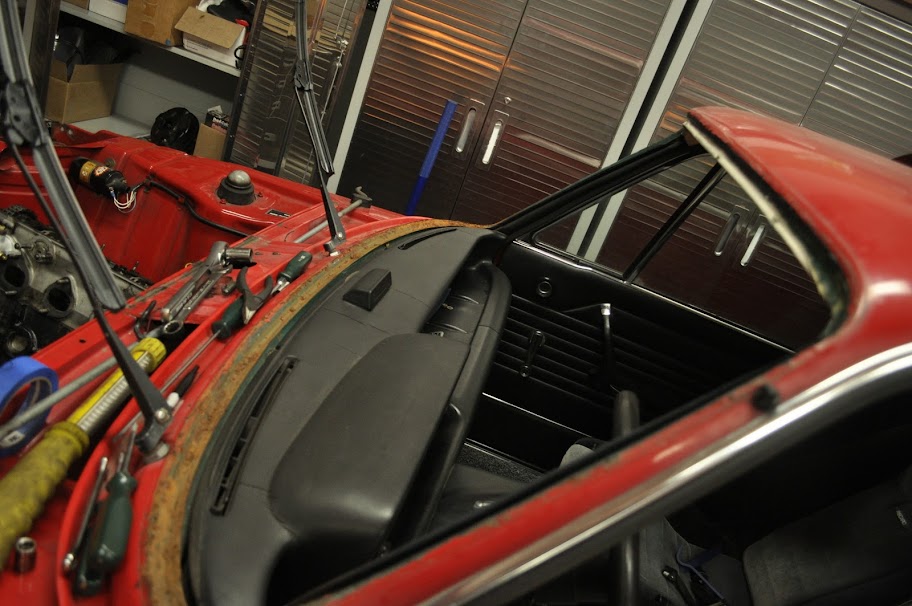
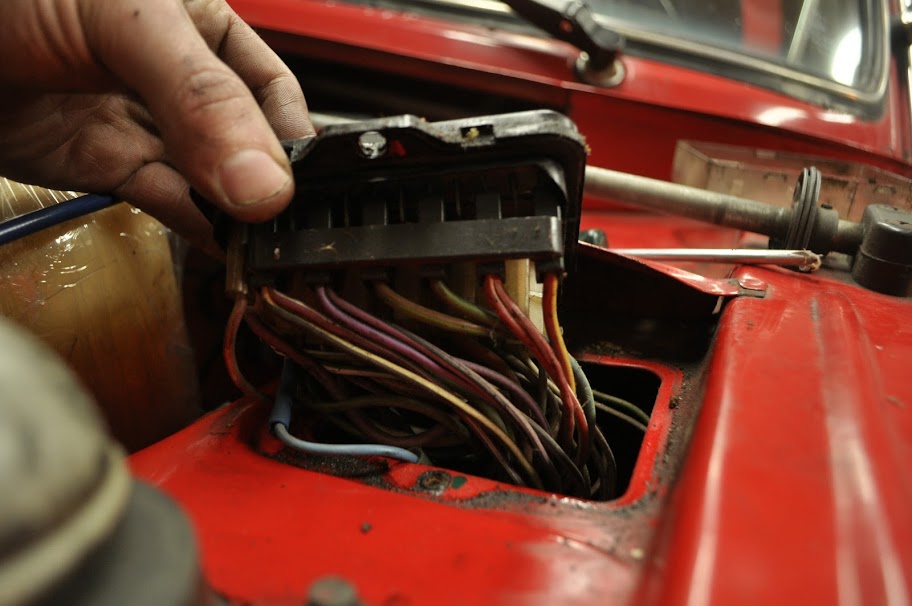
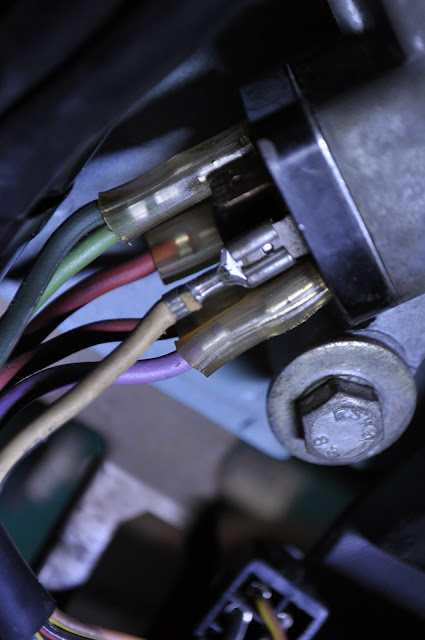
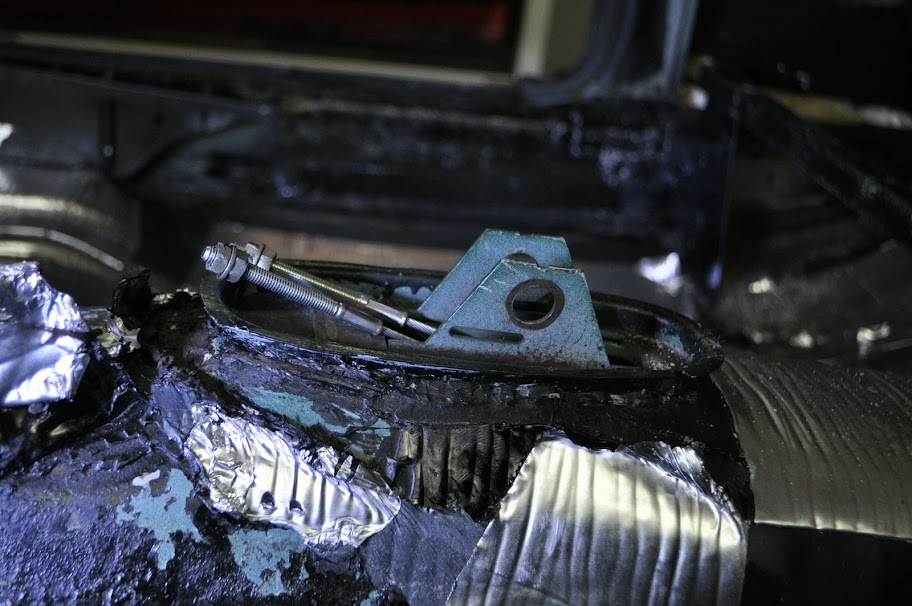
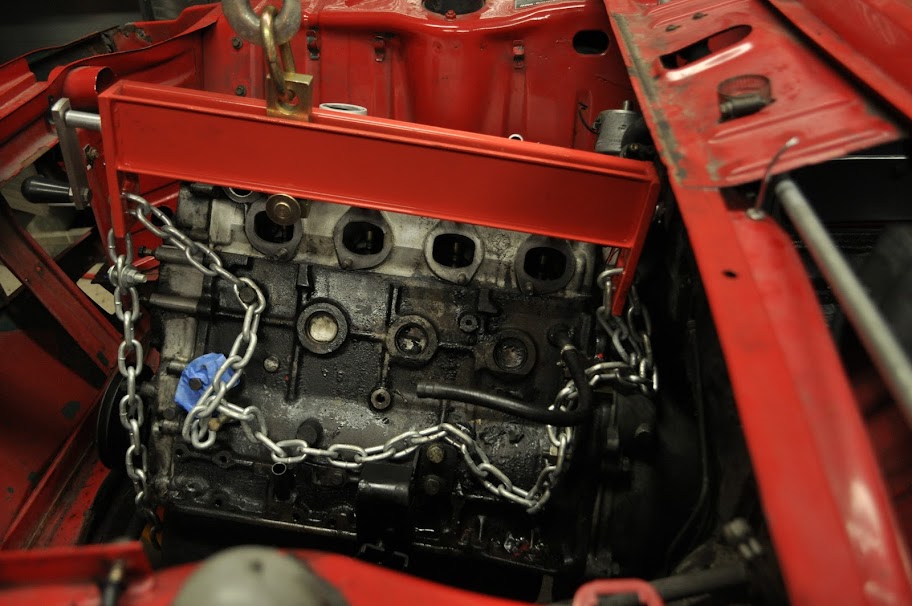
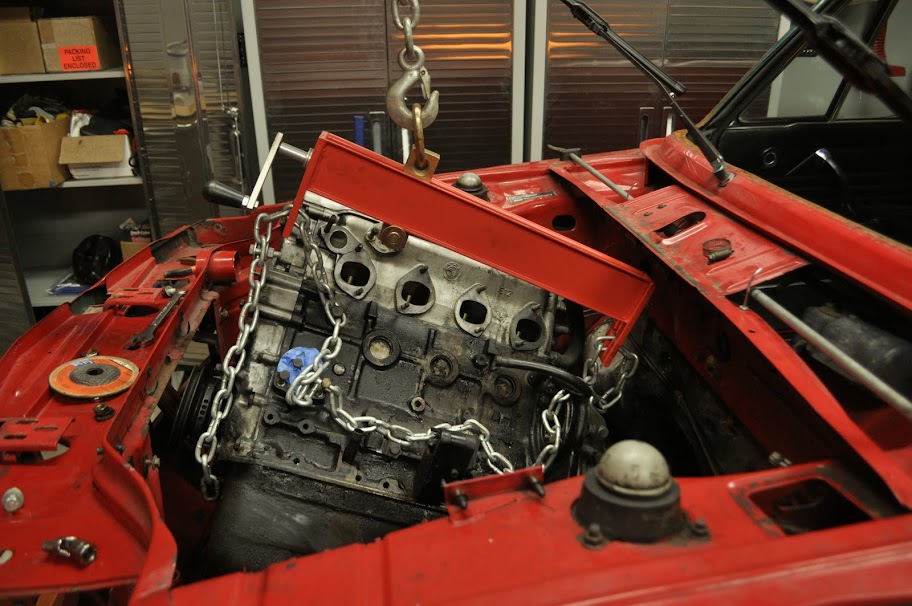
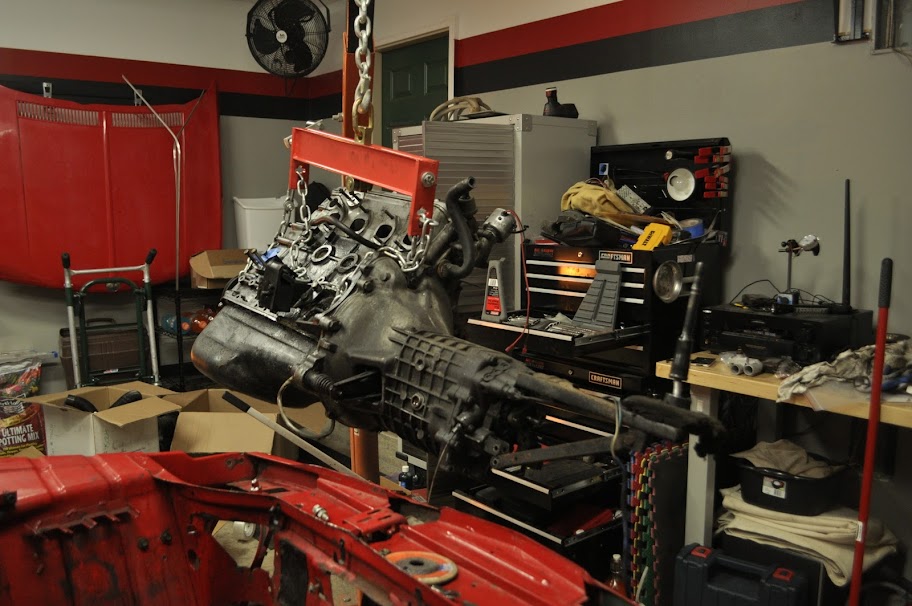
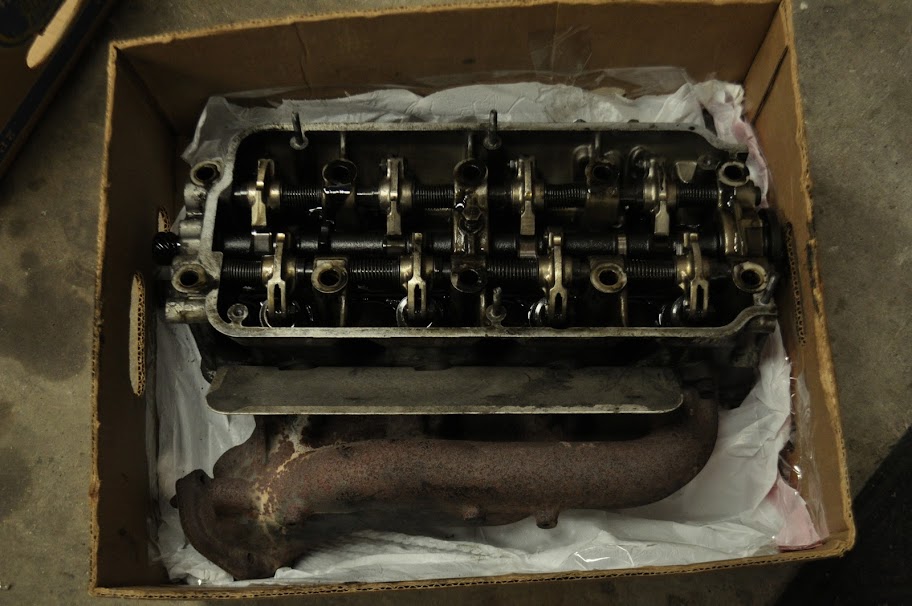
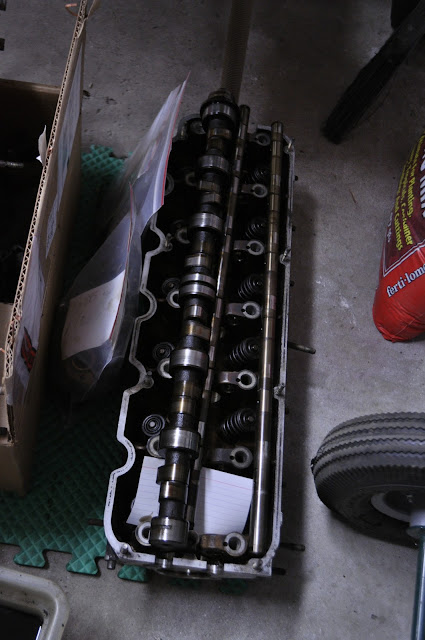
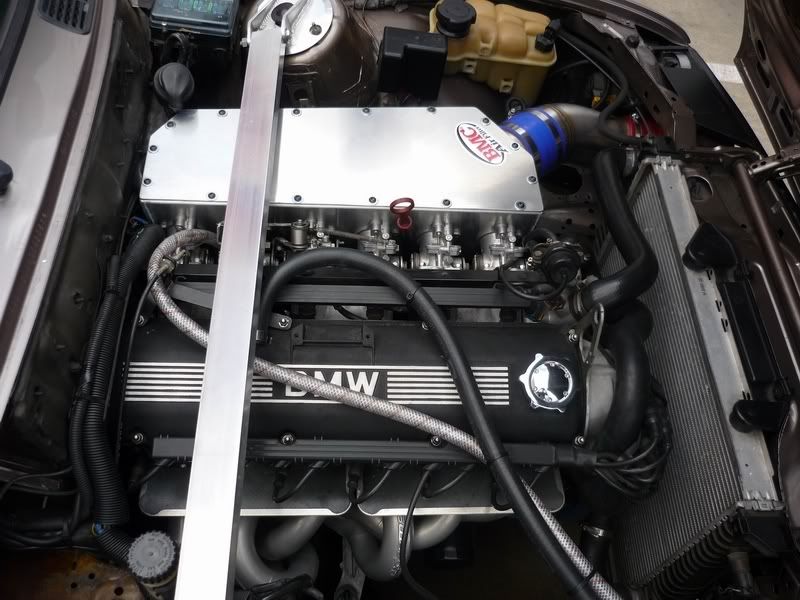
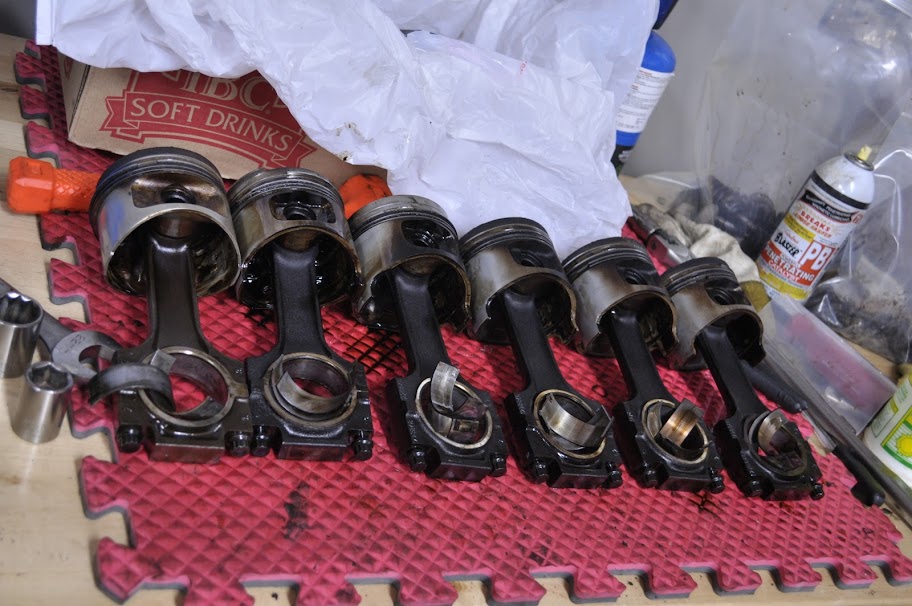
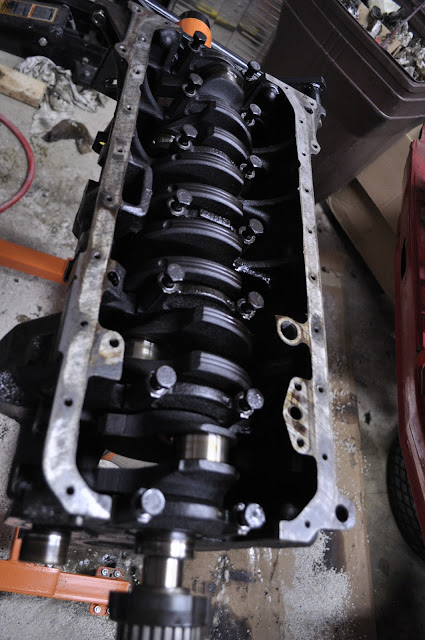
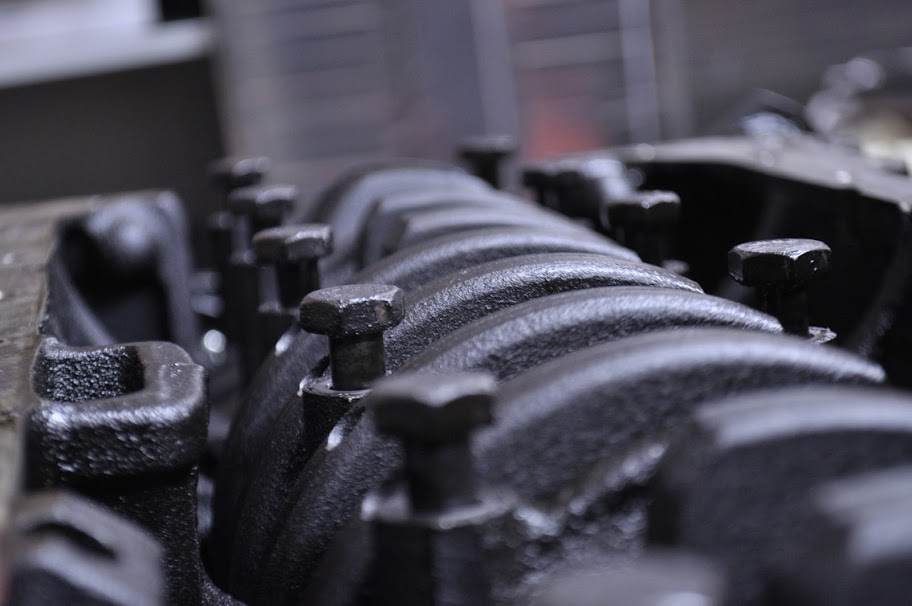
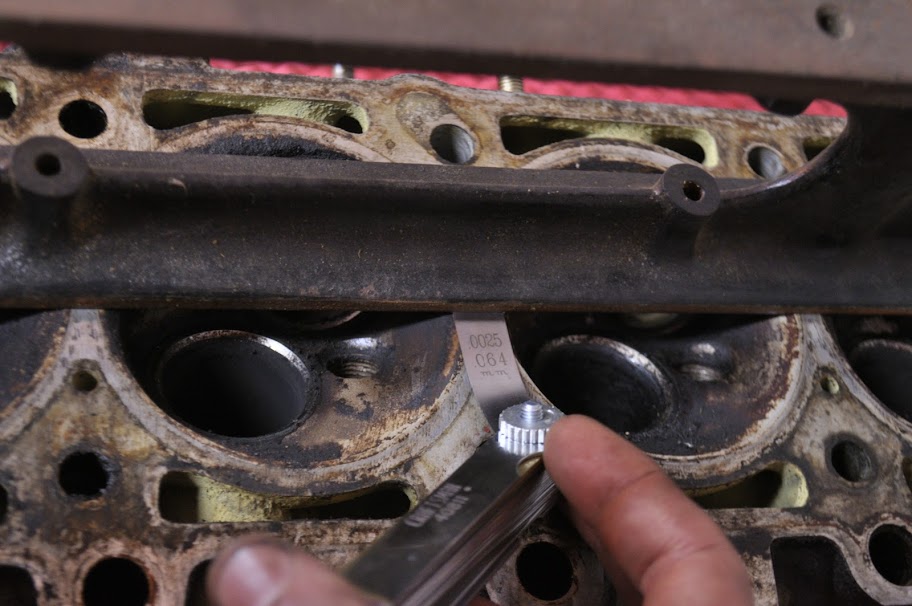
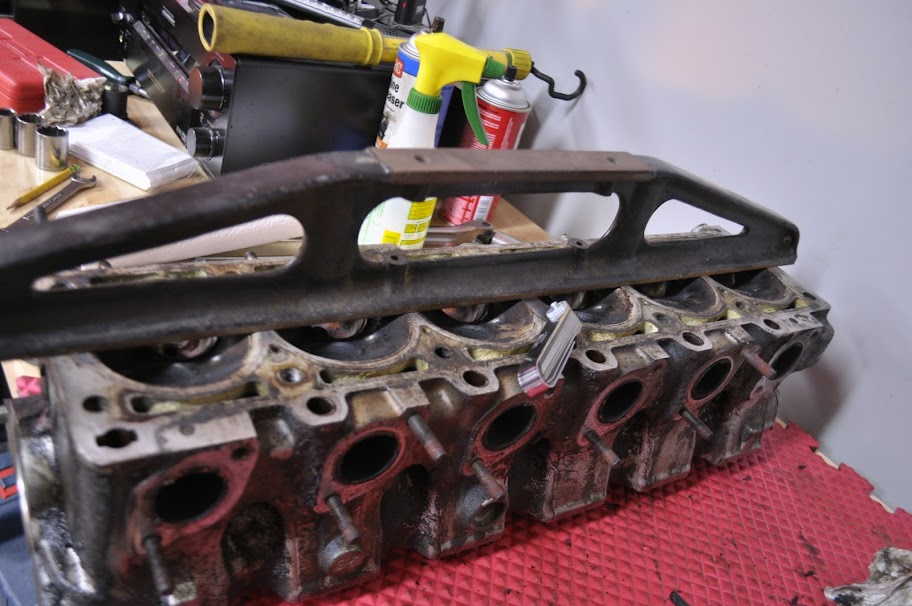
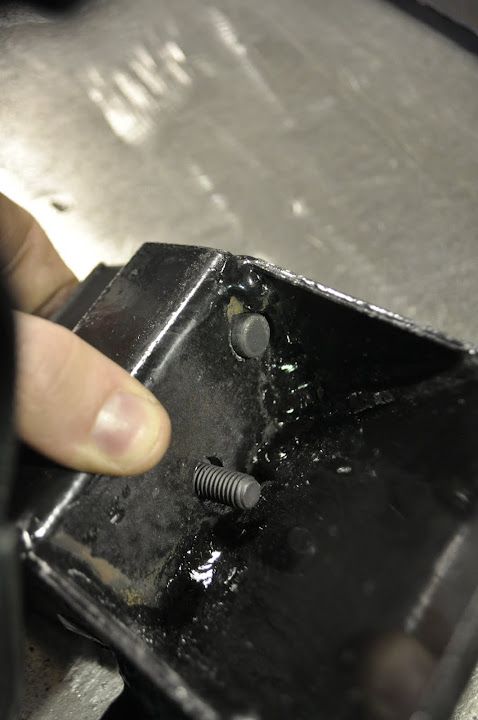
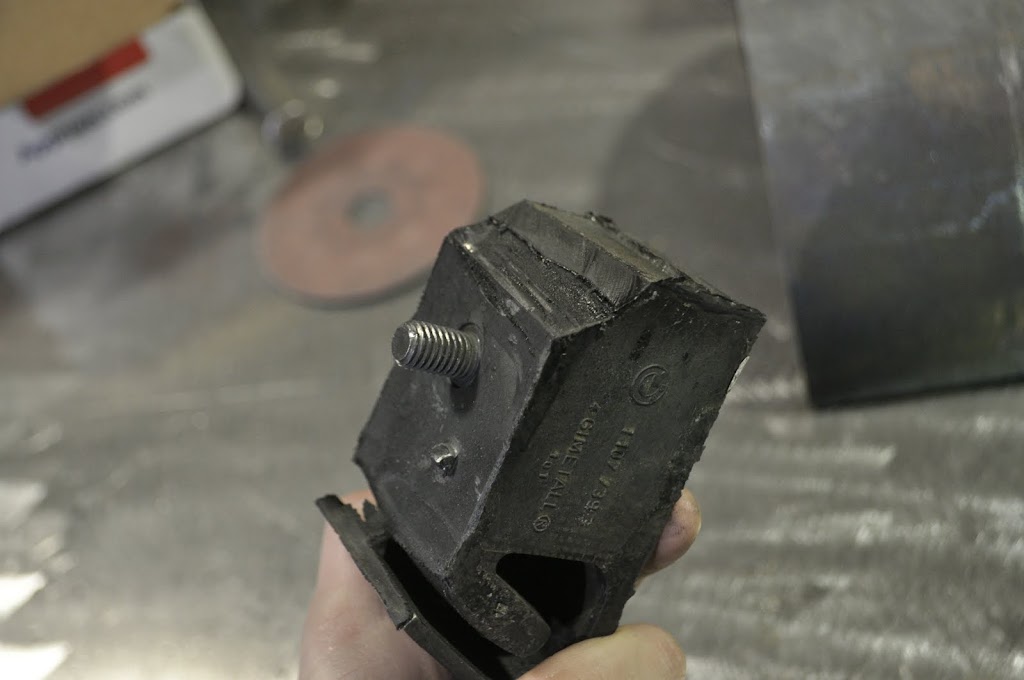
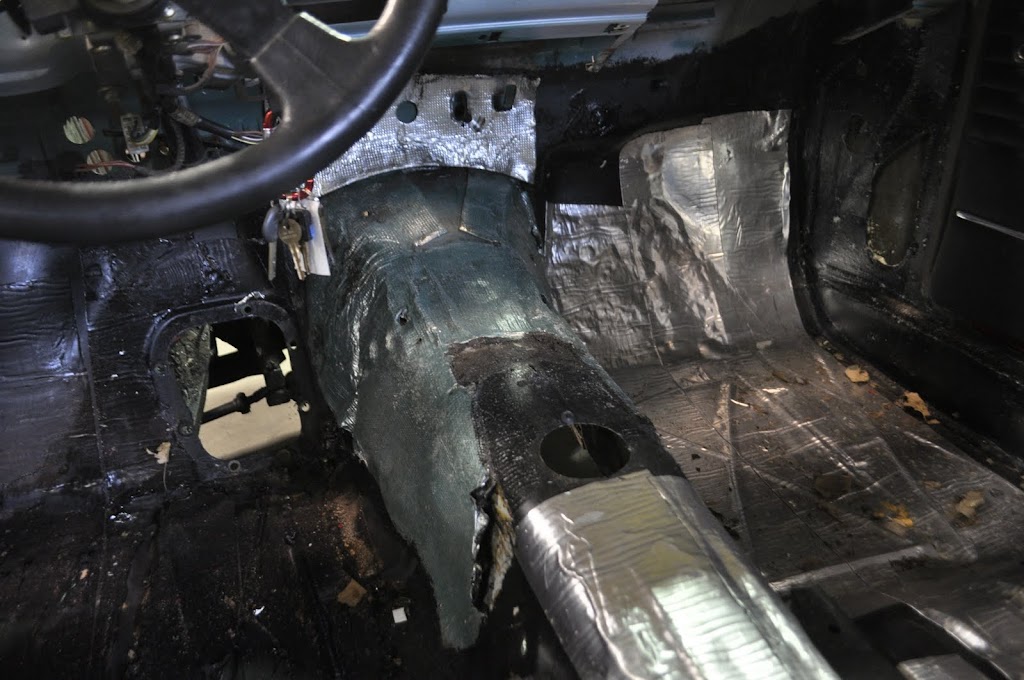
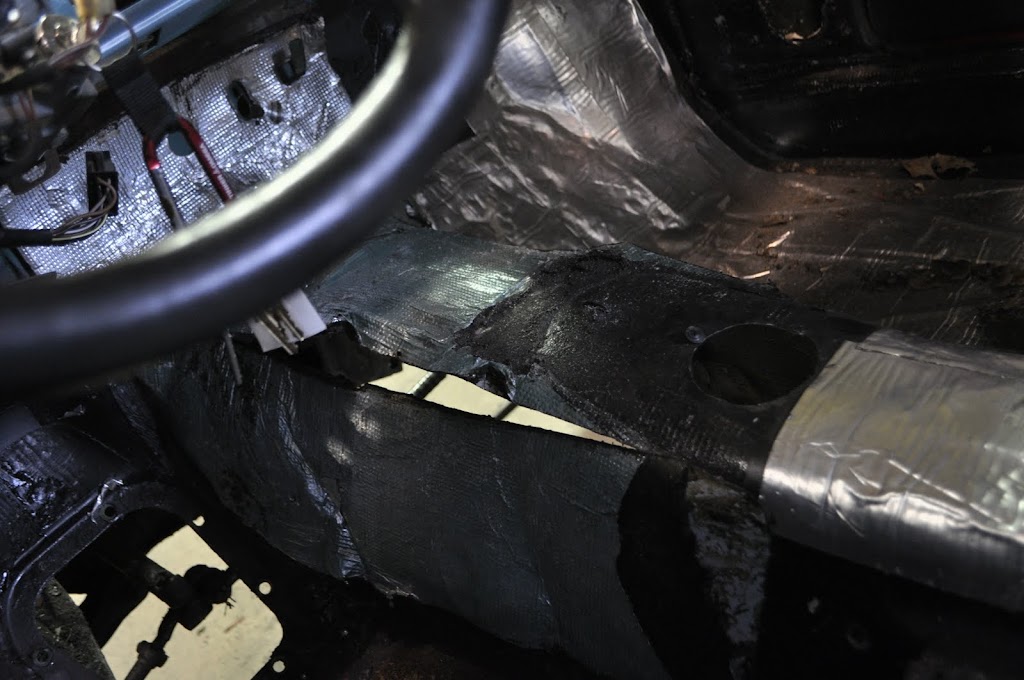
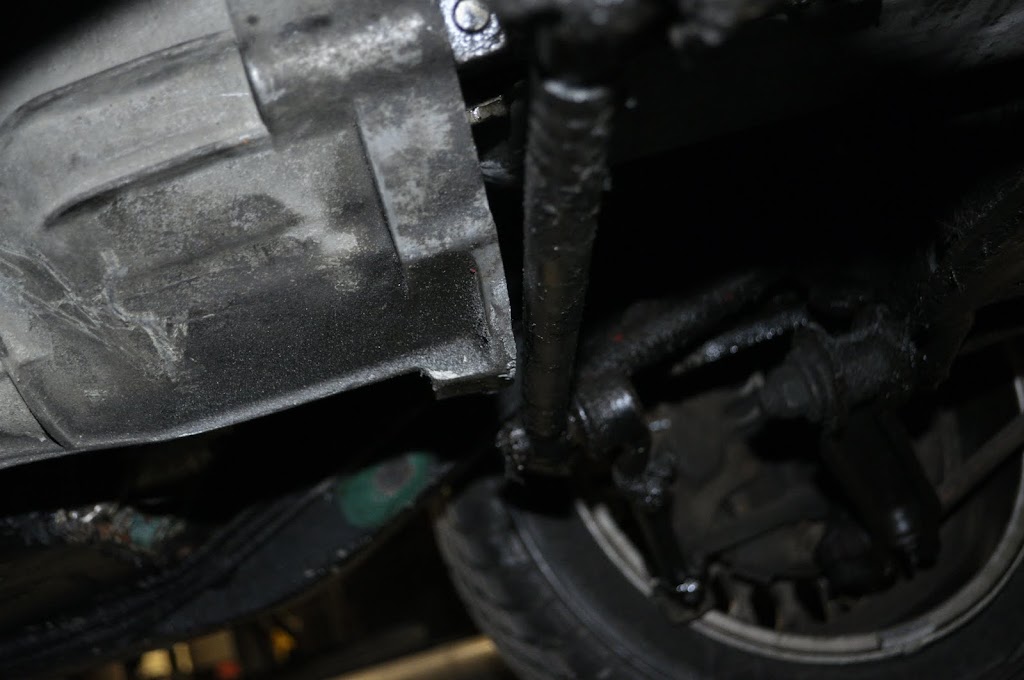
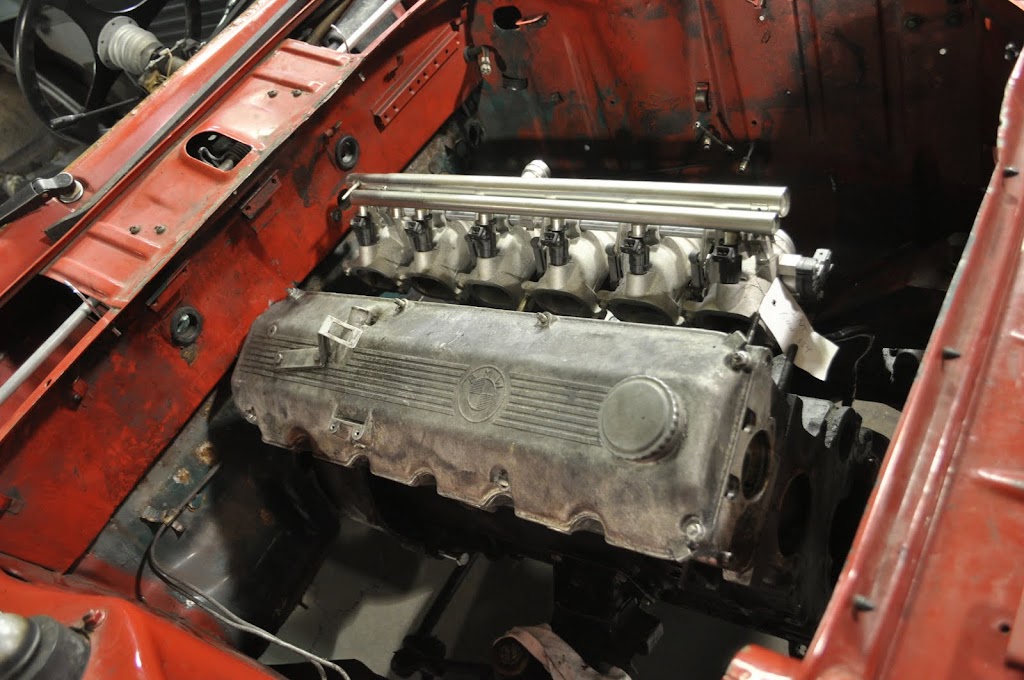
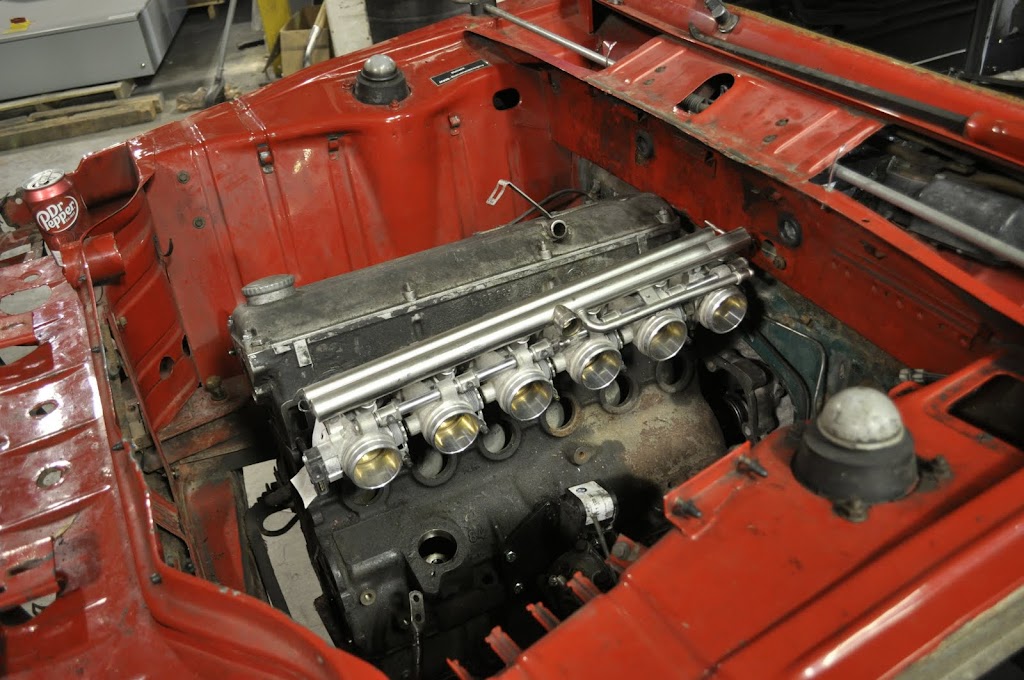
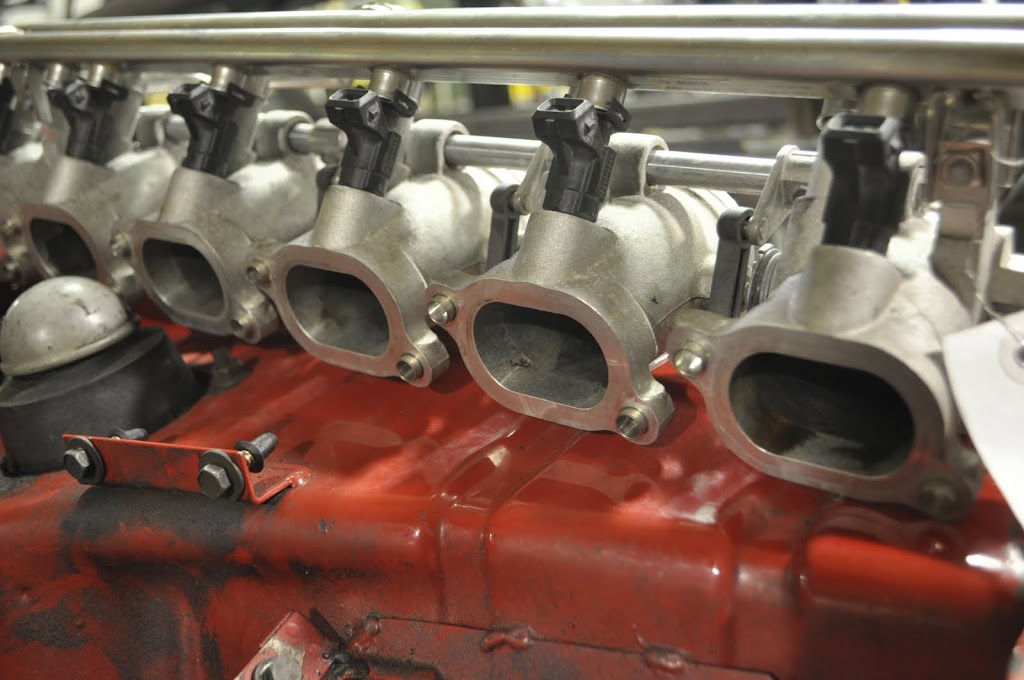
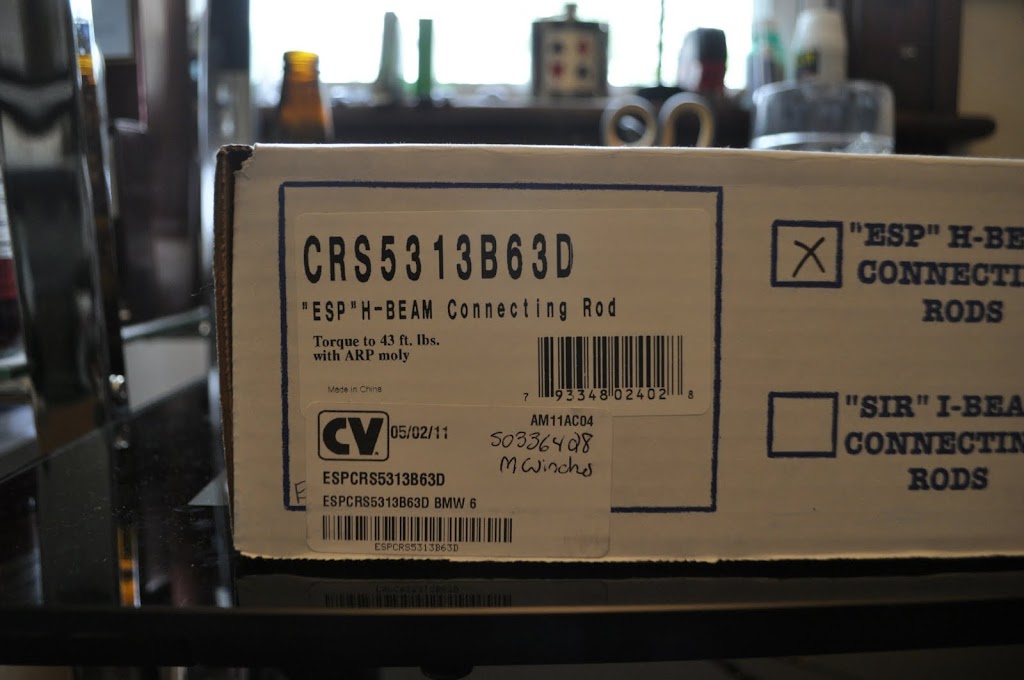
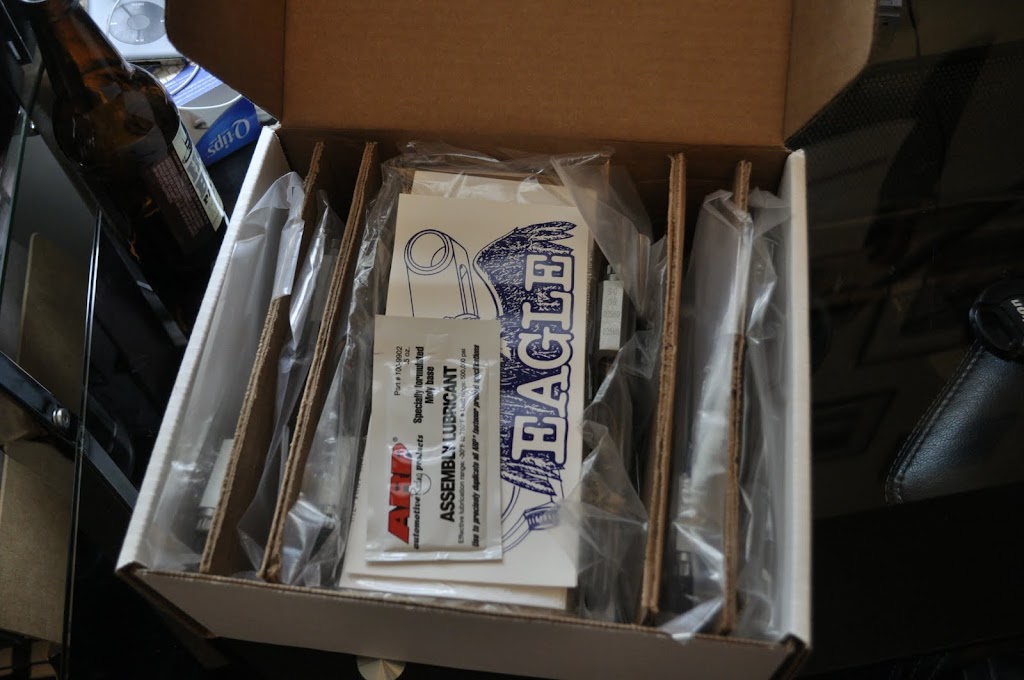
    Been poking around on here for a couple months and figured I should start a build thread for my 1975 BMW 2002, affectionately names Fiona (My DD e46 is named Mica, props to whomever can get the reference). I've had the '02 for a little over two years now, and what started out as a cheap winter beater has morphed into more than I could have ever imagined. The few couple of posts will be catching up to where she sits now, so I apologize if it seems a bit out of order. But enough talk, onto the good stuff.
    Tinker Engineering - 2014

    Mica - 2000 BMW 323i - The one that started it all
    Fiona - 1975 BMW 2002 - The Definition of Project Creep
    Heidi - 1988 BMW M5 - The piece of BMW history
    Silvia - 2013 Subaru WRX - Stock, for now

  • #2
    For the past couple of years I've been working towards/dreaming about picking up a 2002 to call my own, and a couple of weeks ago I finally pulled the trigger. I went up to Detroit and amidst a strong fuel/exhaust smell she managed to tackle the 4 hour drive back to Springfield (Ohio) without a fuss so I can't complain. Anyway, without further ado here she is:

    2002

    The engine runs pretty strong, not that I have much to compare it to.

    Engine Bay 3


    Once I got it home and really started looking it over, I found out that she has a few nice surprises and a few not so nice surprises. But that's all to be expected I suppose.


    First, a 32/36 w/ manual choke:

    Weber Carb 2


    Next, a Tii Mechanical Advance Dizzy:

    Tii Dizzy

    Then I forgot to take a picture, but a full Ansa Sport Midsection and Muffler, which is pretty freaking loud @4000 rpm cruising down the highway lol. I think there's also a leak somewhere though, so that's definitely not helping anything.

    The interior also came with a 3 gauge pod with oil pressure, voltage and an old school vdo clock (that still keeps time!) as well as a very old tape deck lol.


    Now some of the not as nice things:

    Driver side rocker panel

    Driver Side Rocker Panel


    Driver Side Floor with carpet and sound deadening removed:

    Driver Side Floor

    Oil leak from somewhere around the oil filter housing / intake manifold / head gasket.
    Oil Leaks


    So the plan is to fix the rusty area's and get the interior back to being sealed from the exterior. I've got some plans to help stiffen her up where it counts that shouldn't add to much weight either. In the end it won't be a show car by any means, more just a car meant to be driven. I've already started some of the rocker work so I'll post up more pictures soon.


    ~~~~~~~~~~~~~~~~~~~~~~~~~~~~~~~~~~~~~~~~~~~~~~~~~~ ~~~~~~~~~~~


    Soo I dove into the driver side rocker panel. As you could see from the picture I posted earlier it was completely filled with expanded foam. It did a decent job of protecting the inside rockers from rust, but it was a ***** to get out. Luckily a wire brush on a drill seemed to do the trick.

    Driver Side Rocker Panel

    This is NOT what I consider a fun foam party...

    Puking Foam

    Foam Party

    You can see in this picture that the inner panels are still fairly solid around the top, so that's good news.

    Clean Rockers!


    The worst rot in the rocker was towards the front just infront of the drivers seat mounts. This was covered with some silicon seam sealer type stuff, but I poked it out with a screwdriver. I'll have to mock up some replacement pieces and weld them in to fix it.

    Rocker Cut out and cleaned


    That's when I decided to call it a night. But not before I checked out some of the different options I had for reinforcing the rockers. I tried out some 2x3 rectangular tubing as well as 2.5 x 2.5 square but neither would clear the up front, so I settled on using 2x2 square. It'll give it way more strength than it had before, and a place to tie in a roll cage when the time comes.


    ~~~~~~~~~~~~~~~~~~~~~~~~~~~~~~~~~~~~~~~~~~~~~~~~


    The next step was to cut the tubing to the correct length to run inside the rocker panel and then notch it so it would clear the seatbelt mounting points that reached into the rocker. In order to notch the tube, I used the ever trusty Plasma torch. For those that don't know, this can cut through 3/4" steel like butter, so it made very short work of my ~0.125" wall tubing.

    The Beast:

    Plasma Cutter


    But of course I forgot the take a picture of the tube after notching. However you can see how nice and flush it sits up in the rocker panel now.

    2x2 Tubing Clamped in Place

    I can also use the tubing to create some e46-like jack points in the rockers. Which will be very nice considering the stock jack points weren't strong enough to support the car anymore :.

    Once the tubing was in there I tacked it in place and started tying it into the inner and upper rocker panels. I'll also weld along the inner bottom and outer top edges so that it spreads out the load and doesn't focus it on a small section of sheet metal (think e46 rear subframe lol).

    One tie-in point before cleaning up the welds:

    Front Patch

    I still need to finish welding along it's whole length, but the tubing is in there now. I'm also thinking about tying it in directly to the front frame rail and the rear subframe mounts just for piece of mind. I'm not sure how much I trust the old mounting points.

    ~~~~~~~~~~~~~~~~~~~~~~~~~~~~~~~~~~~~~~~~~~~~~~~~~~ ~~~~~


    Considering the condition that the stock (read original) seats were in I was keeping my eye out for some replacement. The this past weekend I found two Recaro's from the e21 320is down in cinci for a good price (thanks again Jason).

    Recaro's

    I'll probably end up recovering them in black vinyl and alcantara or something along those lines down the road, but for now they're still light years ahead of what was in there to begin with. I'm just glad I won't have to pick off pieces of foam from my back every time I get out of the car.


    Then since the front seats were getting replaced I figured I should do something with the rear as well. The stock rear bench had a couple of gashes as well as zero foam left. So a quick search on bimmerforums turned up a 6 series being parted out just north of me. That scored me these beauties:

    Rear Seats from e24


    These also included my personal favorite feature:


    Arm Rest!


    The fold down middle arm rest!


    Just for comparison this is what the normal 2002 seats look like (not the ones from my car though):

    Front:


    Rear:


    Both the front and rears feel great. They really hold you in place. They're also incredibly light, but I'm used to the e46 M3 seats so that's not really saying much.


    I was also able to get a really good deal on a complete set of beltline trim (the po shaved it off the car before I got it) thanks again to eurotrash and his magical donor '76 tii. The best part is none of the pieces are dented or dinged up. After some polishing they should look really good.

    Beltline Trim Pieces


    All in all she should be starting to come back together very soon, and then I get get out and driver her again, I can't wait!


    ~~~~~~~~~~~~~~~~~~~~~~~~~~~~~~~~~~~~~~~~~~~~~~~~~~ ~~


    So this past weekend I was able to get a big chunk of the rust repair taken care of. There's still a lot of stuff to do, but now I have a feel for what I need to do and more importantly how to do it. This is the first time doing body work and so I'm pretty much learning as I go.


    First order of business was to remove all of the rusted out/heavily pitted metal. Once this was done it exposed the frame rail that sits under the floor. Luckily for me it was still very solid, it just has some debris inside.

    Driver Frame Rail - Before

    Once I cleaned it out, I applied a coat of Weld-Thru primer so I could add some extra support on the inside of the frame with a 1/8" thick sheet metal cut to fit.

    The Primer:

    Weld-Thru Primer


    The Frame Rail freshly primed:

    Driver Frame Rail - Primed and Ready


    The reason for the primer is that when 2 pieces of metal of butted up against one another they have a tendency to trap moisture, which leads to rust. The best way to prevent that is to paint both pieces before you push them together. But since the insert was being welded in normal paint would be burnt away, so it wouldn't do any good. The Weld-Thru primer is special in doesn't burn away when welding, so it will still protect the metal from rust.

    The frame rail with the added metal welded in:

    New Patch Welded In

    After that I applied a good coat of POR-15 (rust inhibitor). Once that was sealed up I could move on to the rest of the driver's floor. Below you can see where the rust started to run up onto the transmission tunnel ever so slightly. In order to repair this I cut put a template from thick paper and then traced the pattern onto some sheet metal.

    The hole:

    Driver Floor Before

    The metal piece cut from the paper template:

    Patch for Driver Tunnel

    Once I had the outline cut out I used some body hammers and dollies to get the curve right. Once the shaping was done I tacked it in place until the rest of the floor could be made up. I forgot to take more pictures as I made that piece up, but here's the paper template I made for the other corner of the floor.

    Paper Template:

    Paper Template

    Sheet metal from Template:

    Metal cut from template

    And here you can see this piece tacked in place:

    Tacked in 2

    Next in line was the inner front rocker/side of the floor. At first I was going to leave this piece in, but the more I poked at it the more fell out, and so I decided to make up a new patch to cover it up.

    The rusty piece:

    Old Busted Joint

    The sheet metal patch, unbent:

    Template of old busted joint

    The patch, freshly bent:

    New Hotness\

    And here is where it got welded in:

    Location of old busted joint

    Once the sides were patched up I made up the inner floor panels. Here's the left one ready to be tacked in place:

    Left Floor Pan


    The last thing I worked on this weekend was my crappy stock gas pedal mount. it was rusted and pitted and all around worn out, so I figured I would make a new one.

    The old busted joint:

    Old Pedal Mount


    The new sheet metal piece ready to be cut:

    New Metal

    The bends matched up pretty good:

    Bent up to match

    Then I made up some new mounting 'nipples' from some 1/4-20 bolts and acorn nuts. I put the nuts in a drill press and then rounded them off with a grinder until they were the right shape. To hold the bolts in place I welded then through the holes from the back of the mounting plate. Finally I threaded on the rounded acorn nuts down onto the bolts and Voila!


    The New Hotness:

    New Pedal Mount

    And it actually fits!!

    It fits!


    Last here's a picture of how she sits right now. I still need to grind the welds down and then seal everything up nice and good. I'm hoping to get to that tonight or tomorrow. Then I get to tackle the passenger side....

    It has a floor now! :excited:

    New Floor!
    Last edited by TinkWithanR; 11-13-2012, 11:02 PM.
    Tinker Engineering - 2014

    Mica - 2000 BMW 323i - The one that started it all
    Fiona - 1975 BMW 2002 - The Definition of Project Creep
    Heidi - 1988 BMW M5 - The piece of BMW history
    Silvia - 2013 Subaru WRX - Stock, for now

    Comment


    • #3
      The Passenger Floor. Maybe there's at least some hope of clean metal underneath....


      No Such Luck:


      Finally cut it back to some 'clean' metal:


      Then new floors were cut out, beads were rolled, and then welded in like the drivers side. Which I forgot to take pictures of.

      Next was the rear passenger fender area. This is were you could really start to tell the car spend a lot of winters in Michigan (and were the wind noise was coming from on the drive home).

      Lots of cancer:


      View from the inside, cause even backseat drivers need a sunroof for their feet.


      Luckily the cancer could be cut away:


      It did get fairly deep though...


      So after cutting out that rust and welding in some new metal I gave it a nice coat of POR-15:


      After Drying:


      And then a new panel to cover up the insides from more damage:

      Last edited by TinkWithanR; 11-13-2012, 11:03 PM.
      Tinker Engineering - 2014

      Mica - 2000 BMW 323i - The one that started it all
      Fiona - 1975 BMW 2002 - The Definition of Project Creep
      Heidi - 1988 BMW M5 - The piece of BMW history
      Silvia - 2013 Subaru WRX - Stock, for now

      Comment


      • #4
        Then I needed to make a new outer fender panel. Here it is in the earlier stages of being hammered out:


        And here it is welded in place. It's not the prettiest but I'd say it's pretty darn close for my first hand-made fender.


        Now with the majority of the rust repair done (woo!) it was time to help makes sure things didn't start to rot away again. but before you can really protect the metal, you have to get down to the bare stuff. This meant getting all of the old, tar-ish sound deadening off of the floors. Normally this is a terrible job that can take days with a heat gun and a scraper. Unless you know a little trick. Say hello to my little friend...

        Dry ice in a convenient pillow case:


        It may look tame, but it's doing it's thing. After 5-10 minutes under the pillow case, the sound deadening chips right off like a Maaco paint job.


        Here's the rear with all the sound deadening off the floors. They are now ready to be covered in POR-15:


        But first let's give a nice test fit to those e24 rear seats. After some trimming of the rear fiberglass they fit like a glove.


        With the rest of the interior sorted and repaired, the floors got coated in POR-15 top and bottom (where the undercoating had come off):


        Then as the POR-15 was drying, I prepared the next layer to go down. Sound deadening tar paper and Insulating ducting foam. Much like Dynamat and carpet insulation in function, but a whole lot cheaper. If I ever get to the point of doing a 'frame off' restoration, then I may splurge on the name brand stuff. Until then these will definitely do just fine.


        Laying down the Tar Paper:


        Laying down the insulation on top of that:


        With all that done there was just a couple of minor details to button up like re-sealing the gas tank and patching some holes in the trunk. Then the new fuel lines were run and hooked up to the engine. Finally after a couple of cranks she fired up as good as ever. That was about as far as I managed to get before school started and I was back up on campus. I did drive it up at school on and off for a couple of months until the weather really started getting cold. At that point, the lack of a working heater/defroster meant that the windows would fog up within the first 15 seconds of driving. So she got parked until I could find more time to work on the heater box and brakes. Thankfully that time came at the beginning of the new year. hopefully I'll be able to upload those pics in the near future.
        Tinker Engineering - 2014

        Mica - 2000 BMW 323i - The one that started it all
        Fiona - 1975 BMW 2002 - The Definition of Project Creep
        Heidi - 1988 BMW M5 - The piece of BMW history
        Silvia - 2013 Subaru WRX - Stock, for now

        Comment


        • #5
          I'm going to try and let the pictures do the talking....

          Step 1: Remove the Hood


          Step 2: Admire Weight Reduction


          Step 3: Examine Ugly Engine Bay


          Step 4: Spill Coolant All Over the Floor


          Step 5: Disconnect Coolant System and Remove Radiator


          Step 6: Remove Intake Manifold


          Step 7: Admire Your New Roomy Engine Bay. Your engine now runs on hopes and dreams.


          The main reason for removing this stuff was to work on the new manifold design and make sure it would bolt up to the head and let the carbs sit at the correct angle etc etc. But after looking at how dirty the engine was I couldn't help but think I should just pull the whole thing and give it a good refreshing. But I digress...
          Tinker Engineering - 2014

          Mica - 2000 BMW 323i - The one that started it all
          Fiona - 1975 BMW 2002 - The Definition of Project Creep
          Heidi - 1988 BMW M5 - The piece of BMW history
          Silvia - 2013 Subaru WRX - Stock, for now

          Comment


          • #6
            Like I said earlier, one of the main reason's she's been decommissioned for the winter was the lack of a heater. This would let the window's fog up very quickly, which is never a good thing. So while the coolant system was drained I figured now was as good a time as ever to tear into that and get it fixed. So without further ado....

            The ugly 'ol heater box after I wrestled it out from under the dash:


            The mount for the heater valve once I unbolted it. Who knew plastic would get brittle after 35 years of head fluctuation....


            The innards, not very pretty. Although I have heard leaves can increase airflow ~20%.


            And here's the bastard that's been keeping me in the cold.


            Next to his replacement:


            And the fan blade swapped over, ready for it's new home.


            I then finished disassembling the rest of the box and sorted all the parts. I just need to actually sit down and order the new seals and grommets to put her back together. I'll also fix all the cracks with some JB weld or the like and give her a fresh coat of paint.


            Oh, and last but not least I might as well take out the alternator and brackets to give them a good cleaning. I doubt they like being covered in old oil. Also I cut out the stock battery tray since I'm moving it to the trunk. I bet I could fit a V10 in here with all this extra space! (well not even close, but I can dream).

            Tinker Engineering - 2014

            Mica - 2000 BMW 323i - The one that started it all
            Fiona - 1975 BMW 2002 - The Definition of Project Creep
            Heidi - 1988 BMW M5 - The piece of BMW history
            Silvia - 2013 Subaru WRX - Stock, for now

            Comment


            • #7
              So after much debate, it looks like she may be down and out for longer than I anticipated. But it's all for good causes.

              First, more body panel inspection, so off with the fenders:


              Both fenders must have been replaced right before she was resprayed before because they are both very clean (unlike the rest of her). I'll be able to fill in the reflector holes ala euro style and have some nice clean fenders.


              Then I needed to get the windshield out and see how bad the rust under the seal was. In the pic you can see how the entire frame was starting to rust out. Luckily it seems that I got to it just in time, it's only surface rust and should clean up fine:


              Then as I was taking off the front bumper I managed to drop one of the fog lights. Fuuuuuuuuuuuuuu.....


              Next thing on the list was to start unwiring.... Everything.... Thankfully electronics are at a minimum on her, so this was much simpler than say an e36 or even and e30. A couple of pointers, label EVERYTHING. You never know how long it will be until you are re-wiring and you'll pry forget what that little connector went to.


              ---------- Post added at 03:34 PM ---------- Previous post was at 03:26 PM ----------

              Fuse Box:


              A pic of the ignition switch so I can remember how it connects:


              And Finally after about and hour and a half of wraslin' the two harnesses were free. On '02's there are two different harnesses. The engine harness which holds all of the stuff that makes the car go, and the Body Harness that does everything else (lights, gauges, dash etc). They connect together along the firewall underneath the dashboard.

              Body Harness (you can see all my painters tape labels lol):


              Engine Harness:

              Tinker Engineering - 2014

              Mica - 2000 BMW 323i - The one that started it all
              Fiona - 1975 BMW 2002 - The Definition of Project Creep
              Heidi - 1988 BMW M5 - The piece of BMW history
              Silvia - 2013 Subaru WRX - Stock, for now

              Comment


              • #8
                With the wiring out of the way, I was able to finish taking out the rest of the interior.

                Carpet, Steering Wheel, Dashboard, Pedal Box and pretty much everything else gone:


                Here's the stock e-brake set up. It is very prone to being wobbly and hard to operate. Sooo I picked up an e46 handle assembly from ebay and will be retrofitting it in place.

                Stock:


                Stock no longer:


                I forgot to take a picture of the new handle in place, but it will fit very nicely with a little massaging.

                Load leveler = God Send when removing the m10 and transmission combo.


                Getting closer.....


                And FREEDOM!!

                That is one oily engine lol:


                And it seems like there's all kinds of room in there....


                Popped the head off, fairly clean but with lots of carbon build up. I'm thinking this was mainly due to her running pretty rich and worn out rings/valve guides (burning oil).


                And the bottom end, sorry for the shitty resolution, I had terrible lighting.


                Trying to clean up the block a little bit. All the covers and accessories will be getting soda blasted and cleaned.

                Tinker Engineering - 2014

                Mica - 2000 BMW 323i - The one that started it all
                Fiona - 1975 BMW 2002 - The Definition of Project Creep
                Heidi - 1988 BMW M5 - The piece of BMW history
                Silvia - 2013 Subaru WRX - Stock, for now

                Comment


                • #9
                  Then I found this....

                  The Ups fairy brought me a lovely 5-speed transmission for the m10 from a lovely e21 in Cali.


                  Complete with some spares:


                  And then of course there is always the dirt cheap craigslist finds.... Even though I still had full intention of using the M10, it was so cheap I couldn't pass it up:

                  Tinker Engineering - 2014

                  Mica - 2000 BMW 323i - The one that started it all
                  Fiona - 1975 BMW 2002 - The Definition of Project Creep
                  Heidi - 1988 BMW M5 - The piece of BMW history
                  Silvia - 2013 Subaru WRX - Stock, for now

                  Comment


                  • #10
                    Stupid Craigslist.....

                    At first I was going to stick with the m10 and turn my dirt cheap 'eta' m20 into a coffee table or something. But then that little voice started to grow, and then I couldn't make up my mind. Many restless nights followed, tossing and turning in turmoil. Would removing the m10 be like removing the soul of my '02? Do I really want to build up an m10 only to have less horsepower than a stock m20? Then one morning I cleared my head and decided the m20 was the way to go.

                    Which brings us to this past weekend, which consisted of a LOT of running around. Which basically means that I didn't get nearly as much done as I was hoping. However there is still some progress to report.

                    As I mentioned earlier, last weekend I went and picked up a 'craigslist special' m20b27 'eta' motor for dirt cheap. That catch being that it needed to be rebuilt. Luckily enough for me I was planning on an engine rebuild anyway, so the price was great. For those of you that don't know, the m20 basically came in 3 versions in he e30, the b25 (the 'i' variant), the b27 (the 'e' varient) and finally the Super ETA, which is a combination of the two. The 'i' variant is the one we all know and love with roughly 170 hp and torque. The 'e' varient (eta) was an economy version, producing a whopping 180 torque but only 120 hp. The one thing the eta did have going for it was a larger displacement of 2.7L. The super eta was just the eta block and rods with special pistons and the 'i' head (distinguishable by the casting number 885). It bumped the power output slightly to ~ 127 hp.

                    Just to use the eta engine by itself in a stock configuration would be silly, since it is only slightly more powerful than the M10 in stock form. So I then began looking for some other options and settled on a stroked 2.7 hybrid. This will involve the eta block (for extra clearance around the rods), the eta rods and the eta crank matted with a set of 'i' pistons and an 'i' head. Now, if it was just assembled like that, the difference in rod length and piston height between the two versions would result in a compression ration of ~8.0 which is less than ideal for a NA build. The solution to this problem is to deck the block 2mm, which will bring the compression ratio back up to where it was with the regular m20b25 while adding .2L displacement.

                    So now that I had an 'eta' block, rods and crank, I went on the hunt for the 'i' parts I would need. After some wtb threads I was able to find an entire 'i' engine that had bent some valves (Thanks Bill) and another 885 head with a broken rocker (Thanks Ed). I then proceeded to tear into them and see what I had to work with.

                    Here's one of the 'i' heads, torn apart all except the valves. I still need to pick up a valve spring compressor to get those out of there.


                    The other 885 head. Both of them had roughly the same camshaft wear, which was slightly more than I was hoping for. I'll have to see what the machine shop says as far as what is acceptable for cam bearing surfaces. So long as the bearing surface on one of the heads is alright I'll be fine since I'm picking up either the 284/272 or the 288/288 schrick later this month.


                    And to keep me honest, it seems like this is how everything is going to shape up, at least mechanically:

                    M20 engine
                    - stroked to 3.15L
                    - Schrick 288/288 cam
                    - Uprated valve Springs
                    - ~10.5 C.R.
                    - ITB (custom made)
                    - Megasquirt III w/ injection and timing control

                    E30 Rear Subframe assembly
                    - 3.73 lsd
                    - stock disc brakes

                    5-speed Getrag 260
                    - SSK w/ 'gated' shorud
                    - lightened flywheel
                    - M5 Clutch


                    I have a line on most of the parts already, and I should be picking up things like the itb and cams next week. I'm a little sad to be ditching the bike carbs, but the idea lives on with some other '02ers. I just can't say no to this setup. Plus I've always wanted to try tuning and EFI system.

                    Hopefully if I don't mess with my plan to much it should end up something like this:

                    Tinker Engineering - 2014

                    Mica - 2000 BMW 323i - The one that started it all
                    Fiona - 1975 BMW 2002 - The Definition of Project Creep
                    Heidi - 1988 BMW M5 - The piece of BMW history
                    Silvia - 2013 Subaru WRX - Stock, for now

                    Comment


                    • #11
                      So Thursday night I needed to finish tearing apart the engines to see what condition the insides in. First thing was to finish stripping the 'i' block and get the crank shaft out.

                      The empty block ready to go to the machine shop:


                      The 2.5L crank:


                      The 'i' pistons, rods and main bearing caps all together so I don't loose em.


                      All the pieces parts taken off the block. Mounts, oil filter housing, pulleys etc:


                      ---------- Post added at 12:54 PM ---------- Previous post was at 12:38 PM ----------

                      Next on the chopping block is the 'eta' engine. It has no idea what's coming:


                      Popped the head off. Here you can see what the eta pistons look like. They would be perfect for boost (giving a CR of ~8.0 with the 'i' head), so I'll hold on to them for now in case I decide to go down that route in a year or two.


                      The eta pistons and rods. These rods are 130mm where the 'i' rods are 135mm. This will help to compensate for the longer stroke of the crank.


                      The eta crank. Looks a lot like the 'i' crank lol.


                      Over all the eta crank was in great condtion. The only bad spots were two places I could catch my fingernail on the bearing surfaces. Hopefully it can be polished out and reused.

                      Tinker Engineering - 2014

                      Mica - 2000 BMW 323i - The one that started it all
                      Fiona - 1975 BMW 2002 - The Definition of Project Creep
                      Heidi - 1988 BMW M5 - The piece of BMW history
                      Silvia - 2013 Subaru WRX - Stock, for now

                      Comment


                      • #12
                        The last thing to do before heading to the machine shop was to get the valve springs out of the head.

                        My purdy new valve spring compressor. Worked flawlessly and got it for under $20 from sears:


                        Also picked up a real set of feeler gauges. Wasn't expecting it to come in a nice roll-up pouch but no complaints here:


                        With the valves out I could do a preliminary check of flatness on the head. Looks like it's right around 0.0025" max, so it should be easy to get it smoothed out again.


                        All the parts wrapped up and ready to go to the machine shop. Who says the e46 can't haul parts.


                        Also, saturday morning I went over and picked up an e30 rear subframe (thanks again Bill). Included was the 3.73 lsd diff and rear disc brake setup. This mounts in the same basic way that the 2002 rear subframe mounts, except that I'm pretty certain the track width is wider. This means that I will most likely end up modifying the the 2002 and e30 subframes to make 1 hybrid, using the e30 diff and trailing arms/brakes with the 2002 mounting points.

                        Tinker Engineering - 2014

                        Mica - 2000 BMW 323i - The one that started it all
                        Fiona - 1975 BMW 2002 - The Definition of Project Creep
                        Heidi - 1988 BMW M5 - The piece of BMW history
                        Silvia - 2013 Subaru WRX - Stock, for now

                        Comment


                        • #13
                          The past weekend I was finally able to find some time to work on the '02. The 2.7l block and 885 head are still at the machine shop, but luckily for me I ended up with 2 complete m20's and so I was able to use the spare engine as a 'dummy' to get the engine and transmission mounts made up. At first I was planning on fabricating my own mounts for everything, but considering how much free time I've had to spend on this in the past month I made the decision to purchase some premade mount from Manimal (a member on 2002faq.com). They turned out very nice, the only thing I might change is to cut the tabs and re-weld them so the engine sits slightly lower in the bay. As is there is well over 1" of clearance between the oil pan and the subframe, and one of the upper mounting bolts for the transmission is blocked by part of the firewall. No biggy, but it would make removing the transmission without taking out the engine more challenging. Oh, and I also had to drill out the locating hole on the passenger side mount so the rubber pin on the stock mount would fit through it.

                          Here you can see the one hole I had to enlarge:


                          And here you can see the pin fitting nicely inside the hole:


                          For the driver side mount, you have to notch the stock rubber piece so it will fit at the correct angle. Here's how much I took off with a cut-off wheel:


                          And here you can tell the my angle was a bit to large. I took off material @ a 45 degree cut, in hindsight a 30 degree probably would have done the job:


                          With those modifications done I was able to drop the engine in without much trouble. For some reason my driver side engine mount was a little to far in, so I took my trusty BFH and persuaded it to get into it's proper position. Once everything else is mounted and in place I'm going to drop the from subframe and refurbish it, at which point I will also weld in some re-enforcement on the driver side engine mount. For now it fits/works just fine though.

                          With the engine mounted in place next was the transmission. For those that don't know, the stock '02 trans is a 4-speed, which allows it to be very small. This means that the transmission tunnel is also very narrow. The transmission I decided to use is the getrag 260, which came on all the 6 cylinder e30's. It's much tougher and reliable, but that comes at the price of being much larger. So because of this the tunnel needed a lot of massaging. But after about 5 minutes of minimal results the massaging gave way to cutting and cursing lol.

                          Here's a picture of the stock transmission tunnel:


                          And after the cutting and cursing, this is what was left:


                          In order to help gain more clearance, I also took off a majority of the random tabs on the side of the transmission case:


                          It doesn't look like much, but removing the tabs probably gained me another 1/2" of clearance along the top edge, which was were the most interfering was happening.
                          Tinker Engineering - 2014

                          Mica - 2000 BMW 323i - The one that started it all
                          Fiona - 1975 BMW 2002 - The Definition of Project Creep
                          Heidi - 1988 BMW M5 - The piece of BMW history
                          Silvia - 2013 Subaru WRX - Stock, for now

                          Comment


                          • #14
                            With more clearance made, it was time to lift the transmission in place. Normally I have my friend at the shop to give me a hand, but he had to work this weekend so I was on my own. After wrestling with the trans I welded up a jack adapter to hold it up better. This let me lift it into place until I could get it bolted to the engine.

                            You can see my handy jack adapter in this pic:


                            With the trans lifted into place I needed to make sure the entire assembly was in line with the differential. In order to do this I took the e30 driveshaft I picked up earlier and mounted it straight to the output shaft on the transmission with some solid couplers machined to the same thickness as the guibo. This would allow me to use the driveshaft as a 'straight edge' and eliminate any slop in the middle. At this point I also figured out that the stock e30 driveshaft was the correct length and bolt pattern to bolt up to the '02 diff (and obviously the e30 lsd I'm going to install in the near future). This was very good news since I'll no longer need to pay to get a custom length driveshaft made up.

                            Once the driveshaft was bolted in place and everything was lined up perfectly I fabbed up my transmission mount. You can see the top of it in this picture. It's help to the body with 2 8mm bolts that thread into a reinforcement plate on the underside of the body as well as a nut welded on the inside of the car.


                            With this in place the entire engine/transmission assembly is VERY solid. I may upgrade to poly mounts down the road, but we'll see how the rubber ones feel.

                            Here's a picture showing how much clearance there is between the steering linkage and the bell housing of the transmission. It's not very much at all, probably 1.5mm tops. I'll probably have to either notch or bend the linkage to gain some more clearance, but I'm going to wait and see if the transmission moves that much under spirited driving. It may be another reason to get the poly mounts.


                            Now for the money shots. I put the S54 throttle bodies in there to get an idea for what kind of clearance I would have between the brake booster. I'll need to fab up some kind of airbox for the tb's, so depending on clearance I may also go with a straight boosterless system.


                            Next on the list is probably going to be making the manifold to interface between the throttle bodies and the head. I'm probably going to end up casting a custom piece, much like what I was planning to do with the bike carbs earlier. This one will be a little trickier though because of the oil passage between the 3rd and 4th intake runner. I'm going to draw it up in CAD this week and see what we can come up with.

                            The ports on the head:


                            The ports on the tb's:


                            The huge benefit of casting is the transition between the two ports can be very smooth and clean. I'm thinking the overall length of the manifold will probably be ~ 10 cm or so. This should leave enough room for an airbox.


                            Also, the head should be back from the machine shop the beginning of this week. It got new exhaust valve guides, a 3-angle valve job, shaved 0.025" (not desired but necessary to flatten it out) and cleaned. The block is still waiting on me to make up my mind. The cylinder walls have some wear, and so if I reuse the stock 'i' pistons like I was planning it will probably have some piston slap when cold. So I'm taking the pistons in this week when I pick up the head and they will let me know what would work. I really don't want to buy new pistons if it can be avoided.

                            Oh, and I picked up a m52btub28 crank so now it will be a square (84mm stroke x 84 mm bore) 2.8l at the least. This saves me from having to shave the deck of the block down as well as bumps up the displacement. Win-Win
                            Tinker Engineering - 2014

                            Mica - 2000 BMW 323i - The one that started it all
                            Fiona - 1975 BMW 2002 - The Definition of Project Creep
                            Heidi - 1988 BMW M5 - The piece of BMW history
                            Silvia - 2013 Subaru WRX - Stock, for now

                            Comment


                            • #15
                              Well it seems school has taken over my life this quarter. Little progress has been made on the actual car. The good news is the quarter is over next week AND a lot of the details have been figured out/planned for.

                              A lot of parts have been rolling in the past few weeks:

                              New Hydraulic tubing flare tool. This can do all sizes of metric and american brake lines, as well as fuel lines and quick-disconnect for hydraulic applications. This will come in handy when it comes time to run the new brake and fuel lines.


                              Hmmmm... what could these be..


                              Eagle H-Beam connecting rods. 100g lighter than stock m20 rods and good for 600+ HP. That'll do donkey, that'll do.


                              AKG Motorsports Stage II Shifter Assembly. This will let me mount the shifter directly to the chassis. This will save some space as opposed to having to figure out a way to get the g260's shifter carrier and bushing in between the seats. And best of all, the stock old-school shifter still fits!


                              Next some VDO (they did they original factory gauges for the 2002 for those of you that don't know) series 1 gauges. Right now I just have water temp, oil temp and voltage. In the end I'll also have oil pressure, boost/vacuum and an a/f ratio gauge. (the a/f will most likely be an innovative WB analog gauge).


                              And finally, on the electrical side of things I got some deutsch pieces. I still need to get the crimper for the terminals, but my initial impression is very good.


                              Tinker Engineering - 2014

                              Mica - 2000 BMW 323i - The one that started it all
                              Fiona - 1975 BMW 2002 - The Definition of Project Creep
                              Heidi - 1988 BMW M5 - The piece of BMW history
                              Silvia - 2013 Subaru WRX - Stock, for now

                              Comment

                              Working...
                              X