 Tweet
Tweet
Finally came around to making a build thread for my 300zx after all these years. Don't expect anything immaculate because this has been my first build. There were definitely issues I could've avoided had I had my knowledge now, but hey, you live and you learn. Also for clarification, this whole first thread happened in the past so apologize for any lack of pictures. Once I get home from school I will have more stuff to post
The story began 4-5ish years ago when I was 16. I fell in love with 300zx's through high school and was dead set on getting one, and after a few years of working my bus boy job I finally had the money saved up. A clean one popped up in my area at a Lexus dealership and I decided to pull the trigger on it.
When I got to the dealership I knew I had to have the car. 1990 Nissan 300zx 2+2, NA/Auto (Dad wouldn't let me get a stick/boosted car for first car, sad, I know) old man owned, 60,000 original miles, no rust, no scratches or swirls in the paint, a beautiful off-white and a near immaculate interior. I ended up paying about $6500 for it, not a terrible price, probably could've gotten a better deal from a private seller but this was too clean to pass up.
[img]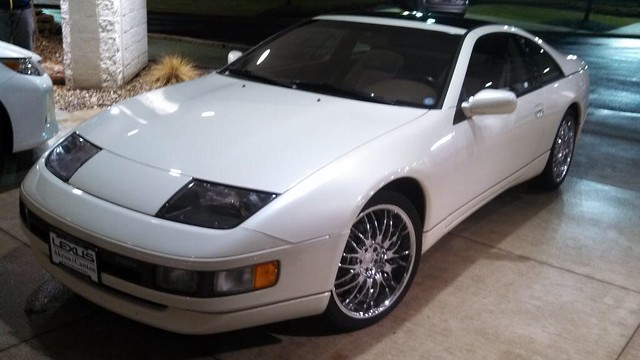 [/img]
Once I got it home I immediately wanted to start "modifying it" so I did what every high schooler does and plasti-dipped the wheels. Which I ended up regretting after taking hours to peel it off lol
[img]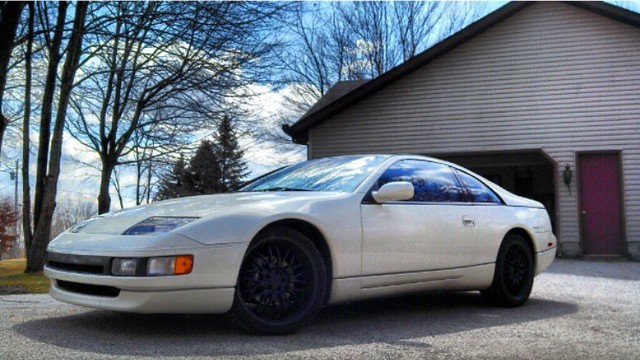 [/img]
[img]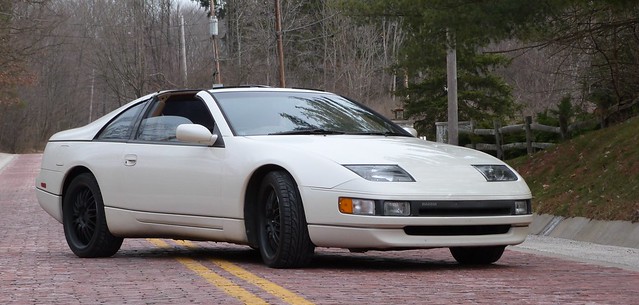 [/img]
[img]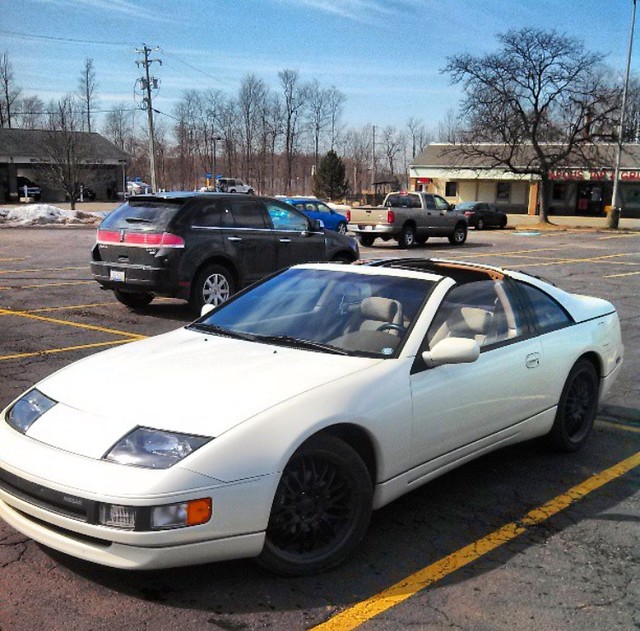 [/img]
Heres me and my buddy Rudy with his A4. We fell in love with cars together and you'll see more updated pictures of his car later in this thread.
[img]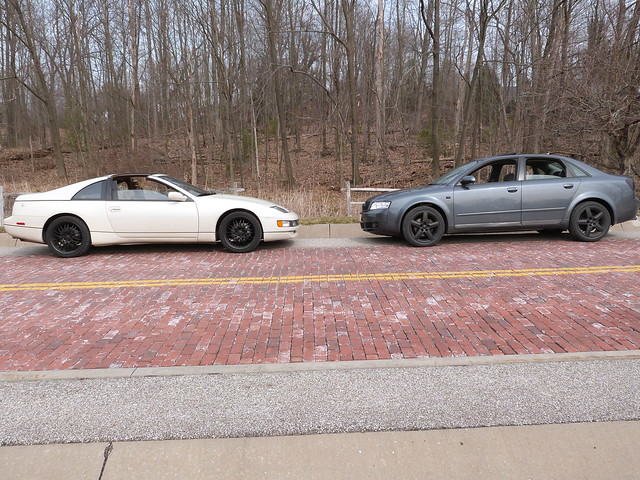 [/img]
Took the plasti-dip off and got my car tinted by my buddy Tyler who drives the lowered Gen 3 Camry in the background. 35% windshield, 20% brow, 5% all around (wsdycsybi), now no one could see my ugly mug while I'm driving around lol, sorry for the crappy photo too.
[img]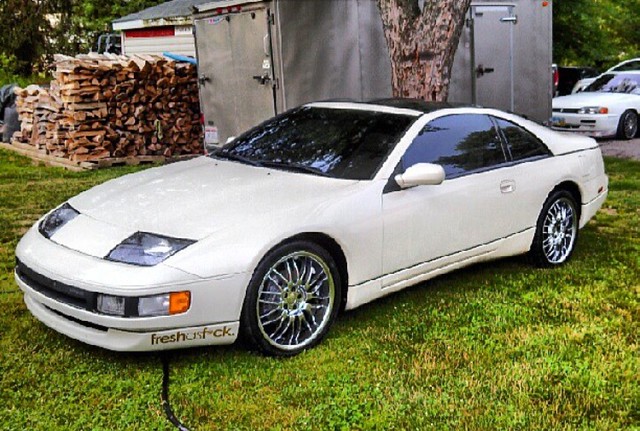 [/img]
[img] [/img]
[img] [/img]
Also won some limbo contests which was fun
[img] [/img]
And then it hit me
[img] [/img]
Since I owned the car I fell in love with the stanced look. Being an NA/Automatic I didn't have much functionality to lose and since the motor was running well and still low on miles I didn't want to mess with (or pay for) something that wasn't broken to attempt a TT/5 speed swap. So, I took the leap and picked up some coilovers and decided to take the "stance" route, thus starting my bank account draining passion and beginning the journey of Eliza.
[img]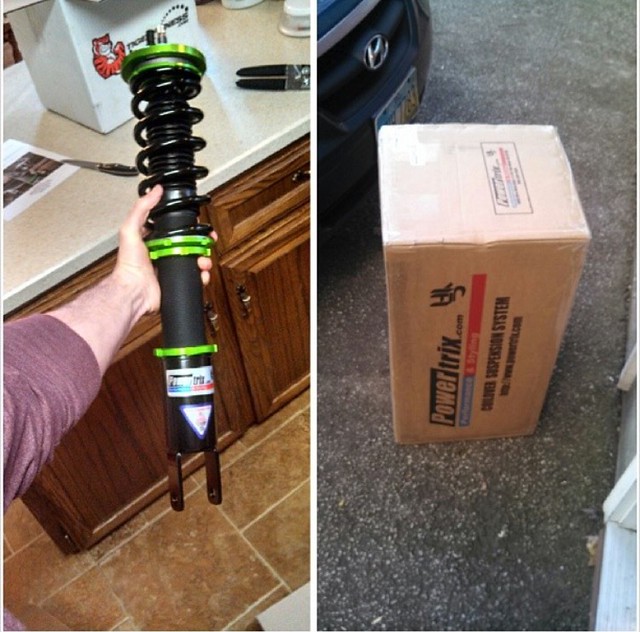 [/img]
After hearing nothing but good things about the company, I decided to pick up these Powertrix SuperStreet coilovers for about $1000. Expensive but worth it; I never had any issues with them and after owning them for 4 years I still am amazed with their quality. Charles the owner does an awesome job with customer service and got these bad boys shipped to my house in no time.
[img]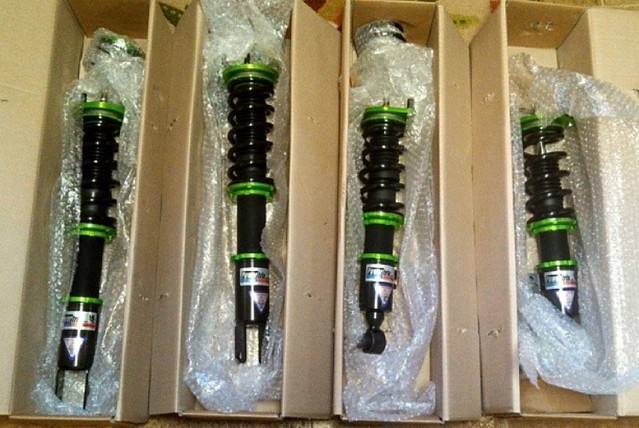 [/img]
After multiple cans of PB Blaster and a few busted knuckles, the coilovers were on but there was an issue. I wasn't pleased with the ride height and knew something must be down about it, but the funds just weren't available at the time.
[img]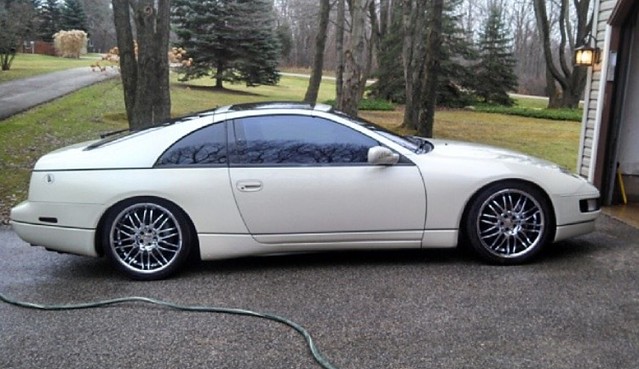 [/img]
[img]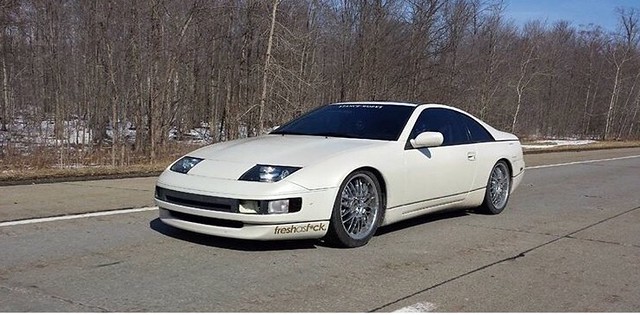 [/img]
Heres me and my buddy Tyler with his clean lowered Camry
[img]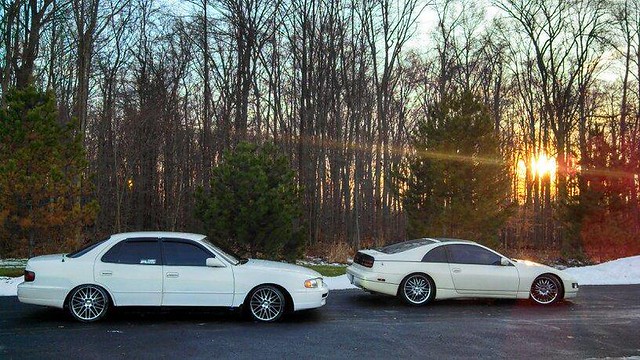 [/img]
I wanted to be low and this definitely wasn't low. Even at this height I would rub when turning and my un-rolled fenders kept rubbing on my rear tires. So, I did some research and looked into my first set of wheels. After a few months of saving I picked up a set of Varrstoen ES6's for about $1000, bought some cheepy-deepy Kuhmo or Federal tires, rolled my fenders and threw them on. This was definitely a big check point for me with this car and I was and still am pleased with the outcome.
Heres the test fit. 18x9.5 +22 Front, 18x10.5 +22 Rear
[img]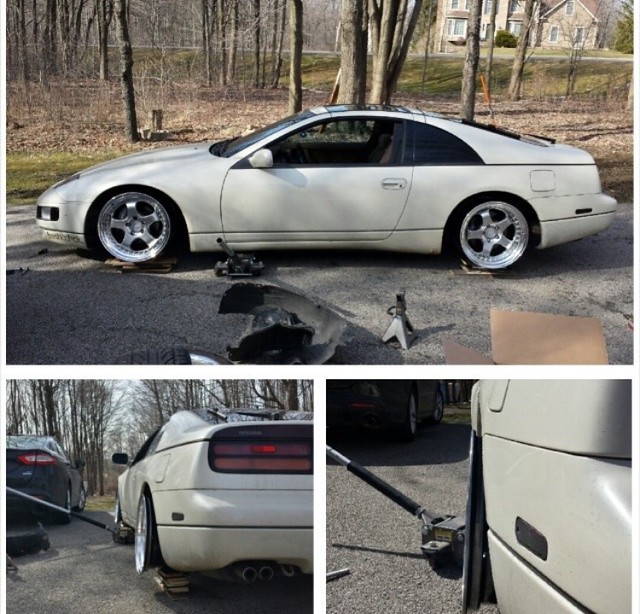 [/img]
Took the wheels and tires to my local tire shop and they thought I was crazy. They stretched these for me and immediately banned me from their garage because they thought the car was unsafe (dat mismatched thread tho)
[img]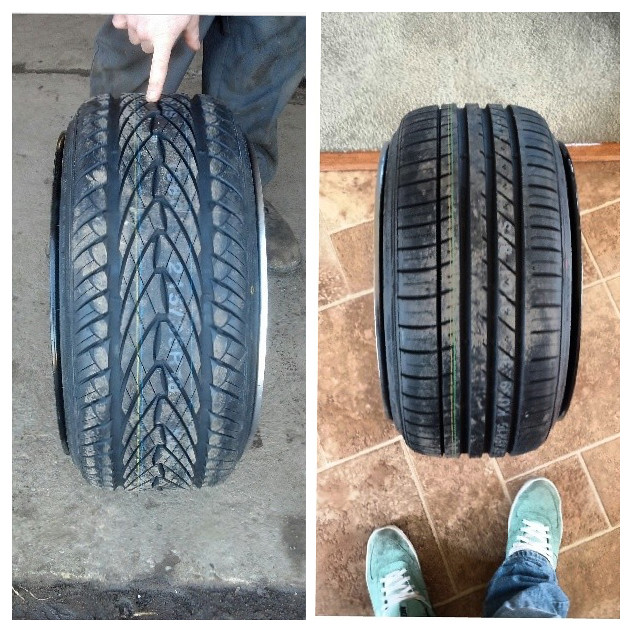 [/img]
[img]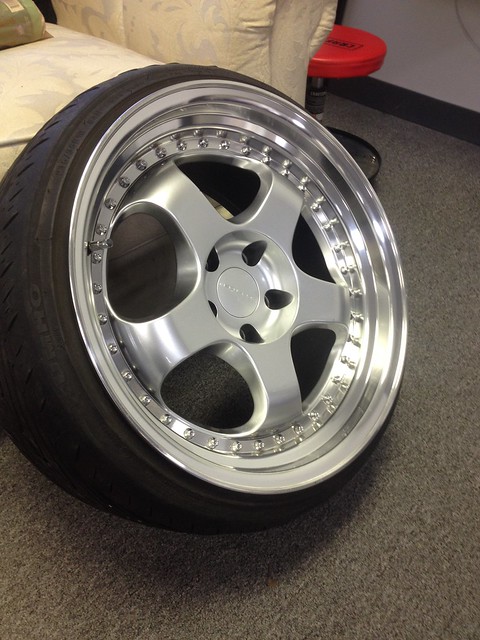 [/img]
And heres the result, super simple style, nothing too flashy and it did the car well imo
[img]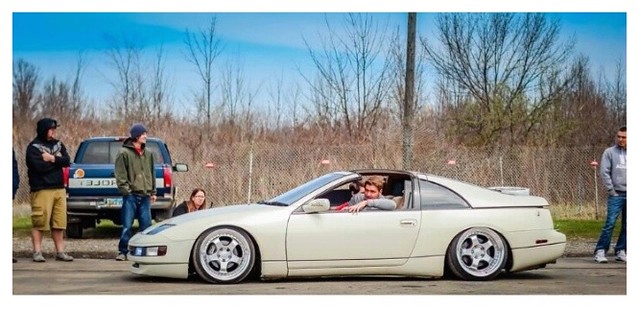 [/img]
[img]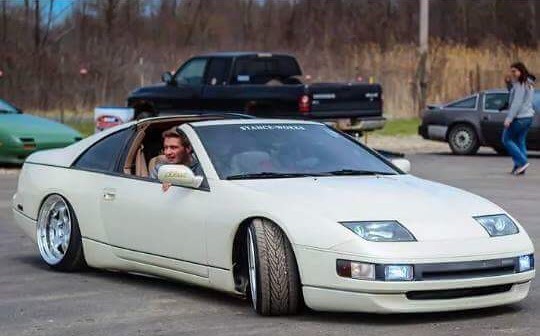 [/img]
[img]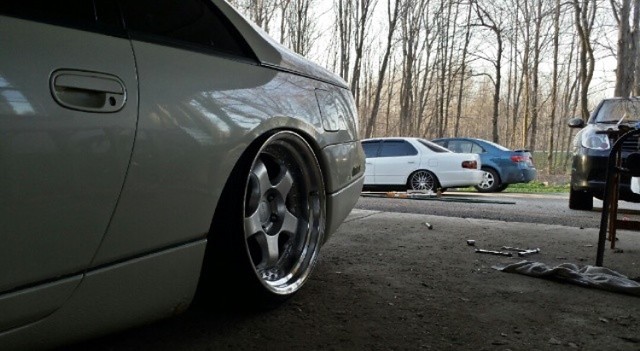 [/img]
Me and my Tyler again
[img]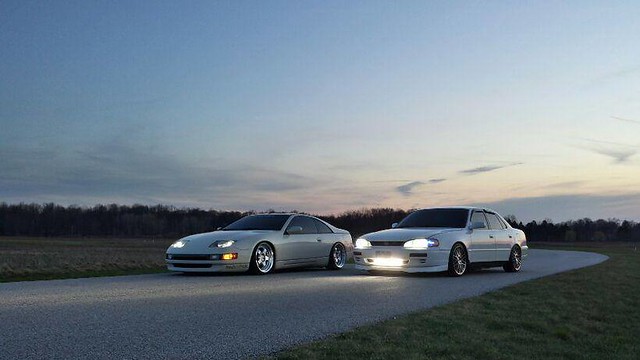 [/img]
[img]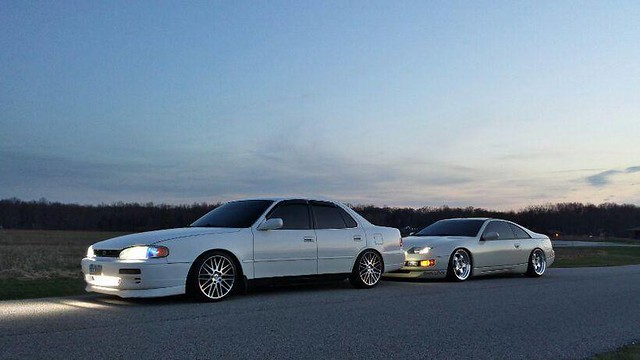 [/img]
The car sat like that for a few months until I ran into an issue. The car started to get some bad rust on the rear of the side skirts and on the passenger side fender and I knew I had to fix it before it spread. I took it to a few garages for quotes and was shocked. It was not the rust that was going to be expensive, it was the paint that was killer. Some places quoted me over $2500 (on top of the rust repair cost) just to color match the repaired area and I just simply did not have the money for that. Supposedly the off-white of my car was difficult to color match, thus making it time consuming and expensive. So, I went ahead with the rust repair, told the just to primer the repaired spots and I started looking into vinyl wrap
The next few weeks I spent sticking square samples of vinyl all over my car to figure out what I wanted only reason I have this picture is because my exhaust got ripped off on an overpass and it punched a softball sized hole in my gas tank and this was the final resting point until the new tank from Texas came in. You can also see some of the primer from the rust repair
[img] [/img]
I finally decided on a vinyl color and started taking pieces off the car to prep. I always liked how this car looked without bumpers/fenders. Definitely got some funky looks driving around in full project mode too
[img]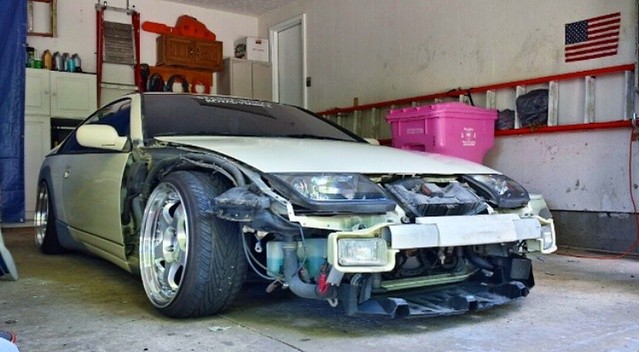 [/img]
[img]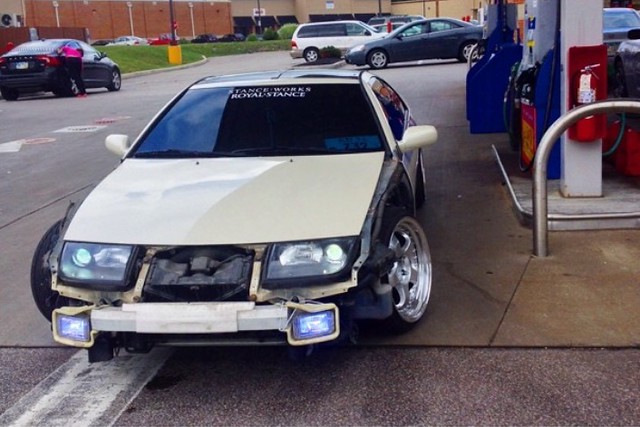 [/img]
Wrapping the car was definitely a learning experience considering it was my first time. The prep work took forever but it helped ease the process of laying the vinyl and everything went smoothly. There were and still are some flaws, but again, I can't complain since I saved a few grand by doing it myself. Id like to thank my friends Ross and Brian for all the help as well, the wrap definitely wouldn't of gone as smoothly if they weren't there. During the prep we also deleted my rear windshield wiper (no pictures) and threw on some 15mm spacers up front to help with the fitment
[img]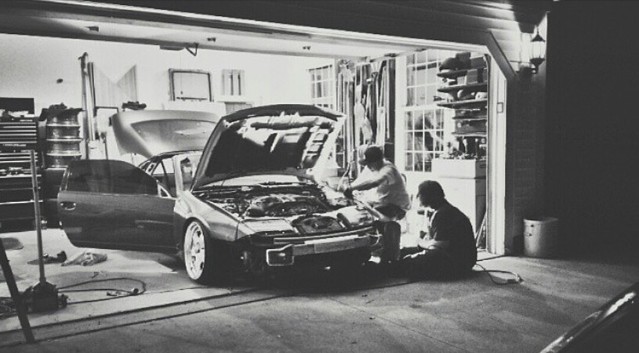 [/img]
[img]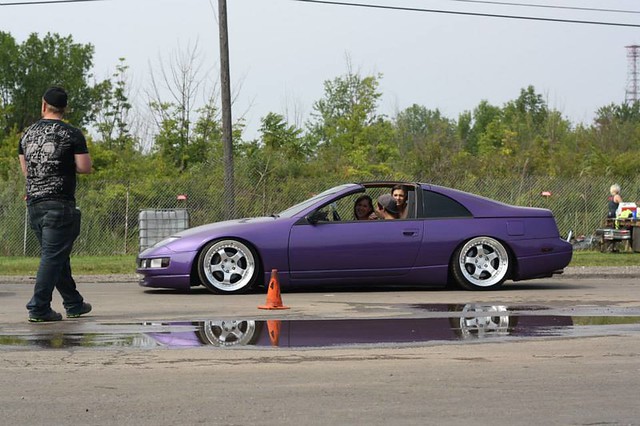 [/img]
[img[ [/img]
A quick transformation photo with Rudy who finally got on coilovers.
[img]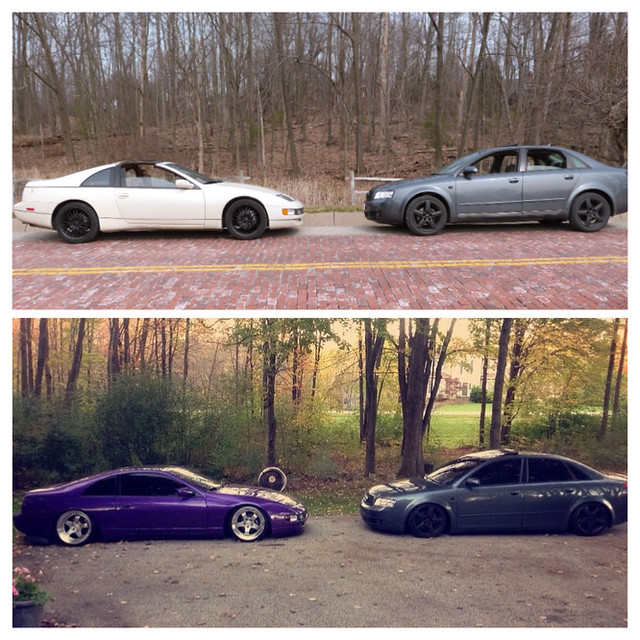 [/img]
Also purchased an 04-07 STi rear diffuser which fit with nearly zero trimming needed. Ended up ripping it off on the highway and trimming it up/re fiber glassing it in the future, oops.
[img]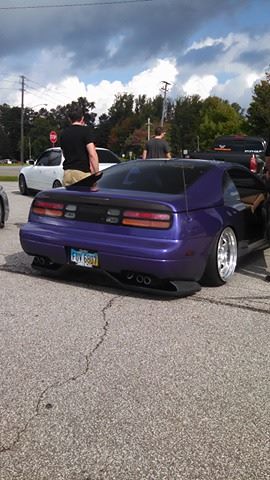 [/img]
[img] [/img]
[img]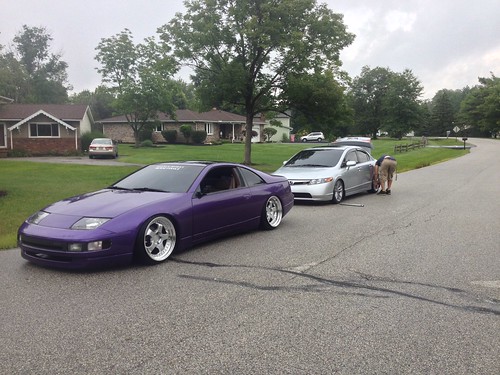 [/img]
[img]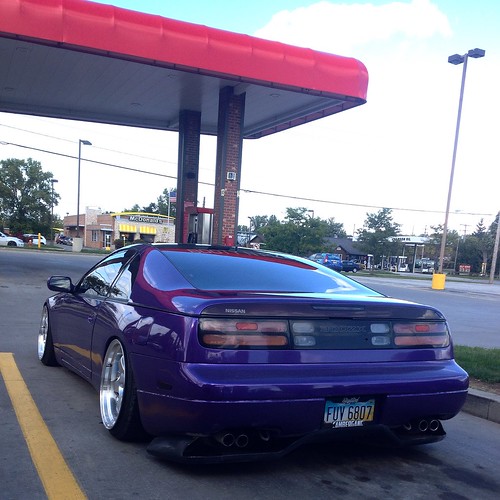 [/img]
Picked up an NRG hub and hardwood Grip Royal steering wheel to add a little flare to the interior
[img]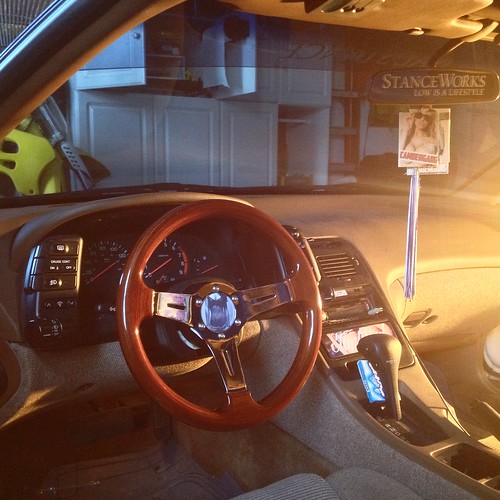 [/img]
Also won some more limbo contests
[img] [/img]
Picked up some piping and had a cheap exhaust made up until I could afford something more legitimate. 2.5" piping from the cats, muffler delete and a 3" tip, it wasn't anything terrific sounding, but still better than hearing nothing.
[img]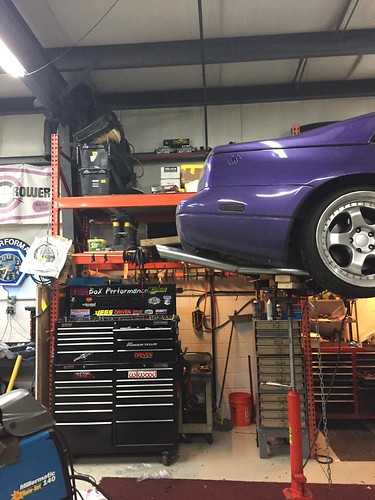 [/img]
The car stayed like this for another half a year or so until I had the money to buy.....yes....real wheels
I always liked these wheels and was curious about what they looked like on my car and picked them up for a decent price (paid about $2000). Lips needed a good polish and the faces needed redone, but that was a minor issue. 19x10.5 +10 front, 19x11.5 +10 rear
[img]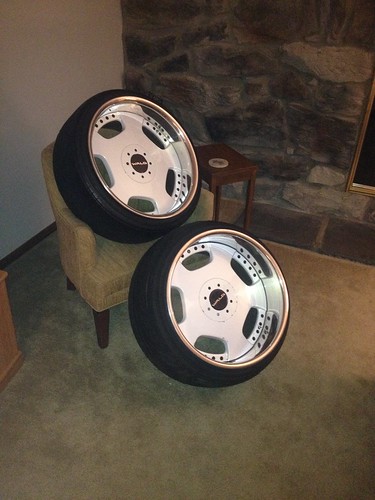 [/img]
[img]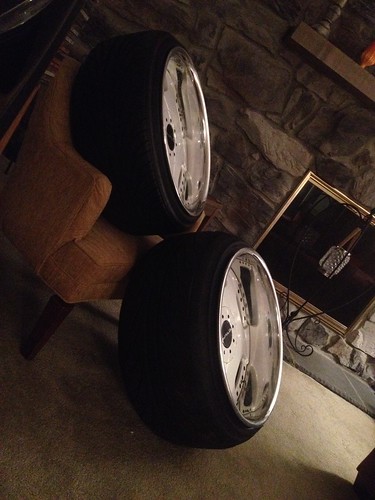 [/img]
[img]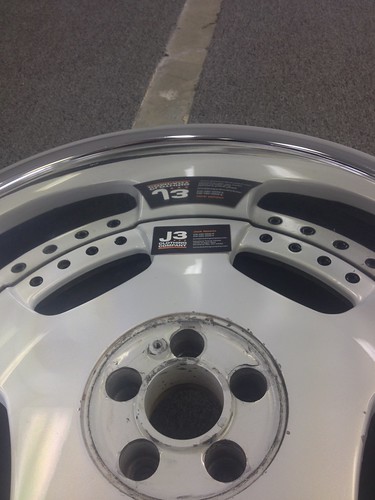 [/img]
Wider wheels meant I needed some suspension upgrades. I picked up Powertrix rear camber arms and Powertrix rear adjustable toe arms as well as new Swift springs with 16k/20k spring rates
[img]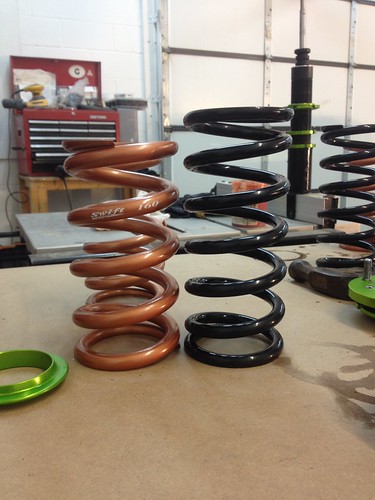 [/img]
Getting them to fit was a ton of work, we had to do a ton of fender pulling which is when I ran into a big issue. Turned out the shop I took my car to for rust repair a ways back did a trash job, all the rust was back and my passenger side fender got absolutely mangled from pulling. So I grinded off all the remaining rust and left it how it was until I had money to fix it since I had zero body work experience
[img]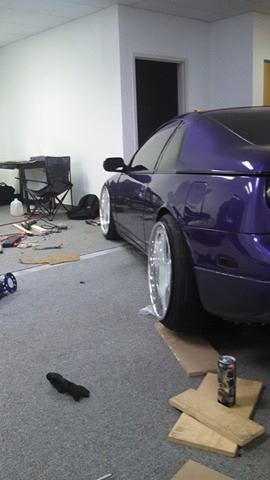 [/img]
The non fucked up fender
[img]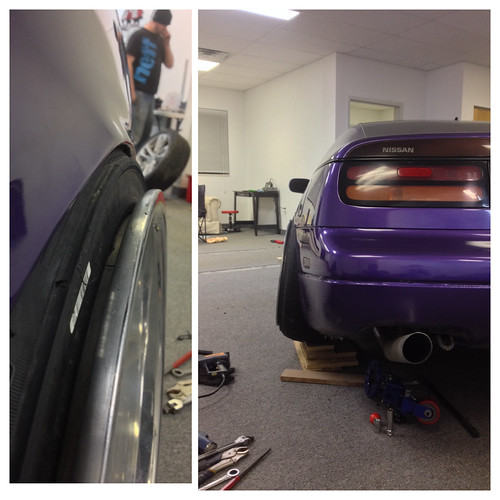 [/img]
[img]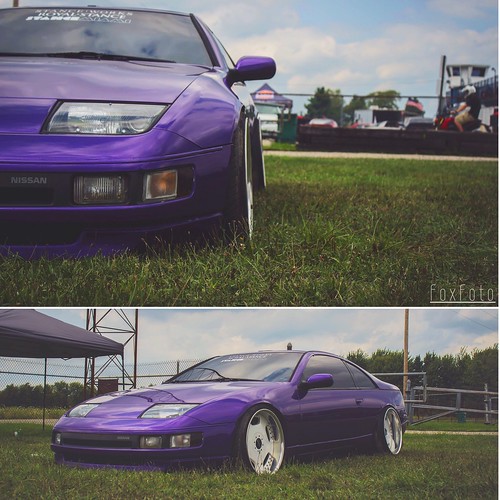 [/img]
[img] [/img]
[img]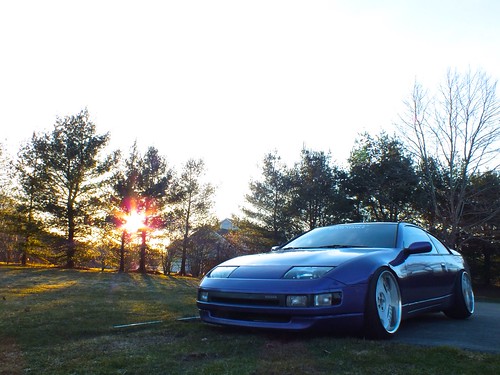 [/img]
[img]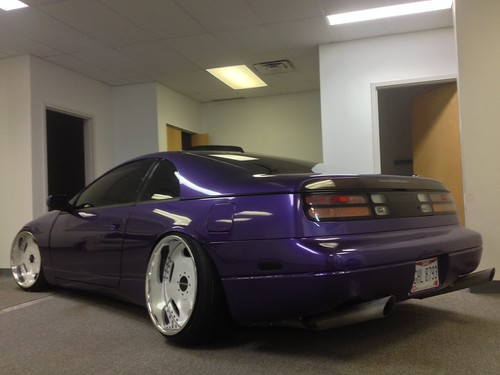 [/img]
[img]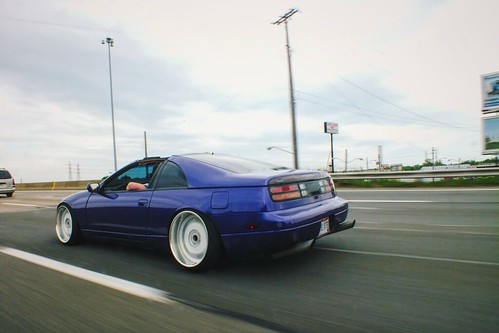 [/img]
No truck in the family means my car is the workhorse
[img]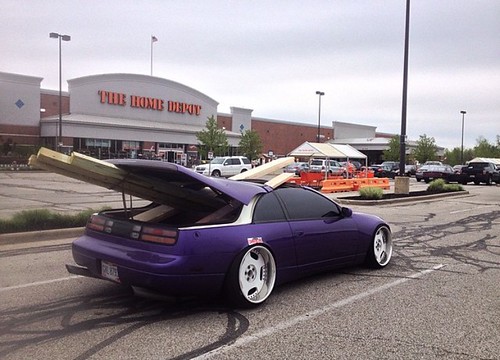 [/img]
Once I had to buy new tires I decided it was time to take apart my wheels and re-do the faces. I was debating between doing white again or trying a new color and opted to try something new. I was hoping for more of a bronze/copper color (which is what it looked like online) but it came out more of a brown. In some pictures I love the color in others not so much, its strange, oh well, these wheels were short lived anyway and I turned around and sold them after a season.
I went to North Coast Powder Coating up near Cleveland and they did a fantastic job. Regardless of the color the faces came out immaculate and they threw in powder coating my hardware for a sweet deal so I got them done in Cocaine White
[img]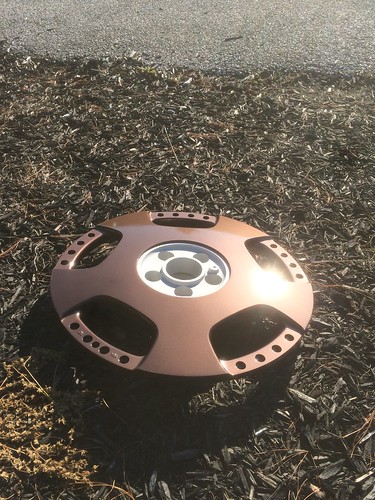 [/img]
[img]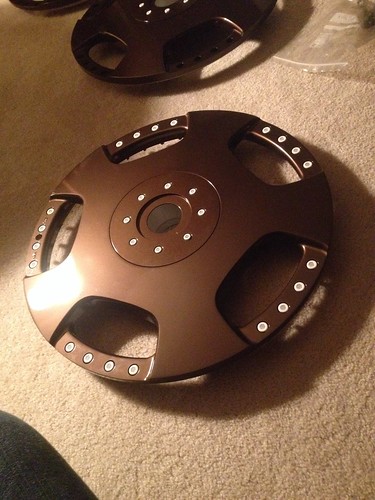 [/img]
Picked up some 225/35 and 235/35 Dunlop tires and turns out they had some stiffer sidewalls than i expected so I was left with a pretty aggressive stretch in the rear. I wasn't too excited about that at the time and how it could have effected the cars drivability, but it was too late to change. I ended up never having any issues with the stretch even on long drives
[img]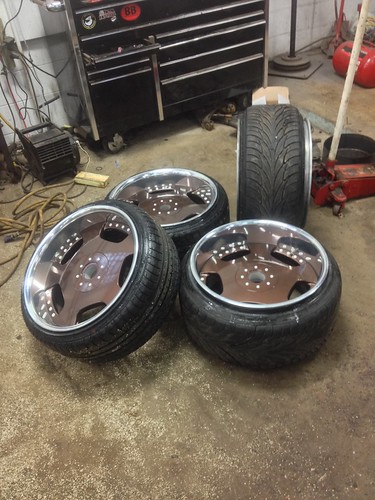 [/img]
[img]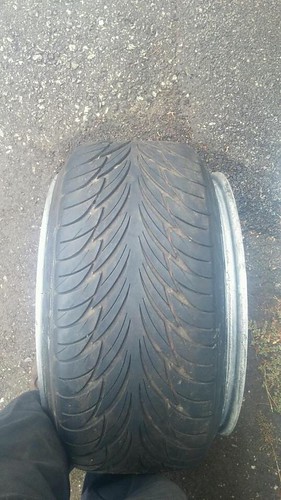 [/img]
Also got my car shot professionally for the first time by my good friend Sean Fox
[img]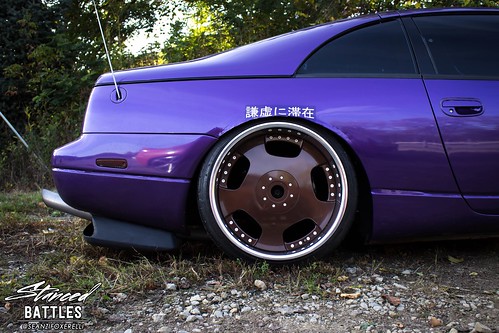 [/img]
[img]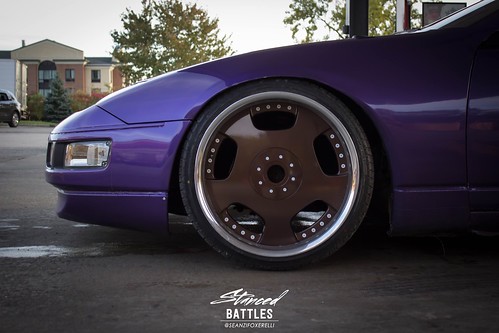 [/img]
[img]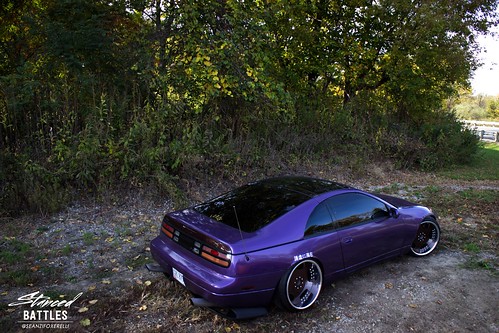 [/img]
[img]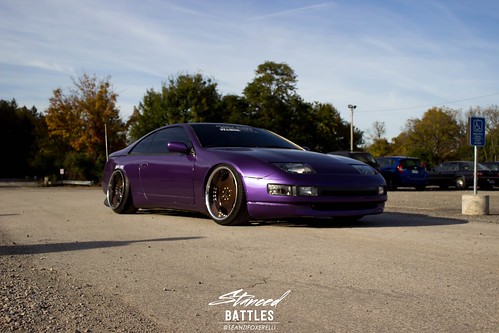 [/img]
[img]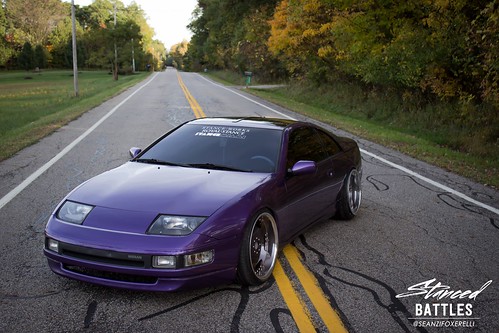 [/img]
[img]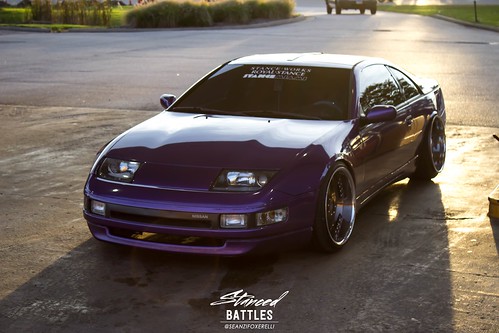 [/img]
[img]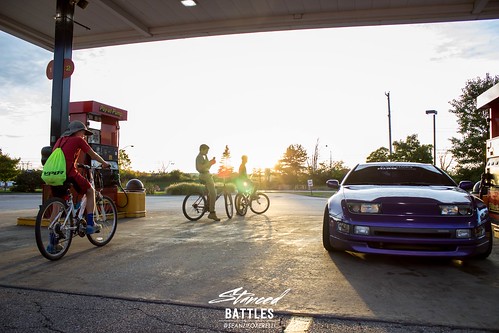 [/img]
[img]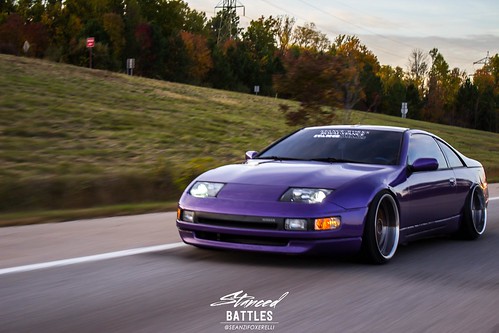 [/img]
2.5 year old vinyl still holding up well and looking beautiful
[img]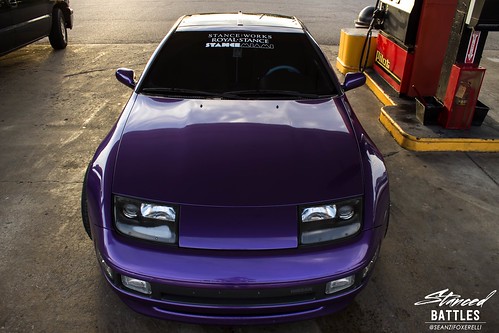 [/img]
[img]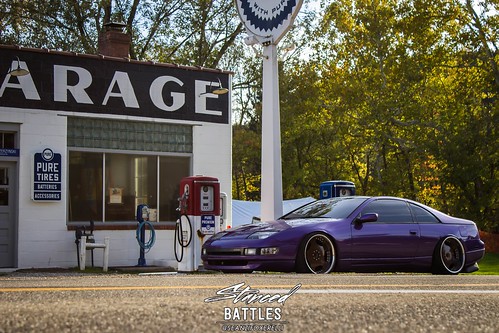 [/img]
[img]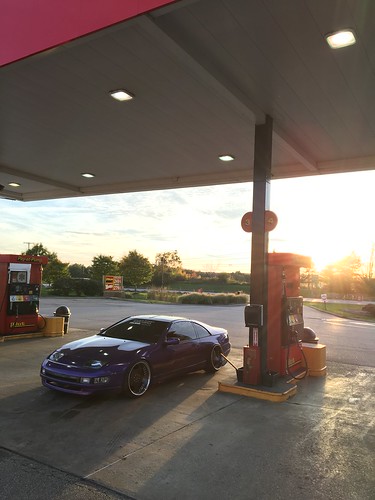 [/img]
[img]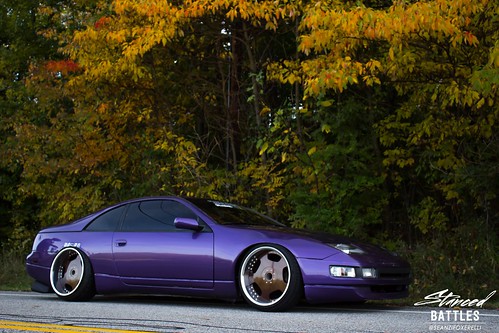 [/img]
[img]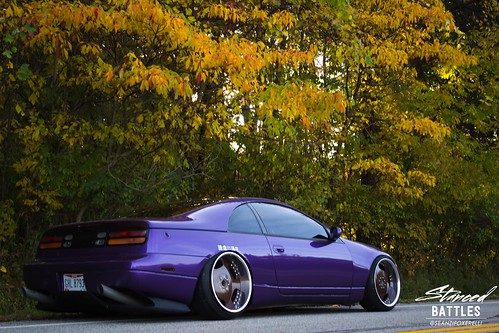 [/img]
[img]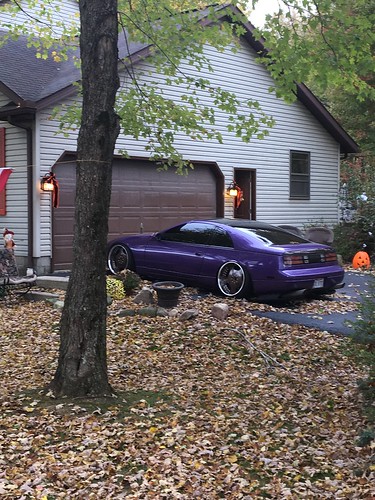 [/img]
Trailered Eliza to H2Oi in 2015 and had a blast despite the hurricane. Didn't get any tickets either! Also very happy with how my fitment ended up, best Ive had yet (Despite my now fucked up fenders)
[img]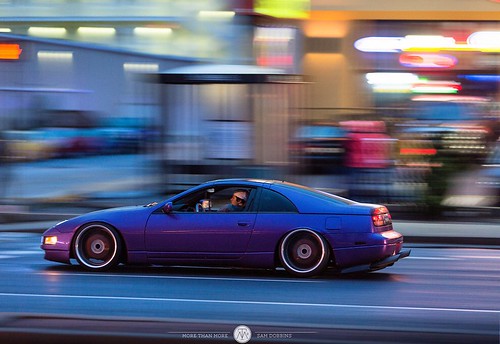 [/img]
[img]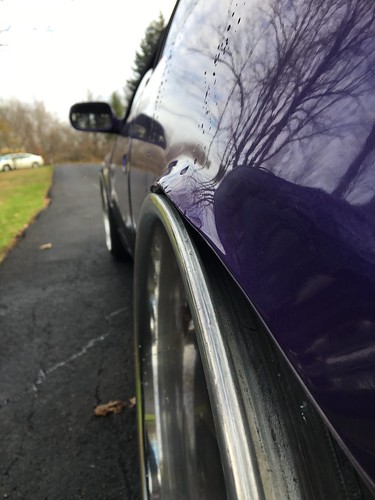 [/img]
[img]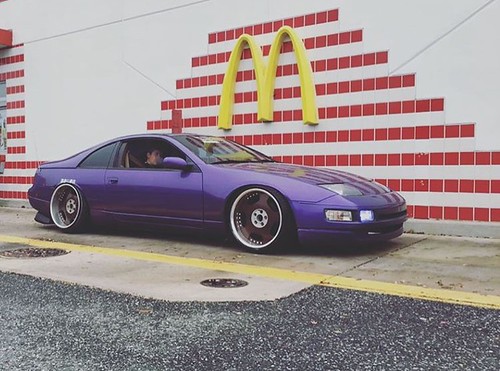 [/img]
Talk about a transformation! It really is crazy to look at this and see such a change, its pretty cool seeing your vision coming to life slowly but surely
[img]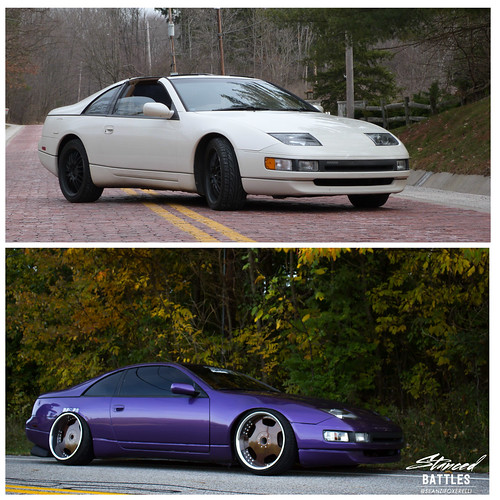 [/img]
[img]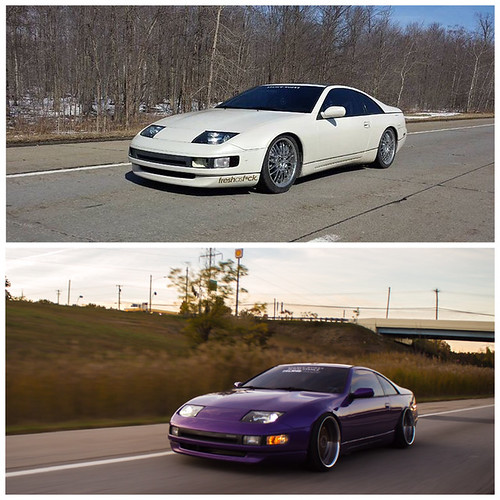 [/img]
As much as I loved my new setup, after a few months of constantly smashing my fenders on my lips over every bump got annoying and I was constantly worried to take my car on the highway because of the stretch. I decided it was time to really invest into the car and make it actually drivable again, while still staying within the "stance" realm. So I began my research on air ride for my car for the first time. I couldn't even fathom owning bags 3 years ago when I was in high school and here I was buying them for my first car! It was and still is a incredibly cool experience.
After a few weeks of emailing around looking for quotes, I ended up buying everything through Open Road Tuning who helped me out a ton. I went with Airdynamik struts, Airlift 3P management, a 4 gallon tank, 1/4" lines and x2 444c compressors. Everything came relatively soon other than my struts which literally took forever. Granted, I love Airdynamik's product, but it took almost 3 months for the struts to arrive at my door long after everything else and getting into any contact with the company was a disaster. But still, I didn't care that much cause I officially owned bags and I was hyped
[img]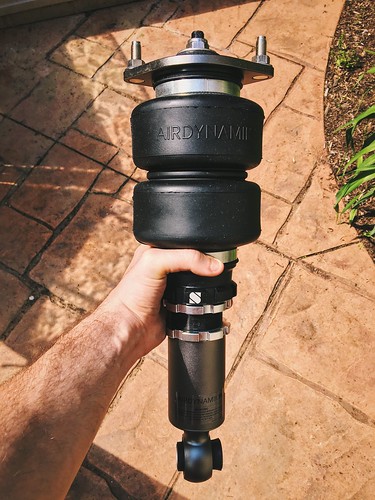 [/img]
[img]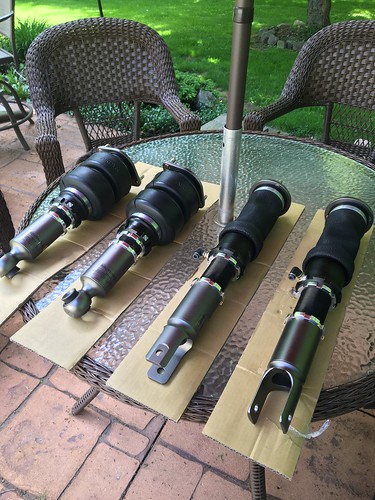 [/img]
Here she sat after a 6 month slumber, my '97 Civic is an admirable steed and toots me around town on a daily basis
[img]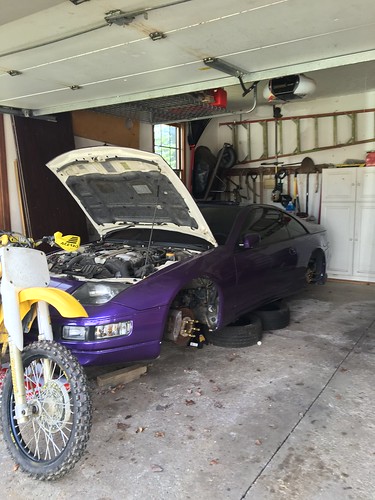 [/img]
[img]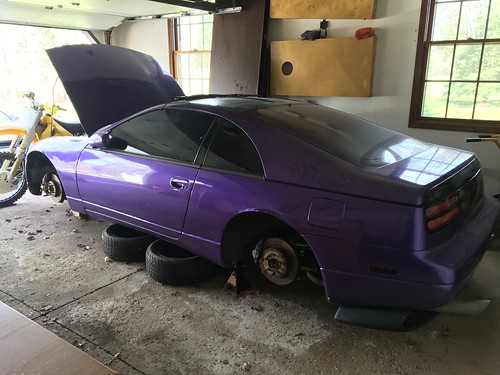 [/img]
Taking the coilovers off is more work than people expect. You gotta take out half the cars interior to get to the rear struts. I definitely want to create some type of hidden door to get to the struts without taking the interior out in the future
[img]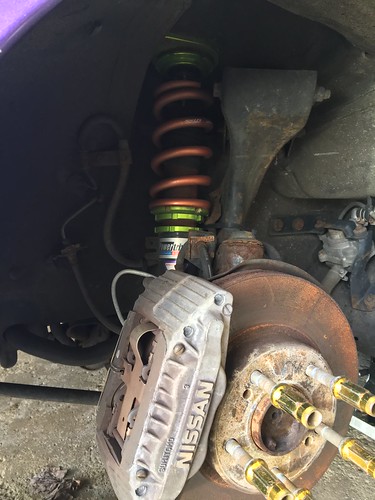 [/img]
[img]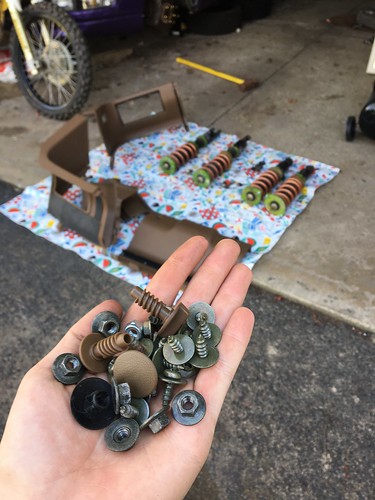 [/img]
Cleared everything out of the trunk and gave it all a nice wipe down before work began
[img]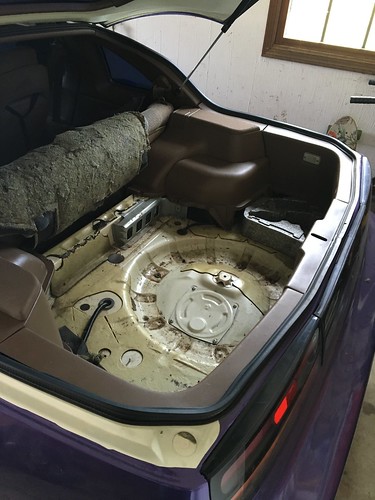 [/img]
Cut out the carpet from my trunk to create a template for my hardwood floor and picked up a sheet of birch from Home Depot
[img]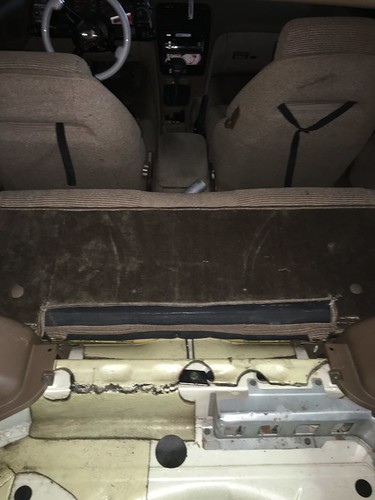 [/img]
[img] [/img]
[img] [/img]
[img] [/img]
[img]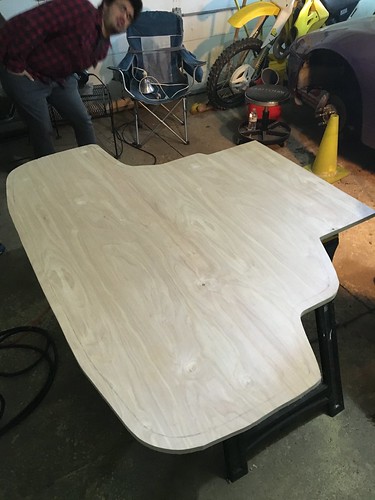 [/img]
Shaping the sheet of wood to the plastic trim pieces in my trunk was a royal pain and took me a few tries before I liked the outcome. We also found out we couldn't fit the entire cut out sheet into the trunk so we cut it into 3 pieces and puzzle pieced it back together once inside the trunk
[img]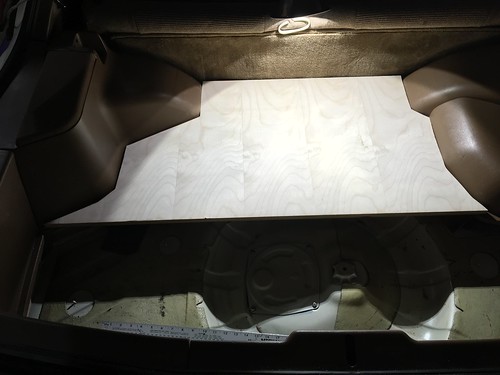 [/img]
Non matching mood pattern because I messed up and re did the top section lol
[img]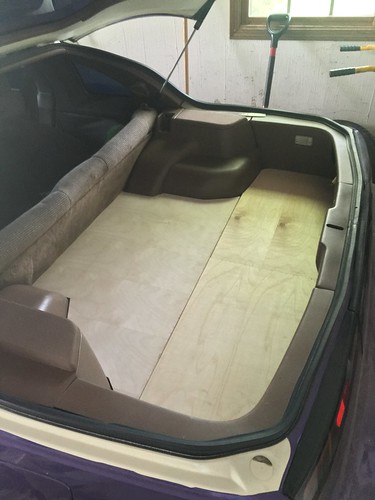 [/img]
[img]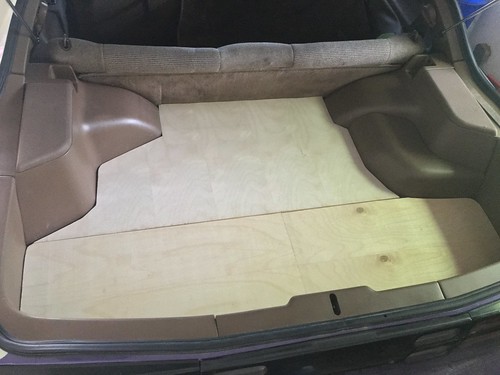 [/img]
Drilling the holes for the compressors and tank
[img]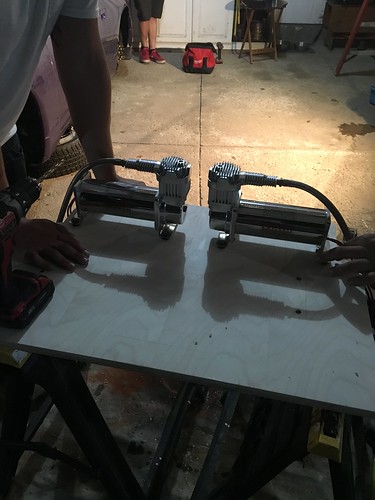 [/img]
Staining the back section so we could get everything mounted and set up in the trunk. I think I ended up staining this piece 3-4 times until I got the shade I wanted and I still haven't done the other two pieces yet lol
[img]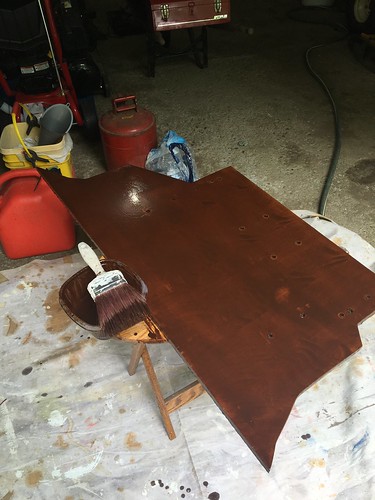 [/img]
Laid everything out in the trunk to gauge how it would look. Ran all of the airlines to the struts and ran the wiring harness to my battery/fuse box in the front of the car. I ran the airlines along side my brake/gas lines and zip tied them away from anything sharp or hot and ran the wiring inside the car under the carpet on the passenger side. I have no pictures of this because it was pretty straight forward and boring
[img]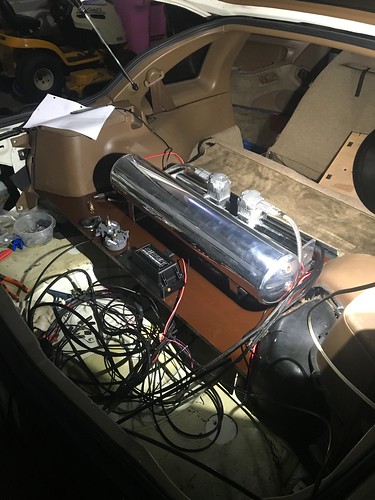 [/img]
Finally mounted the tank and compressors as they will stay, bolted the manifold to the floor of the trunk, ran my exhaust line outside of the car, ran the lines from the struts through factory holes in the trunk (make sure you use a grommets!!) to the manifold, hooked all the lines up to the tanks/compressors/etc, mounted my water trap, ran my management controller under the back seat, under the carpet and through a drilled hole in the back of my center console for easier accessibility, plugged the fuse in and boom, the install was finished. For being my first time doing anything with air ride, the process was pretty straight forward but tedious. Couldn't thank my friends who helped enough either
[img]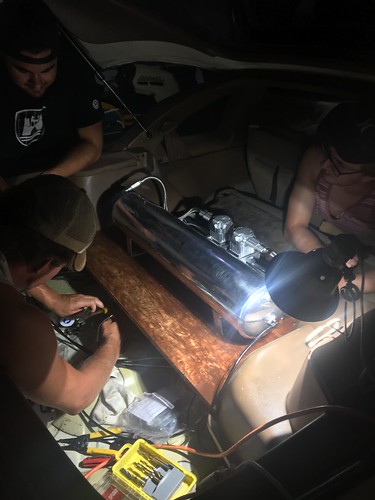 [/img]
While the air install was going down, I swapped out my extended wheel studs from when I ran my 15mm spacers, to OEM length studs. After PB Blasting the crap out of them, they pounded out decently easily, I suggest putting a lug nut on the end of the studs so the edges don't flare and get stuck. To put in the new studs I used two washers and a lug nut to thread them in. I wedged a breaker bar between the old studs and the ground to keep the hub from moving
[img]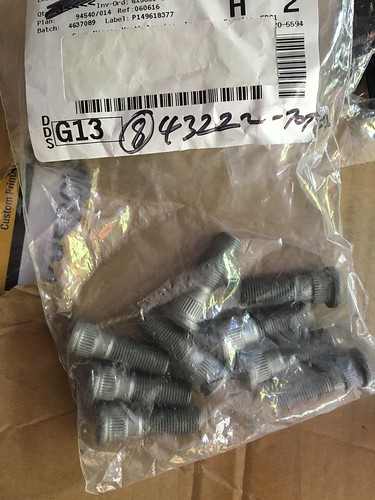 [/img]
Extended vs OEM length
[img]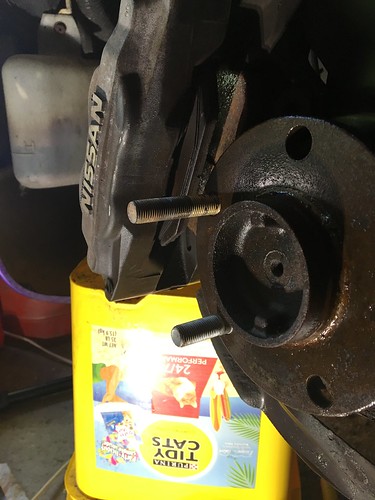 [/img]
The work station
[img]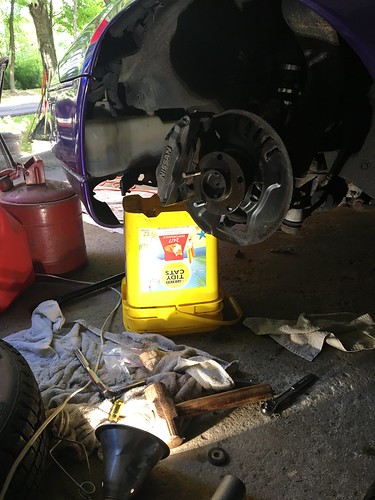 [/img]
The notorious washer/lug nut combo
[img] [/img]
You also have the rare opportunity to see my state of the art hub motion stopper in use
[img]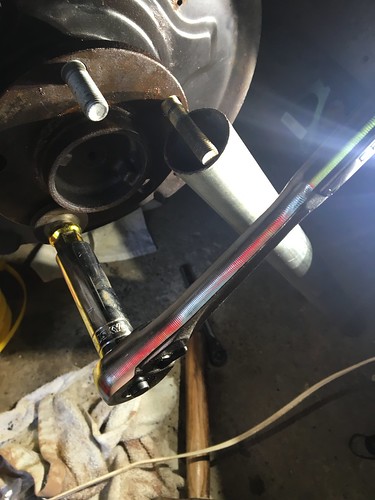 [/img]
After selling my Wald's, Eliza obviously needed a new pair of shoes. I heard a lot of good things about the company VR Wheels and saw some of the gorgeous wheels they made so I picked up a set of 18" Work VS-SS from them. Paid about $2100 for them and VR rebuilt them to the specs I need fo' free which is awesome. I went with the same specs as my last wheels 18x10.5+10 front, 18x11.5+10 rear
[img]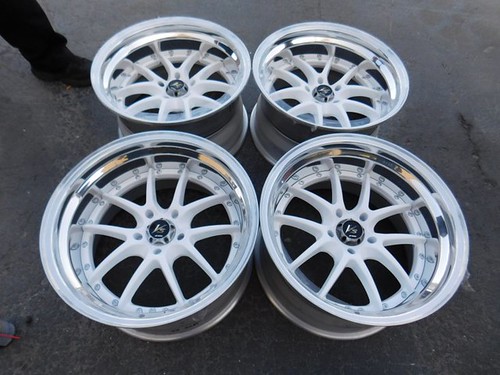 [/img]
Picked up a set of 225/35 and 245/35 Nankang NS20's and the stretch came out beautifully. Not too much, not too little
[img]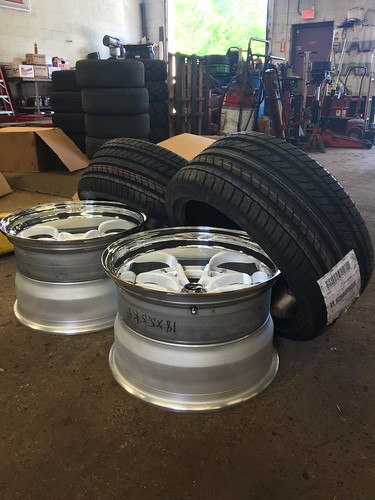 [/img]
[img]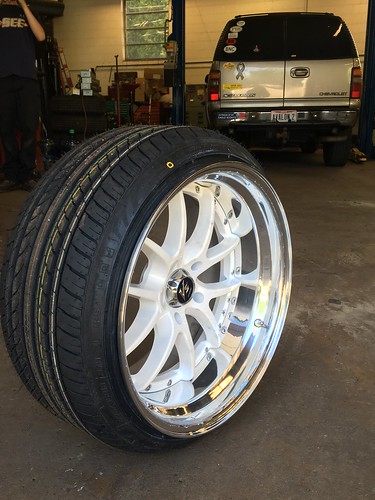 [/img]
[img]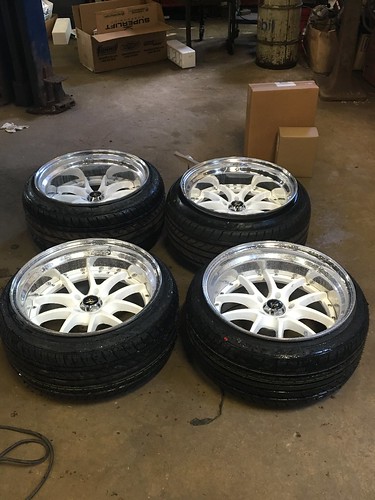 [/img]
And heres the outcome! Pictures are from my shoot with Sean Fox again, this time for my cars first website feature for Slammedenuff!
[img]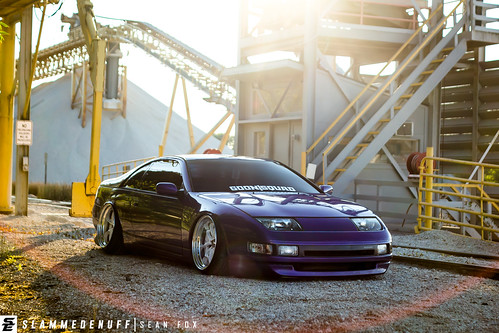 [/img]
[img]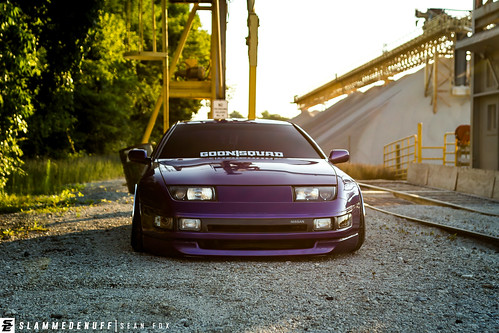 [/img]
[img]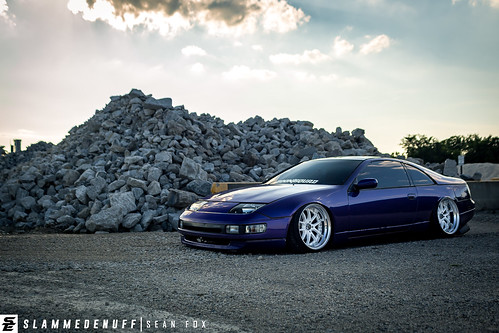 [/img]
[img]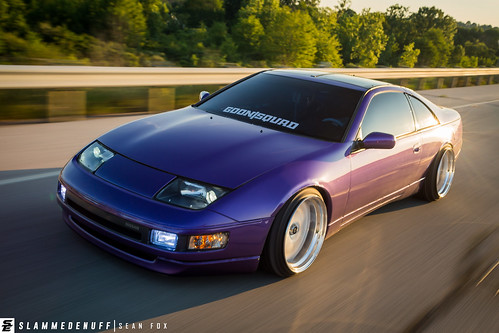 [/img]
[img]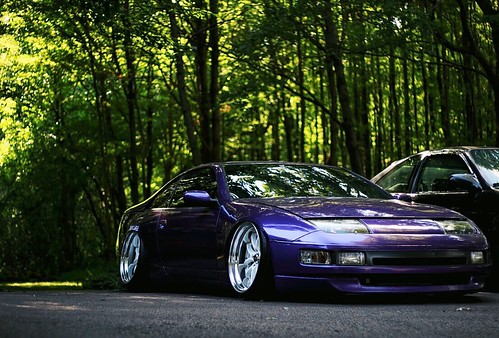 [/img]
The wheels came out phenomenally
[img]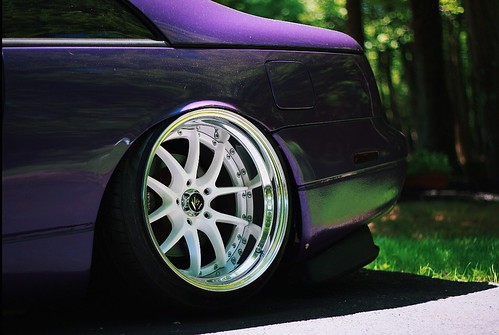 [/img]
[img]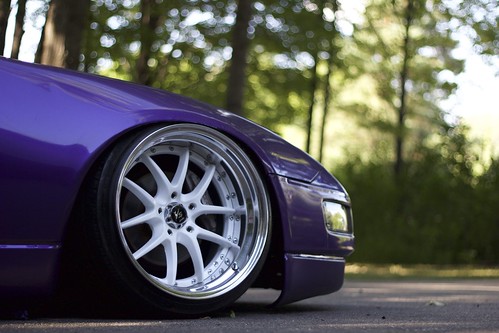 [/img]
[img]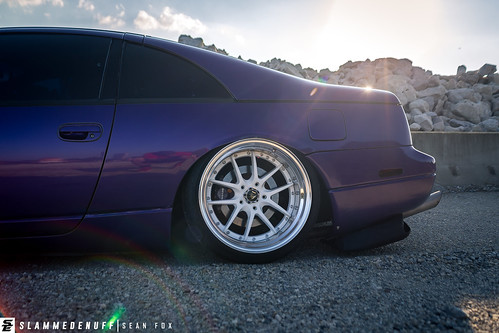 [/img]
[img]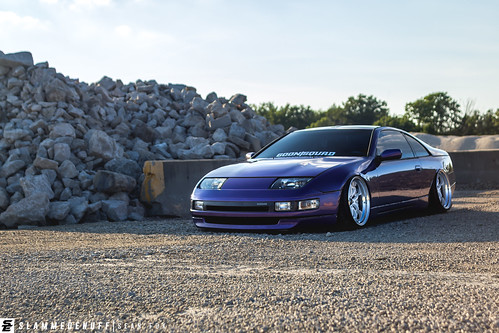 [/img]
[img]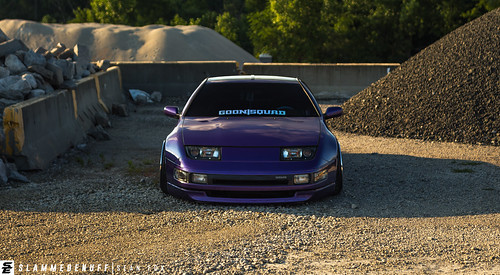 [/img]
Took the plunge and drove Eliza to H2Oi this year and put over 1000 miles on her with zero issues. I now don't have to worry about debeading a tire (as much) as before or stress about ripping my exhaust off again. Buying bags was definitely one of the smarter investments I have made for this car and Im glad I did.
[img]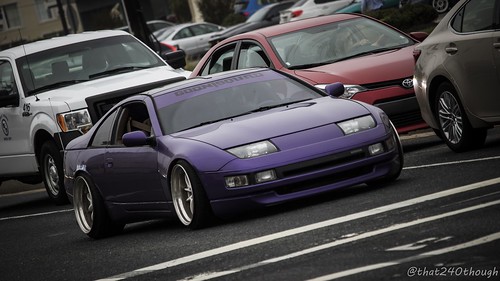 [/img]
[img]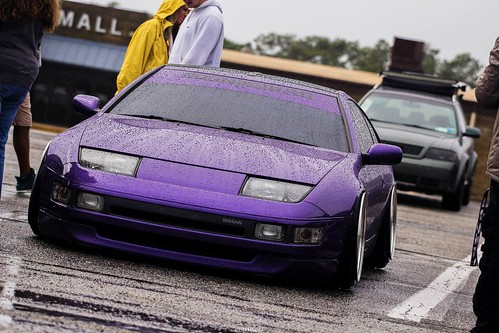 [/img]
[img]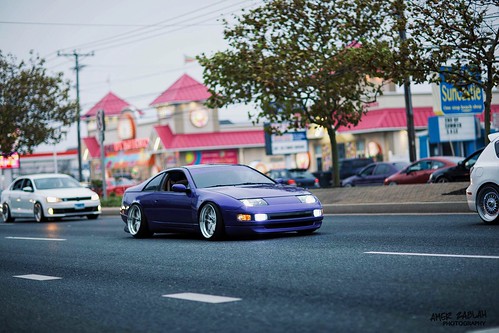 [/img]
[img]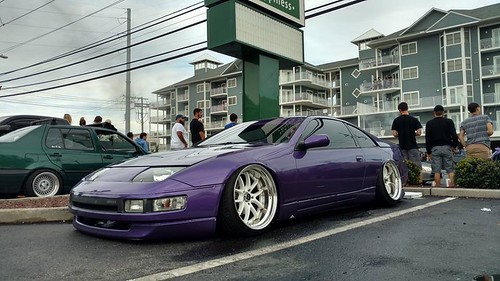 [/img]
I'm beyond ecstatic and very proud of how this car has turned out over the past years; thousands of dollars and thousands of hours have been put into this project and its safe to say I have finally built one of my dream cars. Cant wait to get home from school and start working on it again! Im hoping to do a set of retrofit headlights, finish the trunk completely, wide body the car or just fix the fenders (depends on money), do a full custom exhaust and DIY some Jspec taillights. So Ill have some good stuff for you guys in a few months!
[img]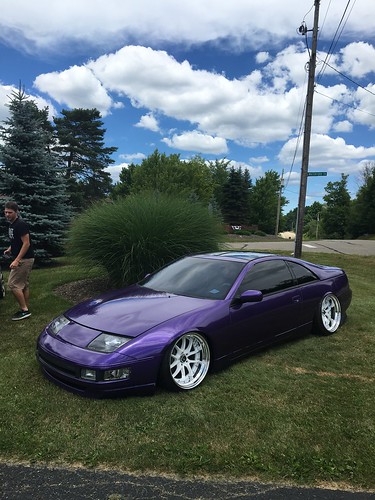 [/img]
The story began 4-5ish years ago when I was 16. I fell in love with 300zx's through high school and was dead set on getting one, and after a few years of working my bus boy job I finally had the money saved up. A clean one popped up in my area at a Lexus dealership and I decided to pull the trigger on it.
When I got to the dealership I knew I had to have the car. 1990 Nissan 300zx 2+2, NA/Auto (Dad wouldn't let me get a stick/boosted car for first car, sad, I know) old man owned, 60,000 original miles, no rust, no scratches or swirls in the paint, a beautiful off-white and a near immaculate interior. I ended up paying about $6500 for it, not a terrible price, probably could've gotten a better deal from a private seller but this was too clean to pass up.
[img]
[/img]Once I got it home I immediately wanted to start "modifying it" so I did what every high schooler does and plasti-dipped the wheels. Which I ended up regretting after taking hours to peel it off lol
[img]
[/img][img]
[/img][img]
[/img]Heres me and my buddy Rudy with his A4. We fell in love with cars together and you'll see more updated pictures of his car later in this thread.
[img]
[/img]Took the plasti-dip off and got my car tinted by my buddy Tyler who drives the lowered Gen 3 Camry in the background. 35% windshield, 20% brow, 5% all around (wsdycsybi), now no one could see my ugly mug while I'm driving around lol, sorry for the crappy photo too.
[img]
[/img][img]
[/img][img]
[/img]Also won some limbo contests which was fun
[img]
[/img]And then it hit me
[img]
[/img]Since I owned the car I fell in love with the stanced look. Being an NA/Automatic I didn't have much functionality to lose and since the motor was running well and still low on miles I didn't want to mess with (or pay for) something that wasn't broken to attempt a TT/5 speed swap. So, I took the leap and picked up some coilovers and decided to take the "stance" route, thus starting my bank account draining passion and beginning the journey of Eliza.
[img]
[/img]After hearing nothing but good things about the company, I decided to pick up these Powertrix SuperStreet coilovers for about $1000. Expensive but worth it; I never had any issues with them and after owning them for 4 years I still am amazed with their quality. Charles the owner does an awesome job with customer service and got these bad boys shipped to my house in no time.
[img]
[/img]After multiple cans of PB Blaster and a few busted knuckles, the coilovers were on but there was an issue. I wasn't pleased with the ride height and knew something must be down about it, but the funds just weren't available at the time.
[img]
[/img][img]
[/img]Heres me and my buddy Tyler with his clean lowered Camry
[img]
[/img]I wanted to be low and this definitely wasn't low. Even at this height I would rub when turning and my un-rolled fenders kept rubbing on my rear tires. So, I did some research and looked into my first set of wheels. After a few months of saving I picked up a set of Varrstoen ES6's for about $1000, bought some cheepy-deepy Kuhmo or Federal tires, rolled my fenders and threw them on. This was definitely a big check point for me with this car and I was and still am pleased with the outcome.
Heres the test fit. 18x9.5 +22 Front, 18x10.5 +22 Rear
[img]
[/img]Took the wheels and tires to my local tire shop and they thought I was crazy. They stretched these for me and immediately banned me from their garage because they thought the car was unsafe
(dat mismatched thread tho)[img]
[/img][img]
[/img]And heres the result, super simple style, nothing too flashy and it did the car well imo
[img]
[/img][img]
[/img][img]
[/img]Me and my Tyler again
[img]
[/img][img]
[/img]The car sat like that for a few months until I ran into an issue. The car started to get some bad rust on the rear of the side skirts and on the passenger side fender and I knew I had to fix it before it spread. I took it to a few garages for quotes and was shocked. It was not the rust that was going to be expensive, it was the paint that was killer. Some places quoted me over $2500 (on top of the rust repair cost) just to color match the repaired area and I just simply did not have the money for that. Supposedly the off-white of my car was difficult to color match, thus making it time consuming and expensive. So, I went ahead with the rust repair, told the just to primer the repaired spots and I started looking into vinyl wrap
The next few weeks I spent sticking square samples of vinyl all over my car to figure out what I wanted
only reason I have this picture is because my exhaust got ripped off on an overpass and it punched a softball sized hole in my gas tank and this was the final resting point until the new tank from Texas came in. You can also see some of the primer from the rust repair[img]
[/img]I finally decided on a vinyl color and started taking pieces off the car to prep. I always liked how this car looked without bumpers/fenders. Definitely got some funky looks driving around in full project mode too
[img]
[/img][img]
[/img]Wrapping the car was definitely a learning experience considering it was my first time. The prep work took forever but it helped ease the process of laying the vinyl and everything went smoothly. There were and still are some flaws, but again, I can't complain since I saved a few grand by doing it myself. Id like to thank my friends Ross and Brian for all the help as well, the wrap definitely wouldn't of gone as smoothly if they weren't there. During the prep we also deleted my rear windshield wiper (no pictures) and threw on some 15mm spacers up front to help with the fitment
[img]
[/img][img]
[/img][img[
[/img]A quick transformation photo with Rudy who finally got on coilovers.
[img]
[/img]Also purchased an 04-07 STi rear diffuser which fit with nearly zero trimming needed. Ended up ripping it off on the highway and trimming it up/re fiber glassing it in the future, oops.
[img]
[/img][img]
[/img][img]
[/img][img]
[/img]Picked up an NRG hub and hardwood Grip Royal steering wheel to add a little flare to the interior
[img]
[/img]Also won some more limbo contests
[img]
[/img]Picked up some piping and had a cheap exhaust made up until I could afford something more legitimate. 2.5" piping from the cats, muffler delete and a 3" tip, it wasn't anything terrific sounding, but still better than hearing nothing.
[img]
[/img]The car stayed like this for another half a year or so until I had the money to buy.....yes....real wheels
I always liked these wheels and was curious about what they looked like on my car and picked them up for a decent price (paid about $2000). Lips needed a good polish and the faces needed redone, but that was a minor issue. 19x10.5 +10 front, 19x11.5 +10 rear
[img]
[/img][img]
[/img][img]
[/img]Wider wheels meant I needed some suspension upgrades. I picked up Powertrix rear camber arms and Powertrix rear adjustable toe arms as well as new Swift springs with 16k/20k spring rates
[img]
[/img]Getting them to fit was a ton of work, we had to do a ton of fender pulling which is when I ran into a big issue. Turned out the shop I took my car to for rust repair a ways back did a trash job, all the rust was back and my passenger side fender got absolutely mangled from pulling. So I grinded off all the remaining rust and left it how it was until I had money to fix it since I had zero body work experience
[img]
[/img]The non fucked up fender
[img]
[/img][img]
[/img][img]
[/img][img]
[/img][img]
[/img][img]
[/img]No truck in the family means my car is the workhorse
[img]
[/img]Once I had to buy new tires I decided it was time to take apart my wheels and re-do the faces. I was debating between doing white again or trying a new color and opted to try something new. I was hoping for more of a bronze/copper color (which is what it looked like online) but it came out more of a brown. In some pictures I love the color in others not so much, its strange, oh well, these wheels were short lived anyway and I turned around and sold them after a season.
I went to North Coast Powder Coating up near Cleveland and they did a fantastic job. Regardless of the color the faces came out immaculate and they threw in powder coating my hardware for a sweet deal so I got them done in Cocaine White
[img]
[/img][img]
[/img]Picked up some 225/35 and 235/35 Dunlop tires and turns out they had some stiffer sidewalls than i expected so I was left with a pretty aggressive stretch in the rear. I wasn't too excited about that at the time and how it could have effected the cars drivability, but it was too late to change. I ended up never having any issues with the stretch even on long drives
[img]
[/img][img]
[/img]Also got my car shot professionally for the first time by my good friend Sean Fox
[img]
[/img][img]
[/img][img]
[/img][img]
[/img][img]
[/img][img]
[/img][img]
[/img][img]
[/img]2.5 year old vinyl still holding up well and looking beautiful
[img]
[/img][img]
[/img][img]
[/img][img]
[/img][img]
[/img][img]
[/img]Trailered Eliza to H2Oi in 2015 and had a blast despite the hurricane. Didn't get any tickets either! Also very happy with how my fitment ended up, best Ive had yet (Despite my now fucked up fenders
)[img]
[/img][img]
[/img][img]
[/img]Talk about a transformation! It really is crazy to look at this and see such a change, its pretty cool seeing your vision coming to life slowly but surely
[img]
[/img][img]
[/img]As much as I loved my new setup, after a few months of constantly smashing my fenders on my lips over every bump got annoying and I was constantly worried to take my car on the highway because of the stretch. I decided it was time to really invest into the car and make it actually drivable again, while still staying within the "stance" realm. So I began my research on air ride for my car for the first time. I couldn't even fathom owning bags 3 years ago when I was in high school and here I was buying them for my first car! It was and still is a incredibly cool experience.
After a few weeks of emailing around looking for quotes, I ended up buying everything through Open Road Tuning who helped me out a ton. I went with Airdynamik struts, Airlift 3P management, a 4 gallon tank, 1/4" lines and x2 444c compressors. Everything came relatively soon other than my struts which literally took forever. Granted, I love Airdynamik's product, but it took almost 3 months for the struts to arrive at my door long after everything else and getting into any contact with the company was a disaster. But still, I didn't care that much cause I officially owned bags and I was hyped
[img]
[/img][img]
[/img]Here she sat after a 6 month slumber, my '97 Civic is an admirable steed and toots me around town on a daily basis
[img]
[/img][img]
[/img]Taking the coilovers off is more work than people expect. You gotta take out half the cars interior to get to the rear struts. I definitely want to create some type of hidden door to get to the struts without taking the interior out in the future
[img]
[/img][img]
[/img]Cleared everything out of the trunk and gave it all a nice wipe down before work began
[img]
[/img]Cut out the carpet from my trunk to create a template for my hardwood floor and picked up a sheet of birch from Home Depot
[img]
[/img][img]
[/img][img]
[/img][img]
[/img][img]
[/img]Shaping the sheet of wood to the plastic trim pieces in my trunk was a royal pain and took me a few tries before I liked the outcome. We also found out we couldn't fit the entire cut out sheet into the trunk so we cut it into 3 pieces and puzzle pieced it back together once inside the trunk
[img]
[/img]Non matching mood pattern because I messed up and re did the top section lol
[img]
[/img][img]
[/img]Drilling the holes for the compressors and tank
[img]
[/img]Staining the back section so we could get everything mounted and set up in the trunk. I think I ended up staining this piece 3-4 times until I got the shade I wanted and I still haven't done the other two pieces yet lol
[img]
[/img]Laid everything out in the trunk to gauge how it would look. Ran all of the airlines to the struts and ran the wiring harness to my battery/fuse box in the front of the car. I ran the airlines along side my brake/gas lines and zip tied them away from anything sharp or hot and ran the wiring inside the car under the carpet on the passenger side. I have no pictures of this because it was pretty straight forward and boring
[img]
[/img]Finally mounted the tank and compressors as they will stay, bolted the manifold to the floor of the trunk, ran my exhaust line outside of the car, ran the lines from the struts through factory holes in the trunk (make sure you use a grommets!!) to the manifold, hooked all the lines up to the tanks/compressors/etc, mounted my water trap, ran my management controller under the back seat, under the carpet and through a drilled hole in the back of my center console for easier accessibility, plugged the fuse in and boom, the install was finished. For being my first time doing anything with air ride, the process was pretty straight forward but tedious. Couldn't thank my friends who helped enough either
[img]
[/img]While the air install was going down, I swapped out my extended wheel studs from when I ran my 15mm spacers, to OEM length studs. After PB Blasting the crap out of them, they pounded out decently easily, I suggest putting a lug nut on the end of the studs so the edges don't flare and get stuck. To put in the new studs I used two washers and a lug nut to thread them in. I wedged a breaker bar between the old studs and the ground to keep the hub from moving
[img]
[/img]Extended vs OEM length
[img]
[/img]The work station
[img]
[/img]The notorious washer/lug nut combo
[img]
[/img]You also have the rare opportunity to see my state of the art hub motion stopper in use
[img]
[/img]After selling my Wald's, Eliza obviously needed a new pair of shoes. I heard a lot of good things about the company VR Wheels and saw some of the gorgeous wheels they made so I picked up a set of 18" Work VS-SS from them. Paid about $2100 for them and VR rebuilt them to the specs I need fo' free which is awesome. I went with the same specs as my last wheels 18x10.5+10 front, 18x11.5+10 rear
[img]
[/img]Picked up a set of 225/35 and 245/35 Nankang NS20's and the stretch came out beautifully. Not too much, not too little
[img]
[/img][img]
[/img][img]
[/img]And heres the outcome! Pictures are from my shoot with Sean Fox again, this time for my cars first website feature for Slammedenuff!
[img]
[/img][img]
[/img][img]
[/img][img]
[/img][img]
[/img]The wheels came out phenomenally
[img]
[/img][img]
[/img][img]
[/img][img]
[/img][img]
[/img]Took the plunge and drove Eliza to H2Oi this year and put over 1000 miles on her with zero issues. I now don't have to worry about debeading a tire (as much) as before or stress about ripping my exhaust off again. Buying bags was definitely one of the smarter investments I have made for this car and Im glad I did.
[img]
[/img][img]
[/img][img]
[/img][img]
[/img]I'm beyond ecstatic and very proud of how this car has turned out over the past years; thousands of dollars and thousands of hours have been put into this project and its safe to say I have finally built one of my dream cars. Cant wait to get home from school and start working on it again! Im hoping to do a set of retrofit headlights, finish the trunk completely, wide body the car or just fix the fenders (depends on money), do a full custom exhaust and DIY some Jspec taillights. So Ill have some good stuff for you guys in a few months!
[img]
[/img]


Comment