If this is your first visit, be sure to
check out the FAQ by clicking the
link above. You may have to register
before you can post: click the register link above to proceed. To start viewing messages,
select the forum that you want to visit from the selection below.
Hahaha. That's a mega temporary just for locating the engine in the bay mount. We were trying to see if we could make a mount bracket that uses a readily available 240sx engine mount (peak performance mount in the pic). It has since been revised and a new version is in the works that will be much more similar to the production version. Complete swap mounts with a sleeved bushing.
Well, that was a longer break than I expected. I have been making strides in the swap so when that happens I tend to get caught up. I have been working on the first set of permanent motor mounts. A couple of braces and that post will be coming.
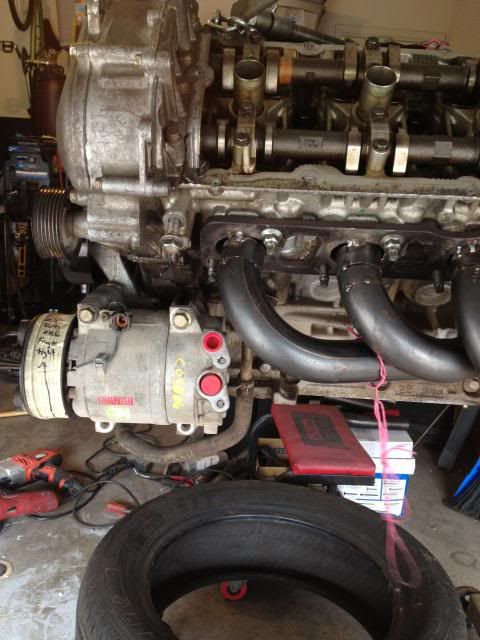
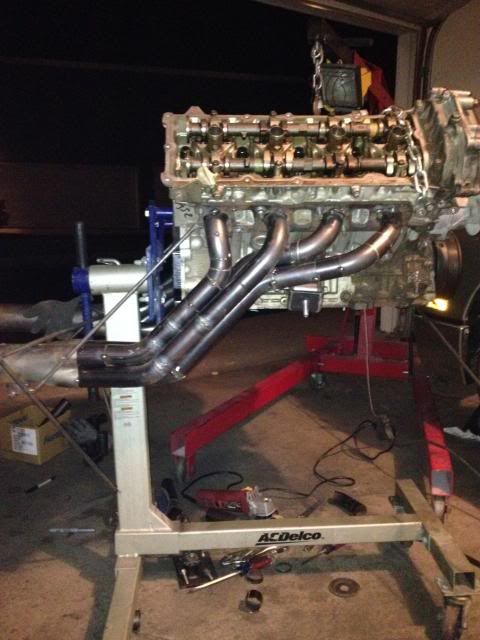
As mentioned last time, the headers are the next item I have in a state where they will become the templates for the final pieces. As with most everything thing, there are a few revisions in the process. I started with the collectors in one place then moved them beside the transmission. The drivers header got remade entirely once, followed by getting half redone before working decent now. This is my first foray into header making. It is like a puzzle that you have the start and finish, but no middle. I am sure they will get tweaked a bit more when I am making the final set.
This like everything done on the build was discussed at great length between Steve and I. We looked at piping size, equal versus unequal length, material, coatings, powerband range, etc. What we attempted to do was focus power through out the power band. We decided to use steel 1-5/8" piping with an unequal length header and ceramic coated or wrapped. Unequal length headers seem to keep power in the mid range and add a bit on either end. The piping size should make good mid range power as well. Stainless seemed too expensive to mess with for the prototype set since we may change pipe sizing later. The one thing I was really sad to see get the axe this go round was a tri-y header. This is something I really want to revisit in the future.
The Start:
The bends in the box:
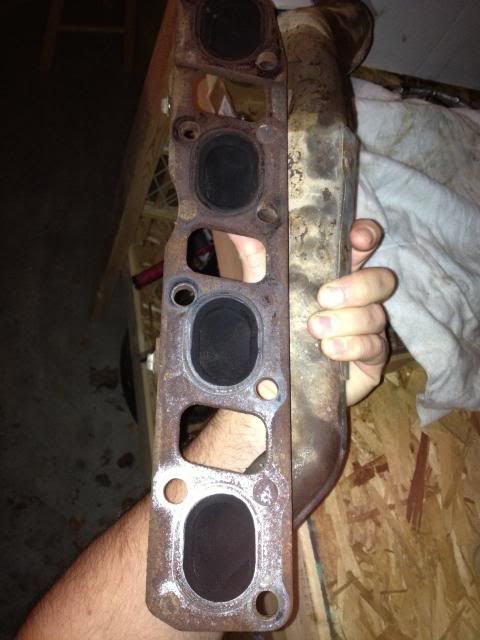
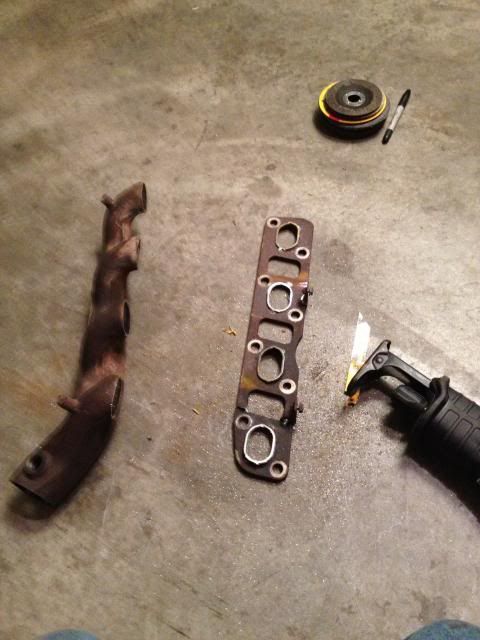
Stock VK56DE Header:
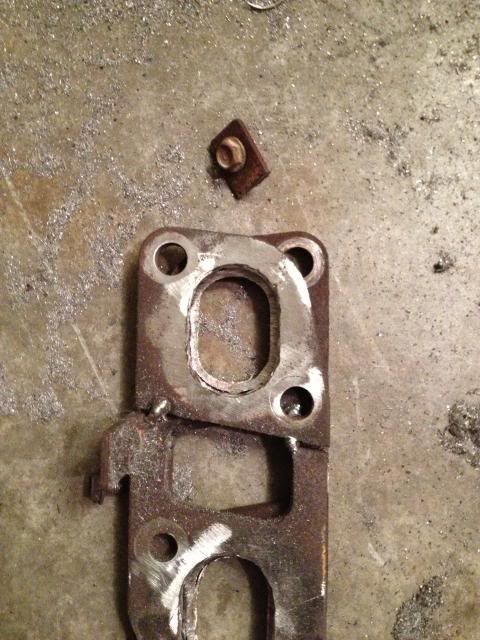
Only need the stock flange. Later I will get new flanges cut:
Here are the two flanges laid over each other. You can see what I removed with the die grinder, so much metal got stuck in my hands while doing this:
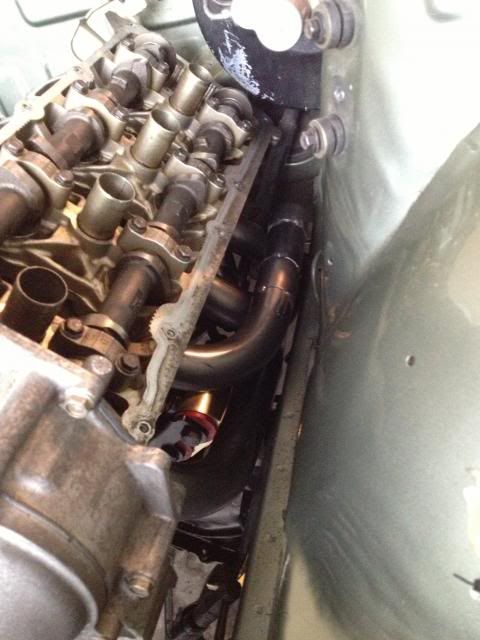
This was where I initially wanted the collectors, but there just wasn't enough room to maneuver the pipes around the steering shaft and into the collecter without many extra cuts:
Drivers side header version 1. I felt this lay out just didn't work:
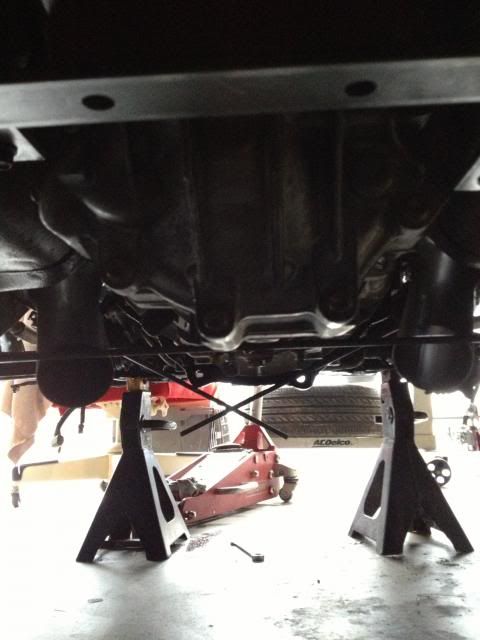
Version 1 fit up in chassis:
Driver side header version 2. This version got nixed due to the pain of the extra cross in the pipes:
Version 2 fit up in chassis:
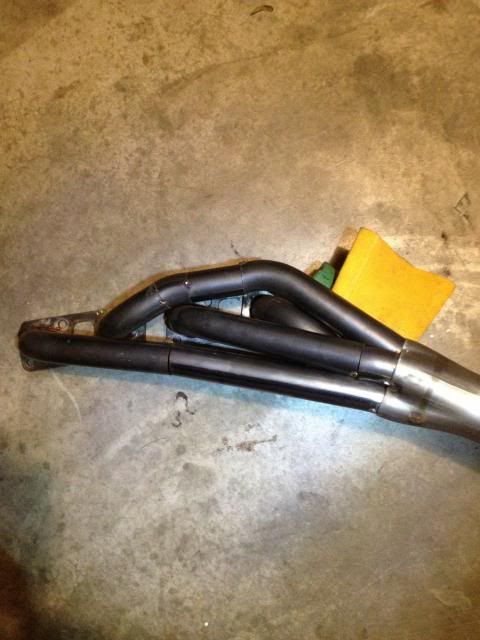
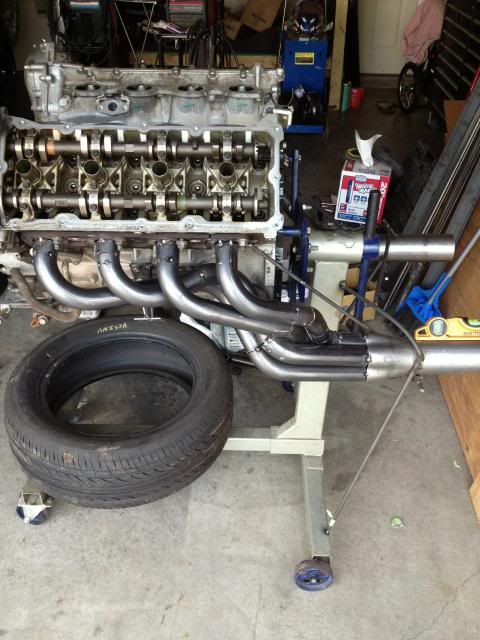
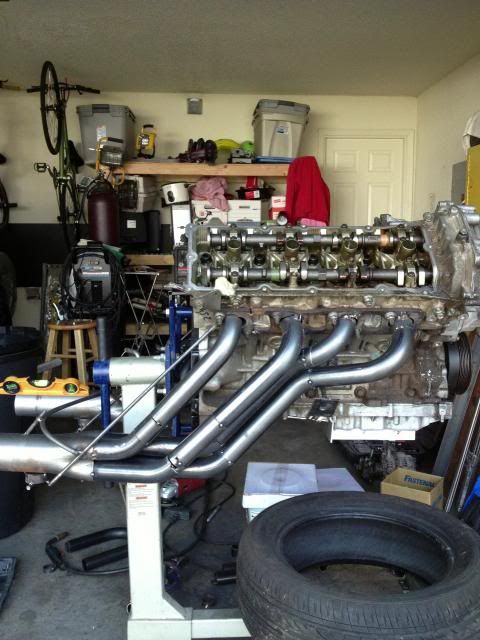
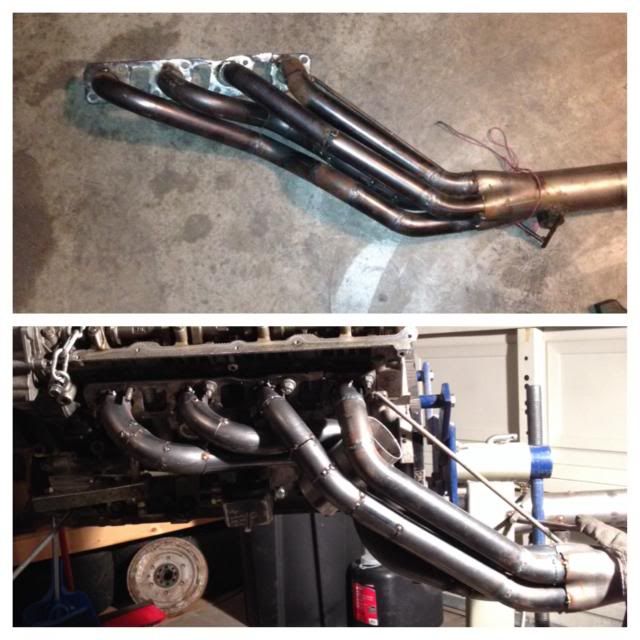
Drivers side header version 3. Pretty happy how this has come out. I look forward to the finished piece:
The passenger side header went pretty quick. I would like to rework the rear pipe to tighten it up to the rest:
Here is the rear view of the set up, with the driver side version 2:
Here comes another tale of struggle and intrigue, masked with deception and mystique....hmmmm, wrong story. hahaha
Sometimes a guy just wants a awesome intro!
Well it has been another busy couple of weeks...at Gas Monkey Garage. hahaha.
Ok, I am done, moving along.
These past two weeks have gone awesome. Built stuff, Rebuilt others, trick or treated, helped a co-worker, and just all around hustled. I want to revisit the headers real quick since it is an update to the previous installment.
As noted previously, I wanted to tighten up my headers. I originally thought this would be a one tube ordeal aka passenger side number 4. Yeahhhhh, well as with most things it didn't go that way.
It was time to test fit the headers and new awesome-town motor mounts together at the same time. Install motor mounts, things are going good, install header....clunk...pissssssss. Jump to the other side. Install motor mounts, things are going good, install header....clunk...pissssssss. On both sides, both pieces are making contact. Decision time, remake motor mount or headers? Move one pipe or move six to eight. Easy or Hard. I really like the motor mounts simplicity, and I knew the headers were to be tweaked anyway. So I chose the lets-rebuild-six-to-eight-pipes way, duh! I would be interested to know what you fine people on the other side of screen would have chosen.
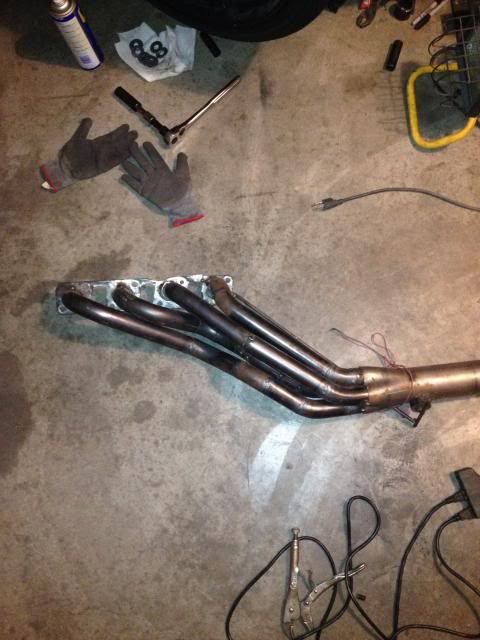
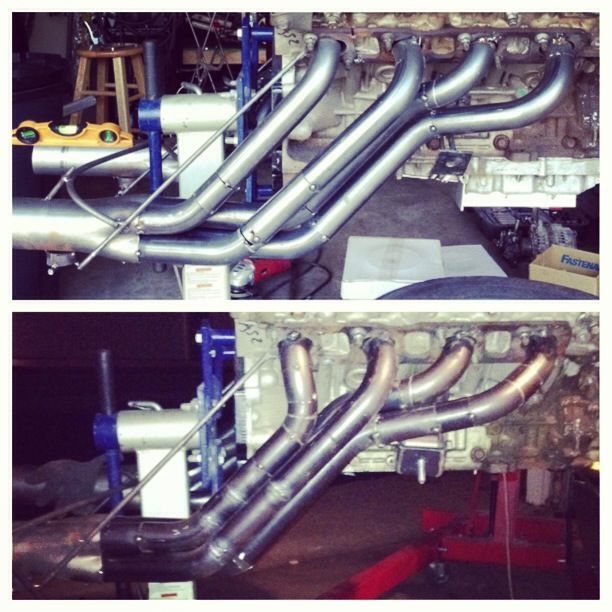
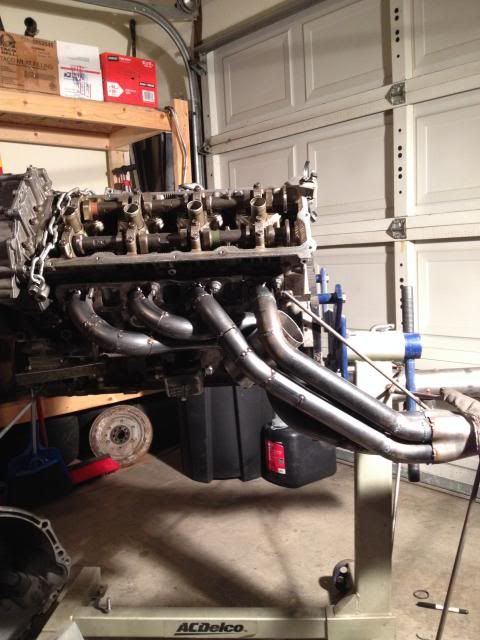
They ended up coming out even better than before. Very nice and tidy. Please ignore all the cuts. All the pipes follow preformed bends basic shapes so they should be about the same when I make the final headers.
This has really become its own post. So I will get a motor mount one up next. Enjoy the photos!
Unfortunately, I never got a picture of the version 2 driver side header on the block, so it is harder to see the changes. Driver side V2 top - V3 bottom:
You can really see the differences on the passenger side since they are both on the block at the same angle. Quality of photo is due to PICStich. Passenger side V2 top - V3 bottom:
Driver's Side better quality. You can see my 3" pipe in there for steering shaft clearance:
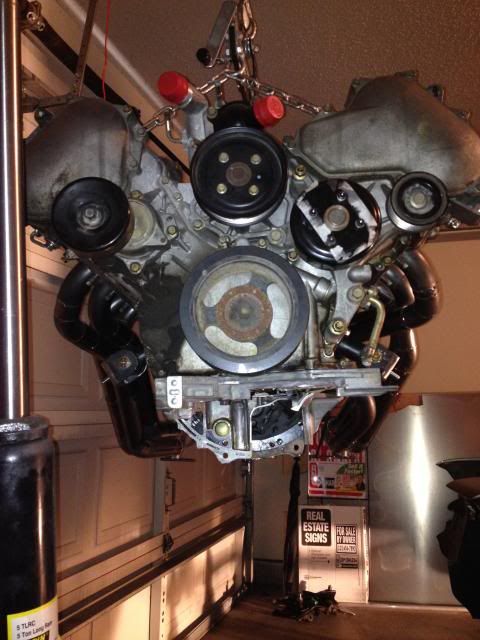
It feels like a double post kind of weekend. I have been wanting to get to the motor and trans mounts, but I needed to be 100 percent happy with them before doing a post on them. This is about the most basic part of any swap, but it sets up so much of what will occur in the future that you need to get it right the first time around.
Initially, I used the factory VK56 motor mounts to just set the motor on the front cross-member and a jack to hold the trans in place. I really wanted to use the factory motor mounts but just couldn't do it. They would have set the motor too high after the necessary adapter brackets were made and in place. Idea-bubble popped.
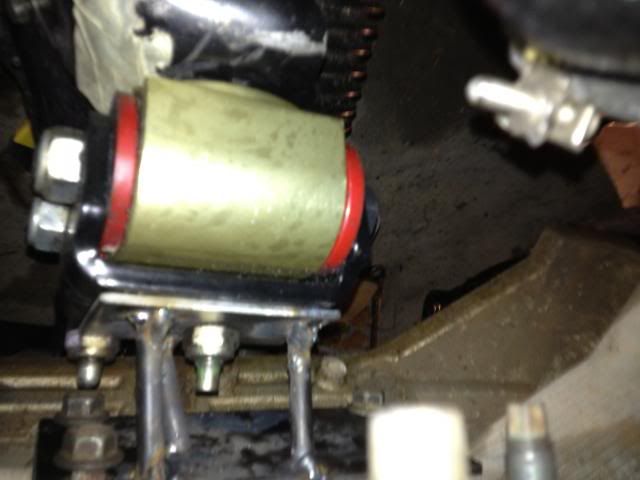
Moving ahead I decided to make some plates for the engine and front cross-member that would be bridged by 3/8" rod, or as I have been calling them "stick mounts". This was, by far, the best use of material and time. It allowed me to quickly and cheaply shift the motor right or left, up or down. Followed up by a very crappy but functional trans mount made out of 1/4"x1.5" flat bar. The motor has lived on this setup for the past 3-4 months until about 2 weeks ago. I finally got to a point where I was waiting for more material or parts to arrive. So I began thinking about how I wanted to build my mounts.
I decided solid bushings were out for me. I knew a polyurethane mount setup wouldn't allow too much movement, but would also keep vibrations down a little. I also figured by adding the poly bushing this would allow the mounts to work on Steven's S14 setup since there is a slight angle change between the S14 and S13 front cross-member "horns". I ended up using 1/4" flat bar for my bases and 1.5" round stock for the posts and bushing. Next up Jigs.
I had really been putting this step off. I really didn't want to invest the time in the jig, and then have to remake the motor mounts in some way. I knew the jigs would take some time, material and have some permanence about it. So in an effort to do it once, I procrastinated this until I couldn't any longer. The jig was fashioned out of some old metal I had laying around- c-channel, 1x2" rectangle and 1x1/4" flat bar. This was followed by a jig for the trans mount which was made from more c-channel and 1.5" square tube. The most challenging portion of this whole process was keeping things at correct angles and square. The last jig I had to make was more of a spacer. I needed a way to replace the polyurethane bushing during welding of the motor mounts. My solution came in the form of telescoping some round stock and welding a washer on either end. This solution took me far too long to come up with but in the end works amazing.
Words got me this far but picture tell the rest.
Motor and trans in - centered and level:
Attempted to clear brake booster, but had no room for an oil pan and still wouldn't clear:
Radiator fits. I use some sort of Nissan e-fan setup and it clears, barely:
Driver and Passenger side stick mount v1. I wanted to use aftermarket 240sx motor and trans mounts, but they were just too large once the headers started getting built:
V2 stick mounts just used to hold spacing:
The v2 stick mounts helped to create the jig below:
Next up was a template for the "U" portion of the new motor mounts:
Which allowed this:
Then I needed a spacing solution for the poly mount sleeves. It came in the form of this telescoping setup:
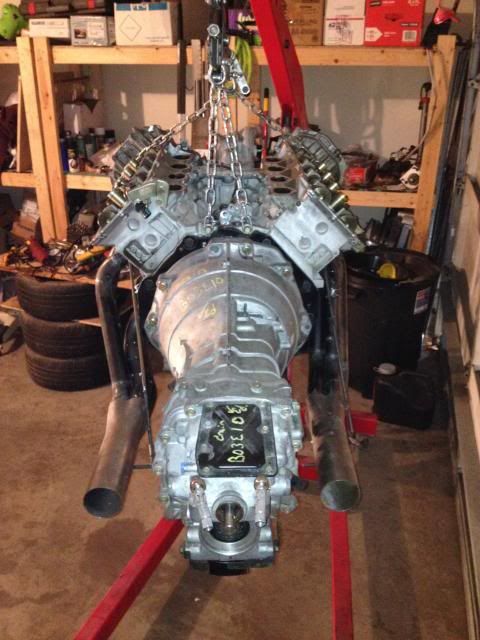
Which got me to a couple tacked up mounts:
Followed up with some TIG welding. It felt good to final weld something. It was a since of accomplishment and progression:
I wanted to poly mount the transmission too. I got a pretty decent idea one day and decided to see if the GM mount they sell at every O'reilly and Advance Auto Parts would work. Picture says it all, zero modding, bolted up no issue:
Utilitarian (read Rough) transmission mount:
Poly mount sorted. It was time for a real transmission mount bracket. So I put together a jig with the Utilitarian Mount:
Which allowed this prototype. I am not satisfied with this mount. It is too large and bulky but was necessary as it tested fitment and tested my jig. I will be remaking from some 1x1.5" rectangle and at the same time I will be raising the trans 3/8 of an inch:
Sorry for the filter but it lightened this picture. Prototype mount installed:
This is a fun picture to see where this has come from - v1, v2 with v3 on the way:
And in all this I dropped the TIG torch and broke the cup. It halted progress until I came up with this - wrapped with cotton string and zip ties. The ties never melted until I tried to weld continuous, I was very happy to be able to continue:
Last edited by irritatedmax; 11-11-2013, 01:01 AM.
I am honestly about to run short of things until I start making more final pieces!! I best get to working more.
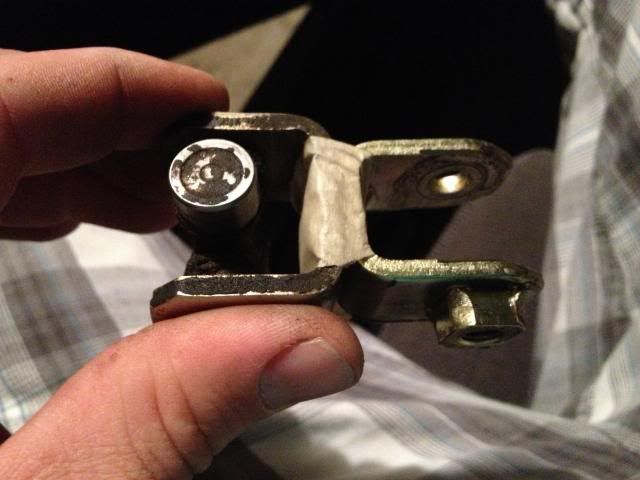
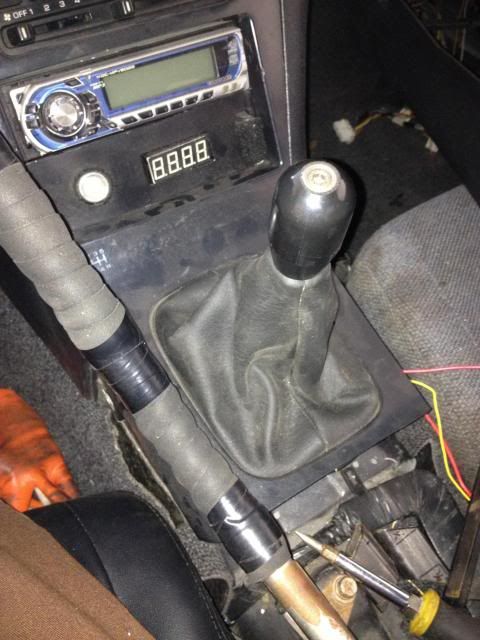
I am going to visit the shifter setup this time. I know most of you are probably thinking, I have seen this before, but I am promise I went another route. Basically I needed another way to move the shifter forward so the shifter hole didn't need to be altered - FD rules and what-not, plus no sheet metal to cut in cabin. It also needed to be able to allow the articulation the Z33 transmission requires.
I started on the shifter and attempted using the stock shifter, and attempted, and attempted. Basically I decided to step back and do something else after while. Then one day I was showing Steve some progress on the shifter. I started explaining my frustration with it and he had a really good suggestion: make a new shifter. I attribute myself being too close to the problem to see the simple solution in front of me. From that point forward, it has gone pretty smooth. Had to source some heims and links, which took some time, but otherwise simple.
Like always this is a prototype piece and not the final setup. The major revision will be: to ditch the square tube and go round instead; to install a reverse lockout; to solve potential loosening of components; and finally to pick a height for the shifter.
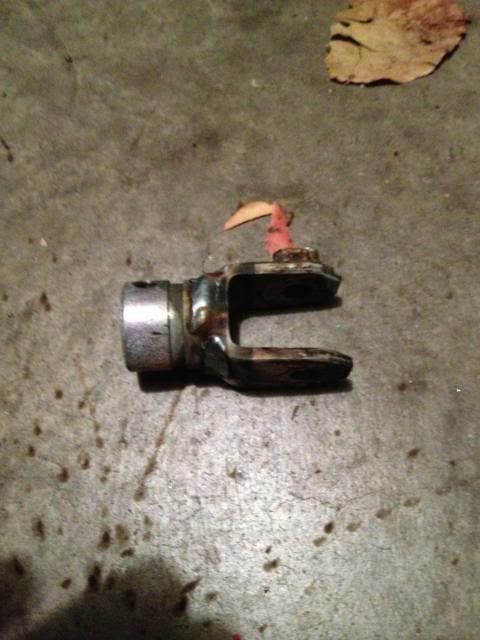
Here is what the stock linkage looks like:
Here is what most people do with the stock linkage. I may end up using this in the S14 if it has more room for it. It allows the shifter to articulate a bit freer:
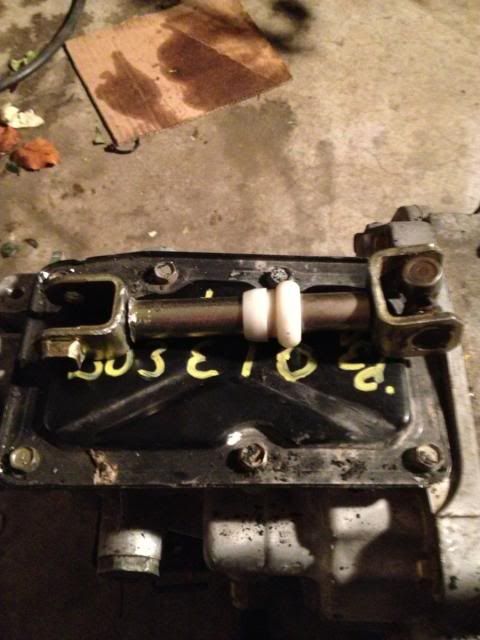
Here is how I did my linkage. The bad part about this linkage is it doesn't allow the in/out motion to occur, but does allow the twist:
After installing the linkage on the transmission here is where it wound up in the shifter hole. It is only off center in the pictures as I didn't have it lined up...it is nice and centered now.
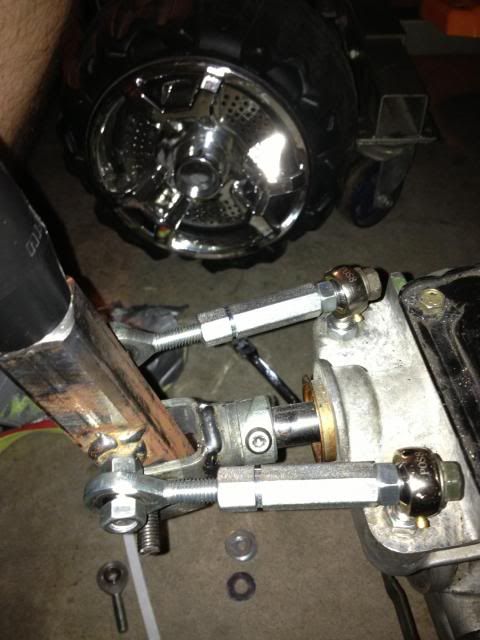
So in order to get the in/out movement and retain the twist I came up with this setup:
Shifter in the car! Functioned awesome:
Shift boot on, centered up good, I like the placement:
I will have to get a video of the setup in progress.
for your booster issue this may help you.
have you thought about a chase bays booster delete for the s-chassis?
i also had to make a trans mount like what you got but it was for a 370z trans into s-chassis.
used the stock s13 trans crossmember with an sr trans mount and some 1"x2" 120wall legs
Aesthetically I like V2 of your headers but the third version looks like it would actually flow better. Definitely like seeing a V8 that isn't just another LS swap.
Looking good, do you think you'll be able to use the stock hood and still clear?
Stock hood clears...without the intake manifold on. Hahaha. We are planning on producing an aftermarket manifold that clears the hood. The stock unit is SOOOO tall.
Naw in the beginning he mention that he'd have to modd it or address the clearance problem
Right you are sir! Just not sure if it's going to get done before the "debut." We've set a deadline to have it all together and running by Formula Drift Texas to enter it in the accompanying car show. It would be awesome to show it to a large crowd of like minded people!
Aesthetically I like V2 of your headers but the third version looks like it would actually flow better. Definitely like seeing a V8 that isn't just another LS swap.
There's actually like Ver.3 right now. Greg's super anal about certain things and he really wanted to do an equal length set - more so just to do it - but, for the final production kit, we'll likely have a more basic version and the equal length available for those who want it.
And couldn't agree more, we're super stoked on getting the VK on the road and see what it can do. I've been pestering Greg to get another update together but progress is being made. Probably jinxing myself but prototype flywheel should be on it's way in the next week or so. Oil pan is done just needing some final welds. And the current version of the headers will be used to make a jig and then final welded as well. Driveshaft is in. Motor mounts are done (re worked yet again). We're getting there! Thanks all for the support! I got the email saying a reply has been made to the thread and then when I had a minute to login it was awesome to see all the interest!
Oh, and hopefully within the next couple months as the body undergoes a big transformation the car itself will be worthy of being in the Stanceworks' build section next to all your guys' awesome cars!
 Tweet
Tweet


Comment