 |
|
10-05-2011, 05:25 PM
|
#1
|
|
StanceWorks Visitor
- Join Date: Dec 2009
- Location: Marietta, GA
- Posts: 163
- User Status:
Offline
- Contact this user:
|
Just your ordinary e34 DD build.
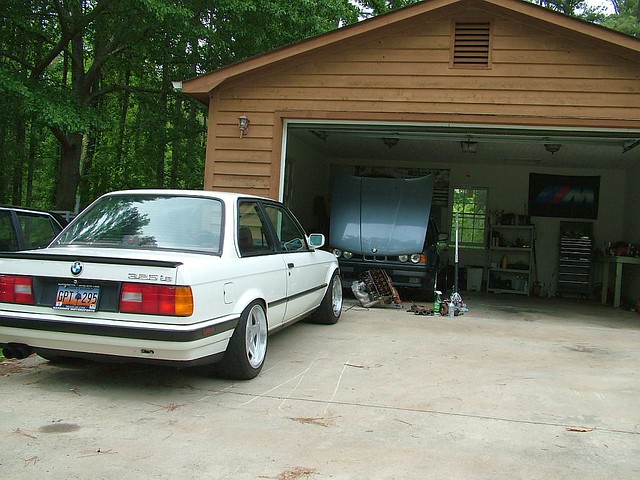
I've been seeing a few e34's popping up on this site lately, I figured I would throw my build thread on here. I started this thread a few months back so I'm just going to kind of post the cliffs up to now. I always have had a thing for e34's and had a really nice one a few years back but I ended up breaking it apart and using the drivetrain in my e30..
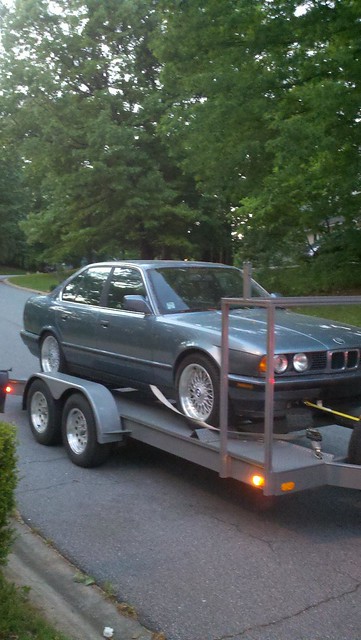
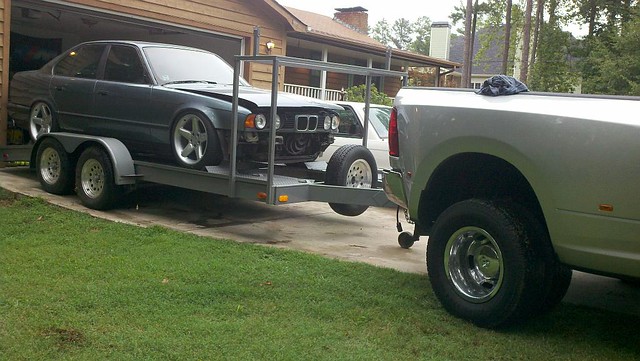
I kinda regretted it and really wanted another one, so I had no choice when I found this '89 535i 5 speed on craigslist locally with a blown headgasket. It was cheap enough to allow me a little extra cash at it, nothing crazy as I am a self sufficient homeowner/college student but I suck at leaving things alone.
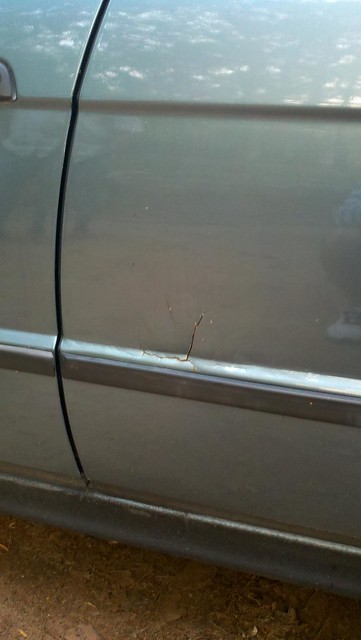
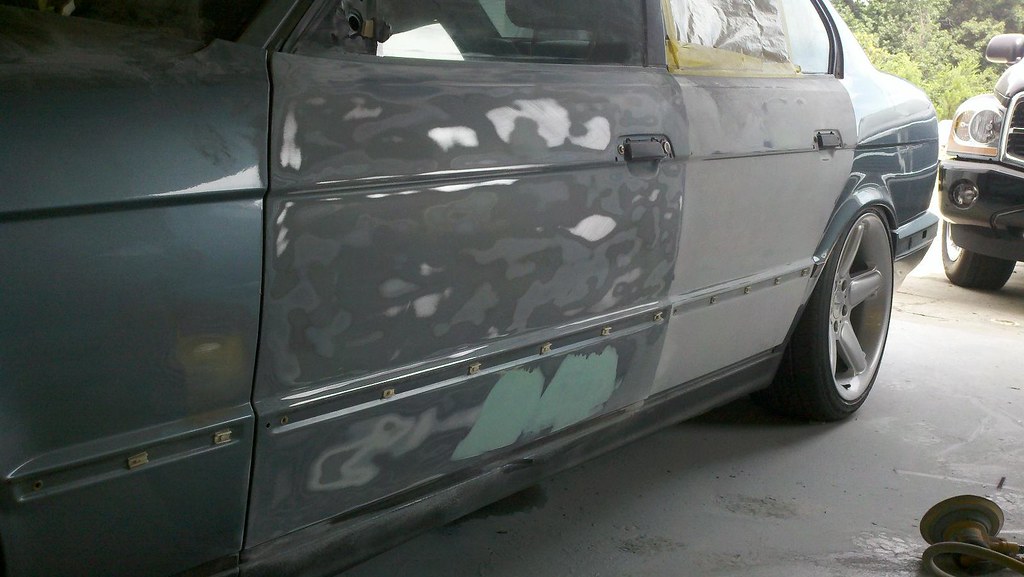
The owner was a typical non-enthusiast bmw owner and after telling me the body was near perfect I drive an hour to see this:
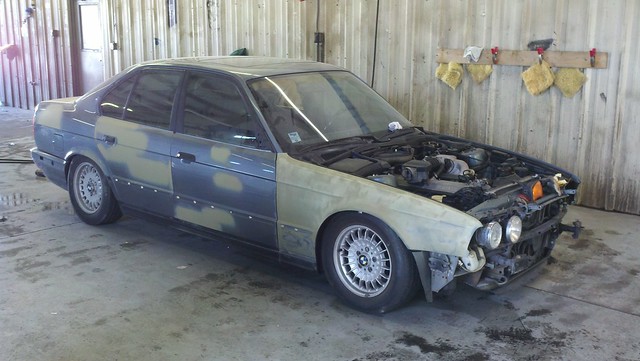
Other than that, the car was fairly clean all things considered and it was cirrus which is one of my favorite BMW colors so I ended up getting it for a decent price and taking it home.
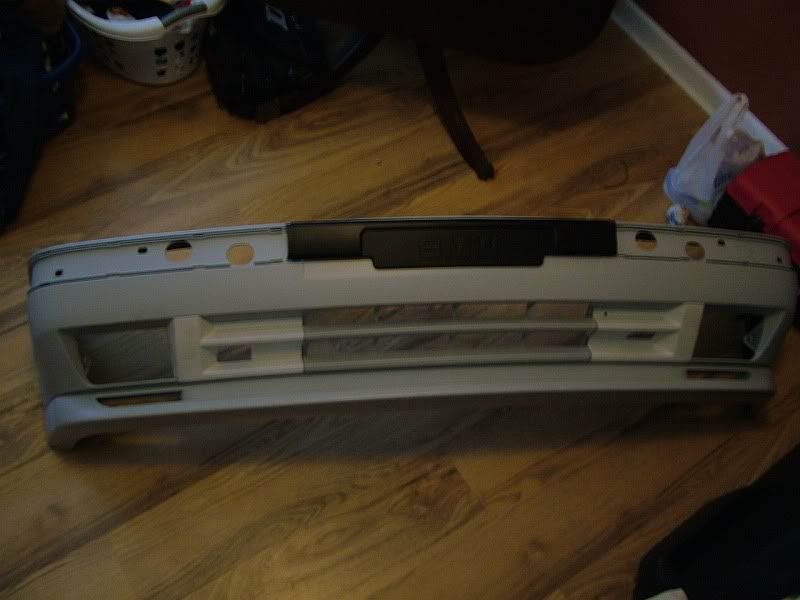
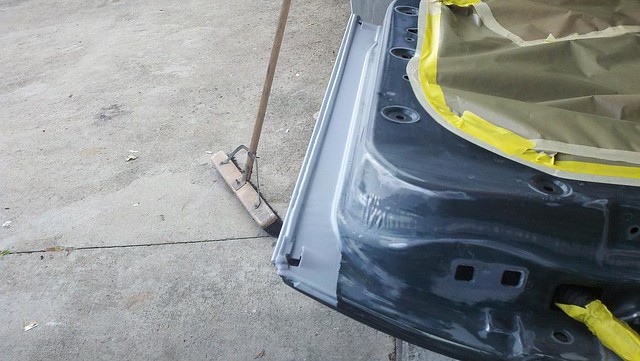
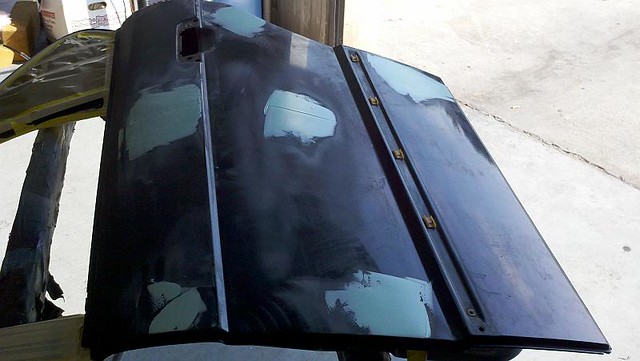
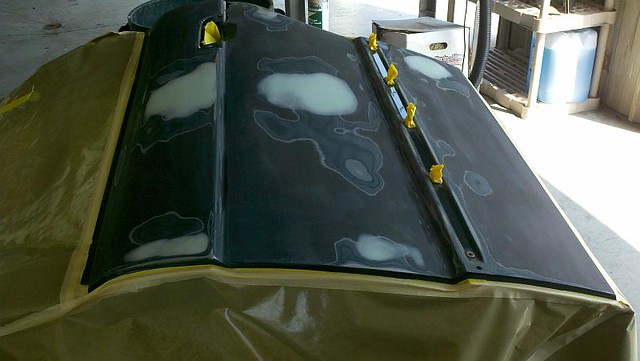
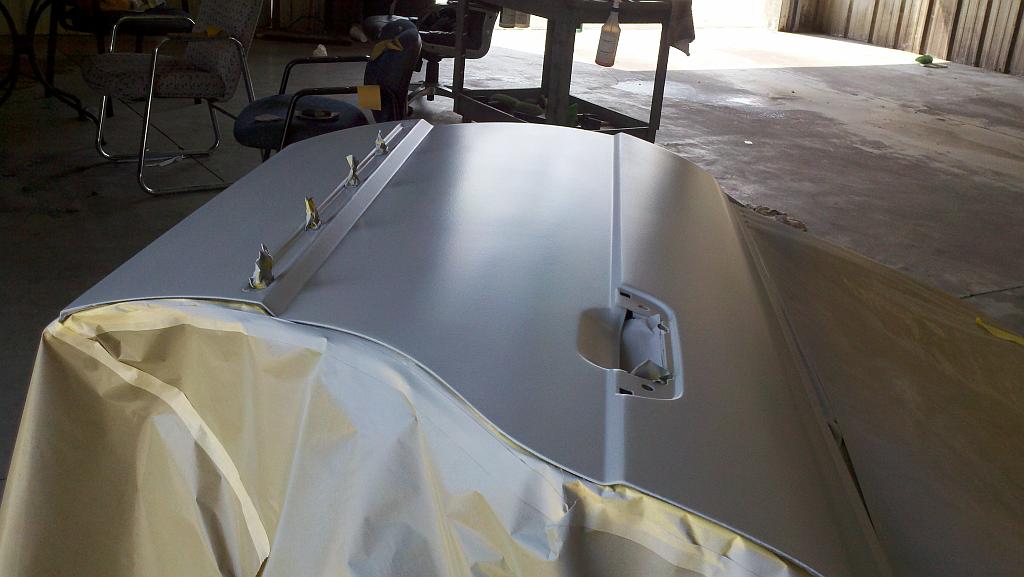
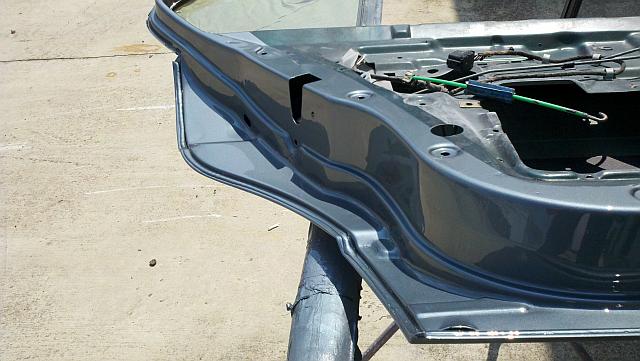
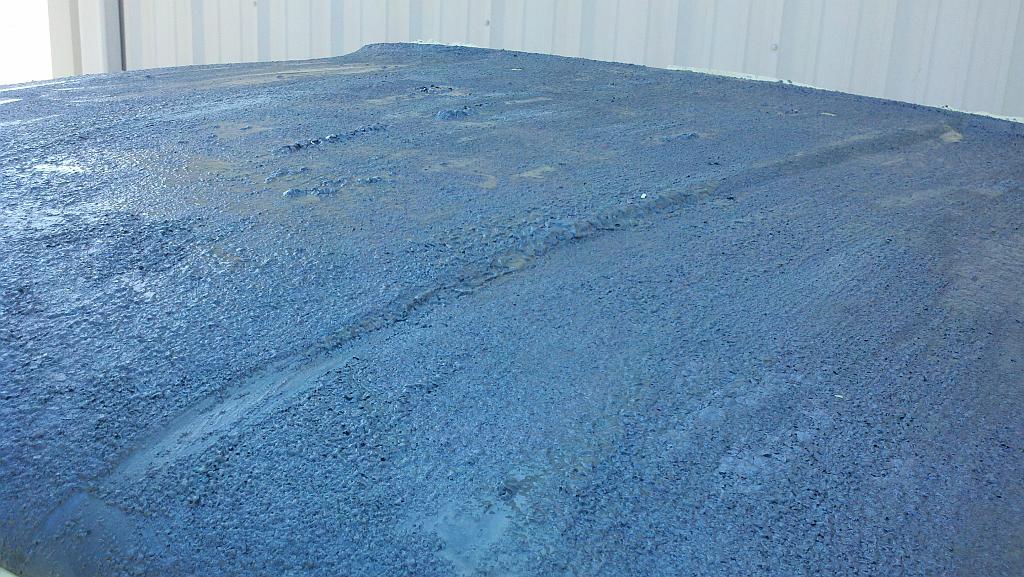
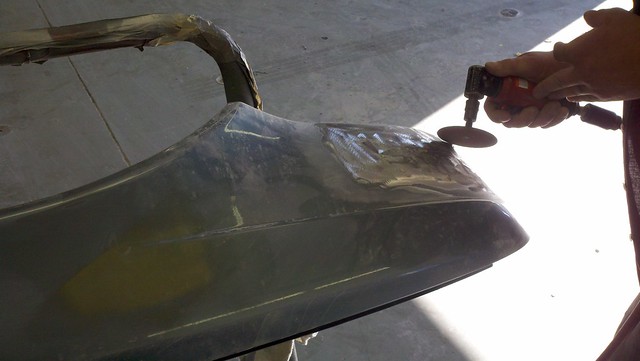
The paint looks decent enough in that picture but I can assure you, it sucks and it was apparent right away that it was gonna need an all over re-spray. I wasn't really excited about this but I've worked with a body shop for years now, so while I've never actually done any paint and body, I kind of know the gist of it and I have some friends at work helping me out along the way.
Anyways, I got the car home and immediately got to work on the headgasket. Check out the steam clean on #6-
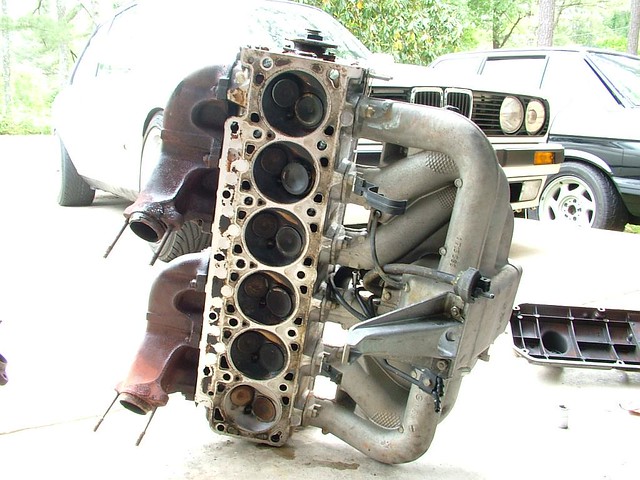
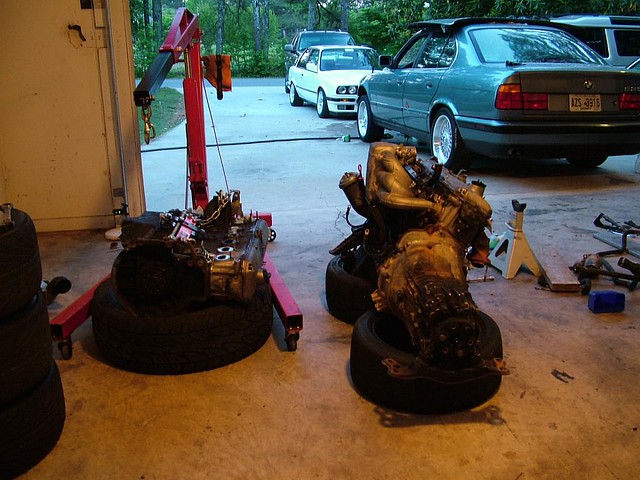
I tried to just slap a headgasket on it but the head was warped, so I had to pull the motor-
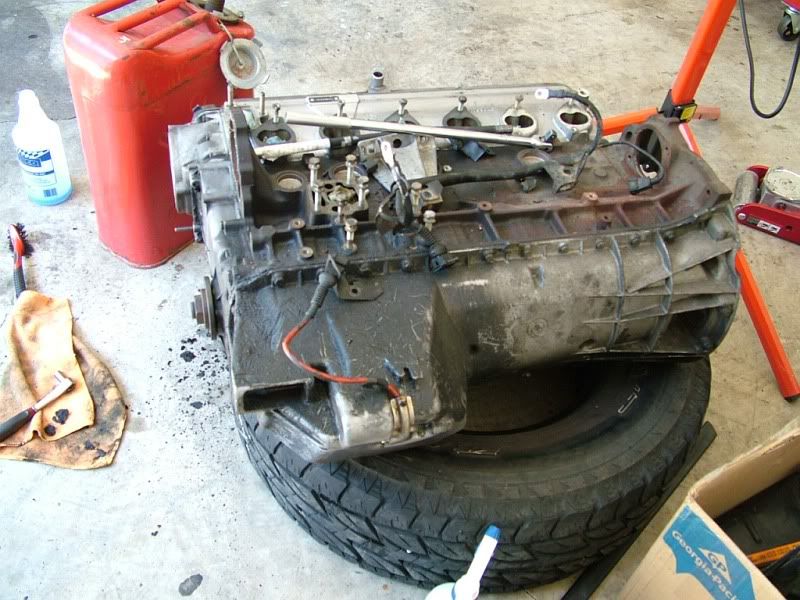
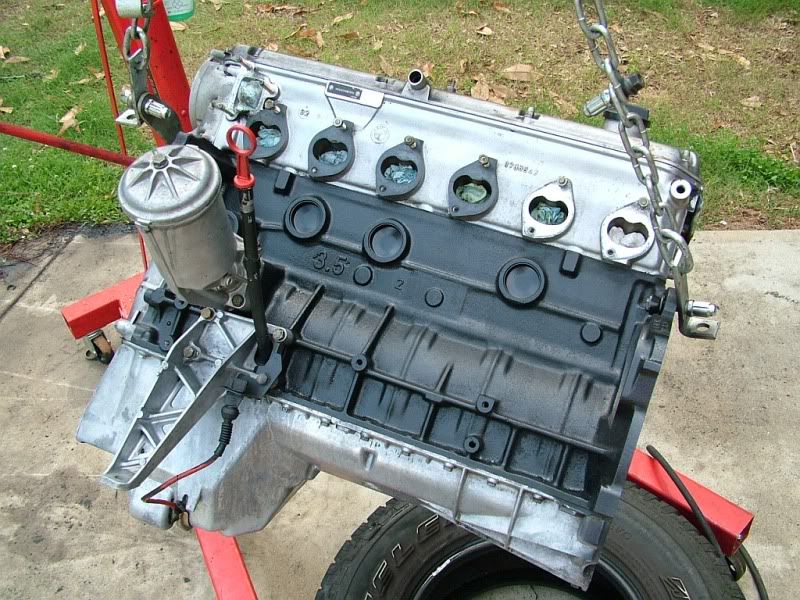
Luckily I had the spare motor from my old e34 just sitting in the garage, all it needed was some cleaning and it was ready to go in-
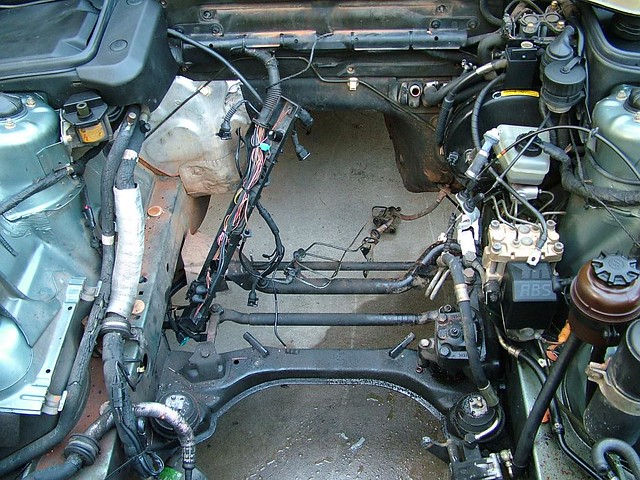
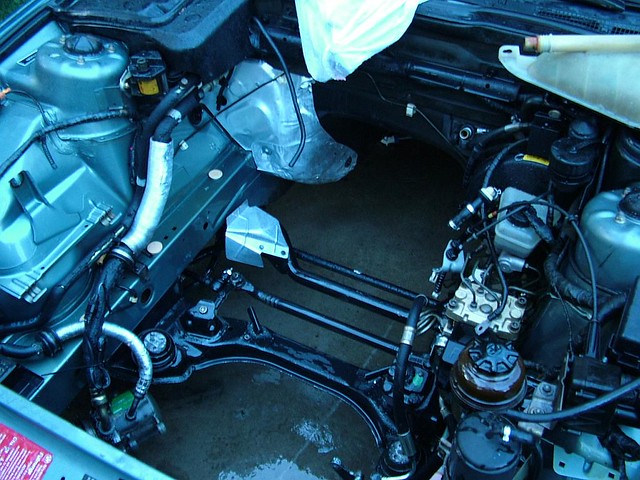
Cleaned the engine bay up too-
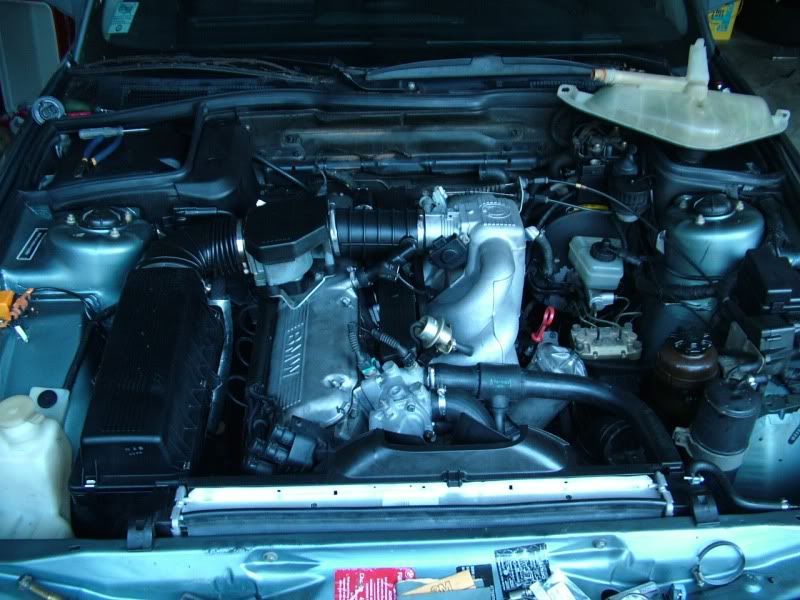
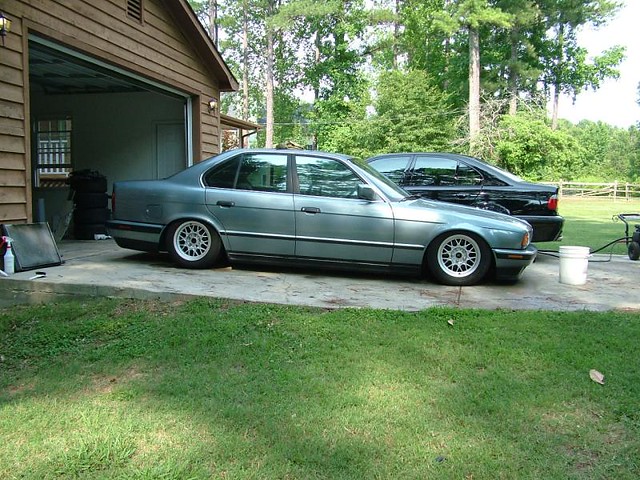
Took a couple weeks but finally got it buttoned up and running again-
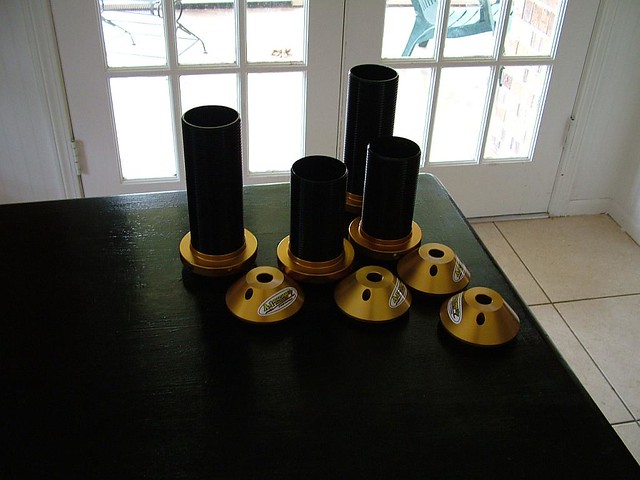
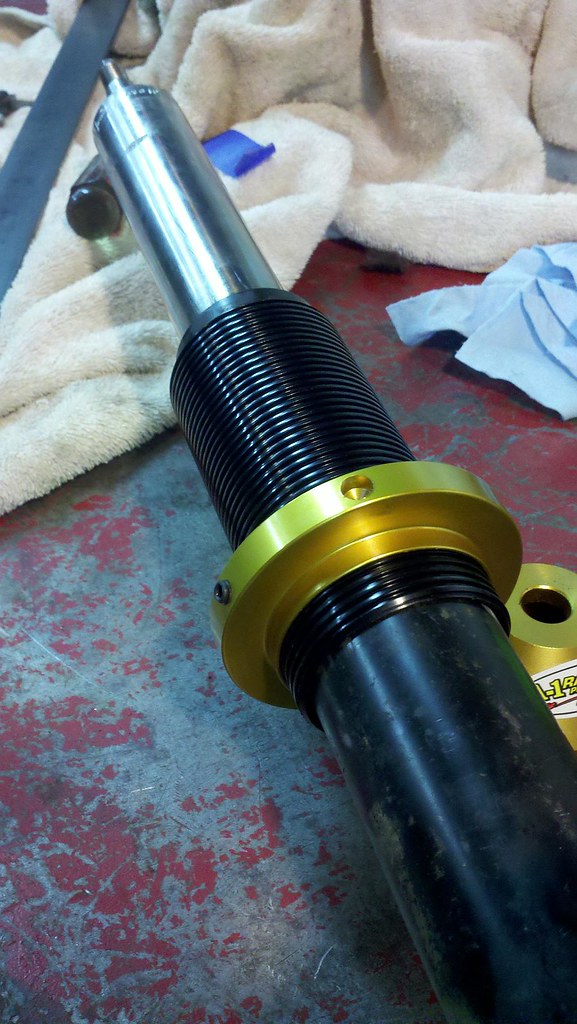
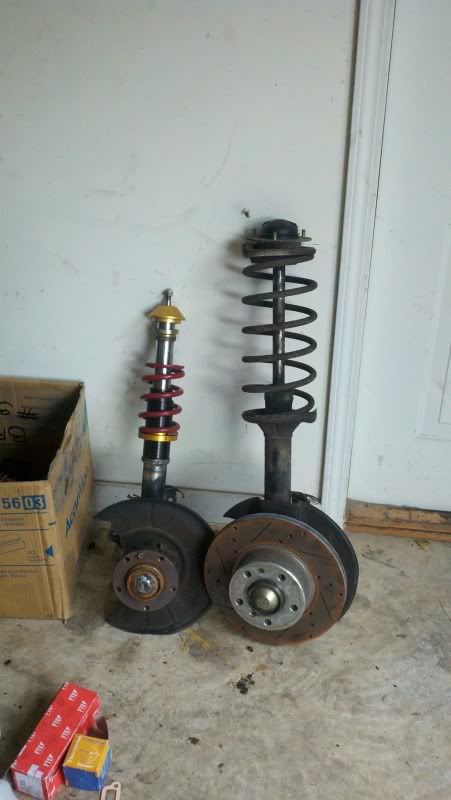
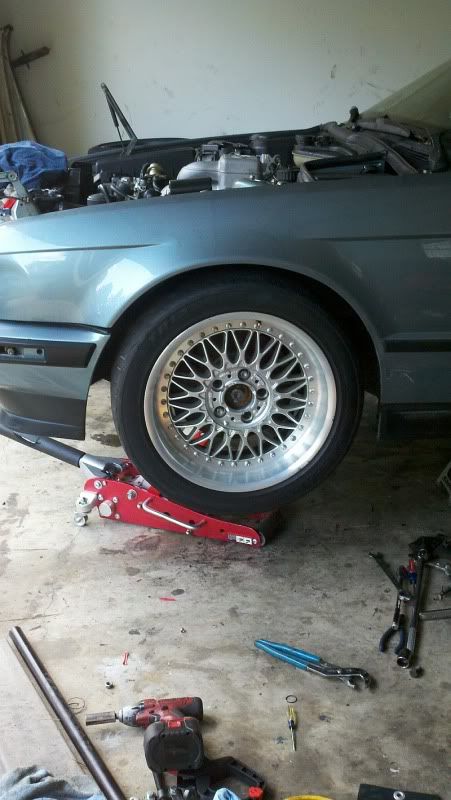
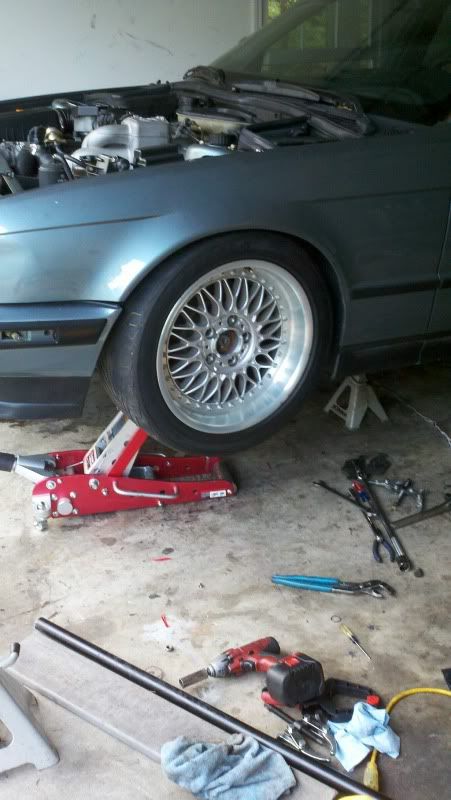
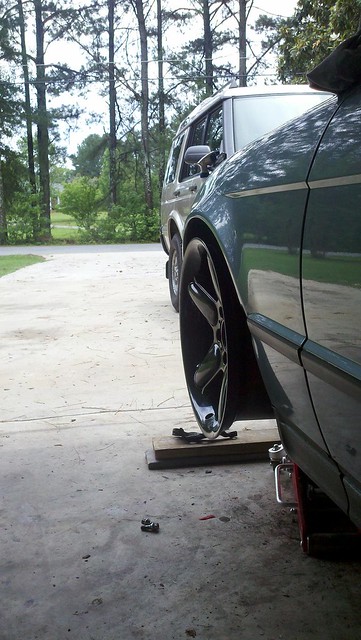
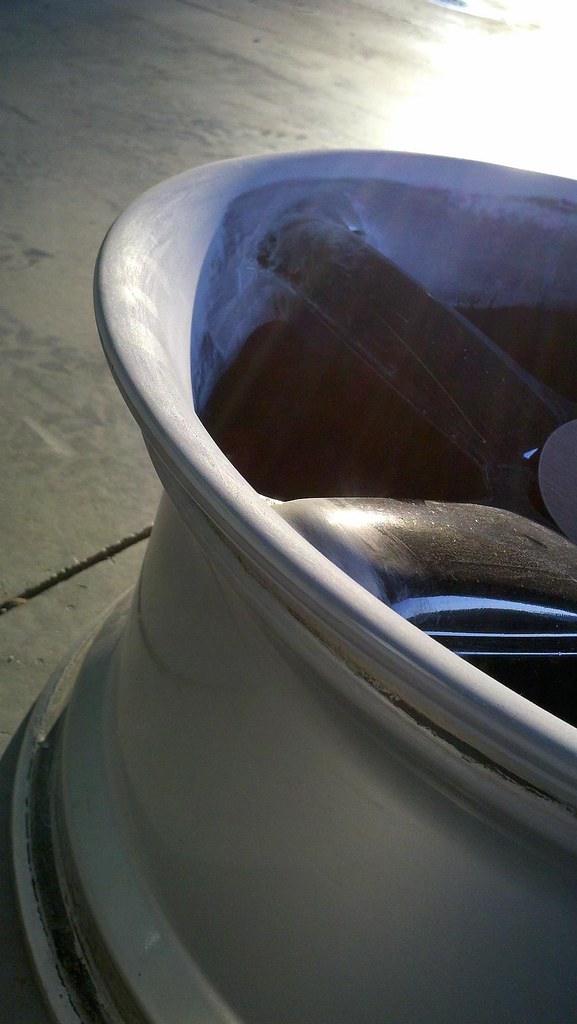
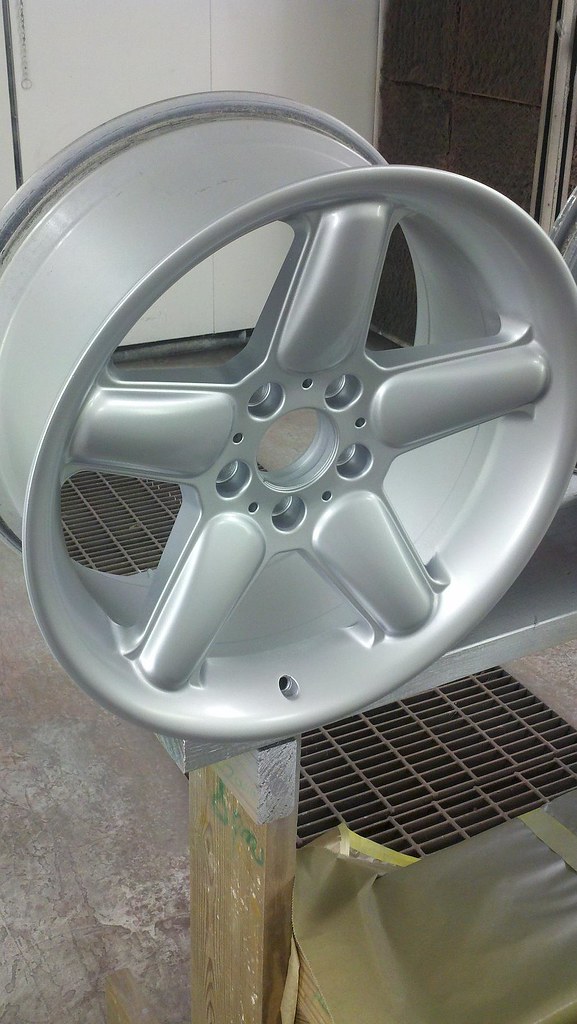
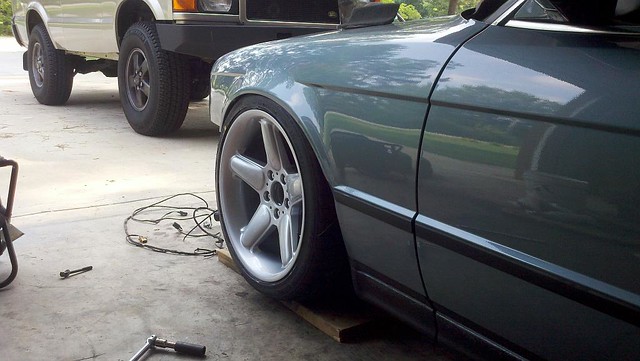
Suspension comes next...
__________________
|
|
|
|
10-05-2011, 05:31 PM
|
#2
|
|
StanceWorks Visitor
- Join Date: Dec 2009
- Location: Marietta, GA
- Posts: 163
- User Status:
Offline
- Contact this user:
|
I really had been wanting to make a set of coilovers. My last e34 had Nex on it and they were pure shit, my e30 has Ground Controls and they are expensive. I wanted something cheap that wasn't going to go through shocks at 5-10k mile increments but I wanted it to be really low if need be. After doing some reading I got this stuff from A-1 racing, they sell mostly dirt track/oval stuff but these sleeves/adjusters are made to fit over strut housings in the front and Bilsteins in the rear. I ended up paying ~$180 for this stuff-
The front sleeves were almost exactly the same diameter as e34 strut housings, so they were going to work perfectly. Unfortunately, I had a set of e28 housings laying around an decided to use them so I could start on the coilovers with the e34 still on the ground. Unbeknownst to me, e28 housings are .1" smaller in diameter than e34 housings so the sleeves didn't fit snug.
I ended up having some perch rings made with a step machined into them to center the sleeves on the housing. This would probably carry over to the e30 if you wanted to make your own coilovers for one, you'd have to make something to center these sleeves on the housings.
All welded up, thanks to Lorin and ready to go on the car (for the first time)-
My plan was initially to use Bilsteins all around with full length housings. I thought that I'd be able to use 6" ~500lb springs all around, weld the rings pretty far down and squeak by with just enough travel to ride as low as I wanted to. Unfortunately this didn't work out-
This is with 2.5" of travel. Not low enough and probably not enough travel-
And bottomed out perch to Bilstein gland nut.. Still not low enough-
That obviously wouldn't work. So I decided to go ahead and buy some short Corrado g60 Koni yellows. These are 4" shorter than factory stuff and would allow me to shorten the housings. I decided to take 2.5" out of the housings, if you look at the picture above I had a lot of room from welding the rings so far down before so I was able to not mess with the area where the perch was welded previously, take 2.5" out from the housings above the perch and just cut down the sleeves. Thanks to Steve @ Apexdesigns for the work on the housings! I got everything back together and it was a lot closer to what I was looking for (got some new wheels too)-
This worked out pretty well but I was still a little low on travel because of the height of the front upper perches that I had. I found some flat perches for sale locally and they worked perfectly, you can see the amount of travel it bought me comparing the two-
New perches and short housings, with 3" of travel still and some room on the adjusters (tires were hitting tops of inner fenders)-
15's btw^
So, suspension finished for now. On to cosmetics..
__________________
|
|
|
|
10-05-2011, 05:35 PM
|
#3
|
|
StanceWorks Visitor
- Join Date: Dec 2009
- Location: Marietta, GA
- Posts: 163
- User Status:
Offline
- Contact this user:
|
The wheels were in great shape for the price, but I wasn't crazy about the blackness and they had some curb rash. I decided to try my hand at wheel repair, and they ended up coming out really good. This was the worst curbage after a lot of work-
And now with some color.. This was my first time spraying base/clear in a booth, and a wheel is a hell of a way to start. This was after the base, I was too tired and ready to leave work to take pictures of the final product in the booth, but they came out really nice for a first time job-
Cleared and on the car, yes I have center caps-
I also bought this, along with some skirts from a local member. Brand new M-sport bumper, never been painted. Came with side skirts as well-
Got a replacement door for my nasty bondo'd POS. It is really straight but had a couple tiny spot of typical e34 lower door rust trying to start. Spent some time today breaking down the door, griding down and re-sealing the seam, the prepping it to be jammed out. Planning on spraying it tomorrow-
Next step is to start the bodywork. I am not an experienced body or paint guy by any means but I've been doing detail/paint correction with the body shop basically forever, so I feel like I'll be able to get it looking how I want to. I do have some professionals at work helping me out as needed though. I'm planning on taking my time and doing it right, especially since I'm on a budget and I'm buying some pretty good stuff to spray, so re-doing anything is going to hurt. So by all means, if any body/paint guys are out there and have any suggestions send them my way! I'll be using Spies hecker base and spies hecker 8035 hs clear, so as long as I don't fail horribly it should be super slick
__________________
|
|
|
|
10-05-2011, 05:40 PM
|
#4
|
|
StanceWorks Visitor
- Join Date: Dec 2009
- Location: Marietta, GA
- Posts: 163
- User Status:
Offline
- Contact this user:
|
started fixing my door today, this is the only panel on the car that needs replacing. It had a few decent sized dents and a few door dings, but it was good practice as I've got a lot of door dings on the car that'll need taking care of.
The last is before the guide coat and hour of blocking. After I got done with that I thought I was looking pretty good until one of the bodymen that is helping me came by and showed me a couple low spots that I'll have to go back over. Re-prime and more blocking tomorrow... awesome
This was the next day, my first time spraying my base and clear.
Finally pulling it out of the garage to take it up to the shop where I work for the beginning of the bodywork
__________________
Last edited by jcbe34; 10-05-2011 at 05:45 PM.
|
|
|
|
10-05-2011, 05:55 PM
|
#5
|
|
StanceWorks Visitor
- Join Date: Dec 2009
- Location: Marietta, GA
- Posts: 163
- User Status:
Offline
- Contact this user:
|
The bodywork has been quite the undertaking to say the least. The car had been painted quite a few times and it really made things difficult, especially for a n00b like myself. Decided to strip all of the old paint of it and start from basically nothing. Not stripping to metal completely but pretty close. These are just a few project pictures along the way. It's been quite the learning experience
Stripping the hood-
Almost done with the easier bodywork, filling normal dings, dents and such.
Now moving onto the serious stuff. The LF fender had a soft ball sized dent that someone just "caved and paved" as my co-worker put it. Had to stud weld it and pull it out, then smooth it and glaze it. I let him handle this as it was in a tough spot and needed to look right
Should be ready from primer soon. Unfortunately once we prime it we'll be blocking and re-priming at least twice, so I'm far from finished. I'll update this thread with progress though
Picked up some new wheels to replace the Schnitzers also, they just weren't wide enough. These are 17x12 and 18x11 Speedline Mistrals. Sending the 17's to weldcraft next week to be cut down to 17x10 or 9.5
Split, stripped and polished the 18's. More to come! BTW, the centers are usually rear mount, so they won't be sticking out so far when assembled.
__________________
|
|
|
|
10-05-2011, 06:10 PM
|
#6
|
|
StanceWorks Newcomer
- Join Date: Jun 2011
- Posts: 2
- User Status:
Offline
|
I like it.
|
|
|
|
10-05-2011, 06:21 PM
|
#7
|
|
eat english muffins
StanceWorks Addicted
- Join Date: May 2011
- Location: denver, colorado
- Posts: 740
- User Status:
Offline
|
nice work man, very thorough
the speedline's are looking great, doing anything fancy with the bolts?
speaking of fancy, you going back to factory paint?
keep it up
|
|
|
|
10-05-2011, 06:22 PM
|
#8
|
|
StanceWorks Visitor
- Join Date: Sep 2010
- Location: Quebec, Canada
- Posts: 76
- User Status:
Offline
|
god I wish I had the tools, references and a garage like yours!
|
|
|
|
10-05-2011, 06:28 PM
|
#9
|
|
StanceWorks Member
StanceWorks OG
- Join Date: Apr 2009
- Location: The Bay, Cali
- Posts: 12,812
- User Status:
Online
- Contact this user:
|
Good shit
|
|
|
|
10-05-2011, 06:32 PM
|
#10
|
|
StanceWorks Visitor
- Join Date: Jan 2011
- Location: Nassau, Bahamas
- Posts: 68
- User Status:
Offline
|
sweet e34!
|
|
|
|
10-05-2011, 06:52 PM
|
#11
|
|
fo doe's fo mo hoe's
StanceWorks Newcomer
- Join Date: Jun 2011
- Location: @lanta
- Posts: 20
- User Status:
Offline
|
very nice progress!
|
|
|
|
10-05-2011, 07:14 PM
|
#12
|
|
Likes Good Ftment
StanceWorks OG
- Join Date: Jun 2009
- Location: Boston
- Posts: 2,181
- User Status:
Offline
|
So happy to see you back at this. Shits sick.
|
|
|
|
10-05-2011, 07:14 PM
|
#13
|
|
StanceWorks Lover
- Join Date: Oct 2009
- Location: Long Island
- Posts: 1,342
- User Status:
Offline
|
looking great so far!
|
|
|
|
10-05-2011, 07:50 PM
|
#14
|
|
StanceWorks Visitor
- Join Date: Jul 2011
- Location: Holladay Utah
- Posts: 65
- User Status:
Offline
|
Awe shit! I got to the bottom of this paging hoping to see like 2 more pages of work to be looked at. Damn. Great looking E34, so jealous of the resources you've got. You have some great looking autos at your house btw.
|
|
|
|
10-05-2011, 07:57 PM
|
#15
|
|
StanceWorks Addicted
- Join Date: Feb 2011
- Location: Jacksonville Florida
- Posts: 598
- User Status:
Offline
|
Nice work so far. I cant wait to see it done
__________________
Quote:
Originally Posted by Jesus Christ
the VW community is weird. dont try to understand, its like understanding africa.
|
|
|
|
|
10-05-2011, 08:13 PM
|
#16
|
|
StanceWorks Addicted
- Join Date: Feb 2011
- Location: Jacksonville Florida
- Posts: 598
- User Status:
Offline
|
Nice work so far. I cant wait to see it done
__________________
Quote:
Originally Posted by Jesus Christ
the VW community is weird. dont try to understand, its like understanding africa.
|
|
|
|
|
10-05-2011, 09:15 PM
|
#17
|
|
StanceWorks Visitor
- Join Date: Dec 2009
- Location: Marietta, GA
- Posts: 163
- User Status:
Offline
- Contact this user:
|
Thanks!
Yeah I am re-painting the car Cirrus blue, the original color. It's one of my favorite bmw colors and it's rare to see one that's really clean to that's the plan.
I'm still not sure what to do about the wheel bolts. half of them are chromed and half are not coated at all, so I need to do something. I was thinking about spraying (base/clear) them silver or black or going with some other type of coating but I'm not really sure what.
__________________
|
|
|
|
10-05-2011, 09:42 PM
|
#18
|
|
The Governors Club
StanceWorks OG
- Join Date: Feb 2010
- Location: Portland
- Posts: 2,927
- User Status:
Offline
- Contact this user:
|
I like this.
__________________
Quote:
Originally Posted by Longboarding_G
you sir, win this battle.
|
“Producing something of quality is obsessing over details nobody sees.”
|
|
|
|
10-05-2011, 09:46 PM
|
#19
|
|
StanceWorks Lover
- Join Date: Jun 2009
- Location: Vancouver, WA
- Posts: 1,486
- User Status:
Offline
|
Awesome work!
__________________
|
|
|
|
10-05-2011, 10:24 PM
|
#20
|
|
Shun The Non Believer
StanceWorks Lover
- Join Date: Sep 2009
- Location: Hayward, Ca
- Posts: 1,012
- User Status:
Offline
- Contact this user:
|
amazing!
|
|
|
|
10-06-2011, 01:25 AM
|
#21
|
|
StanceWorks OG
- Join Date: May 2010
- Location: Bulgaria / EU
- Posts: 2,436
- User Status:
Offline
|
the black one at the first pictures was you previous e34, right? love everything about it, especially the wheels!
love the work you put for the new one, really want to see it finished! keep it up!
|
|
|
|
10-06-2011, 01:40 AM
|
#22
|
|
StanceWorks Visitor
- Join Date: Jun 2011
- Location: Carlsbad, CA
- Posts: 43
- User Status:
Offline
|
wow awesome clean work! makes my urge to get e34 down the road alot more  i did the exact steps with my front struts after noticing i was bottoming out everywhere
|
|
|
|
10-06-2011, 02:11 AM
|
#23
|
|
StanceWorks Addicted
- Join Date: May 2011
- Location: socal
- Posts: 897
- User Status:
Offline
|
killer thread. again, im jealous of your resources
__________________
|
|
|
|
10-06-2011, 10:19 AM
|
#24
|
|
StanceWorks OG
- Join Date: Feb 2010
- Location: Wyomissing, PA
- Posts: 3,016
- User Status:
Offline
- Contact this user:
|
black would look good on the bolts
love the progress so far tho, and deff a perfect color to stick with
__________________
12 Rubicon. 35" Nitto. 2.5" Lift.
|
|
|
|
10-06-2011, 02:22 PM
|
#25
|
|
StanceWorks Visitor
- Join Date: Dec 2009
- Location: Marietta, GA
- Posts: 163
- User Status:
Offline
- Contact this user:
|
Quote:
Originally Posted by projektzwo
the black one at the first pictures was you previous e34, right? love everything about it, especially the wheels!
love the work you put for the new one, really want to see it finished! keep it up!
|
Yep, I only had those for a little while though. Me and a friend went through a few sets of NOS HRE's that he stumbled upon a few years back, and these are the ones I kept the longest (Mike's picture btw)
I probably am going to go black with the bolts. I think I'm going to need all of the contrast I can get
__________________
|
|
|
|
 |
|
| Thread Tools |
|
|
| Display Modes |
Linear Mode
|
Posting Rules
|
You may not post new threads
You may not post replies
You may not post attachments
You may not edit your posts
HTML code is On
|
|
|
All times are GMT -5. The time now is 10:29 PM.
|