 Tweet
Tweet

-
Hipstagram tberardinucci

-
Thanks for all the kind words guys. I took a few months off from working on this, not really on purpose, life just kind of happens, but I'm getting back into it. I promise there will be some good updates shortly, bear with me!1949 Ford F1 Build:
http://www.stanceworks.com/forums/sh...ad.php?t=93274Comment
-
I've been working on the truck, but as you guys can see, my pictures don't show up anymore thanks to photobucket. Anyone have suggestions for an alternative so I can revive this thread?1949 Ford F1 Build:
http://www.stanceworks.com/forums/sh...ad.php?t=93274Comment
-
I use flickr, never had an issue with them.IG @gt3_brz
My Mustang Build
http://www.stanceworks.com/forums/sh...=1#post1552949
My BRZ Build
http://www.stanceworks.com/forums/sh...ad.php?t=86482
My F100 Build
http://www.stanceworks.com/forums/sh...ad.php?t=97329Comment
-
Use tapatalk. No need to host them.Hipstagram tberardinucci
Comment
-
So I found this add-on for Google Chrome that basically bypasses the photobucket image hosting BS. I'm still planning to open a Flickr or Imgur account and revive the thread, but for anyone who has Chrome and wants to be able to see the previous pictures here is the link to the add on:

I'll be back soon with big updates!1949 Ford F1 Build:
http://www.stanceworks.com/forums/sh...ad.php?t=93274Comment
-
Flickr, always.
 Instagram - Benwalsh91
Comment
-
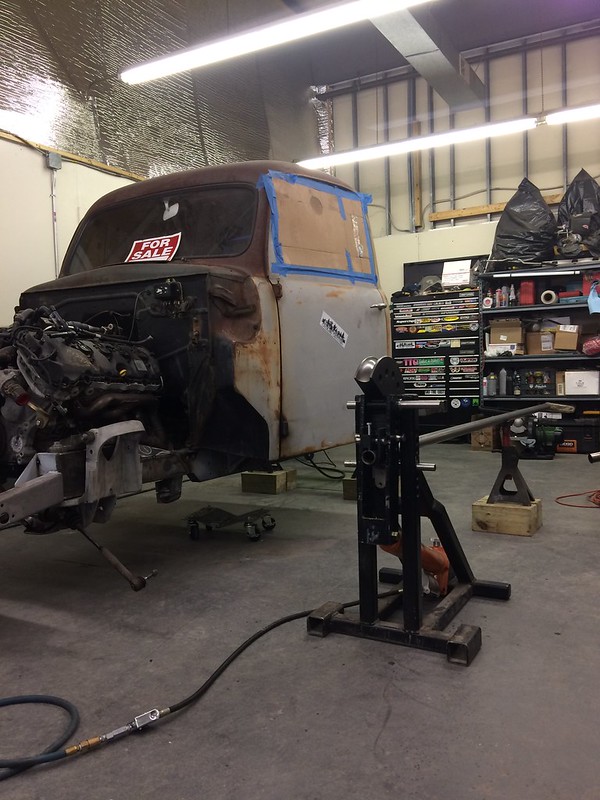
So looking through my pictures I realized this isn't as big of an update as it should be considering how long it's been. Work on the truck this year was scarce and sporadic, but it was a good year anyway. Here's what's happened with the truck since I last posted...
My buddy got his LS swapped E36 running, so the truck was moved further into the shop, and I borrowed a tube bender from a friend.
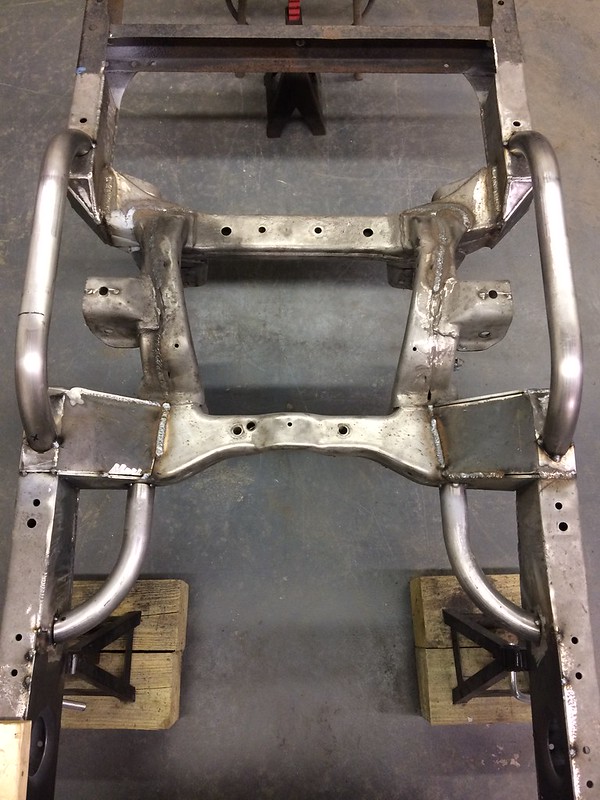
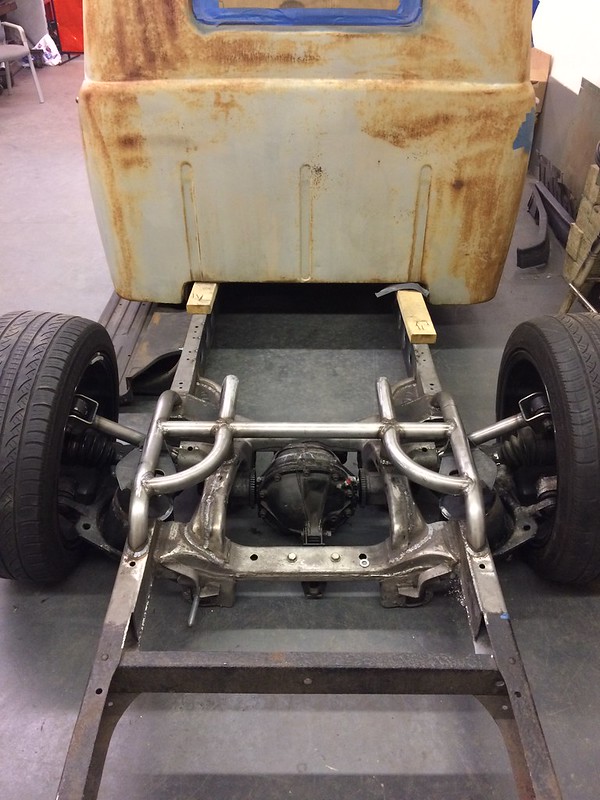
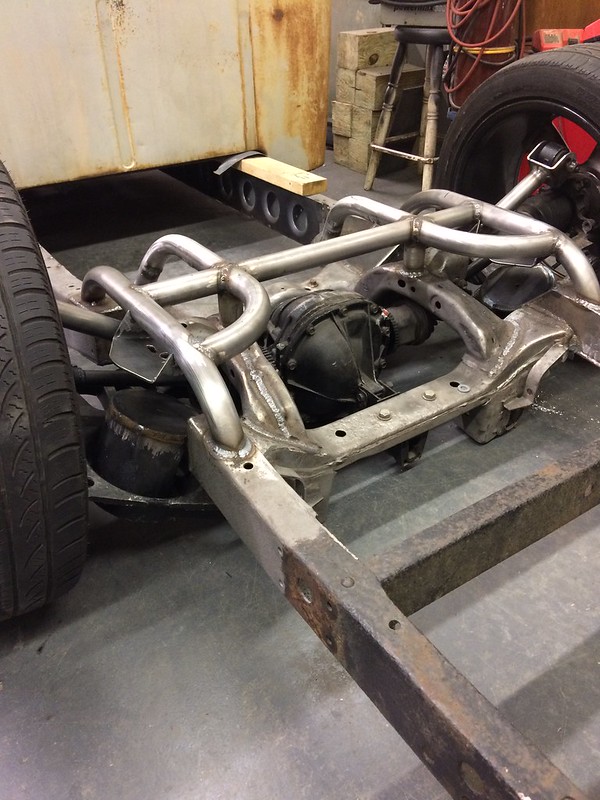
I had never bent tube before, but I had always wanted to, so this was a pretty exciting part for me. All of the tube is 1.75" x 0.120" wall DOM, so it should hold up just fine. The frame had some pretty serious flex around the IRS cradle before, so I knew I needed to do something about it. I think the tube ended up being the best compromise of strength, style, and weight.
I started by adding some bracing to the front mounts.
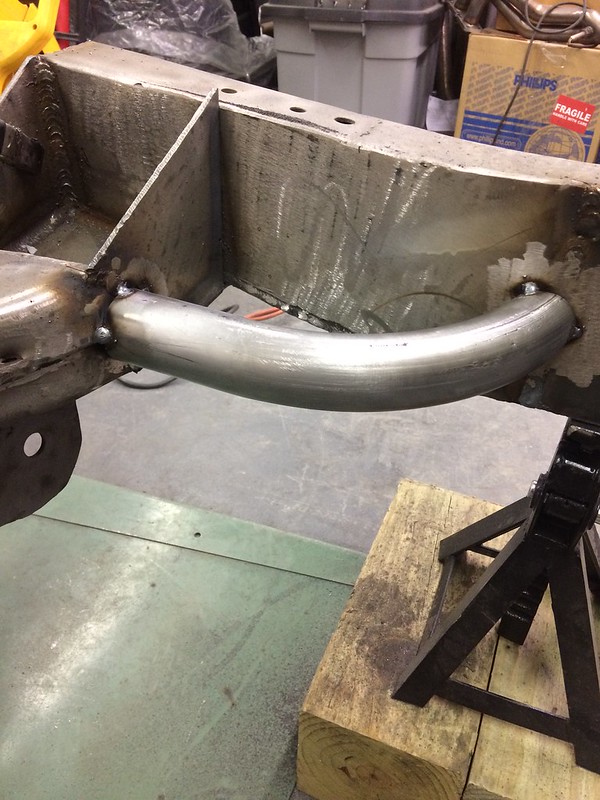
Then came the tubes to connect the two original frame rails back together.
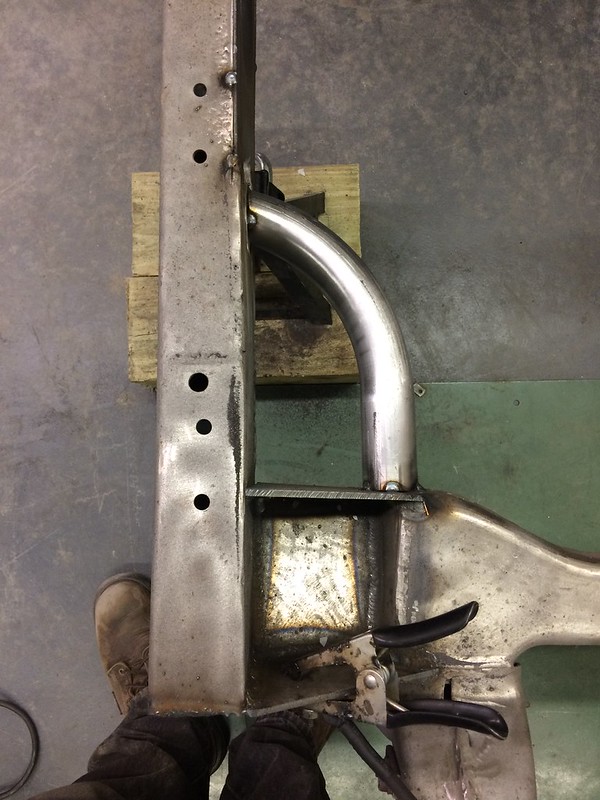
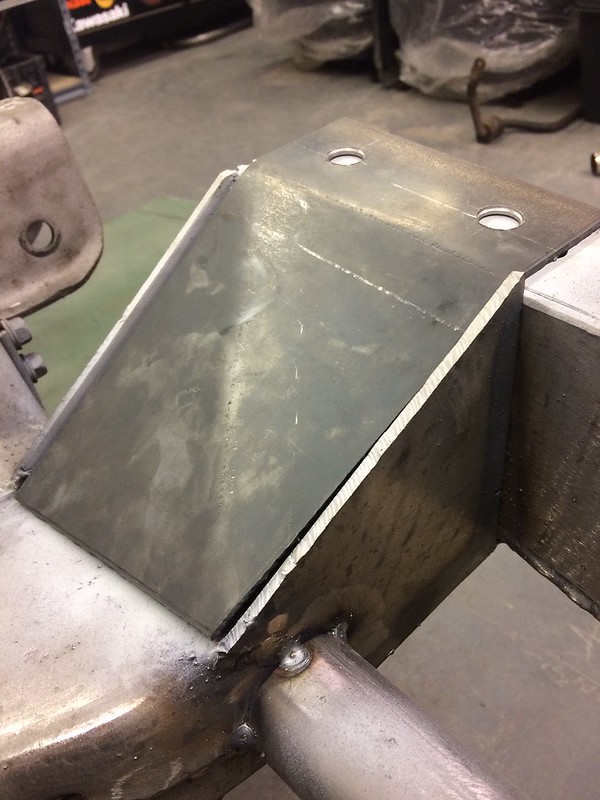
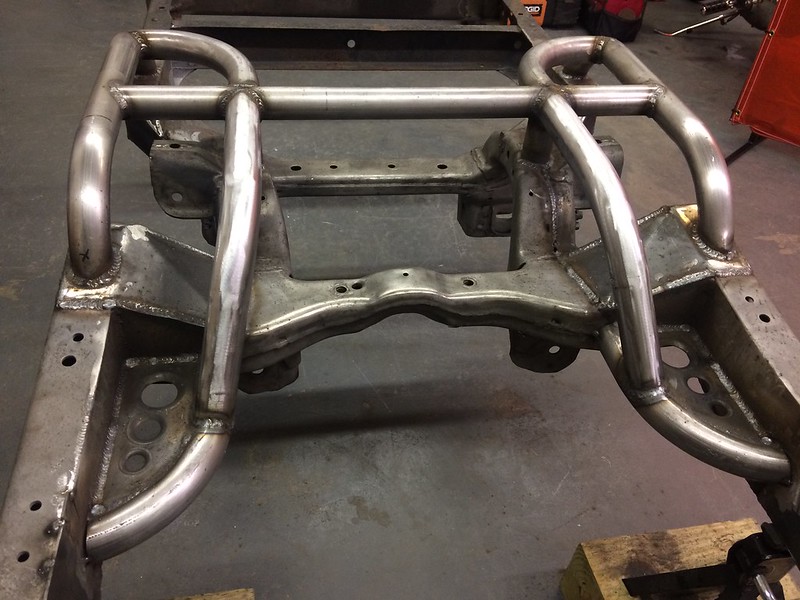
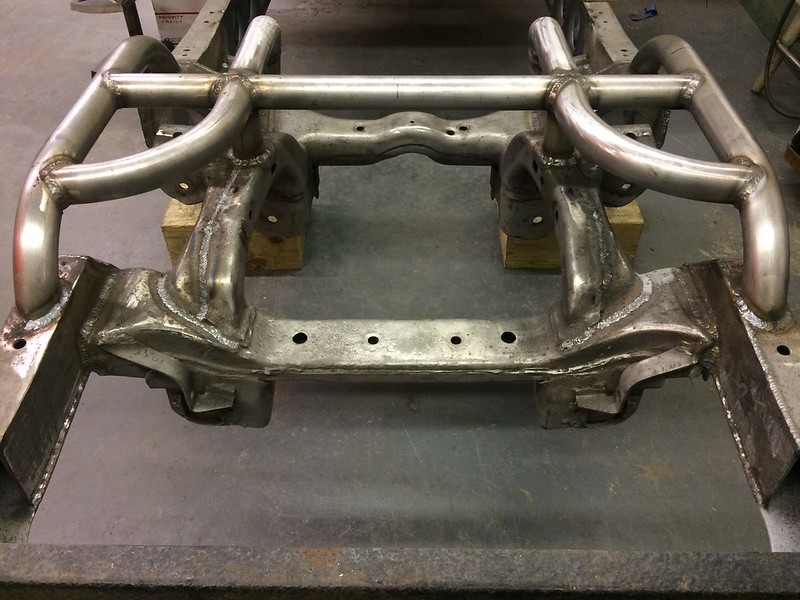
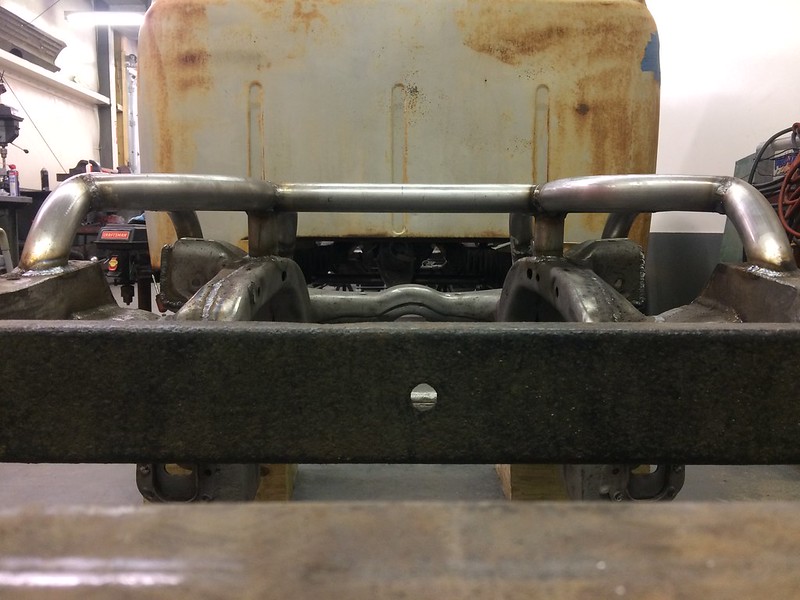
Then somehow I must have lost a lot of pictures, because the next ones are of the finished product. Here you can see the dimpled plates to help tie the tube into the frame at the front, and the two tubes that drop down from the cross tube to attach it to the IRS cradle. I don't think this area will be the weak link anymore!
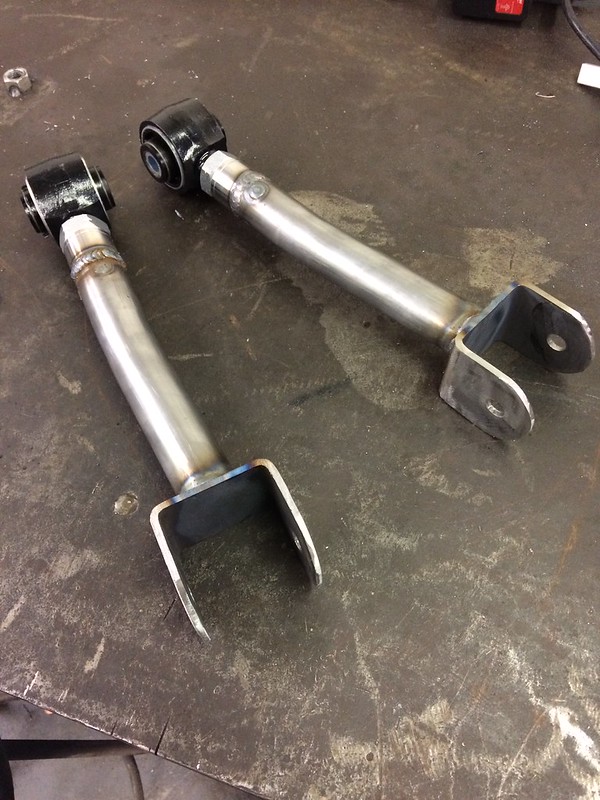
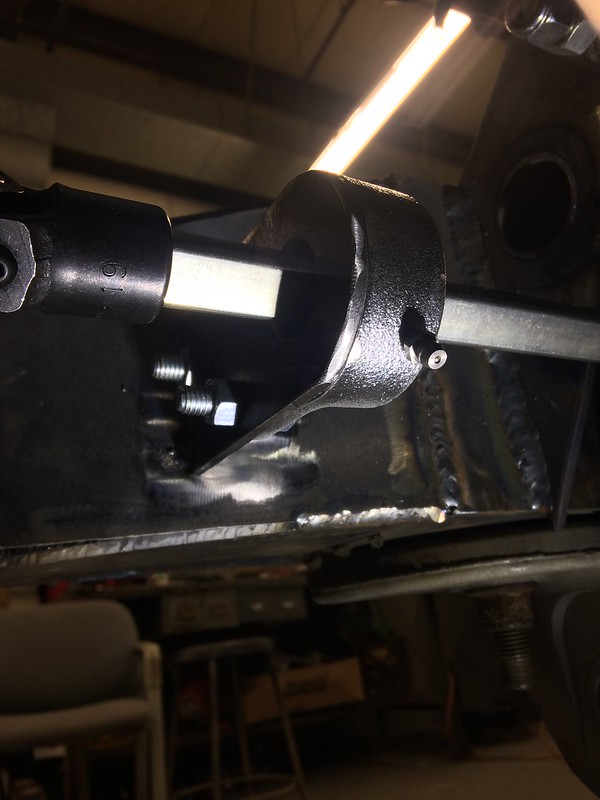
Up next were some custom adjustable control arms for the rear to help my negative camber issue. With these arms I can now go as aggressive as -4* if I ever felt the need to just destroy some tires, or gain some stance points.
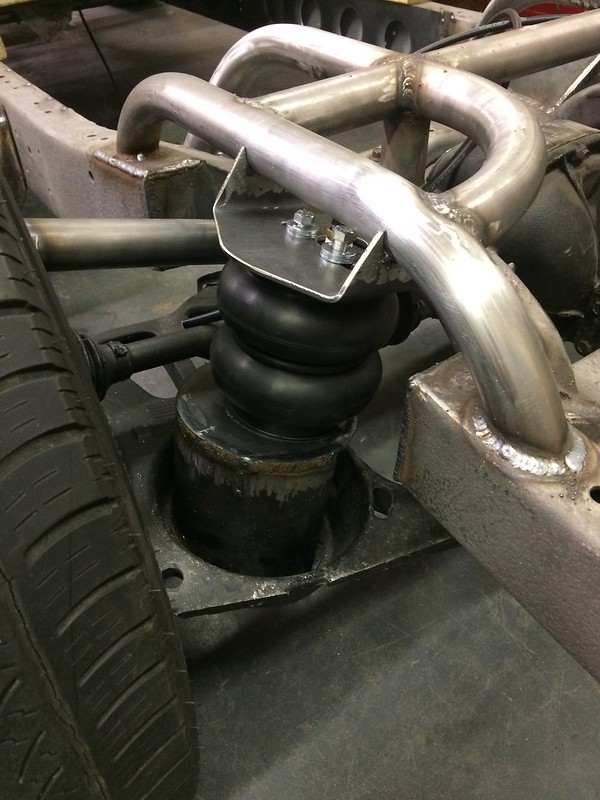
And then then the start of the rear lower bag mounts.
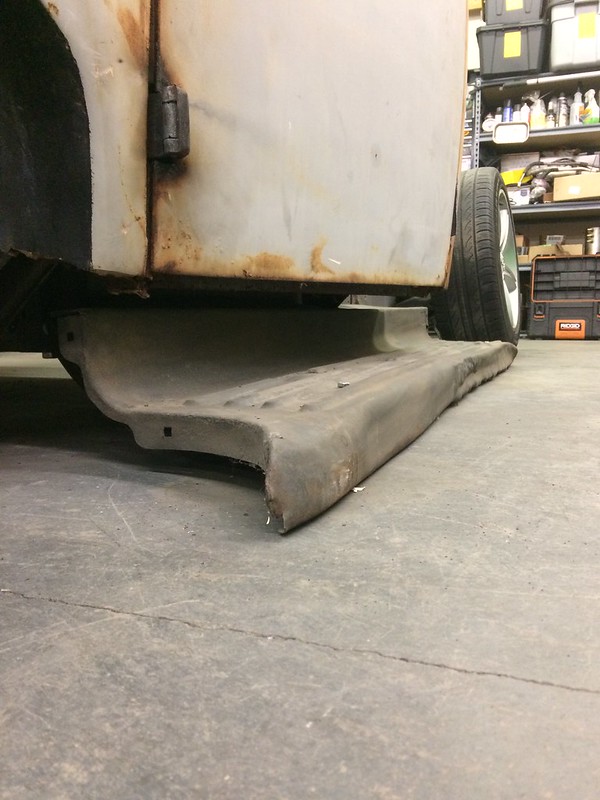
Before and after of the rear lower bag mounts. They are way overkill, But the only tube I could find locally in 6" was a Schedule 40 pipe, so I made it work. They're heavy, but they don't weight as much as a coil spring, so it can't be that bad.
Then I set the truck up at ride height, took a lot of measurements, and made some decisions on what to run for suspension.

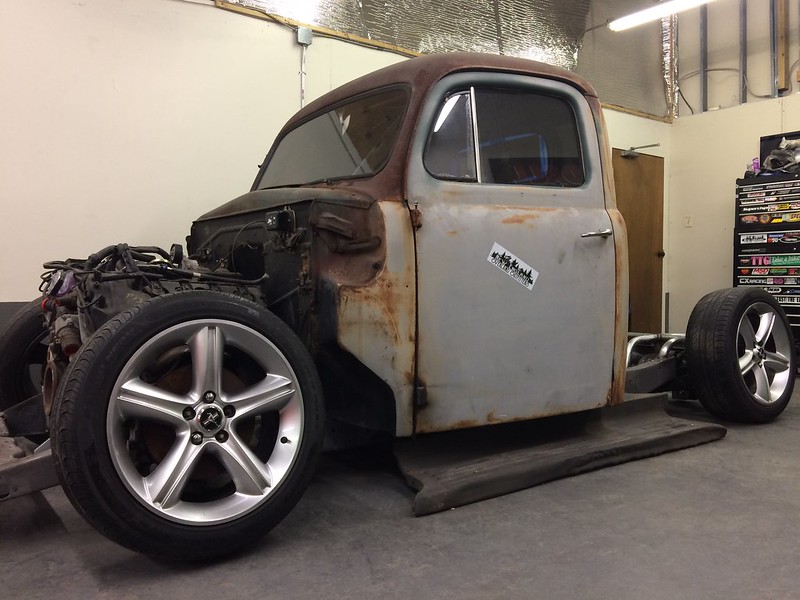
And then I laid it out for the first time with the cab on, and man does it look cool. This got me really motivated!
The IRS all laid out.
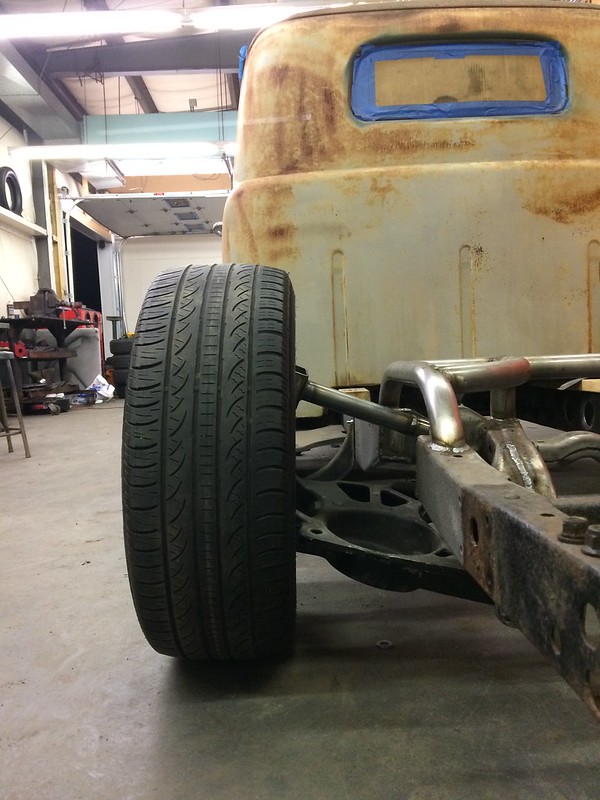
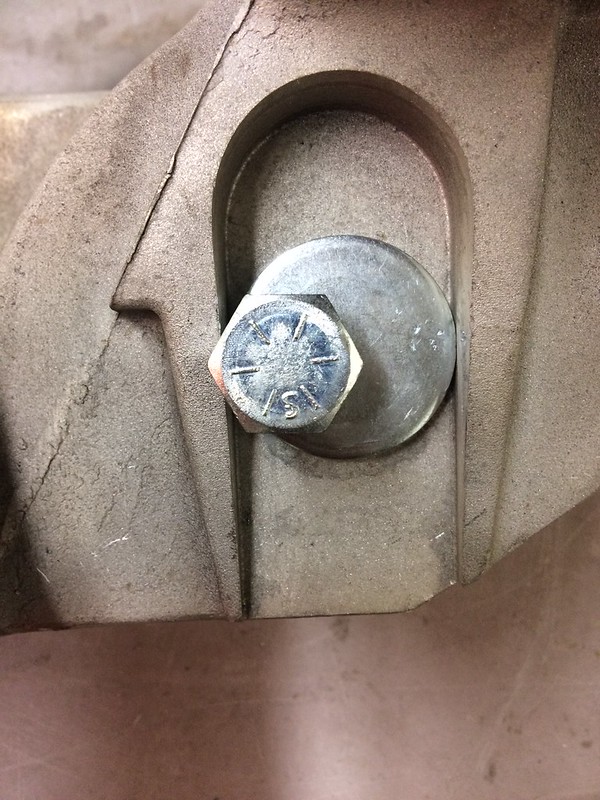
The front had some serious negative camber issues too, and I started to build some custom upper control arms to fix that, but it ended up being a big waste of time and money. Even with the 19" wheels there just wasn't enough clearance for the ideas I had. I may go back to the drawing board someday and come up with something, but for now I'm going to run these SPC camber bolts in the lower control arms. After opening up the holes in the Crown Vic crossmember and installing these I have plenty of camber adjustment from mild street settings to an aggressive track alignment.
Then came the time to open up my wallet. I decided on Ride Tech HQ series 4.1" travel Shockwaves for the front for a few reasons. The main one was packaging, I could have built custom mounts to stuff a regular bag into the space the strut used to live in, but then I would have had to relocate the shock, and I didn't like the placement options for that. The second was adjustability. The Shockwaves are height adjustable like a traditional coilover, so I can fine tune my ride height once the truck is together, and they have external rebound adjusters that are easily accessible. Last, but not least, was performance. These are supposed to be some of the best handling bags you can get, and I want to drive this truck like I stole it, so I decided to spend the money now and appreciate it later.
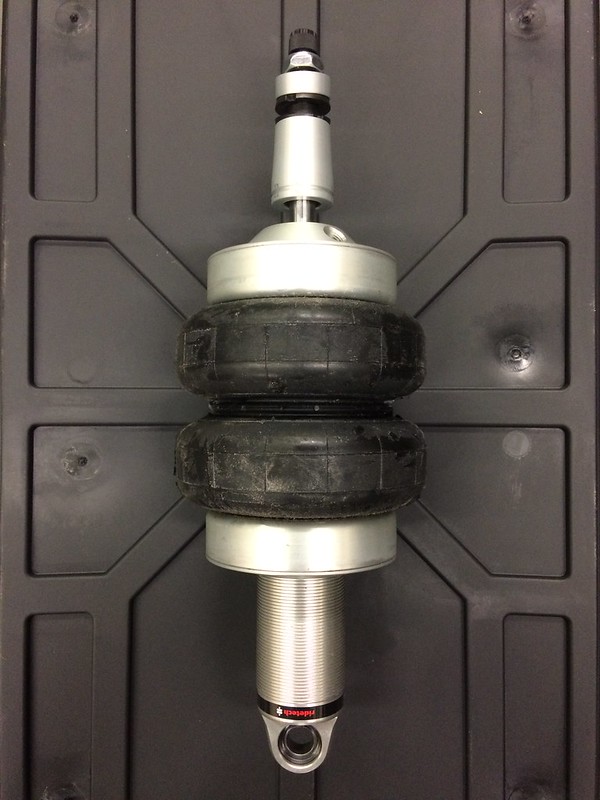
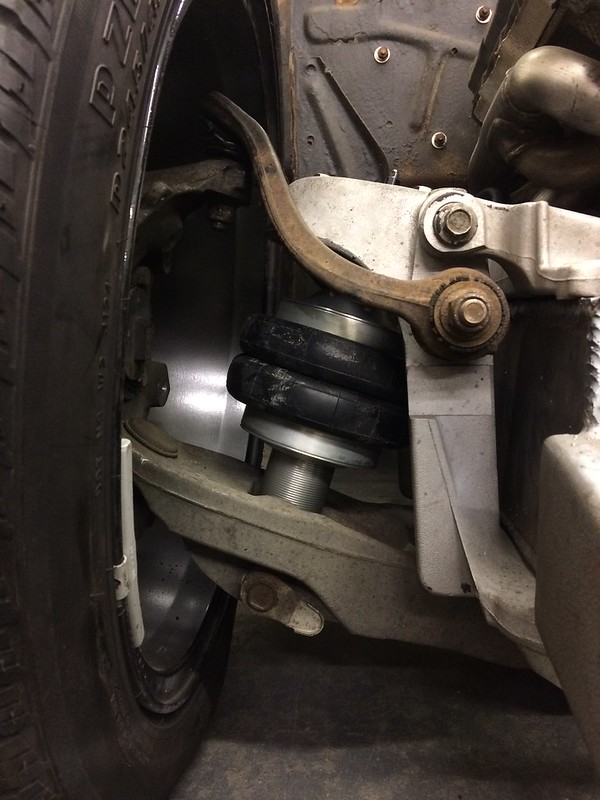
Out back are some Slam Specialties SS-5 5.5" bags. I chose these because the 5.5" size made packaging easier, and they cam with internal bumpstops, which means there's one less thing to buy and find a home for.
And if this works, here's a video of the first time I aired it up. NSFW for some language.

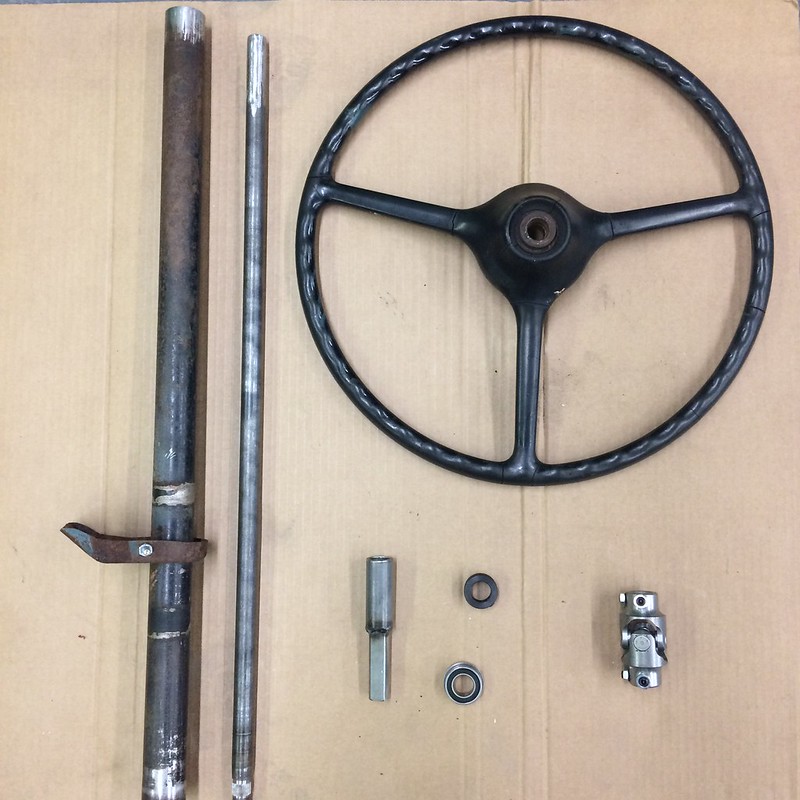
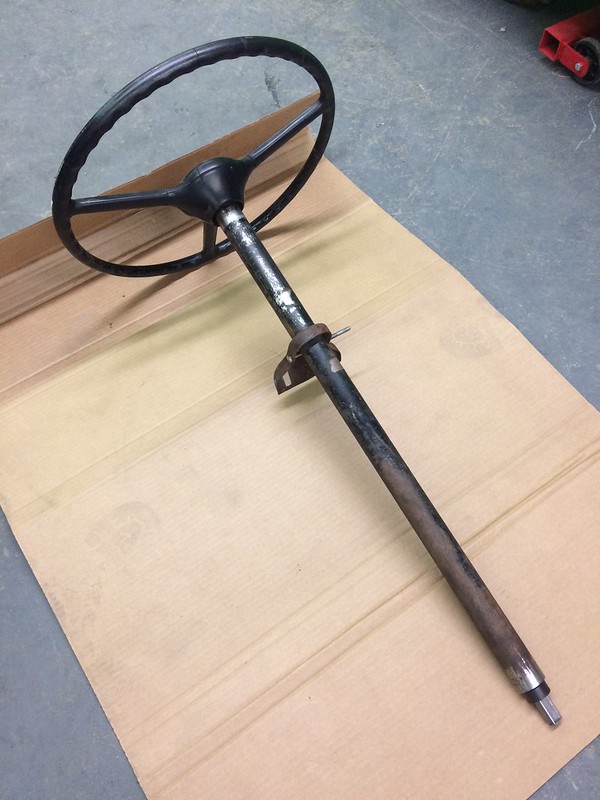
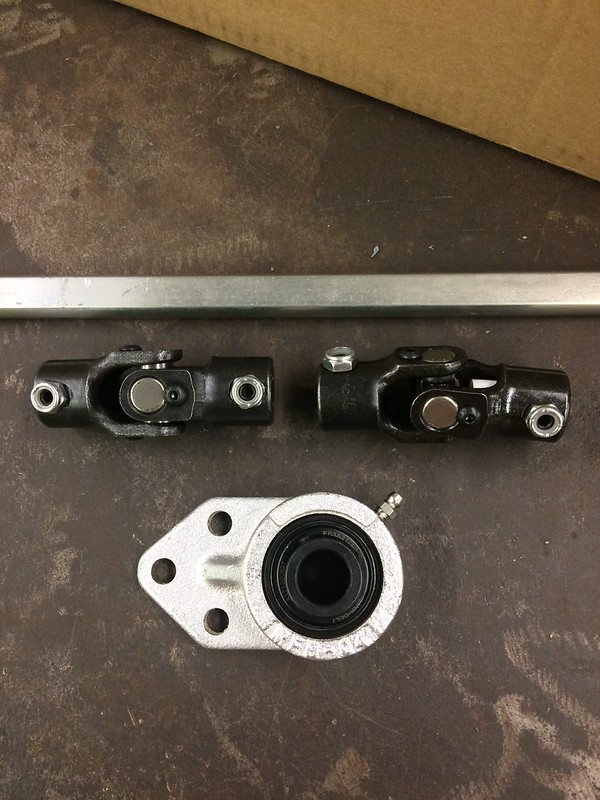
Then I started on the steering. I wanted to keep the stock steering column, at least for now, because it's a lot cheaper. I'm also trying to save something from the original truck haha. I bought a steering column saver kit from Performance Online, and it was easy to install. Here's the parts before assembly.
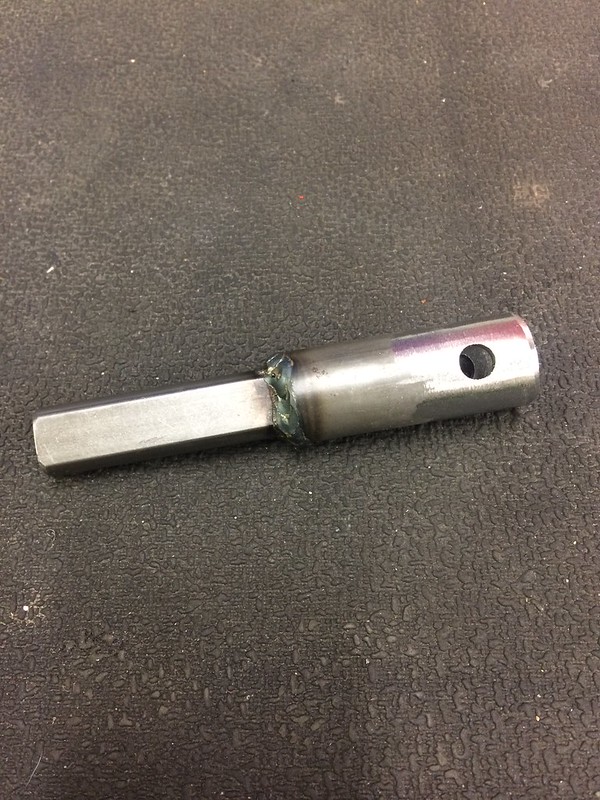
This is the weld on adapter they give you. I added the 3/8" holes for plug welds, and although I probably didn't need to I would rather take 5 minutes to do it now rather than wish I did if something ever went wrong.
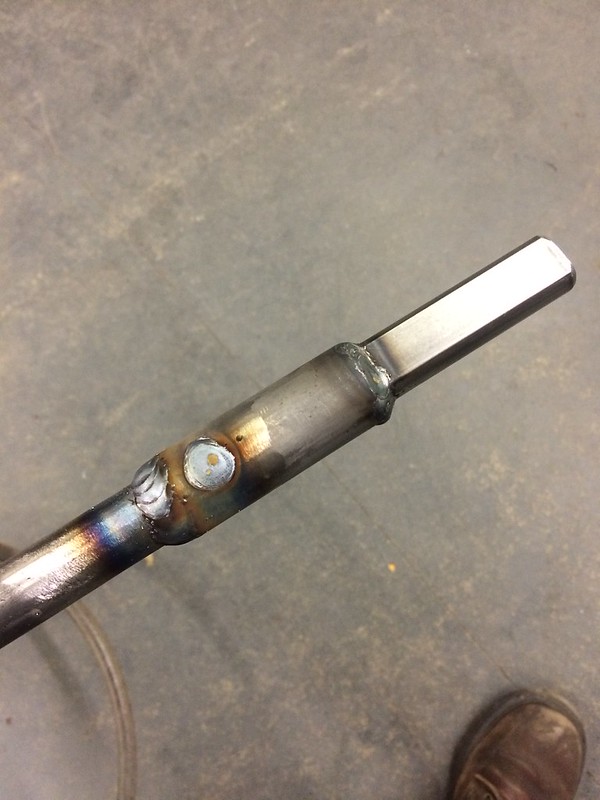
Welded that sucker onto the end of the OEM steering column shaft.
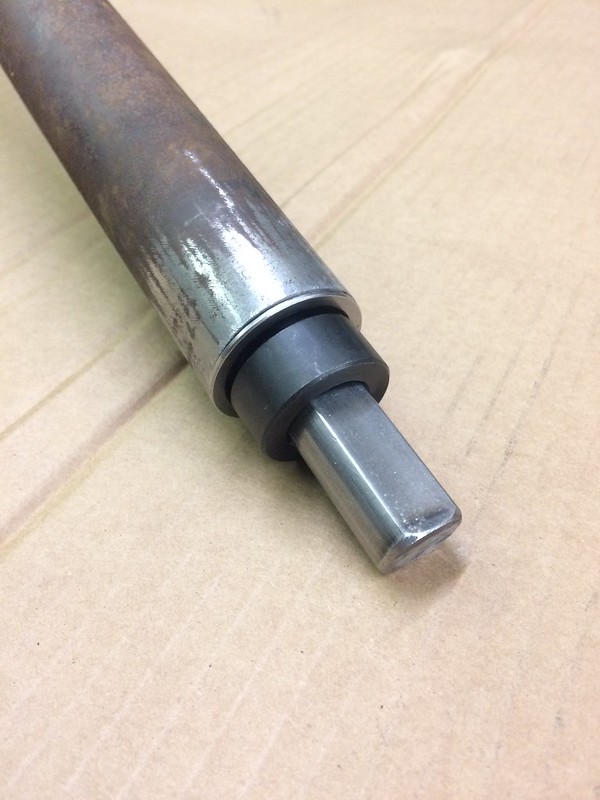
Then I assembled the column.
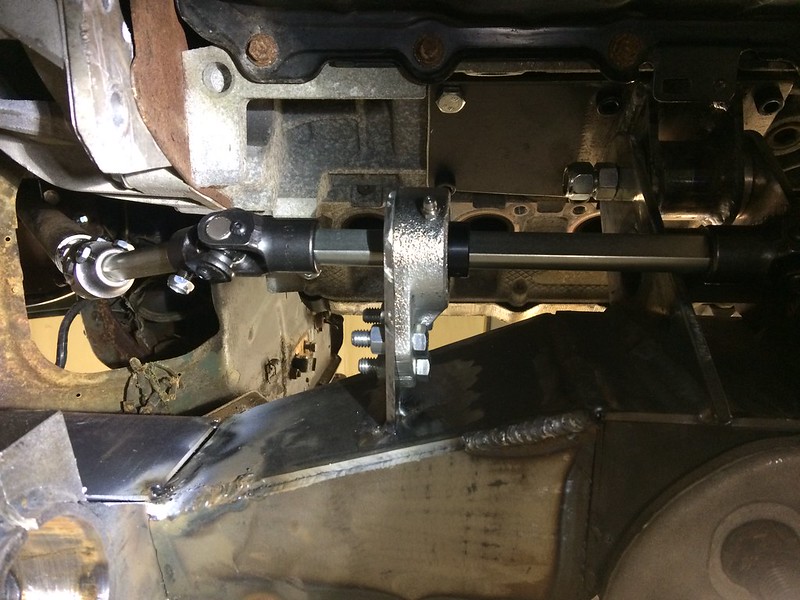
The next step was figuring out how to get my steering and my headers to occupy the same space peacefully. I don't love that there's an extra joint in the shaft, but I think that considering the spacial limitations I was working with, this will be my best bet. I started with some Speedway high angle U-joints, a stick of 3/4" DD shaft, and a 3/4" ID bearing from McMaster-Carr
And ended up with this. Forgive the horrible lighting, it was late and I was lazy.
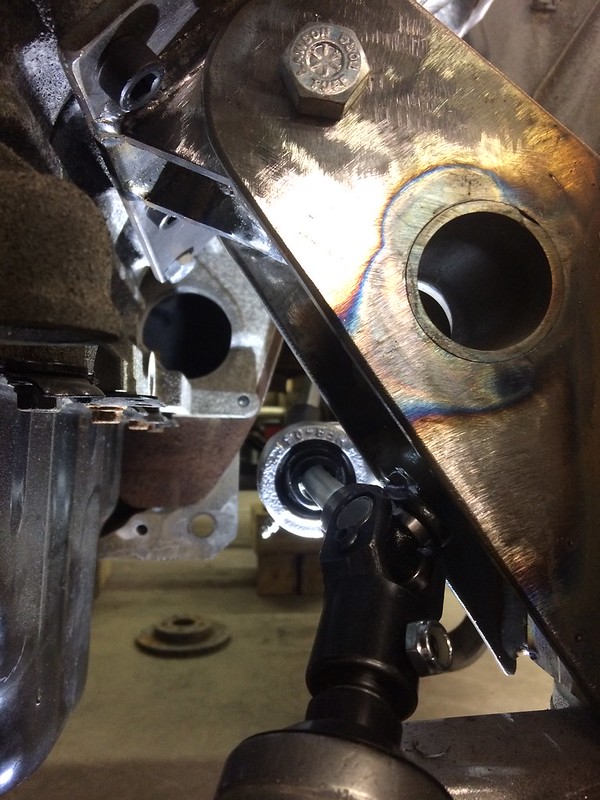
And that's where I left off tonight. Tomorrow I'm going to add a gusset to that bearing mount to keep it from flexing, and then start on the headers. I should have some parts coming in from Summit, so hopefully I can have at least the driver's side header tacked together tomorrow or Saturday. All these little steps feel like thy're adding up, so I'm getting a lot more motivated to work on the truck. As things move forward I'll be better about taking pictures and updating the thread.1949 Ford F1 Build:
http://www.stanceworks.com/forums/sh...ad.php?t=93274Comment
-
Love this thread! Please keep on updating and post many pictures. Great work.Tut DAS denn Not, dass der Karren so tief is?Comment
-
I like your fabwork, very clean but stylish
FB: @DumbassCarCrew - IG: @fruttolo_dumbasscrewComment
-
I also meant to add this to the last post. One of the reasons I haven't had much time to work on the truck until recently was switching jobs. An old boss had called me up and offered me a position as Field Service Rep, which means I'll be traveling a lot and spending time away from the truck, but there are some benefits too. One of them is working from home when I'm not traveling, which means I can sneak some shop days in, and the other is a monthly car allowance that made me decide to buy this:
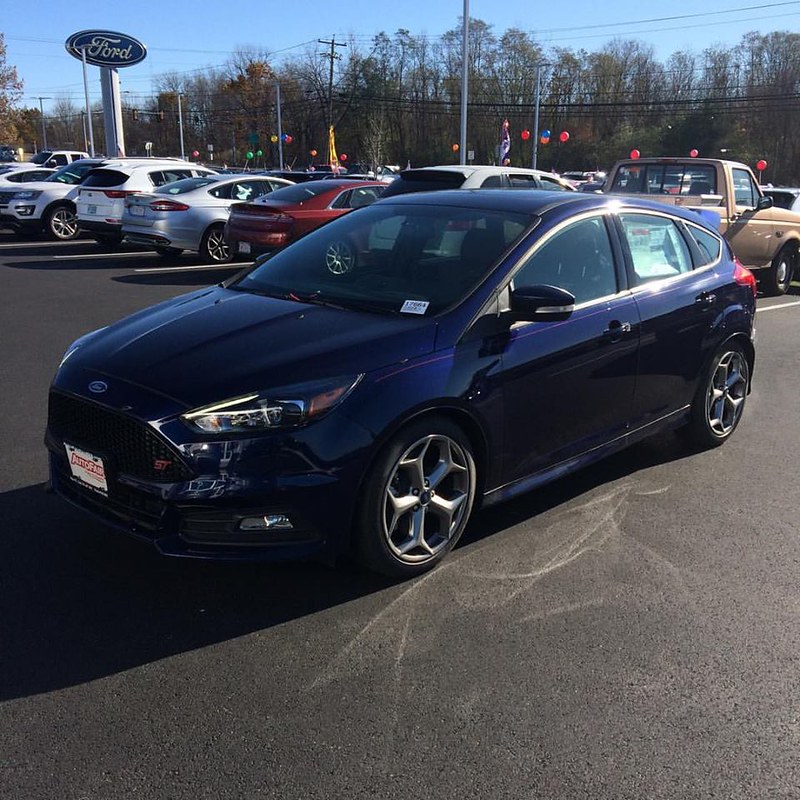
It's a 2017 Focus ST, fully loaded with the ST3 package, and it's a ton of fun to drive. It's also my first brand new car, so that was a pretty good feeling. I'll be back with some updates on the truck this weekend, but I thought some of you guys would enjoy the Focus in the meantime!Last edited by CTeunuch; 01-10-2018, 06:21 PM.1949 Ford F1 Build:
http://www.stanceworks.com/forums/sh...ad.php?t=93274Comment
-
Congrats on the new job, and new car!My super boring build http://www.stanceworks.com/forums/sh...other-M3-buildInsta MintyhinrichsComment
Comment