 Tweet
Tweet
Well that purchase just justified everything ever that this world has ever had to offer ever, so congrats man.
-
Great build thread.
The titanium mufflers sound good with long tubes. Perfect if you're trying to stay under the radar.Comment
-
Do you have any sounds clips? I think you had the same setup.Originally posted by white out View PostComment
-
not the greatest, but you get the idea
Idle and normal driving RPMs sounded what you expect a stock Corvette to sound like.Comment
-
Thanks. I'm hoping for as much crackling and popping on decel as possible. The setup I had on mine before seemed to have quite a bit.Comment
-
Love this! My brother has a yellow C5 z06 and it's amazing. Looks like you have the magnesium wheels on it too, I think those are pretty hard to come by. I'll be watching this for sure, loved your e39 build.Comment
-
Yah I love the mags, they are easily the best C5 wheel out there besides the Z06 10-spoke which I don't think belongs on a non Z06. I am planning to try out some E39 M5 style 65s on this thing the next couple weeksOriginally posted by fifty3bags View PostComment
-
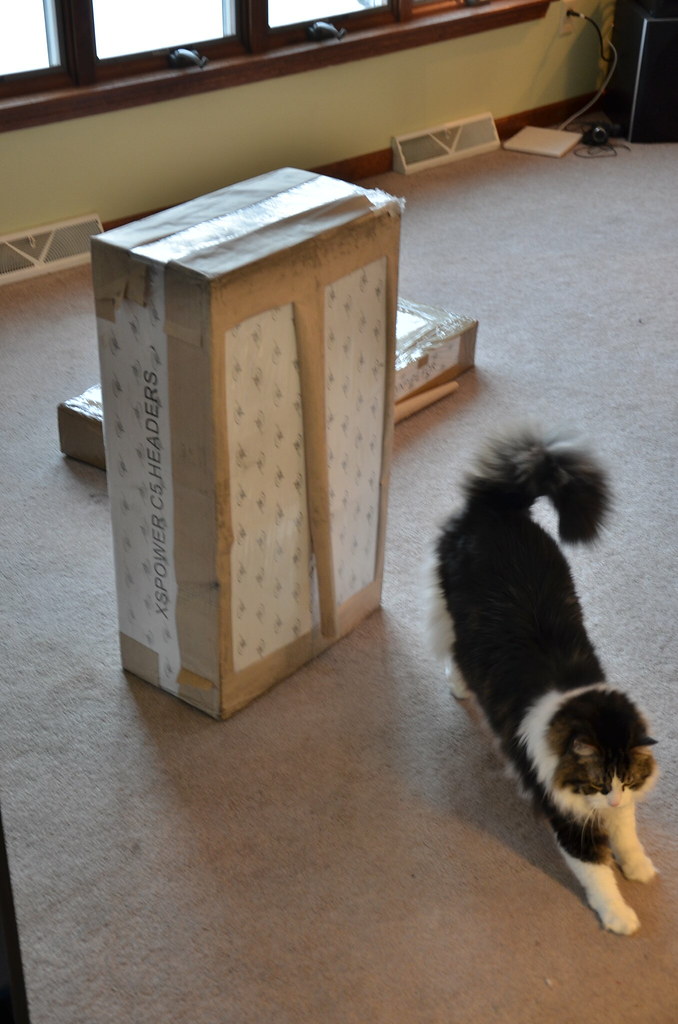
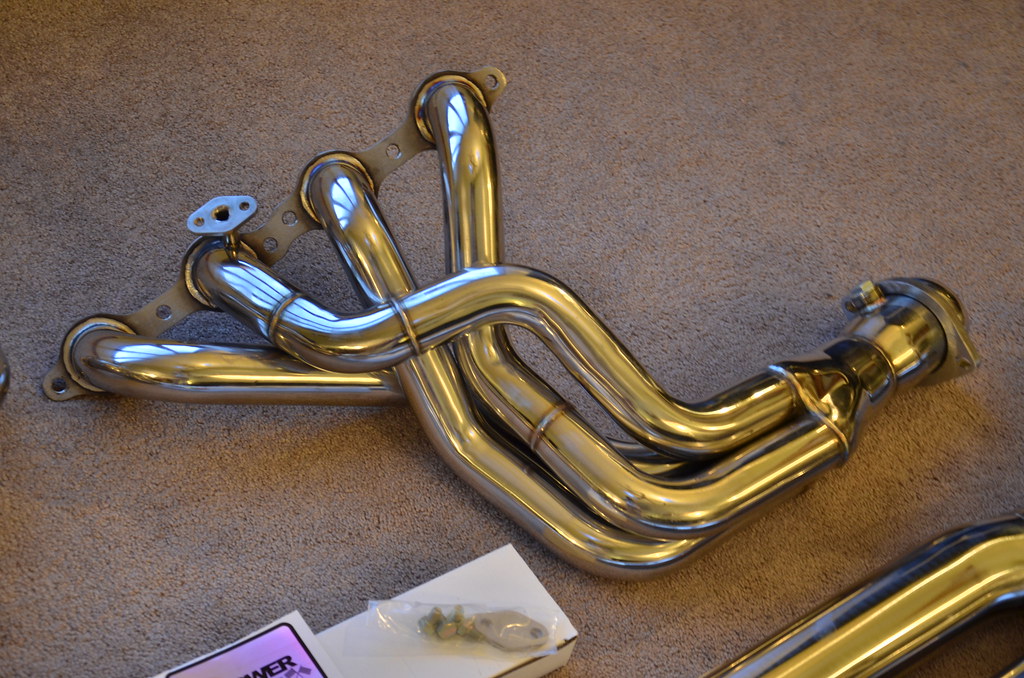
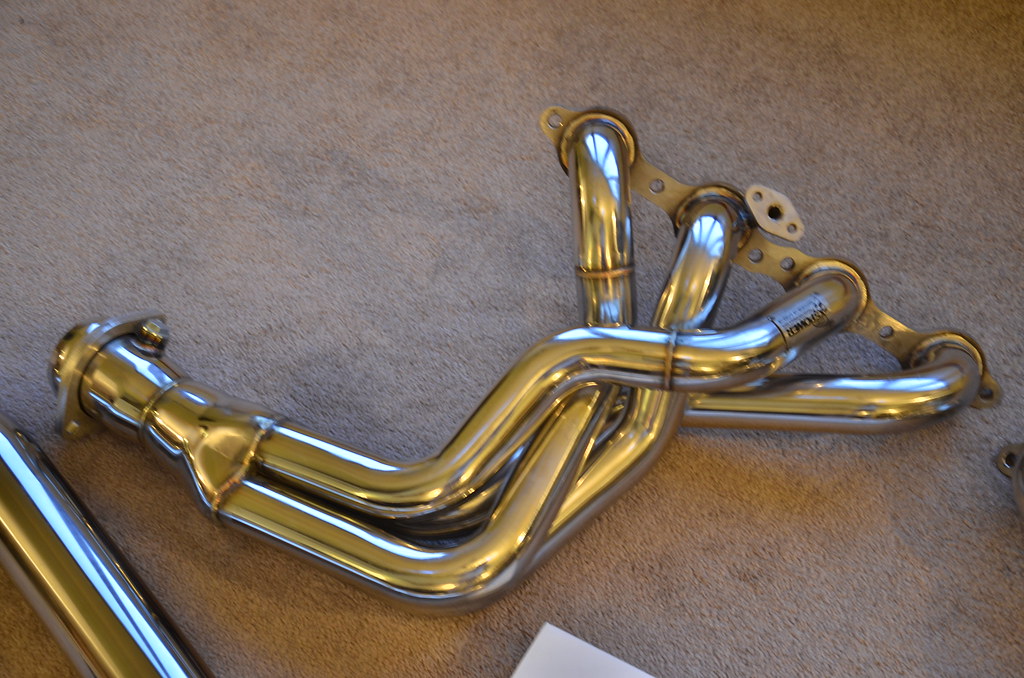
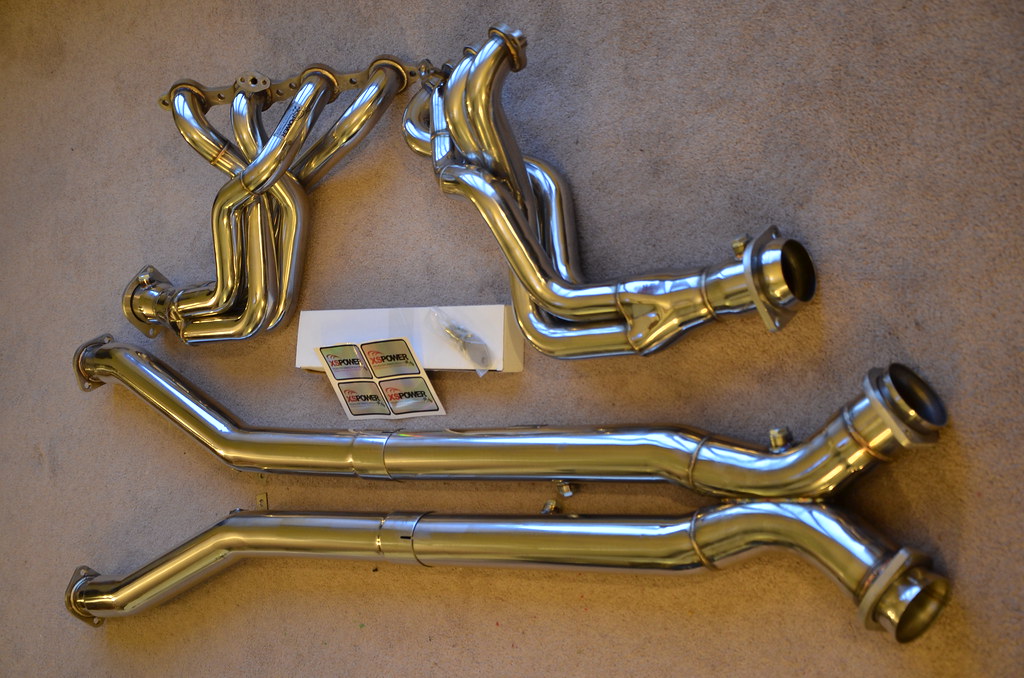
Longtubes came in much earlier than expected! I ordered them Sunday night and they were waiting for me Thursday afternoon. Not bad for a company that is closed this week and didn't expect to ship til next.
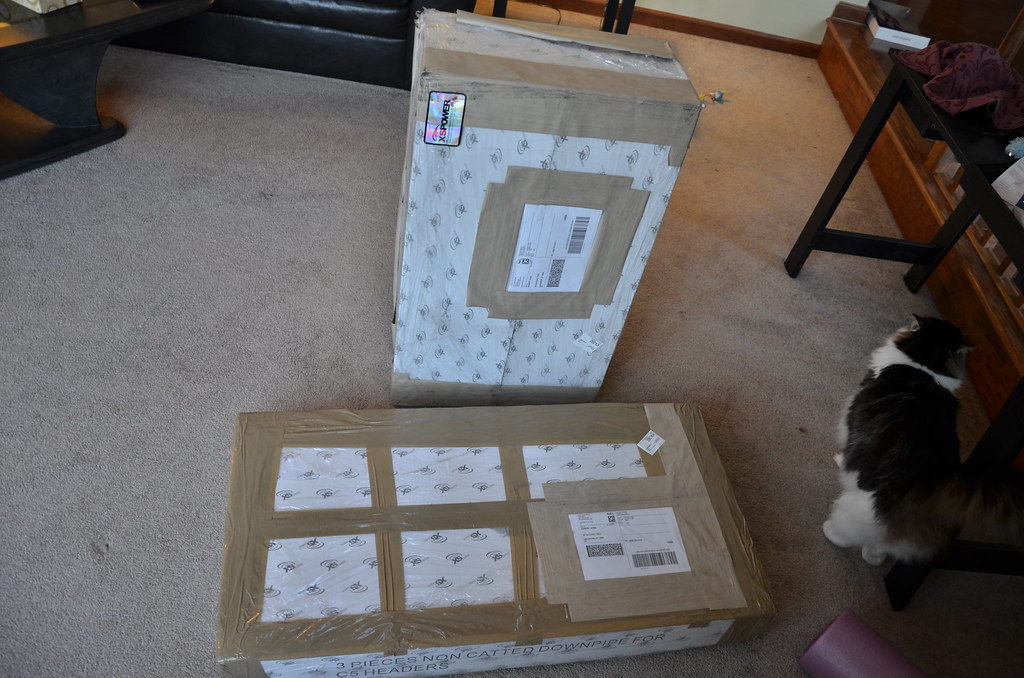
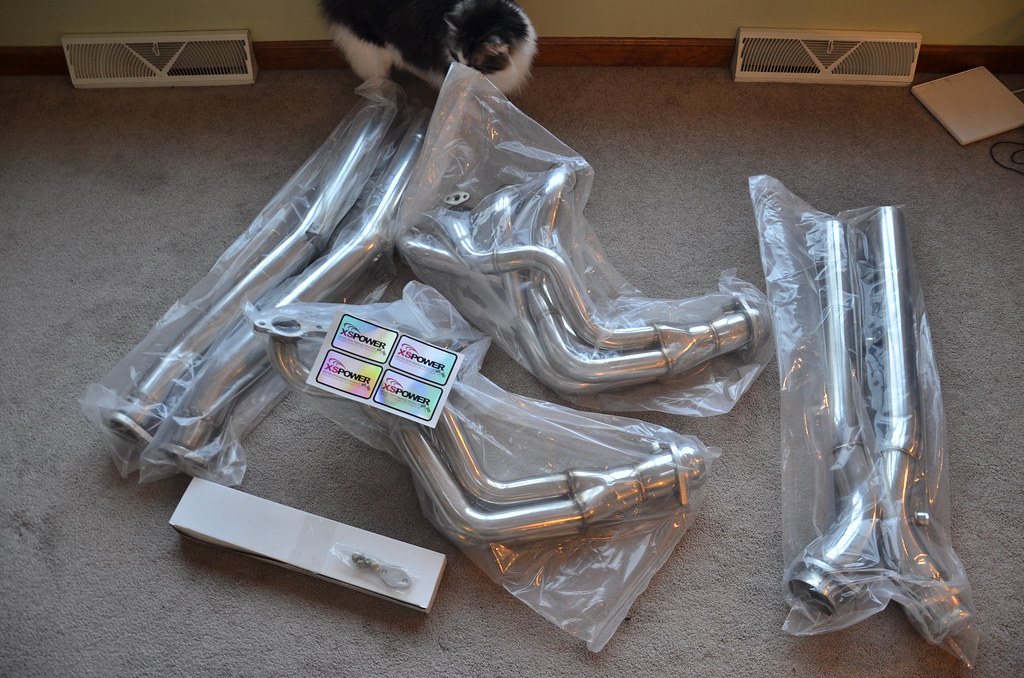
Boxes were wrapped up nicely. Cat was looking over the boxes, unfortunately I got the catless model, sorry lil guy
 _DSC4721 by Norbert Ogiba, on Flickr
 _DSC4723 by Norbert Ogiba, on Flickr
 _DSC4725 by Norbert Ogiba, on Flickr
 _DSC4726 by Norbert Ogiba, on Flickr
 _DSC4727 by Norbert Ogiba, on Flickr
 _DSC4728 by Norbert Ogiba, on Flickr
 _DSC4729 by Norbert Ogiba, on Flickr
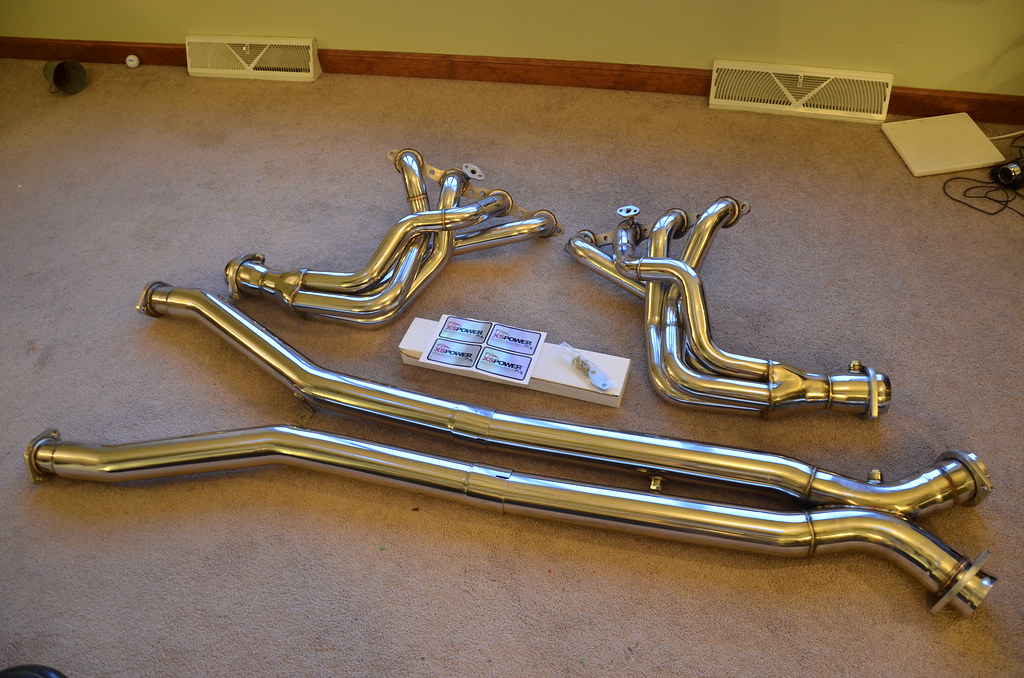
I didn't look too closely at the fabrication quality yet but initial impressions are good. We will see how the fitment is, I have heard good things.
Starting the install. The midpipes were already removed since I had been repairing the stock ones
 _DSC4730 by Norbert Ogiba, on Flickr
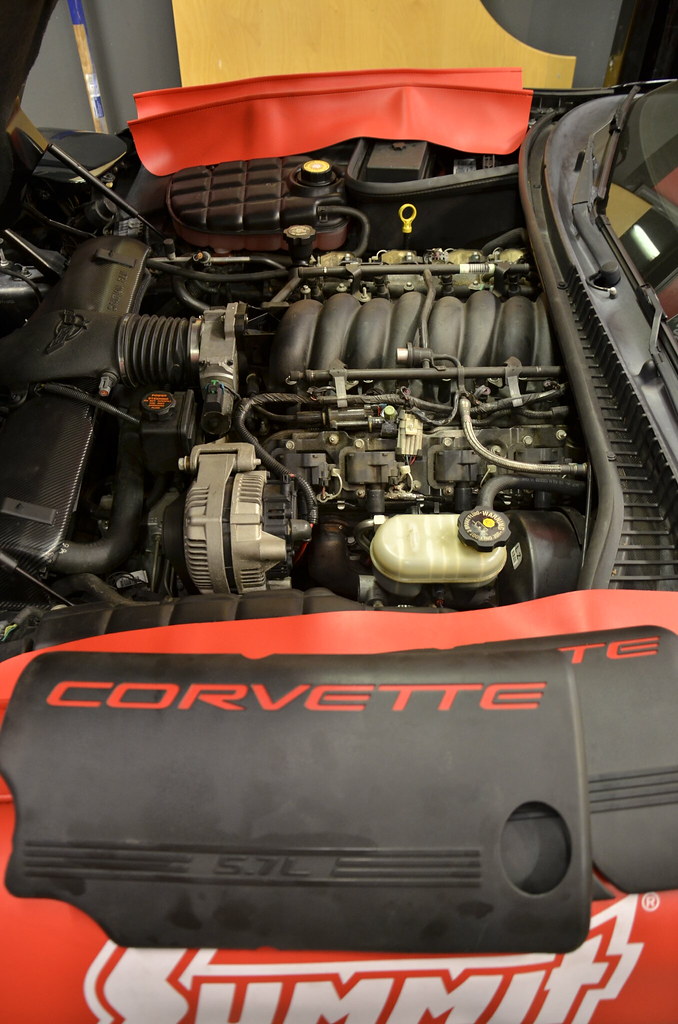
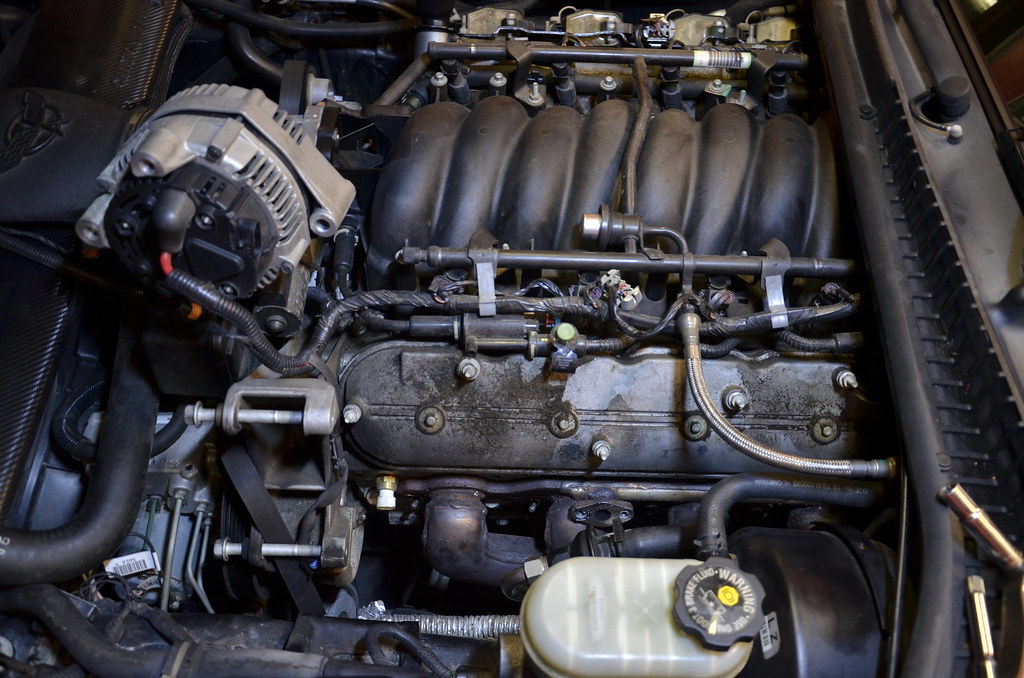
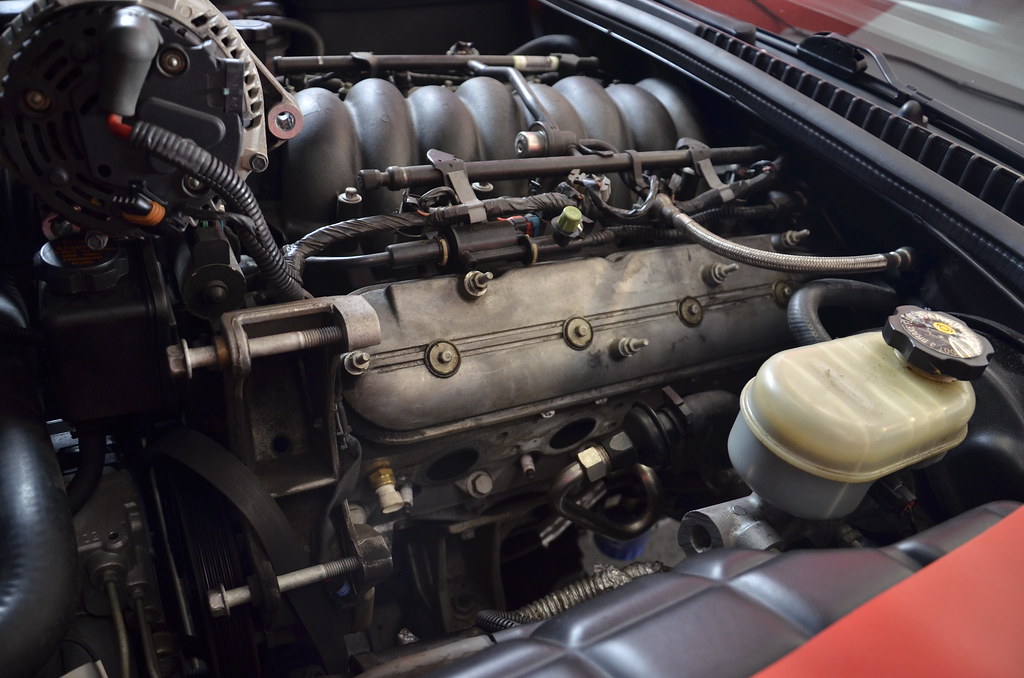
Fuel Rail Covers off. I need to scrub these things in some hot soapy water.
 _DSC4731 by Norbert Ogiba, on Flickr
Battery disconnected and removed.
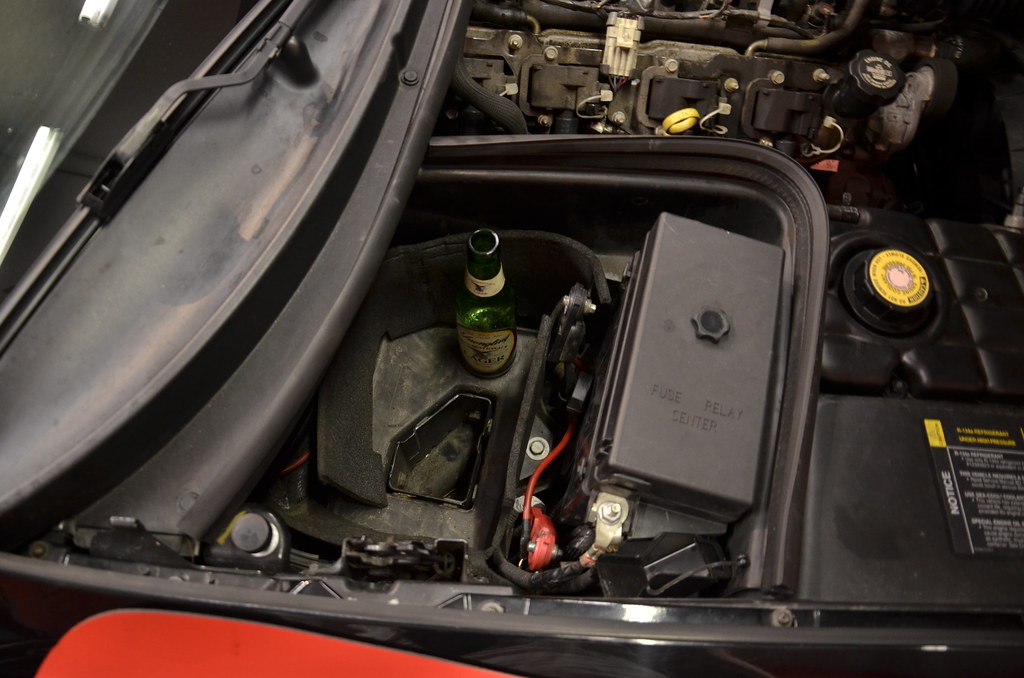 _DSC4734 by Norbert Ogiba, on Flickr
Belt de-tensioned. Also note that I wrapped the radiator cover in 3M CF vinyl. Started wrapping the headlight bezels as well.
 _DSC4735 by Norbert Ogiba, on Flickr
Alternator removed and placed aside (I didn't remove the big battery positive terminal)
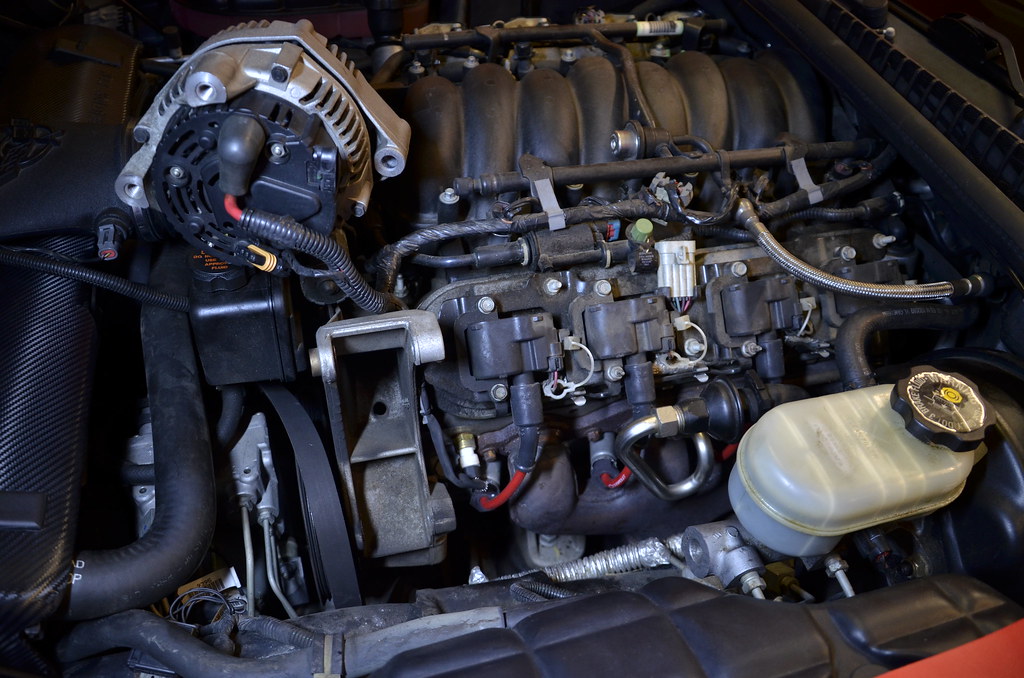 _DSC4737 by Norbert Ogiba, on Flickr
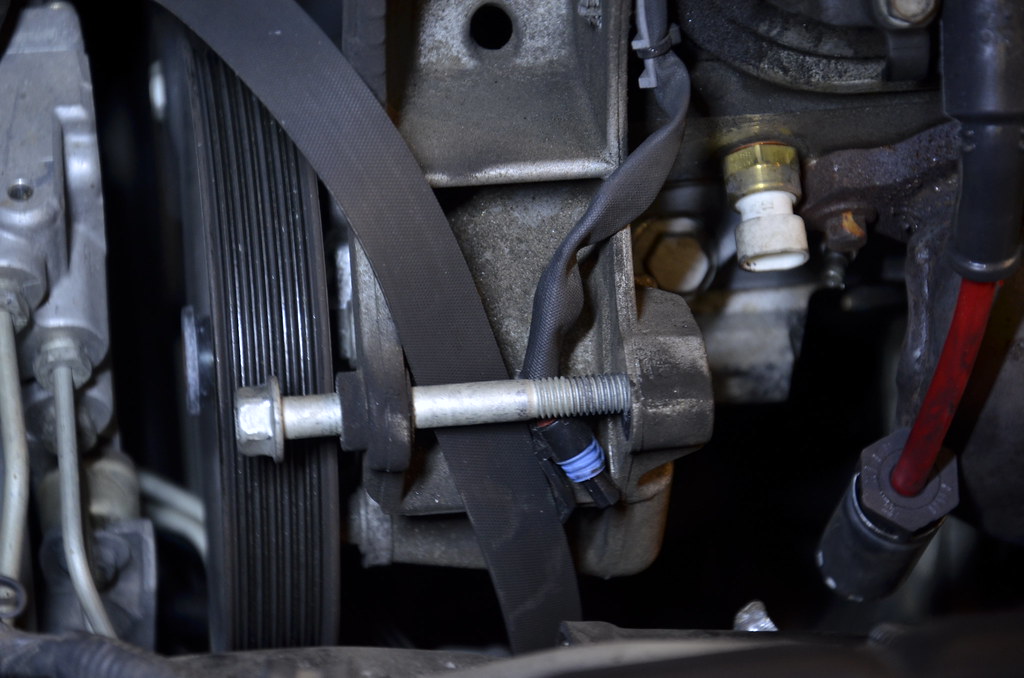
There's not a lot of room by the accessories so rather than remove the belt completely I just tucked it in the alt bracket so that it'll be easy to slip on later.
 _DSC4738 by Norbert Ogiba, on Flickr
Driver's coils and AIR stuff removed. I'll probably end up pulling both valve covers and scrubbing them clean
 _DSC4740 by Norbert Ogiba, on Flickr
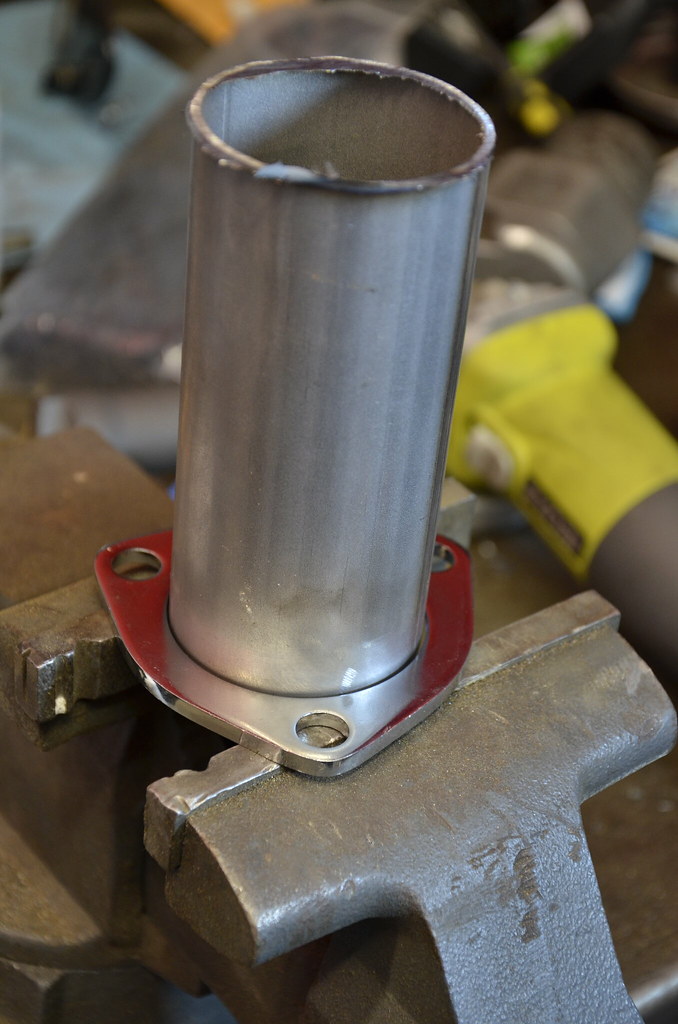
Also started fabbing the cutout pipes that will be welded to the x-pipe. Need to deburr and tack this flange (the cutout valve and turndown will bolt to the flange)
 _DSC4714 by Norbert Ogiba, on Flickr
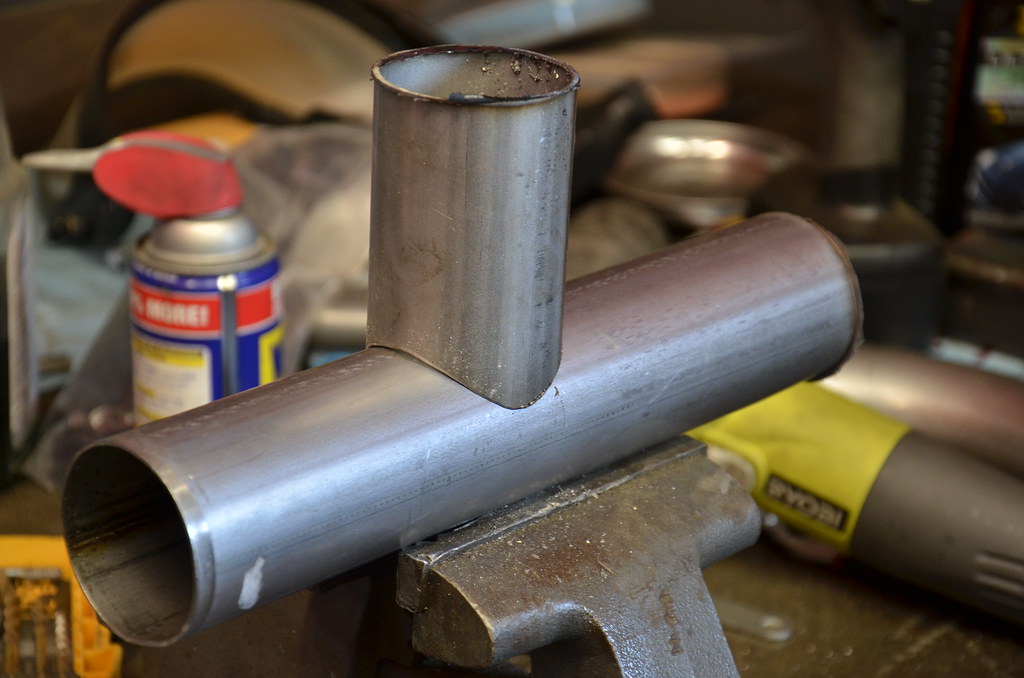
saddle cut with a hole saw. I may need to cut it with a 3" hole saw to saddle to the new x-pipe properly
 _DSC4720 by Norbert Ogiba, on Flickr
Comment
-
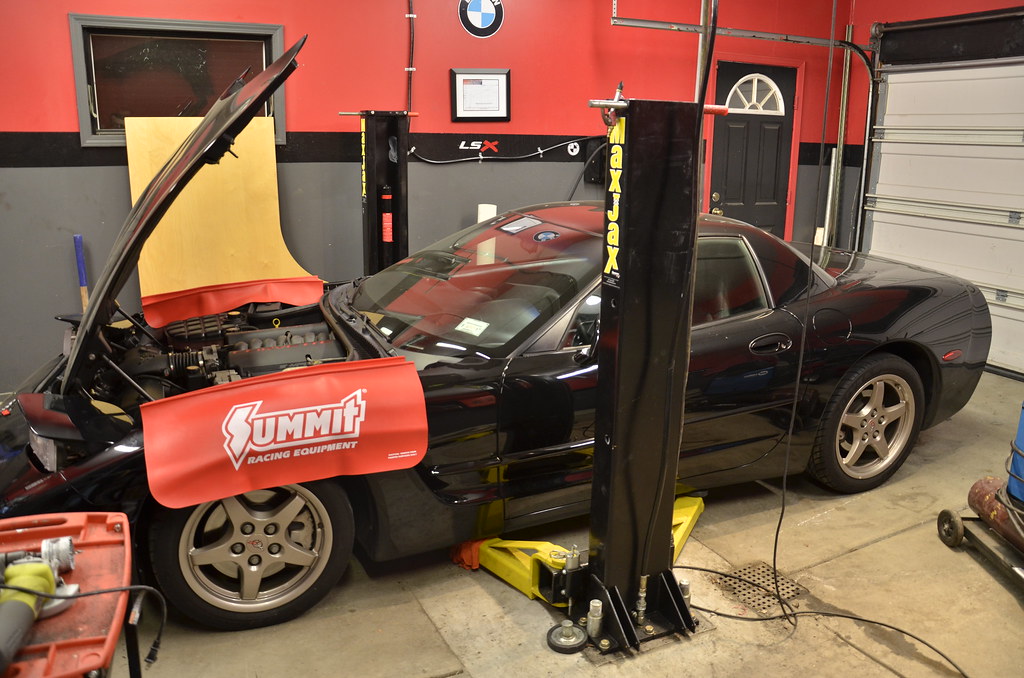
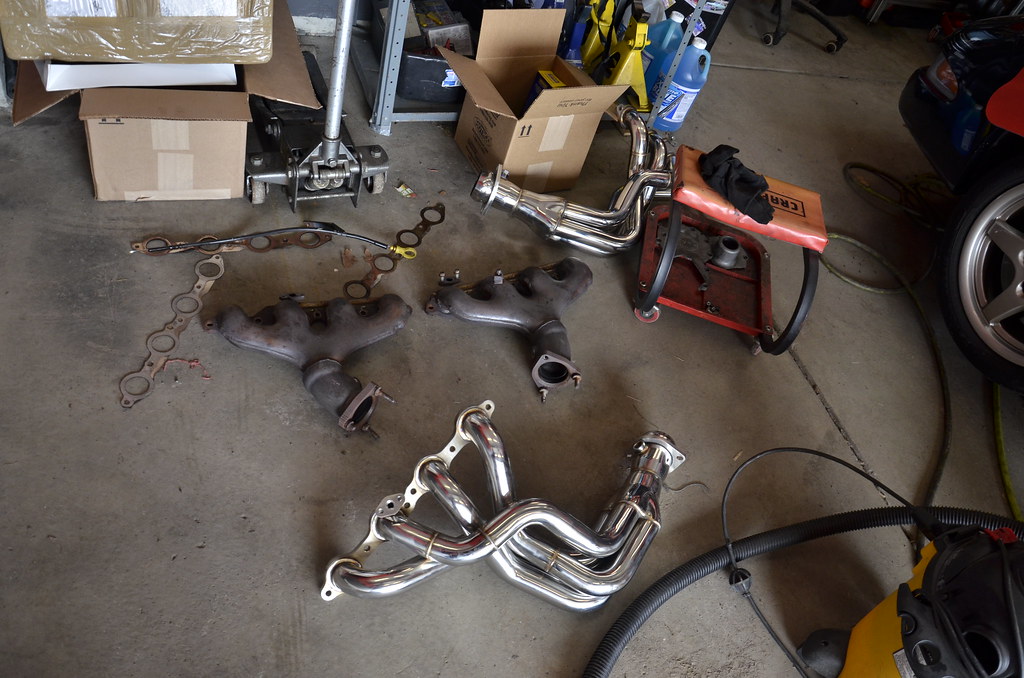
been busy. installed the headers over the weekend
got the old stuff out, came out pretty easy
 _DSC4741 by Norbert Ogiba, on Flickr
shop vac'd and cleaned the valve covers, 16 years of grime
 _DSC4742 by Norbert Ogiba, on Flickr
 _DSC4743 by Norbert Ogiba, on Flickr
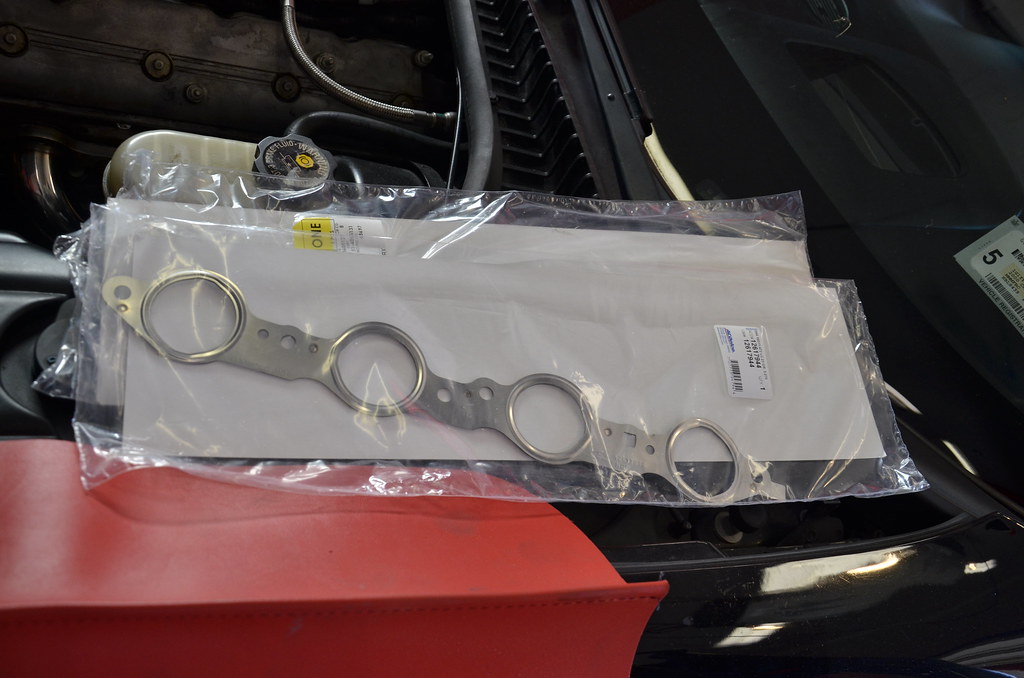
dropped by the dealer around the corner for some new MLS gaskets. I thought the ones that came with the headers would be the crappy imported perforated metal/paper type by they also seemed to be of the MLS construction. Never had a bad experience with the OEM GM gaskets though so they went in.
 _DSC4744 by Norbert Ogiba, on Flickr
at this point I dropped the hammer and got the longtubes in. they fought me at first but I finally wrestled them in. It's a tight fit on both sides for sure. Had to grind a portion of bellhousing on the driver's side and slid those in from the bottom. On the passenger side they went in from the top after removing the starter and dipstick.
 _DSC4745 by Norbert Ogiba, on Flickr
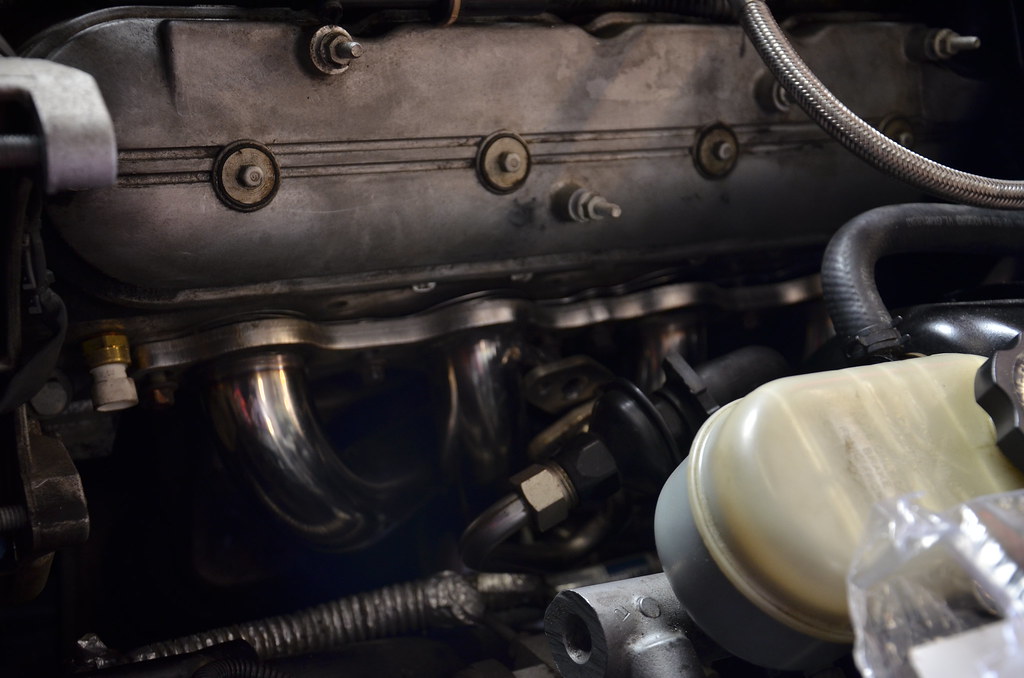
on the passenger side the valve cover had to come off to make some room. good time to inspect the valvetrain, very clean for 105K.
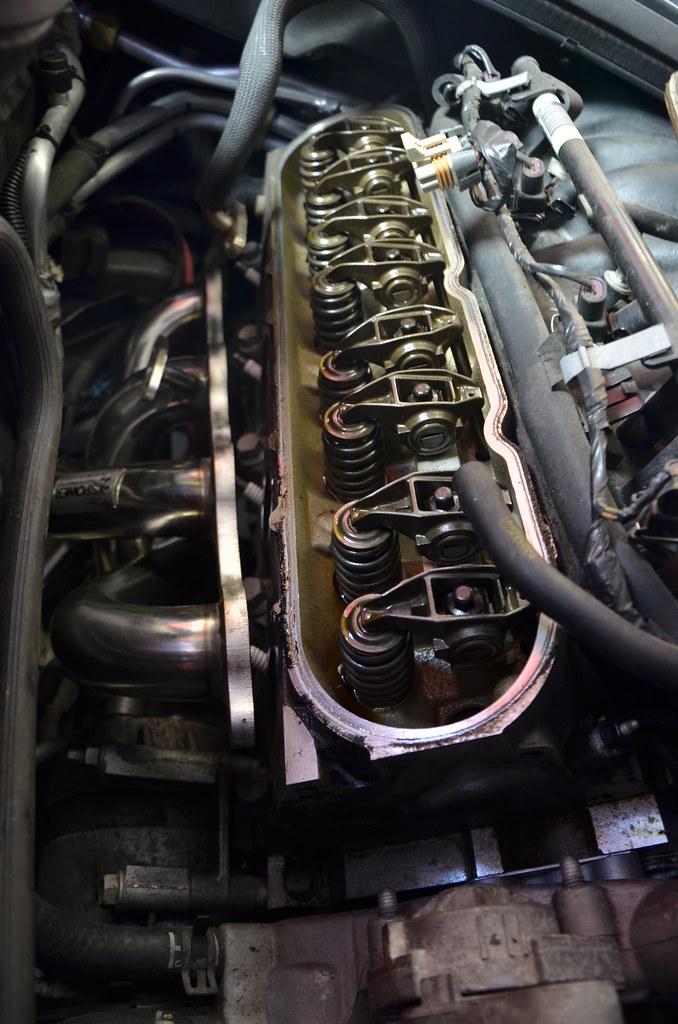 _DSC4746 by Norbert Ogiba, on Flickr
while removing the rear sway bar end links to make room for installing the Z06 Ti's the looked to be trashed, so I picked up metal construction, beefy Moog replacements with nice grease fittings for serviceability.
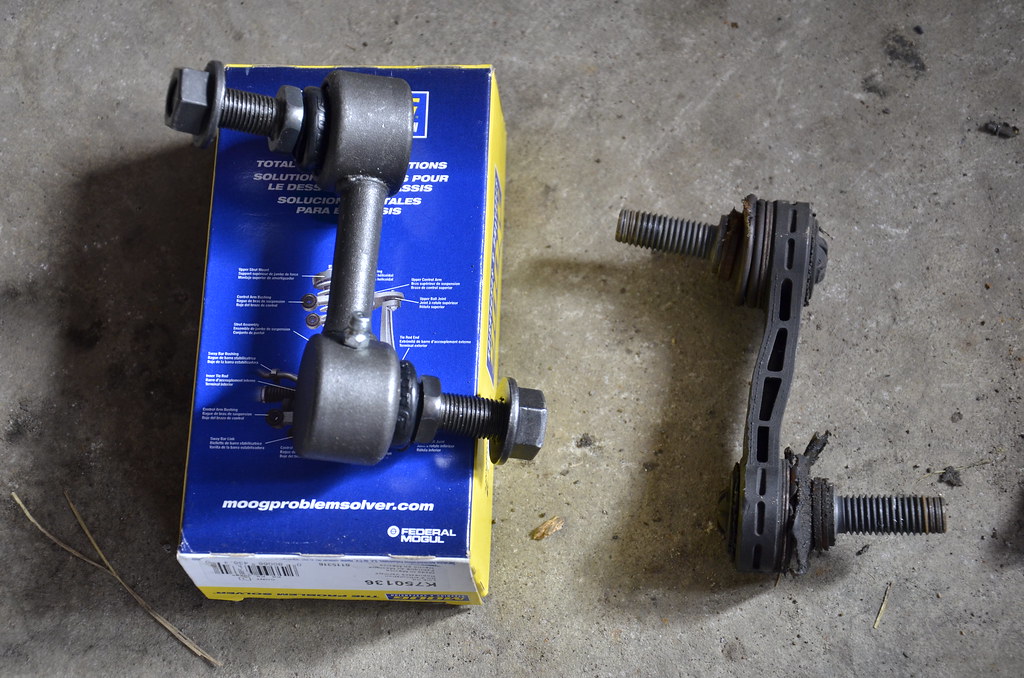 _DSC4747 by Norbert Ogiba, on Flickr
with the headers loosely bolted in I installed the x pipe and intermediate pipes underneath and connected everything. Everything tucked up nicely, no problems. Finally I tightened down the headers, x pipe, intermediates, and axleback. Before wrapping up the install I cleaned everything with IPA so that any fingerprints/grease wouldn't get burned onto the pipes and look bad.
 _DSC4748 by Norbert Ogiba, on Flickr
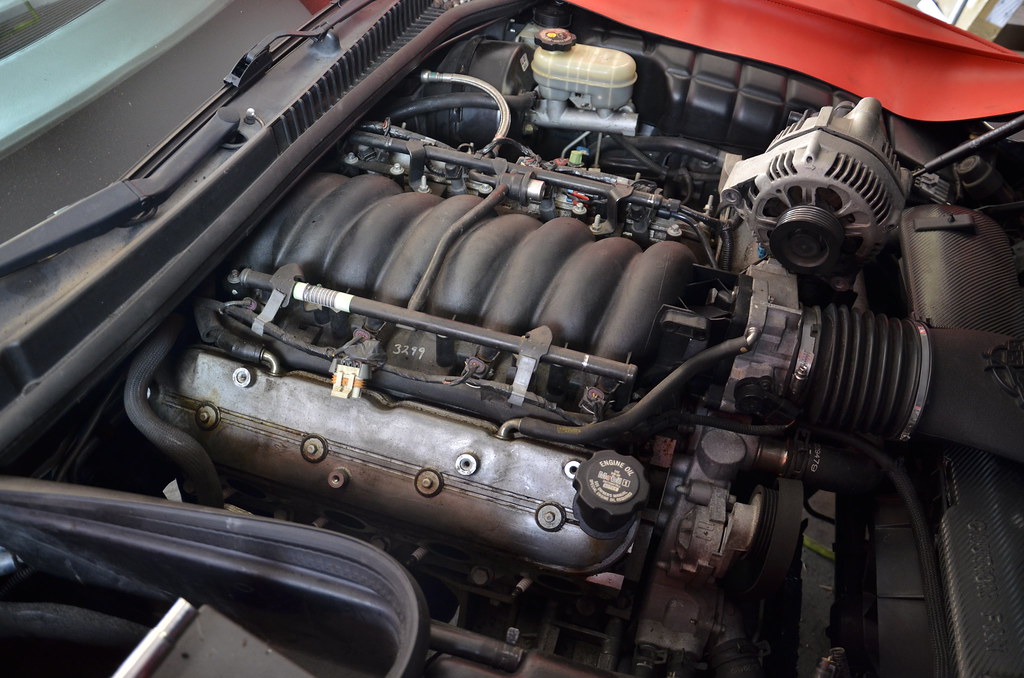
Coil packs, wires, AIR crap all back in.
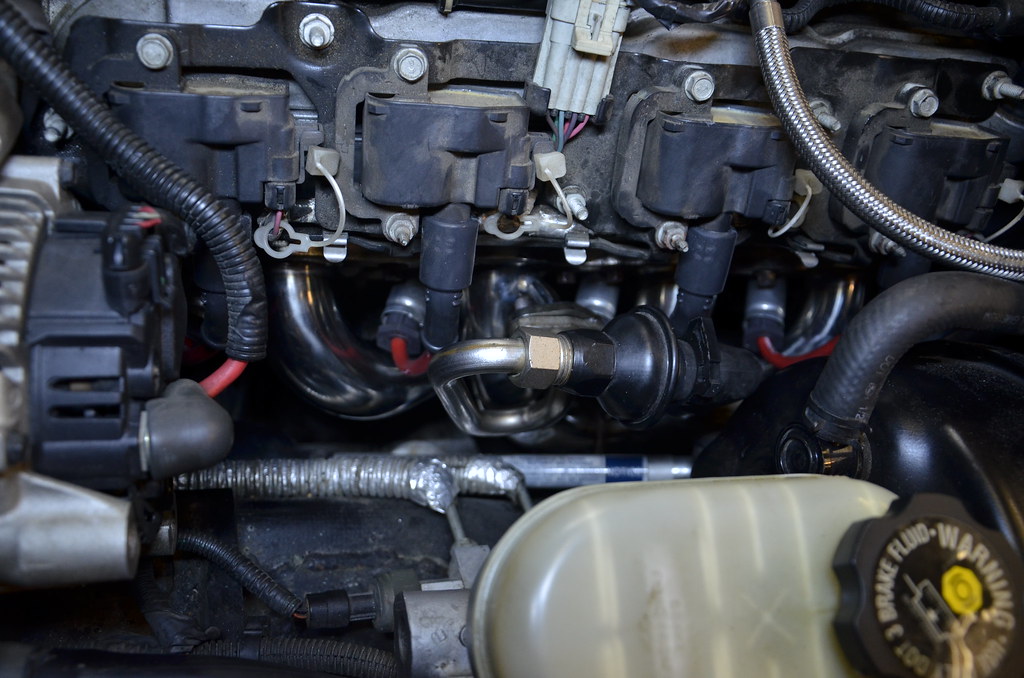 _DSC4749 by Norbert Ogiba, on Flickr
 _DSC4750 by Norbert Ogiba, on Flickr
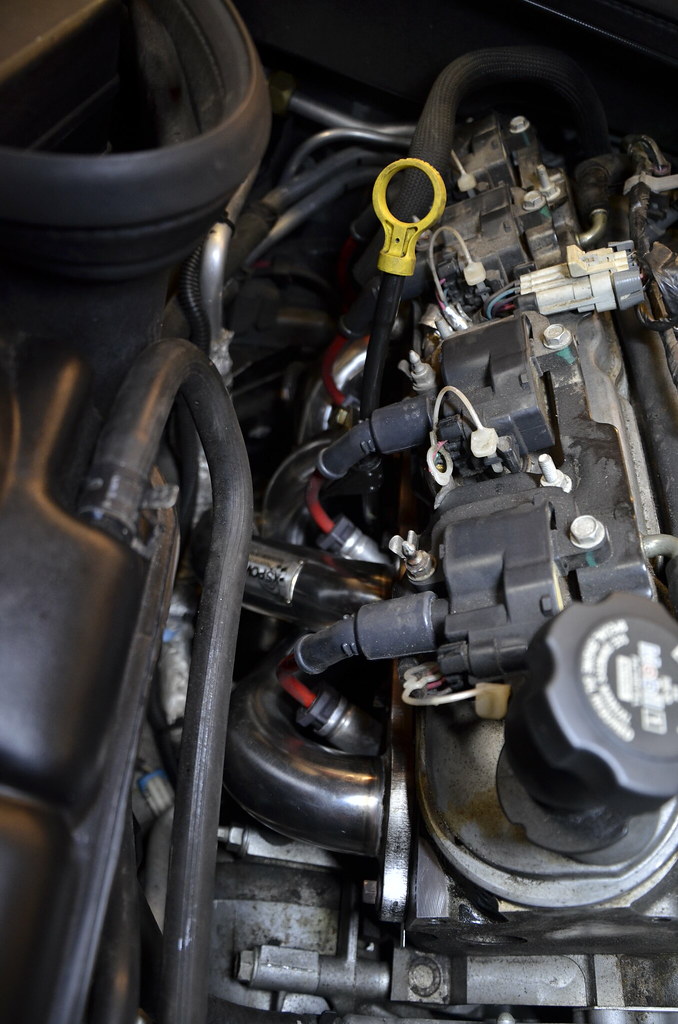
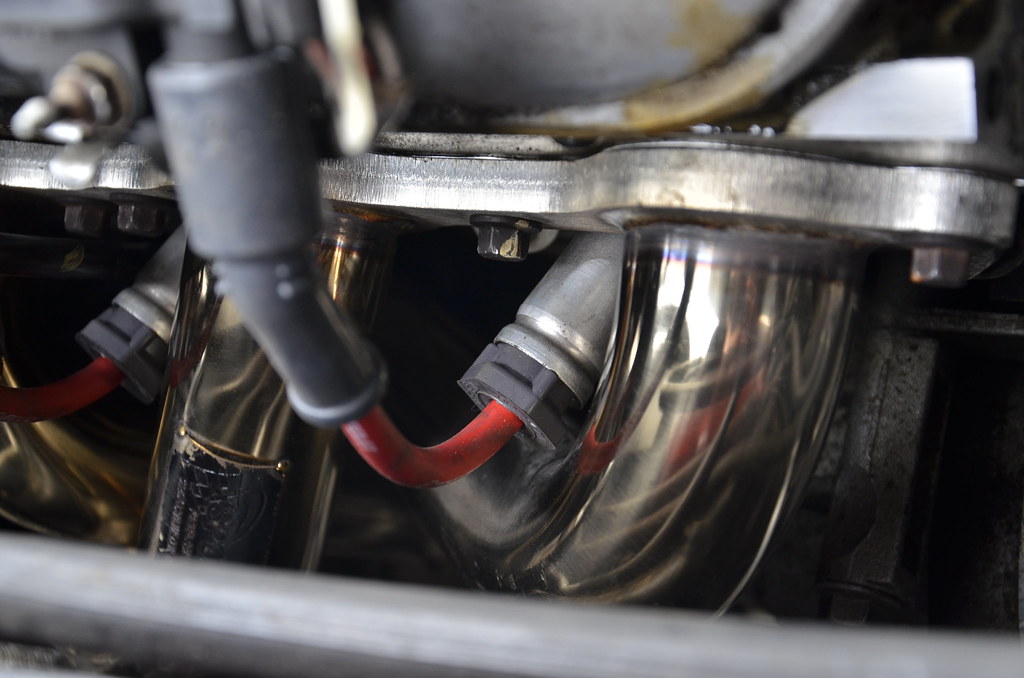
Wire clearance on one of the passenger side primaries was closer than I'd like, but I've put a couple hundred miles on so far with no issue. I'm really glad I kept the factory metal heat shields
 _DSC4751 by Norbert Ogiba, on Flickr
Comment
-
been busy. installed the headers over the weekend
got the old stuff out, came out pretty easy
_DSC4741 by Norbert Ogiba, on Flickr
shop vac'd and cleaned the valve covers, 16 years of grime
_DSC4742 by Norbert Ogiba, on Flickr
_DSC4743 by Norbert Ogiba, on Flickr
dropped by the dealer around the corner for some new MLS gaskets. I thought the ones that came with the headers would be the crappy imported perforated metal/paper type by they also seemed to be of the MLS construction. Never had a bad experience with the OEM GM gaskets though so they went in.
_DSC4744 by Norbert Ogiba, on Flickr
at this point I dropped the hammer and got the longtubes in. they fought me at first but I finally wrestled them in. It's a tight fit on both sides for sure. Had to grind a portion of bellhousing on the driver's side and slid those in from the bottom. On the passenger side they went in from the top after removing the starter and dipstick.
_DSC4745 by Norbert Ogiba, on Flickr
on the passenger side the valve cover had to come off to make some room. good time to inspect the valvetrain, very clean for 105K.
_DSC4746 by Norbert Ogiba, on Flickr
while removing the rear sway bar end links to make room for installing the Z06 Ti's the looked to be trashed, so I picked up metal construction, beefy Moog replacements with nice grease fittings for serviceability.
_DSC4747 by Norbert Ogiba, on Flickr
with the headers loosely bolted in I installed the x pipe and intermediate pipes underneath and connected everything. Everything tucked up nicely, no problems. Finally I tightened down the headers, x pipe, intermediates, and axleback. Before wrapping up the install I cleaned everything with IPA so that any fingerprints/grease wouldn't get burned onto the pipes and look bad.
_DSC4748 by Norbert Ogiba, on Flickr
Coil packs, wires, AIR crap all back in.
_DSC4749 by Norbert Ogiba, on Flickr
_DSC4750 by Norbert Ogiba, on Flickr
Wire clearance on one of the passenger side primaries was closer than I'd like, but I've put a couple hundred miles on so far with no issue. I'm really glad I kept the factory metal heat shields
_DSC4751 by Norbert Ogiba, on Flickr
rather than upgrade to the newer 01-04 dipstick I made the older version work by bolting to the AIR fitting. the AIR won't be around for long, will wait until I install the LS6 intake before tuning
 _DSC4752 by Norbert Ogiba, on Flickr
Fired her up, checked for leaks, the band clamps on the intermediate pipes suck, so I'll replace those with proper quality ones
pipes getting nice and golden with heat, paid off to wipe them down
 _DSC4755 by Norbert Ogiba, on Flickr
 _DSC4756 by Norbert Ogiba, on Flickr
Looks stock otherwise, fuel rail covers are off to get scrubbed
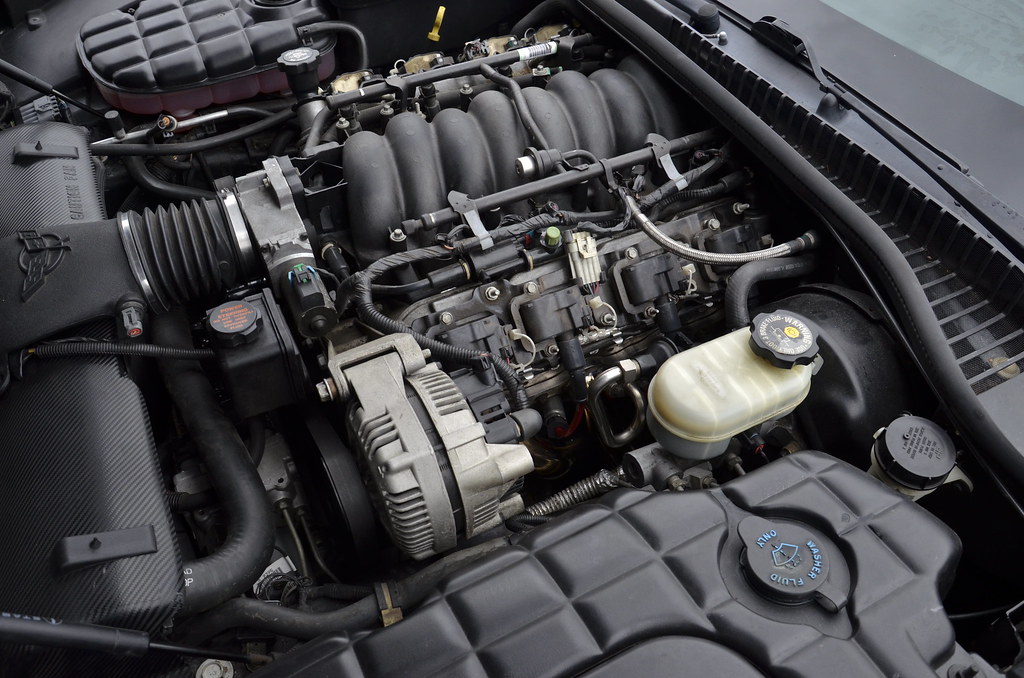 _DSC4757 by Norbert Ogiba, on Flickr
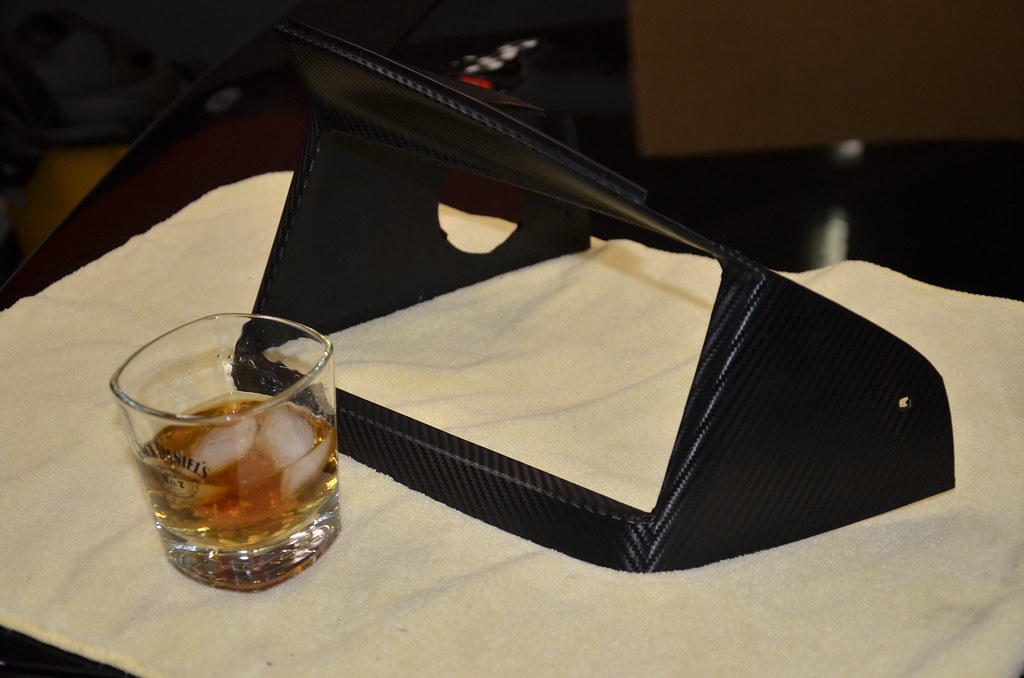
removed the headlight bezels and wrapped with Carbon Fiber Vinyl, ended that night with a treat
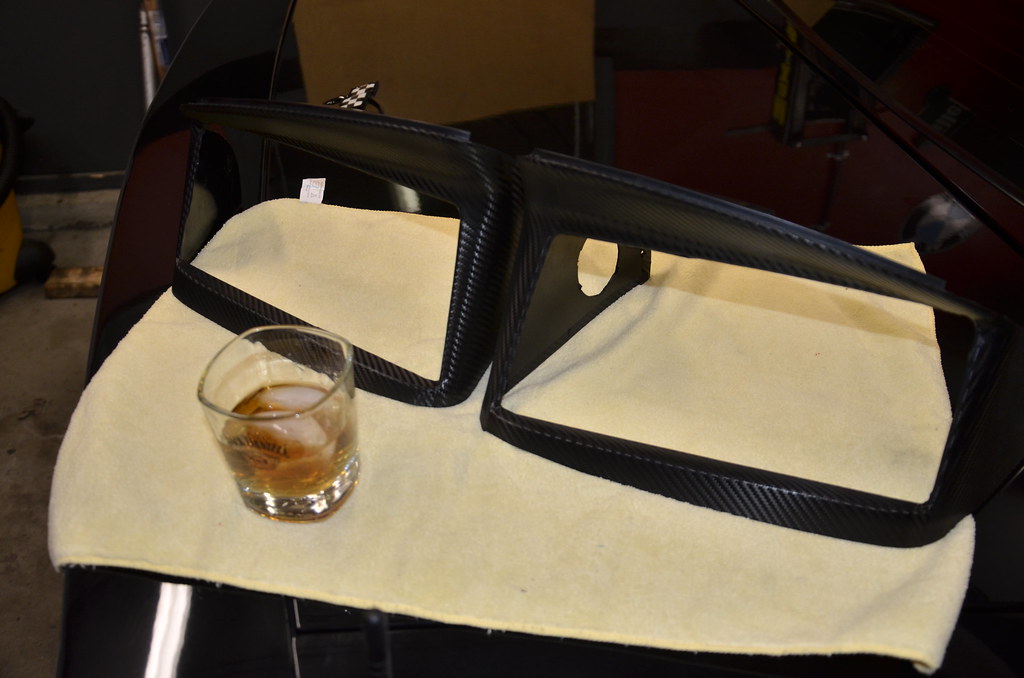 _DSC4759 by Norbert Ogiba, on Flickr
 _DSC4760 by Norbert Ogiba, on Flickr
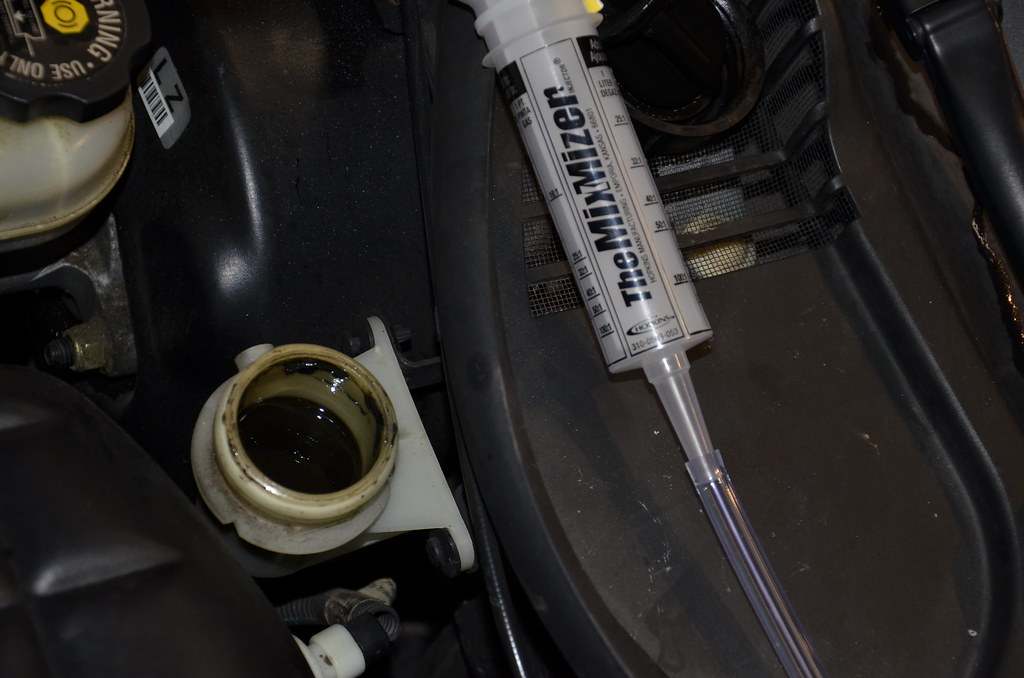
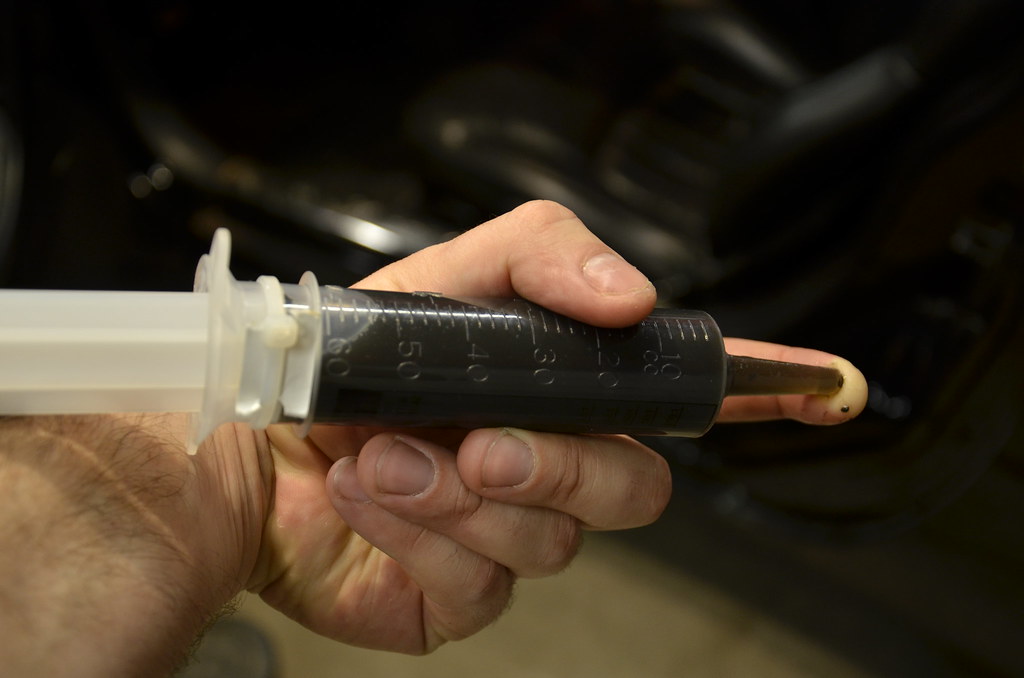
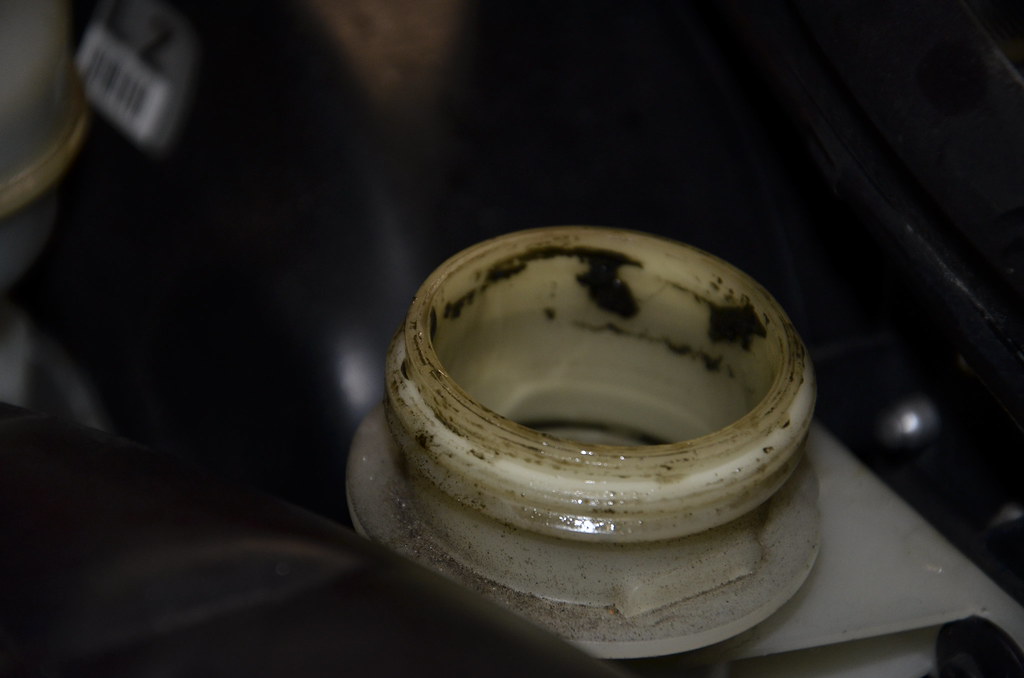
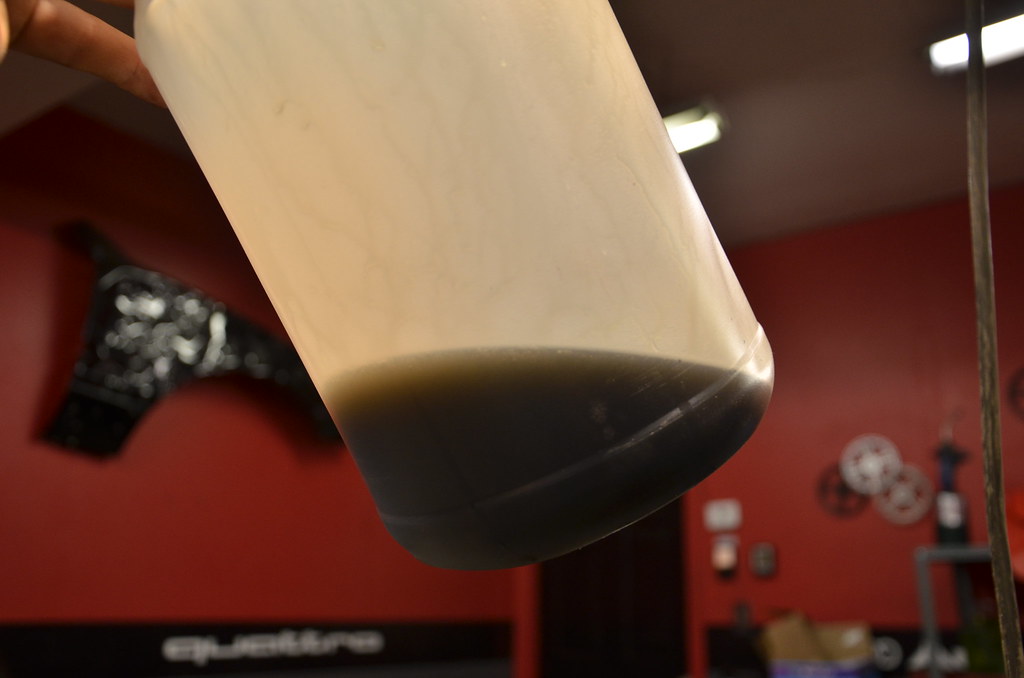
Finished up by doing the Ranger method for clutch fluid. Put 100 miles on it Sunday in the countryside, clutch went to the floor after a couple gear changes at very high RPM. Hopefully this helps.
Fluid definitely original
 _DSC4763 by Norbert Ogiba, on Flickr
totally opaque
 _DSC4764 by Norbert Ogiba, on Flickr
 _DSC4767 by Norbert Ogiba, on Flickr
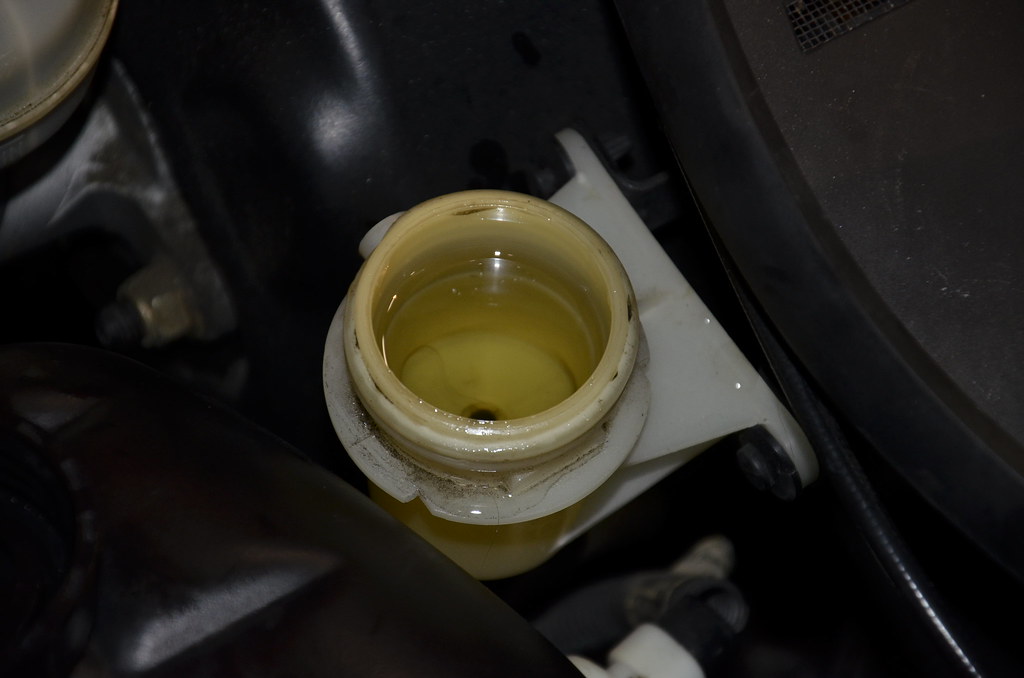
getting there
 _DSC4769 by Norbert Ogiba, on Flickr
Final product of what was removed
 _DSC4770 by Norbert Ogiba, on Flickr
More to come this week, I'm working on installing an AUX connection for my phone with Bluetooth capabilityLast edited by nsogiba; 02-23-2016, 08:00 PM.Comment
-
Nice thread so far, followed your 540 stuff on bimmerforums2016 WRX
E39s are forever in my heart.Comment
-
Those headers were a bitch to install, especially on the driver's side. Glad to see you're done with the installation.
Dump the SAI, it's useless weight and an eyesore at this point.Comment
-
I plan to ditch it and retune, But, need to wait until I install the LS6 intake, so that I don't have to pay for 2 tunes.Originally posted by white out View Post
She's quicker with the headers by a bit! I love them. Weather turned sour here this week so she will be off the road for a little while, I plan to start fabbing cutouts in the meantime.
Comment
-
Pick up HP tuners so you can deactivate column lock as well as the CELs. Plenty of tuners that will send you a map via HP.Comment
-
I have a couple local guys that do dyno tunes via HPTuners but wasn't thrilled with the experiences there.
Also dabbled a bit myself in HPT but frankly don't have the time to do a full on-road tune.
Will be sending out to ECS (East Coast Supercharging) for a mail order once I have the LS6 intake in.Comment


Comment