 Tweet
Tweet
Mike i loved the switch upgrade, the brushed details are awesome, also that phone mount looks so good.
-
My BMW E36 318ti Steel Blue Compact build thread -
http://www.stanceworks.com/forums/sh...ad.php?t=88271 -
Thank you sir, appreciate the feedbackOriginally posted by Steven_318ti View Post

Audi RS4PRA | VW Golf MKV GT-Y | Audi A1 SportBackComment
-
Hello and Merry Xmas to all of you guys who are still into forum build threads. Seems like Youtube has killed forum of every kind
Found some time to do some maintenance stuff mostly.
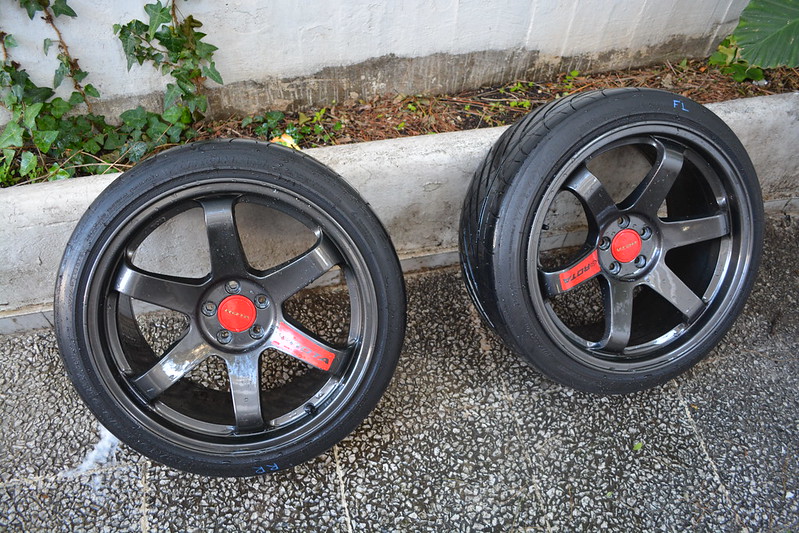
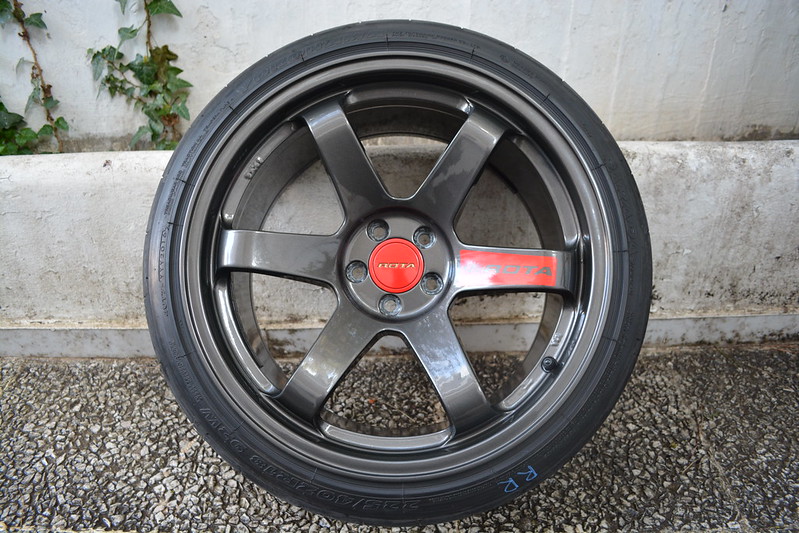
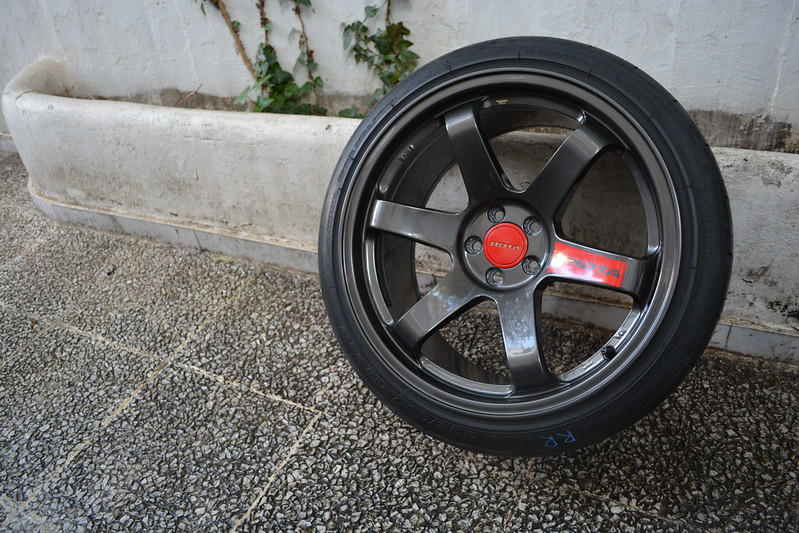
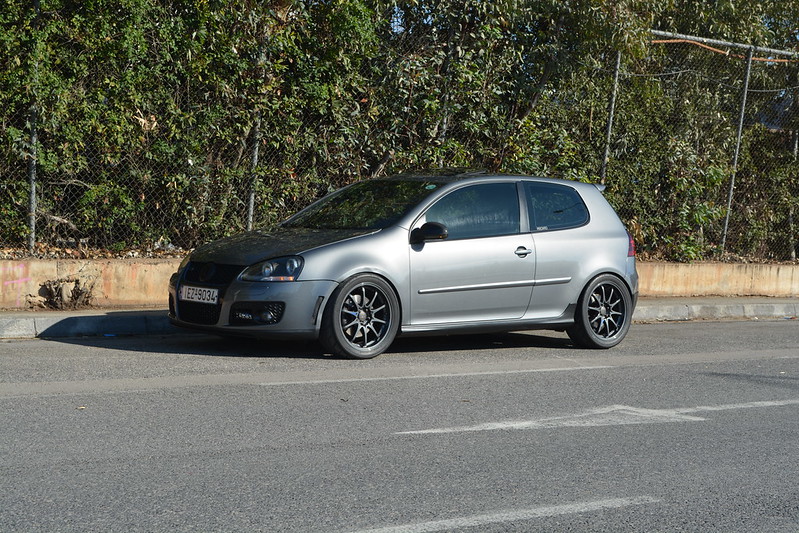
First I had to prep the summer wheels i took off the Audi A1.
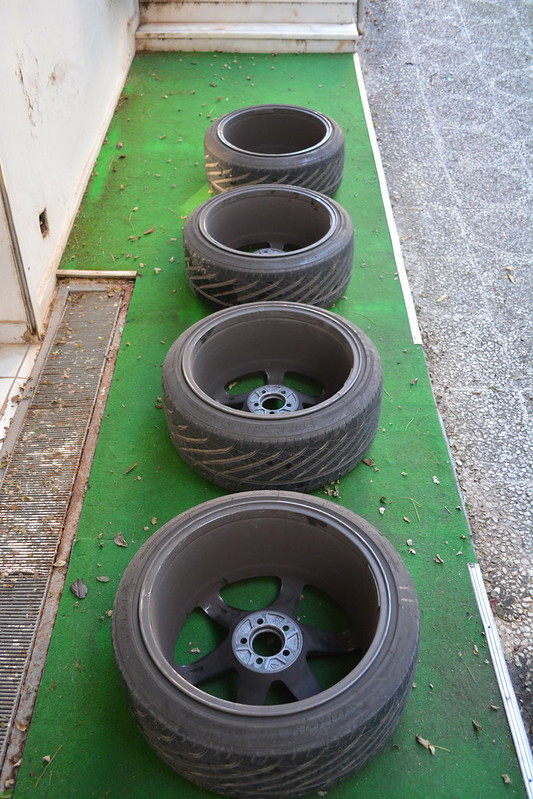 DSC_0962 by mgpdoc, on Flickr
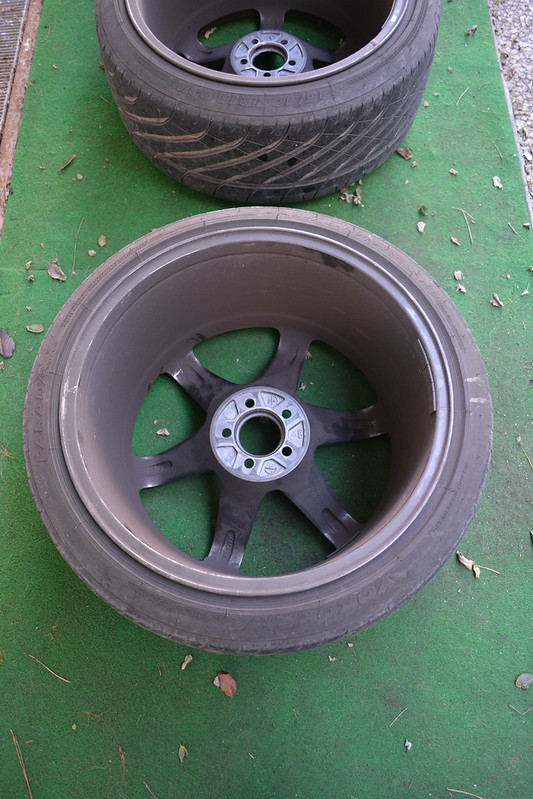 DSC_0964 by mgpdoc, on Flickr
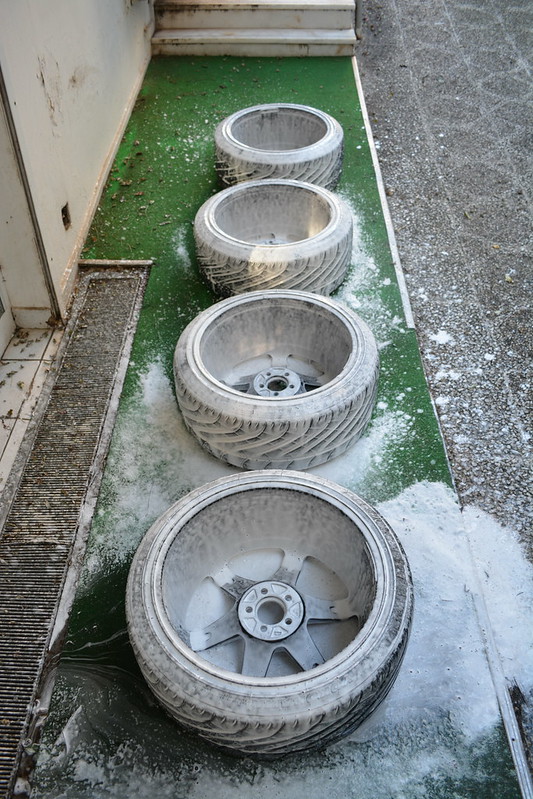
Foam Lance comes very hand in every case.
 DSC_0966 by mgpdoc, on Flickr
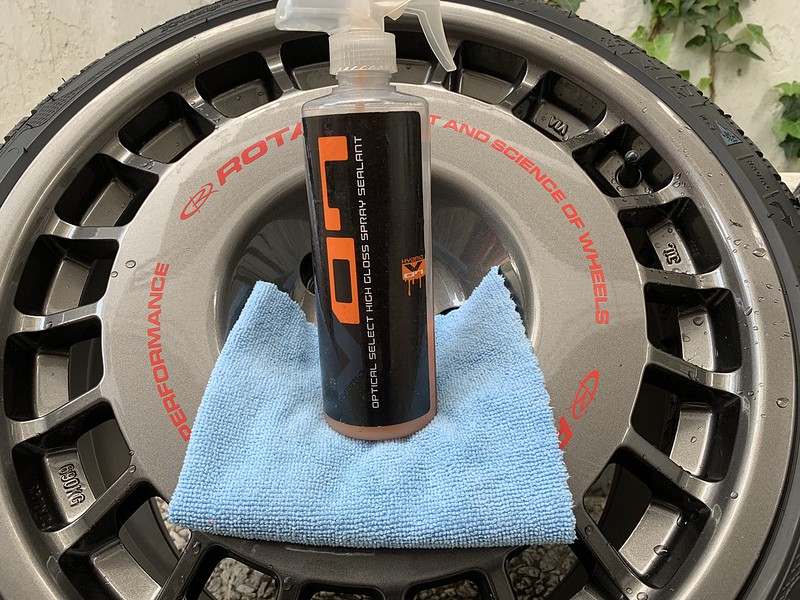
Also what helps A LOT is the wax/sealant i had used after the powdercoating. It helps a lot guys.
 DSC_0968 by mgpdoc, on Flickr
Then, onto air to remove all water and then reseal for winter storage
 DSC_0970 by mgpdoc, on Flickr
 DSC_0972 by mgpdoc, on Flickr
 DSC_0974 by mgpdoc, on Flickr
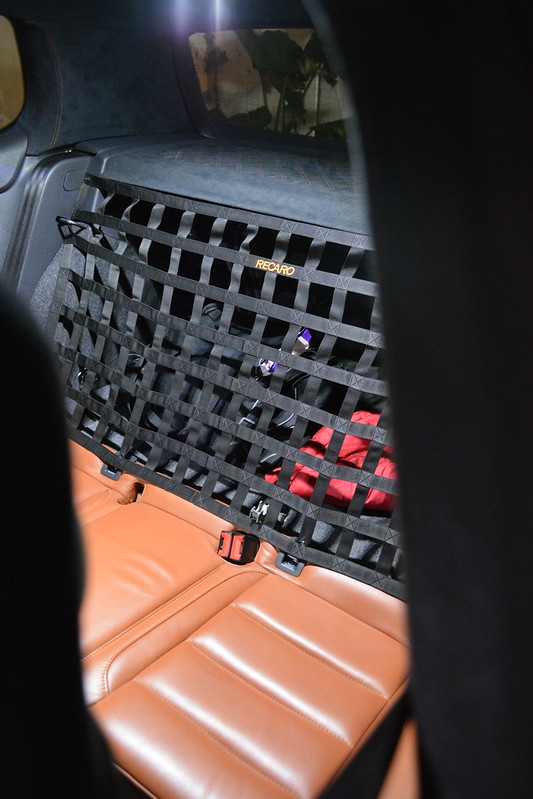
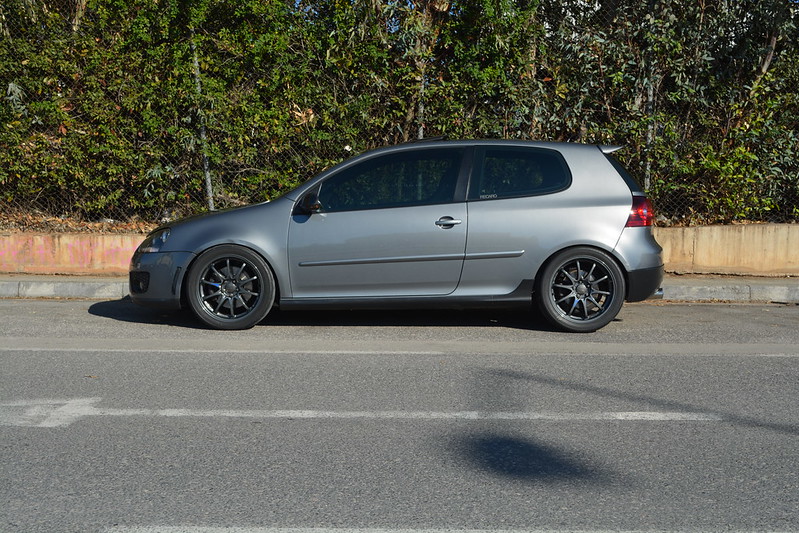
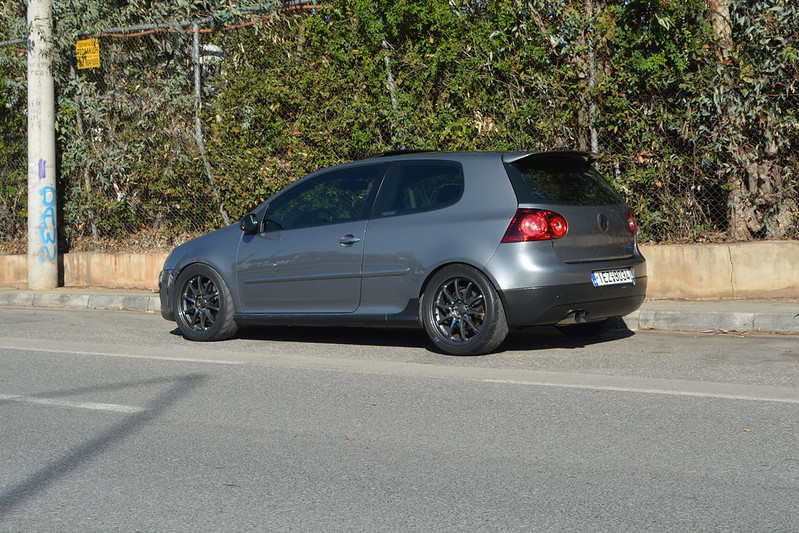
Then I spent some time on the Golf.
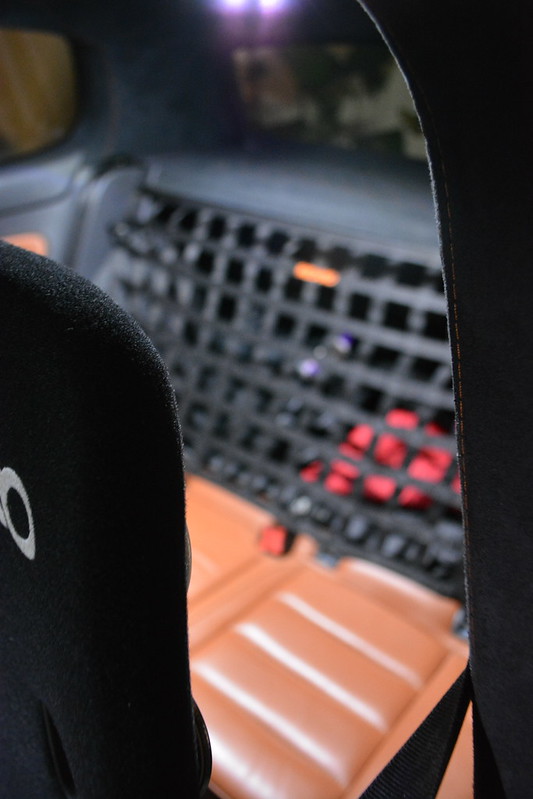
First i Installed the rear seats net, like i had in the A1. Came out great in my opinion, let me know what you think as always.
 DSC_0757 by mgpdoc, on Flickr
 DSC_0758 by mgpdoc, on Flickr
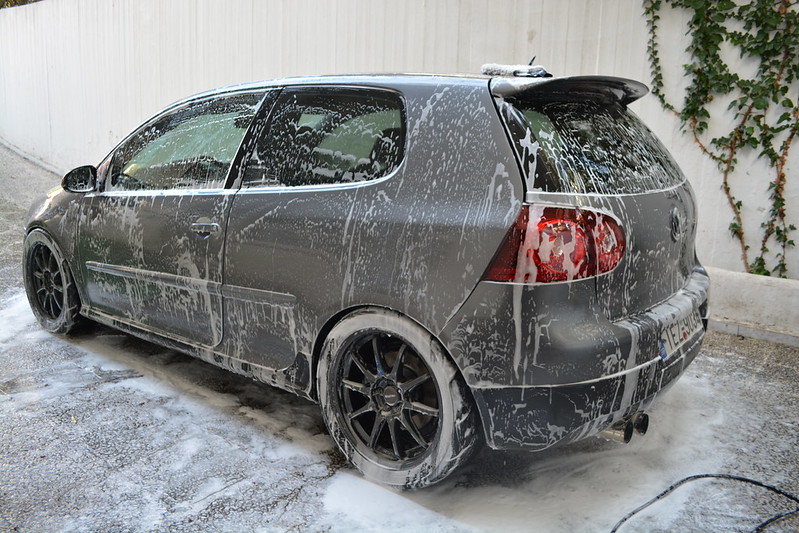
Then it was washing time for the Golf as well
 DSC_0988 by mgpdoc, on Flickr
 DSC_0980 by mgpdoc, on Flickr
 DSC_0982 by mgpdoc, on Flickr
 DSC_0984 by mgpdoc, on Flickr
Interior was in a pretty ok condition, only the floormats needed attention
 DSC_0986 by mgpdoc, on Flickr
And some shots i took
 DSC_0991 by mgpdoc, on Flickr
 DSC_0996 by mgpdoc, on Flickr
 DSC_0998 by mgpdoc, on Flickr
 DSC_1000 by mgpdoc, on Flickr
 DSC_1003 by mgpdoc, on Flickr
Cheers guys
Mike
Audi RS4PRA | VW Golf MKV GT-Y | Audi A1 SportBackComment
-
Hello and Happy New year to all of you.
I have another update to share with you guys
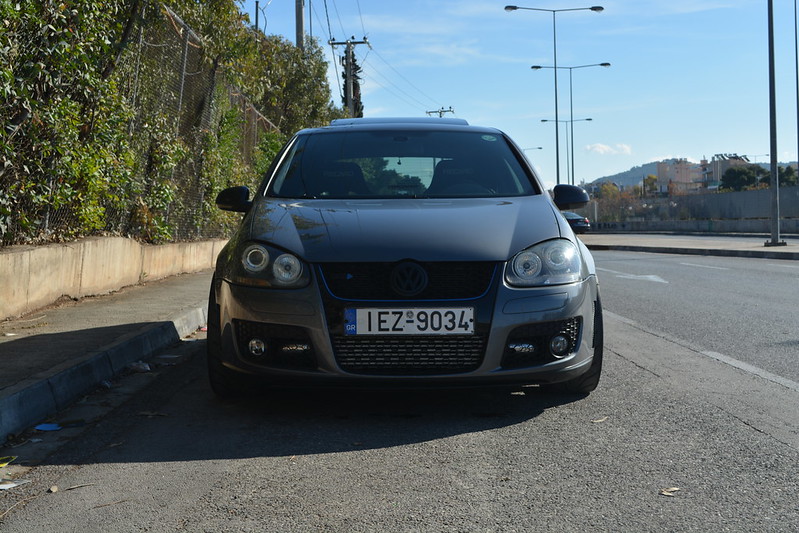
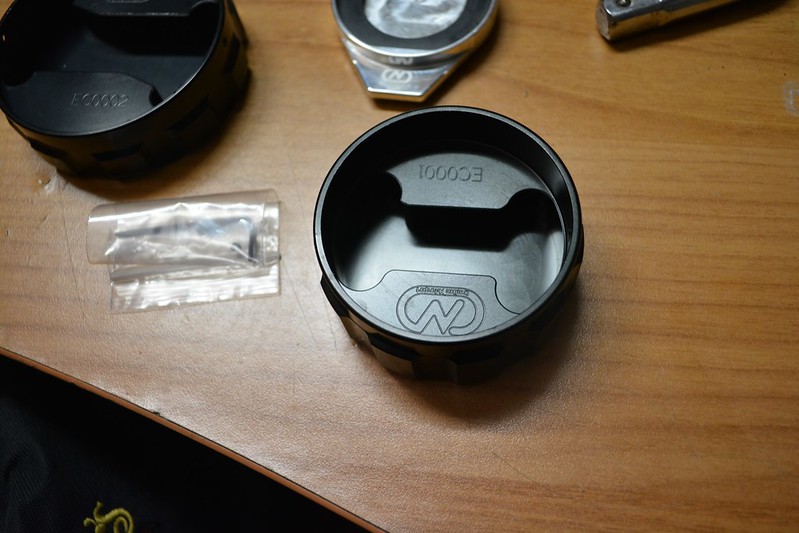
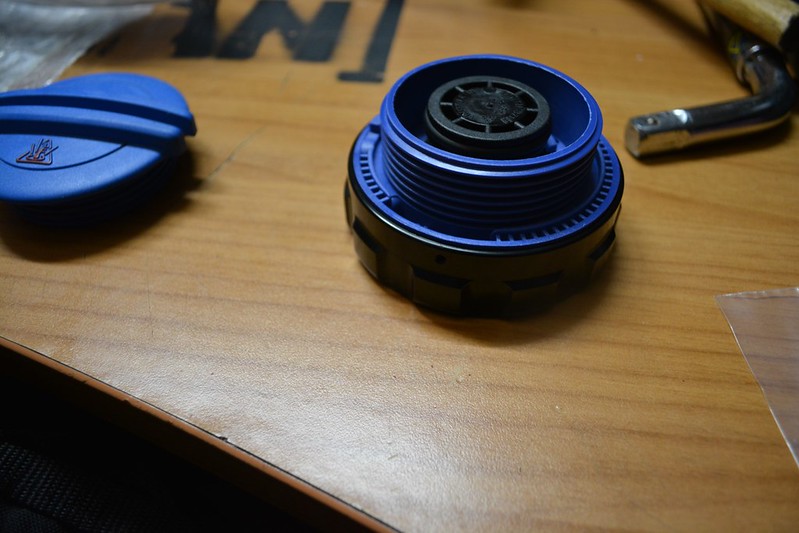
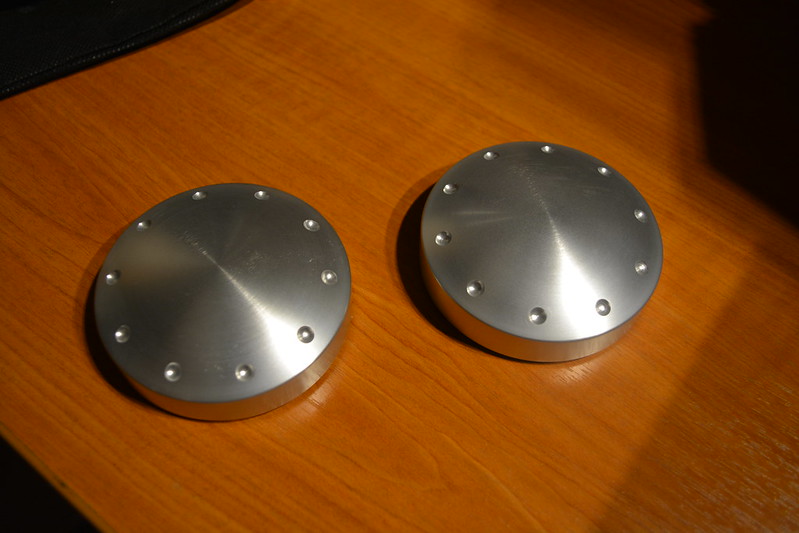
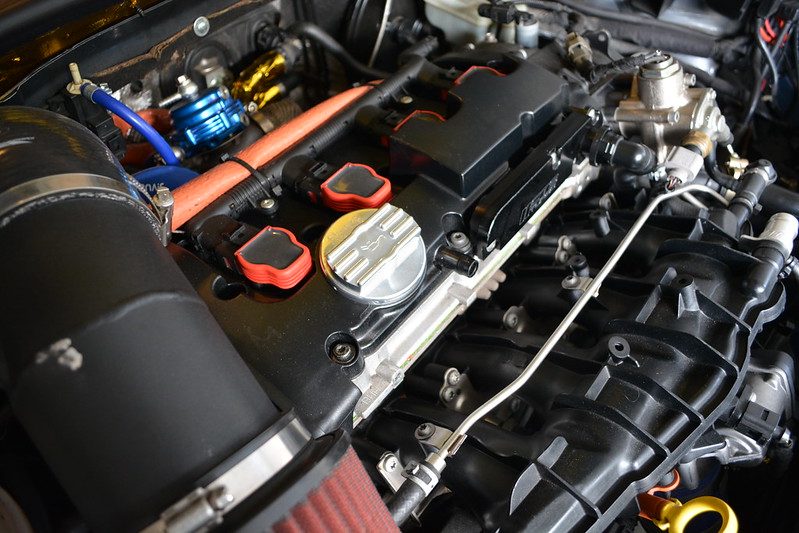
So, it had been in my mind for quite some time, that since this car isnt as fast, performance-wise, as my other projects, although, percentage-wise, power increase from stock, is 60%, nevertheless i thought it could look nice under the bonnet. So I found some things available for this car.
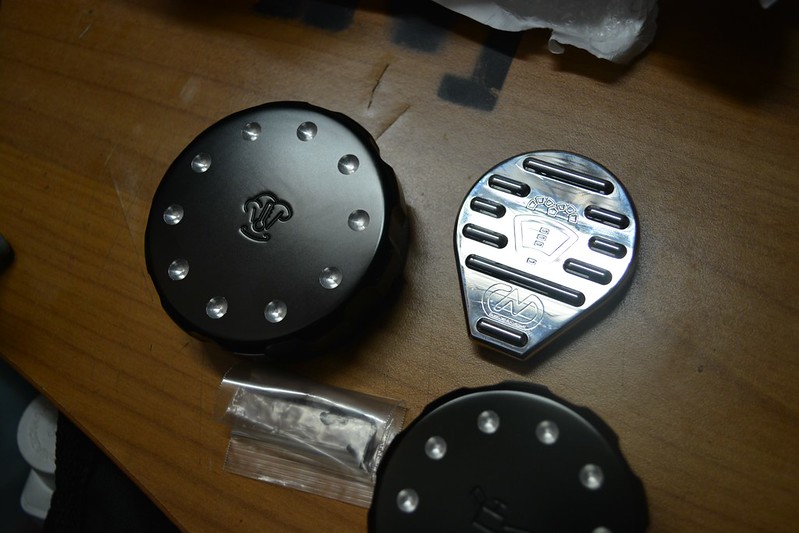
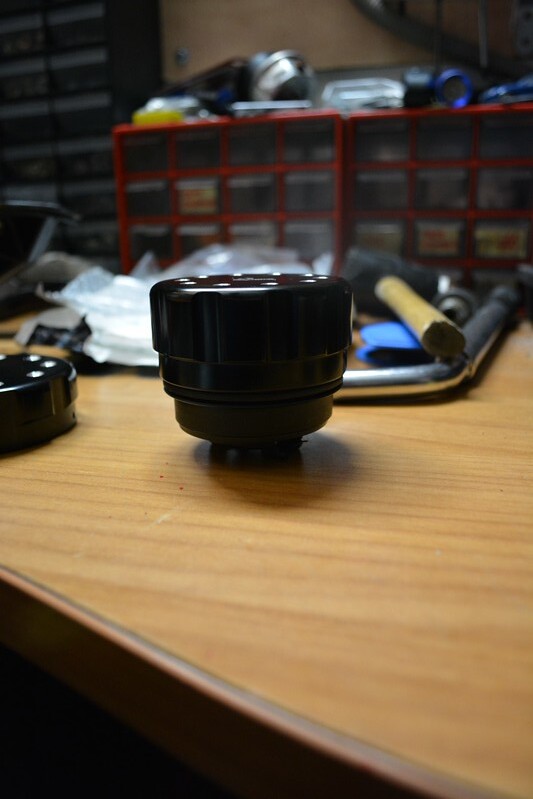
Mostly, billet caps for places here and there.
The Oil Filler Cap Coolant Cap, Washer Fluid Cap, and the Top Mount Caps.
Firstly, these three arrived which were supposed to be a direct fit for my car.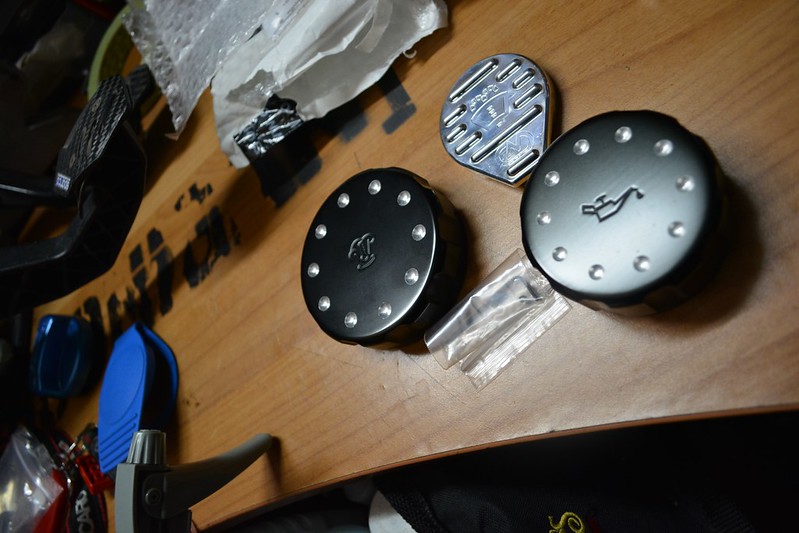 DSC_0853 by mgpdoc, on Flickr
Their quality is amazing
 DSC_0855 by mgpdoc, on Flickr
 DSC_0856 by mgpdoc, on Flickr
 DSC_0858 by mgpdoc, on Flickr
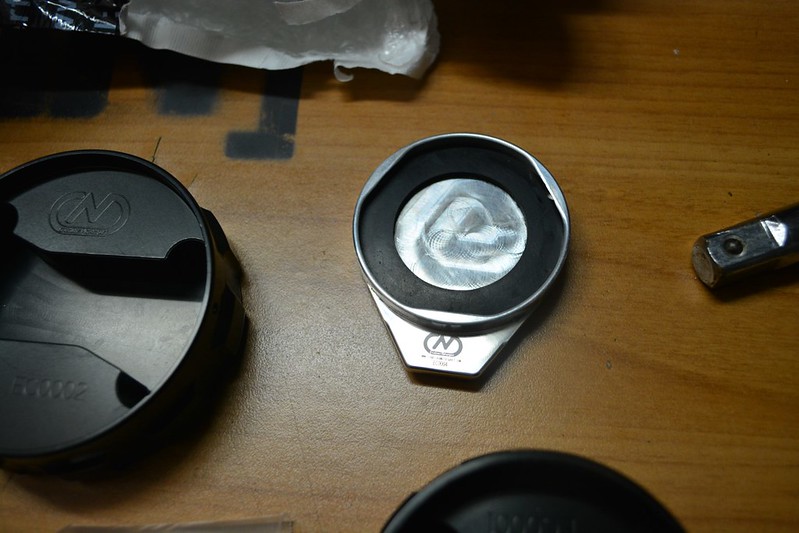
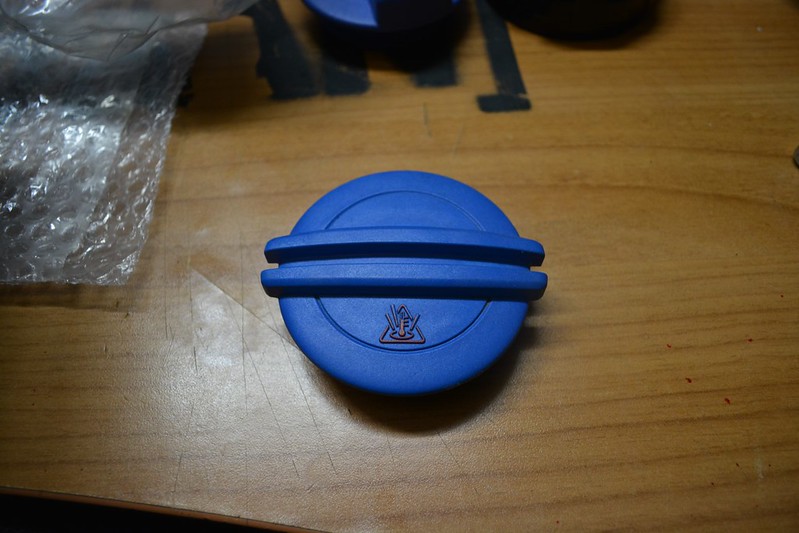
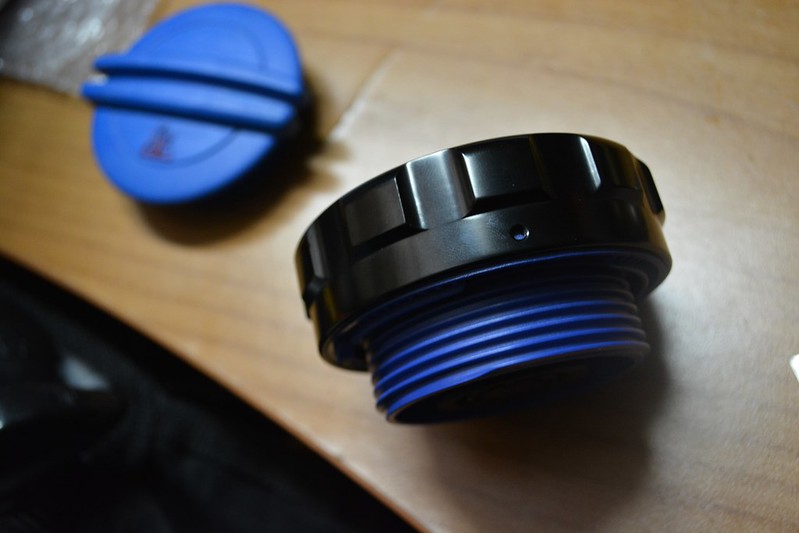
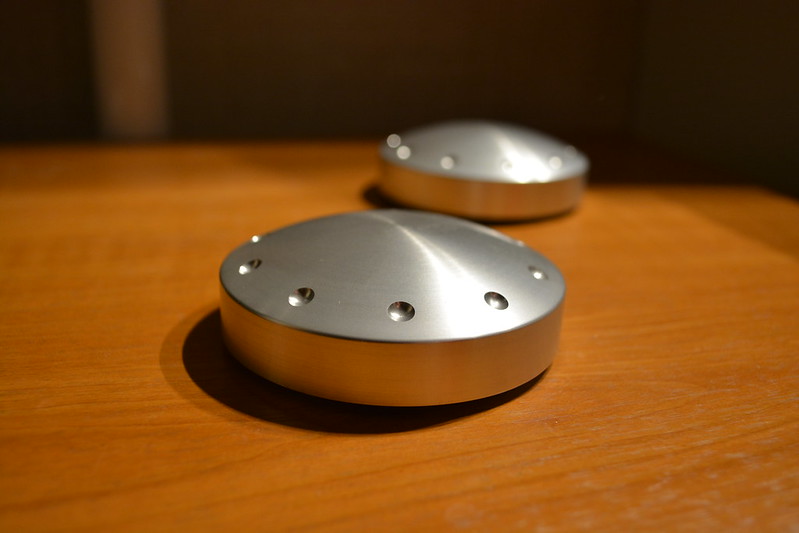
However........there is an issue when it comes to fitting them. It wasnt specified that these were designed to fit on top of older style caps. Oem ones, but from older cars, Golf mk3/4 era, and TT era. So, their bottom sides looked like this
 DSC_0859 by mgpdoc, on Flickr
 DSC_0860 by mgpdoc, on Flickr
And they supplied headless worm-style screws to tighthen them - which were not much needed as they had a tight fit if you had the right caps.
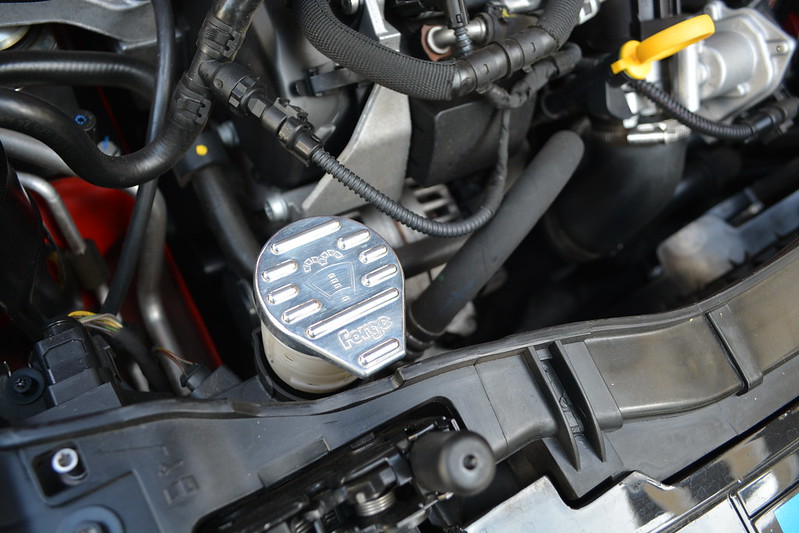
The washer fluid cap, needed no oem cap, it was a direct snug fit, so that went on easily first
 DSC_0861 by mgpdoc, on Flickr
 DSC_0874 by mgpdoc, on Flickr
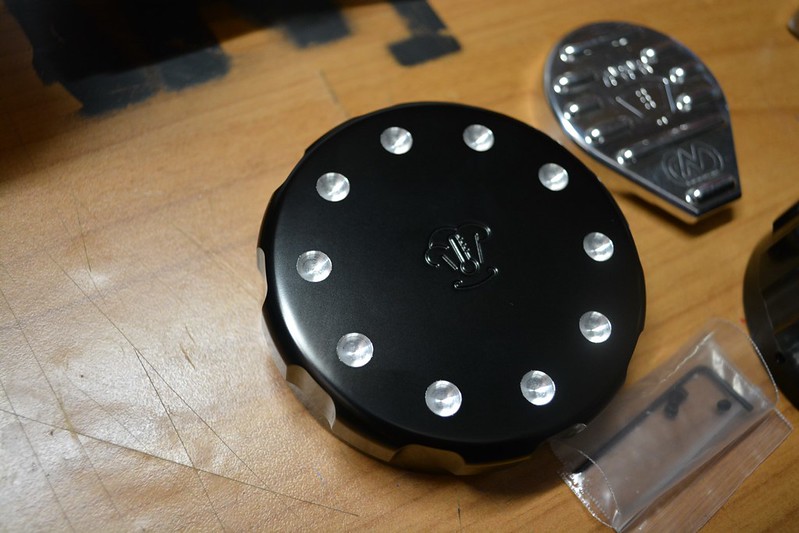
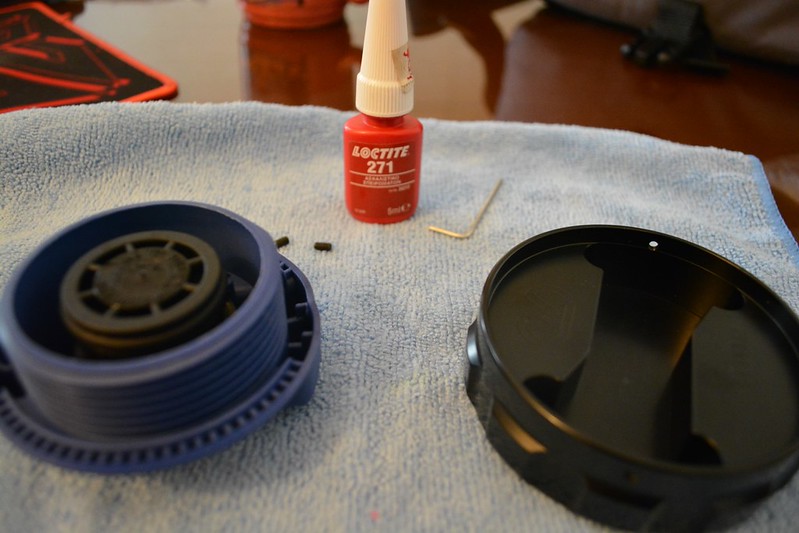
Also, the oil cap, went on the existing one, with the help of the small screws, and i also added some loctite there just for good measure
 DSC_0880 by mgpdoc, on Flickr
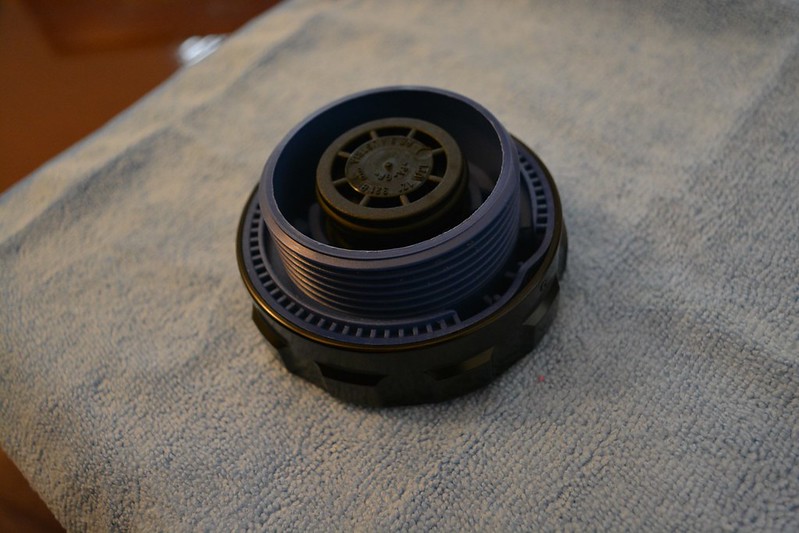
Just the look i was going for
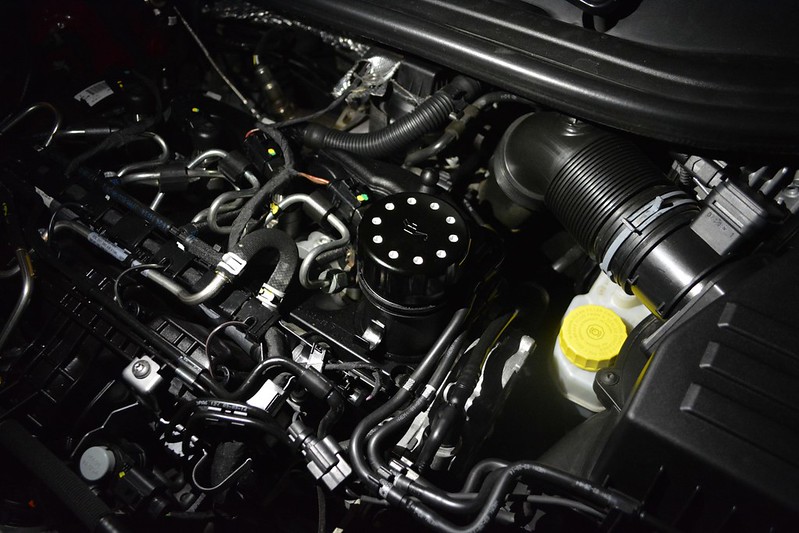 DSC_0888 by mgpdoc, on Flickr
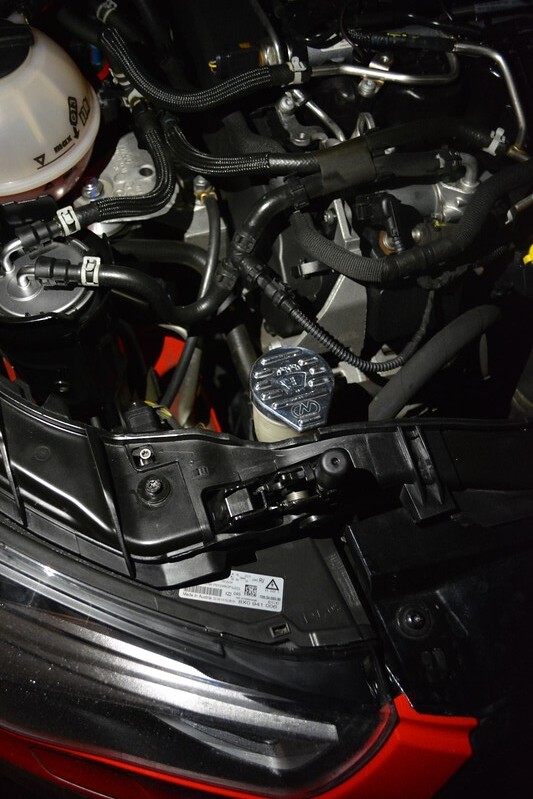
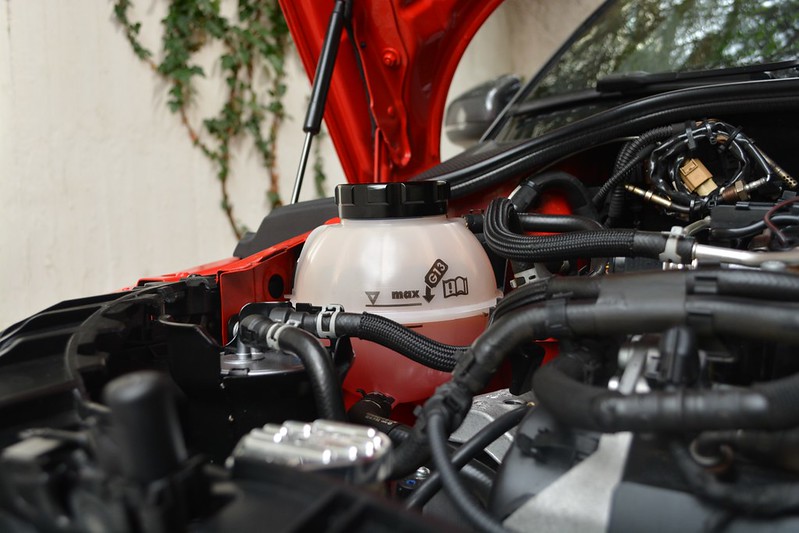
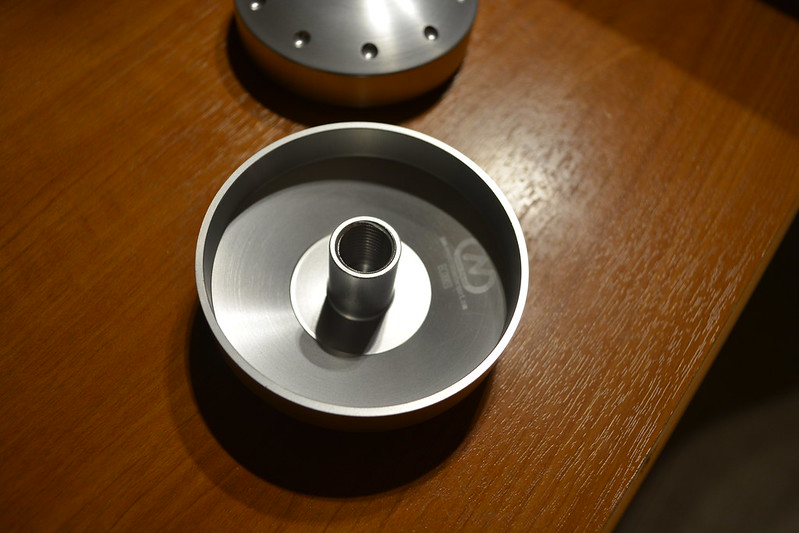
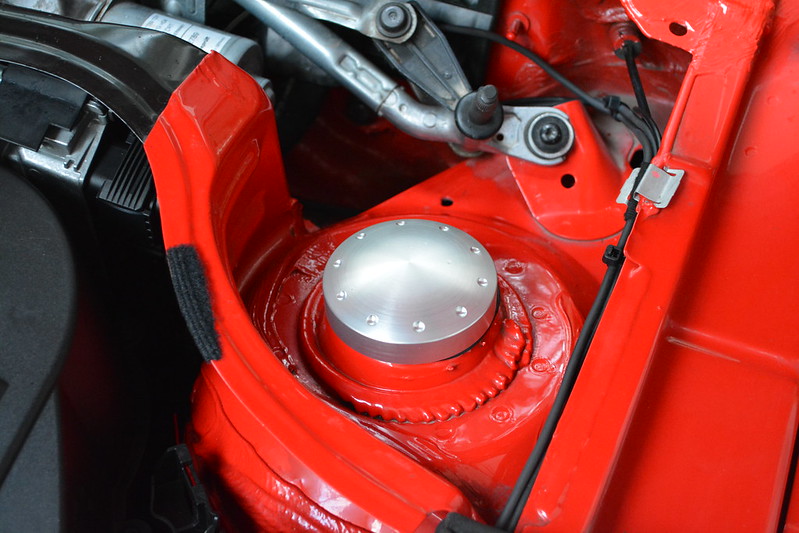
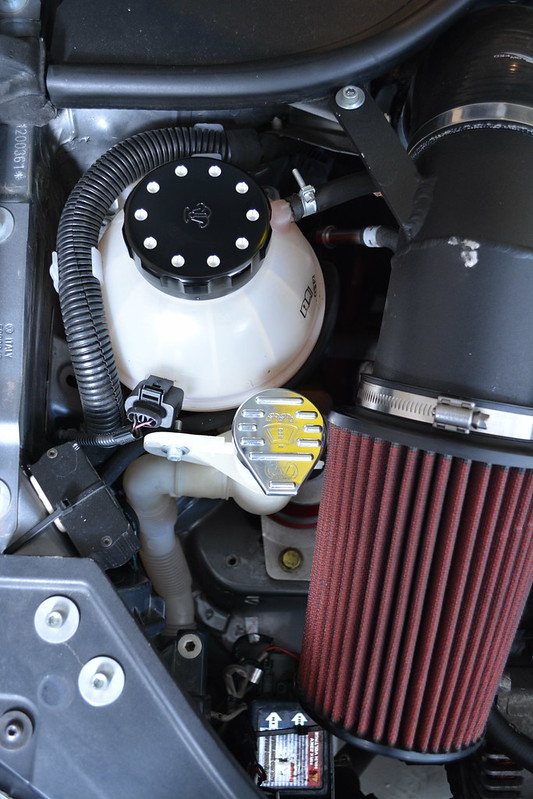
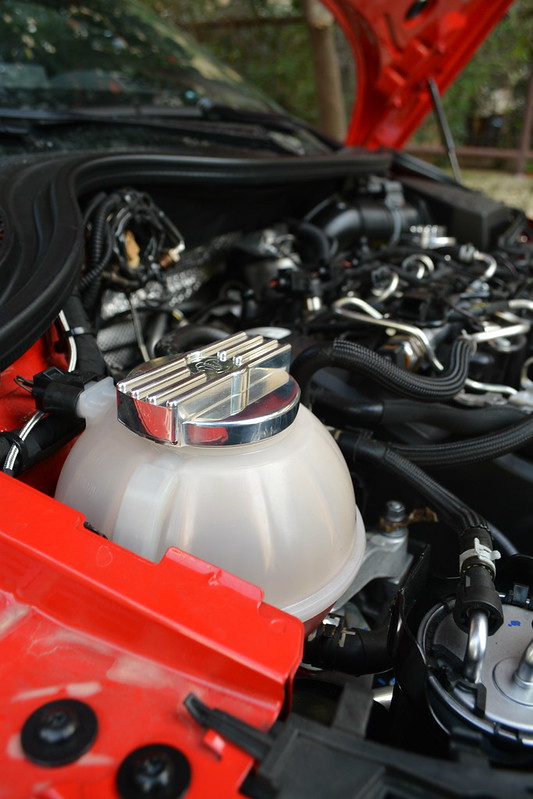
Now, lastly the coolant one
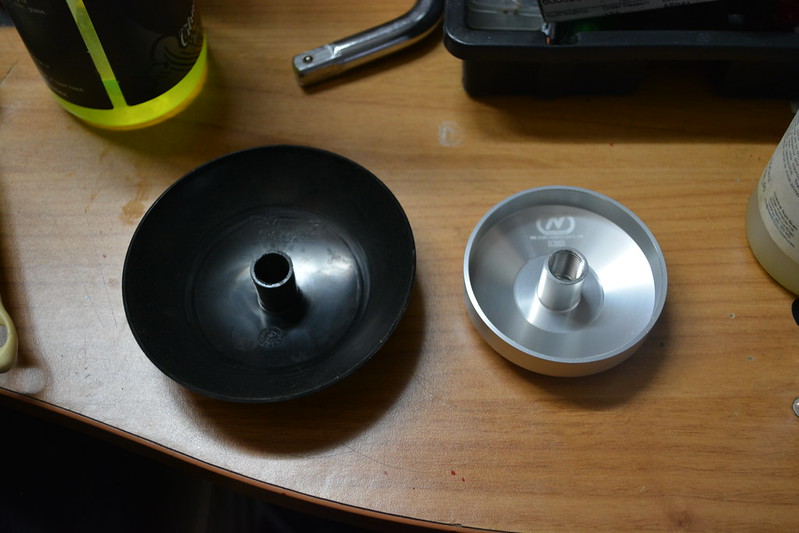
Here is the style cap our cars come with
 DSC_0893 by mgpdoc, on Flickr
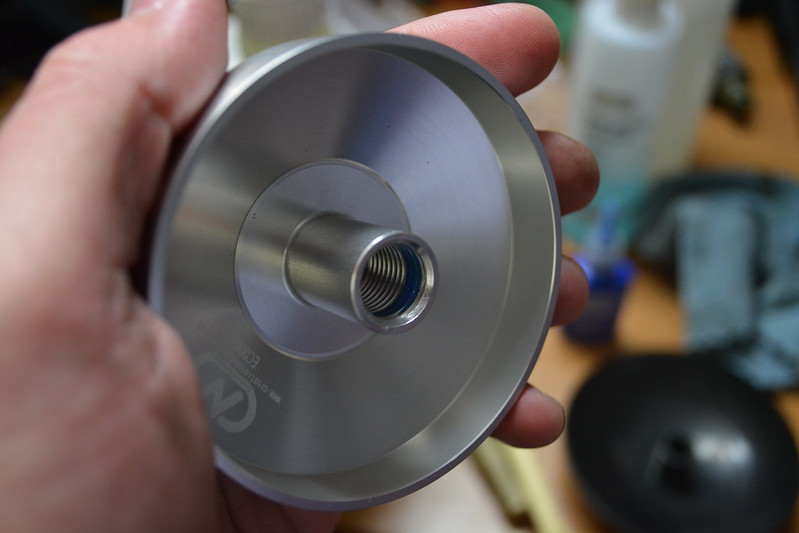
And this is what you need to buy to make it work
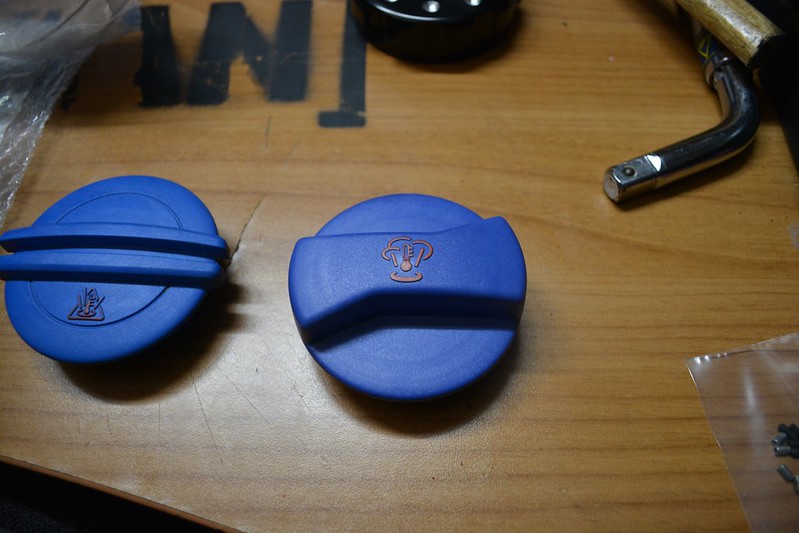 DSC_0894 by mgpdoc, on Flickr
It is the same from below, and fits perfectly
 DSC_0895 by mgpdoc, on Flickr
Like that, flush fit
 DSC_0896 by mgpdoc, on Flickr
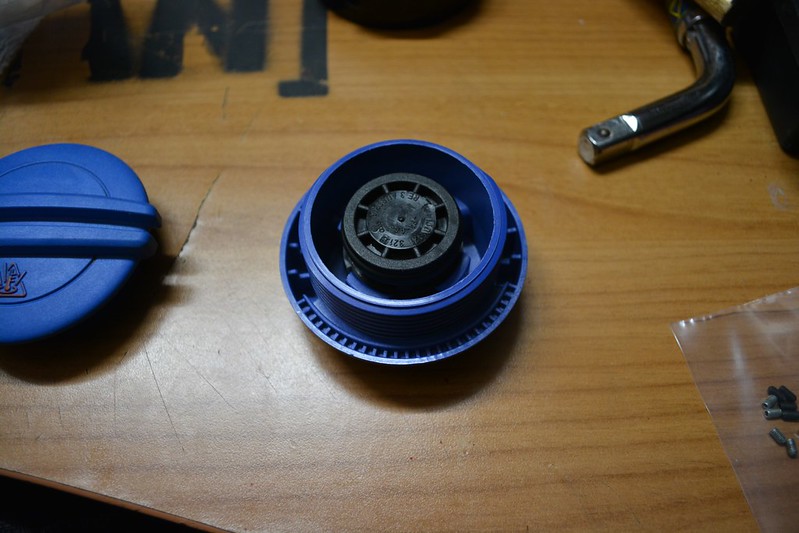
And this is where you can add the little screws for extra strength, and i did.
 DSC_0898 by mgpdoc, on Flickr
 DSC_0926 by mgpdoc, on Flickr
Secured
 DSC_0928 by mgpdoc, on Flickr
Installed
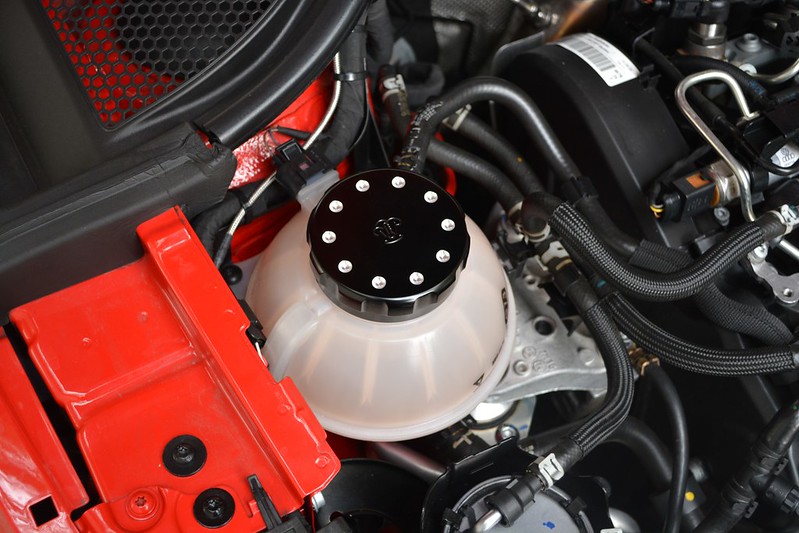 DSC_0932 by mgpdoc, on Flickr
 DSC_0936 by mgpdoc, on Flickr
Love the look
 DSC_0940 by mgpdoc, on Flickr
General Overview
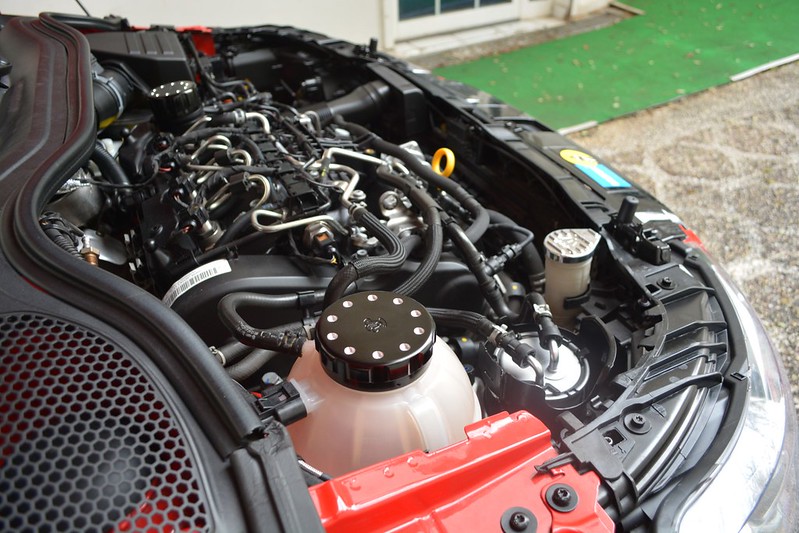 DSC_0943 by mgpdoc, on Flickr
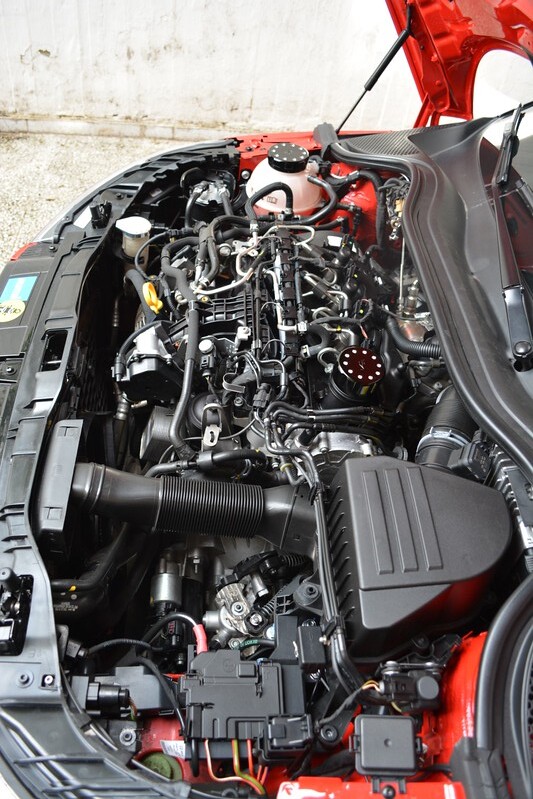 DSC_0944 by mgpdoc, on Flickr
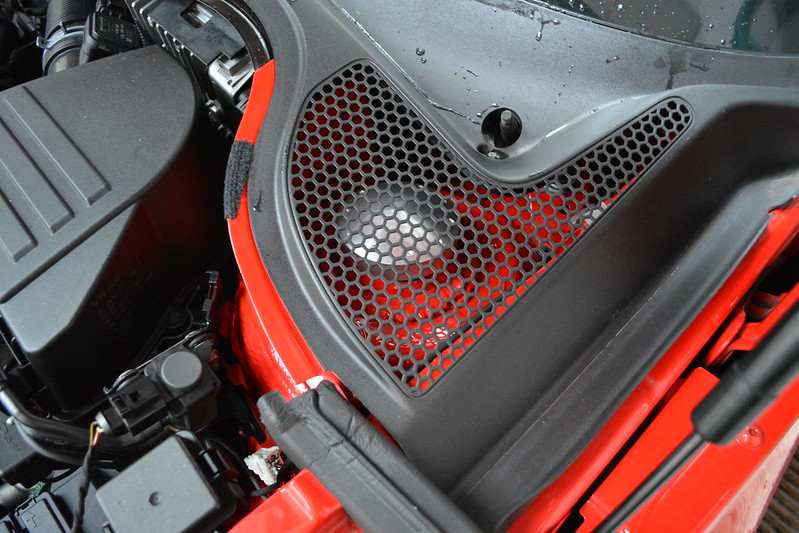
hmmm wonder if we can do something about these as well
 DSC_0947 by mgpdoc, on Flickr
Well we can, we surely can
Boom
 DSC_1015 by mgpdoc, on Flickr
 DSC_1026 by mgpdoc, on Flickr
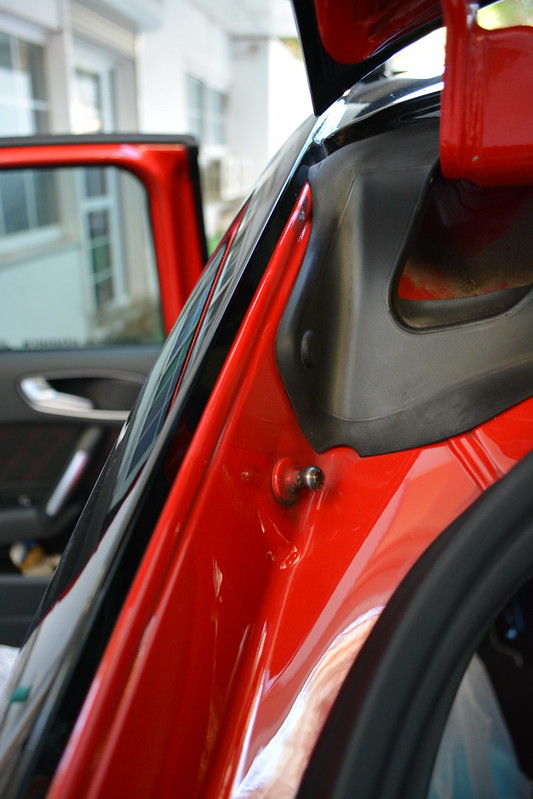
These were also available in black aluminum, but where they are located under the plastic undertray they would be lost so i went for silver for a subtle contrast
 DSC_1022 by mgpdoc, on Flickr
Quality once again, amazing
 DSC_1016 by mgpdoc, on Flickr
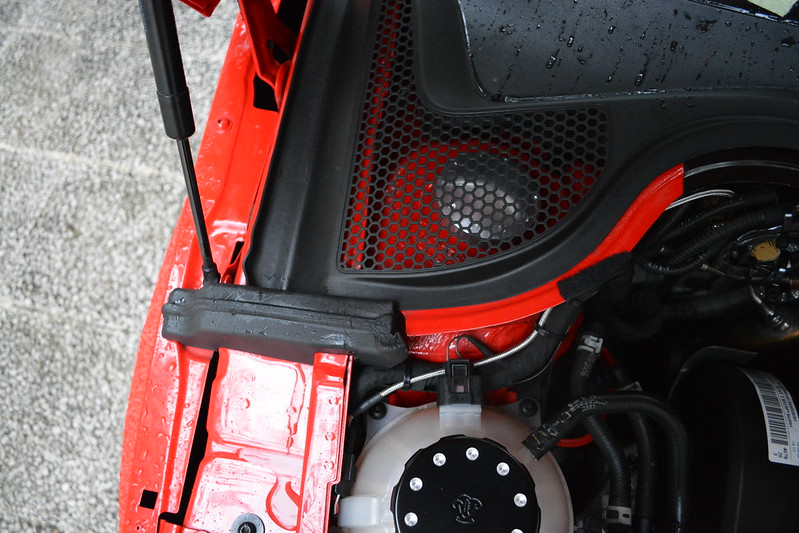
Despite the heavy rain, on NYE, i went out and went for it, hehe
 DSC_1031 by mgpdoc, on Flickr
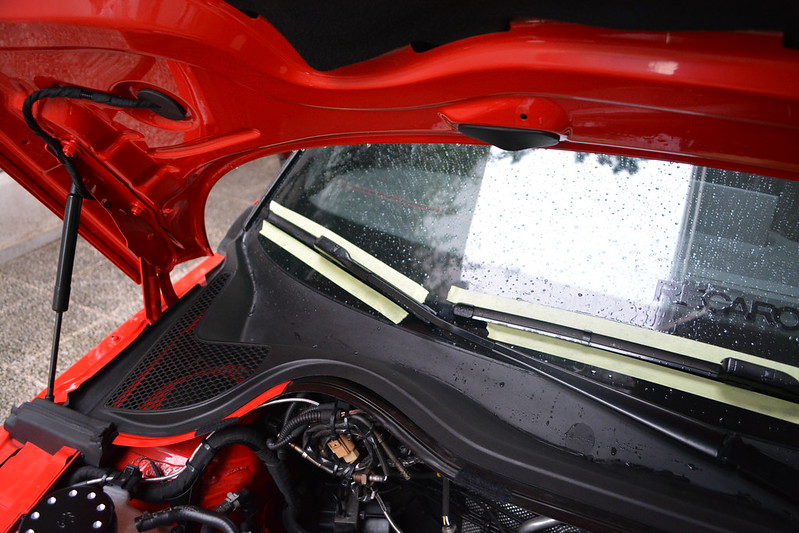
Marking the wipers location prior to removing them to then remove the plastic undertray
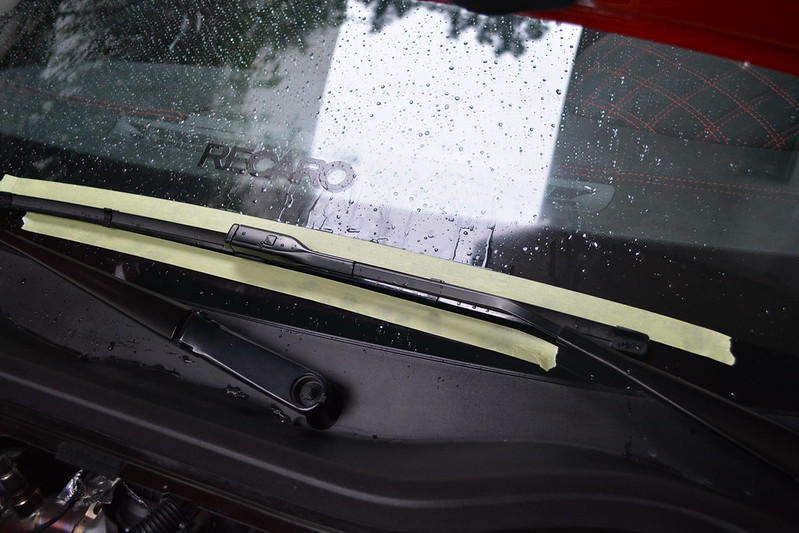 DSC_1030 by mgpdoc, on Flickr
Remove the OEM plastic cover and you are left with this
 DSC_0007 by mgpdoc, on Flickr
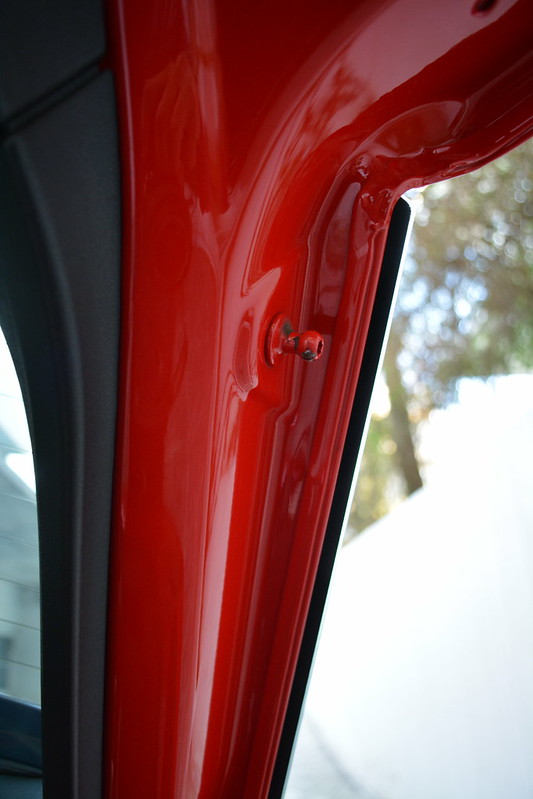
Caps side by side
 DSC_1035 by mgpdoc, on Flickr
 DSC_1037 by mgpdoc, on Flickr
Added some blue Loctite prior to installing to prevent diesel vibration from removing the cap- trust me it vibrates.
 DSC_1038 by mgpdoc, on Flickr
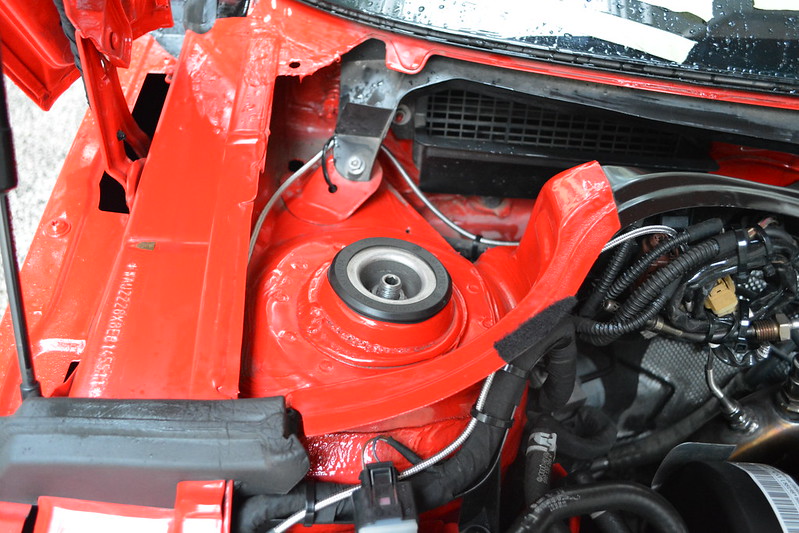
And then it was a matter of installing them on
Passenger side
 DSC_0017 by mgpdoc, on Flickr
Driver side
 DSC_0004 by mgpdoc, on Flickr
And this is how it looks with the plastic cover back on.
 DSC_0019 by mgpdoc, on Flickr
It is there, but very subtle
 DSC_0020 by mgpdoc, on Flickr
Cheers guys
 DSC_1014 by mgpdoc, on Flickr
Happy New Year
Mike, @mgpdoc over on instagram
Audi RS4PRA | VW Golf MKV GT-Y | Audi A1 SportBackComment
-
Hello how are you doing.
Have some things to show you.
Remember the floormats i had purchased from a seller over at ebay ?
Yes they looked awesome. But in three months time they looked more tired than oem ones did in a 3+ year period time.
Look at them.
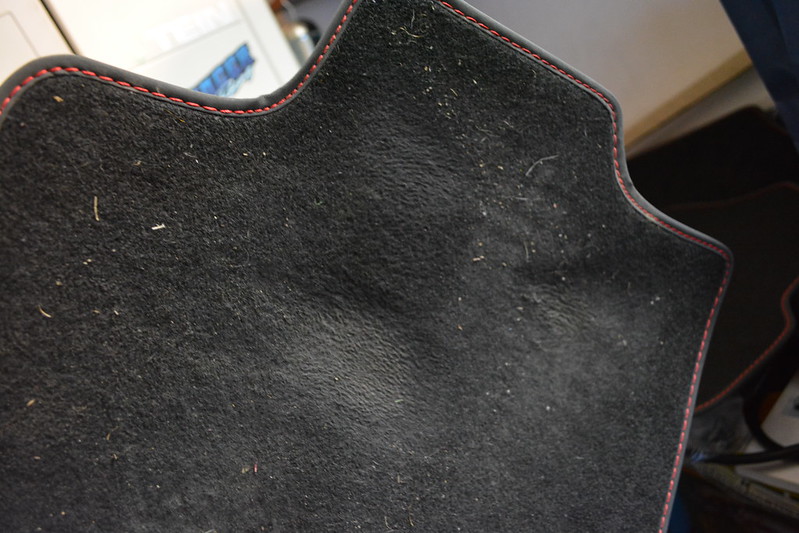 DSC_0027 by mgpdoc, on Flickr
 DSC_0026 by mgpdoc, on Flickr
 DSC_0028 by mgpdoc, on Flickr
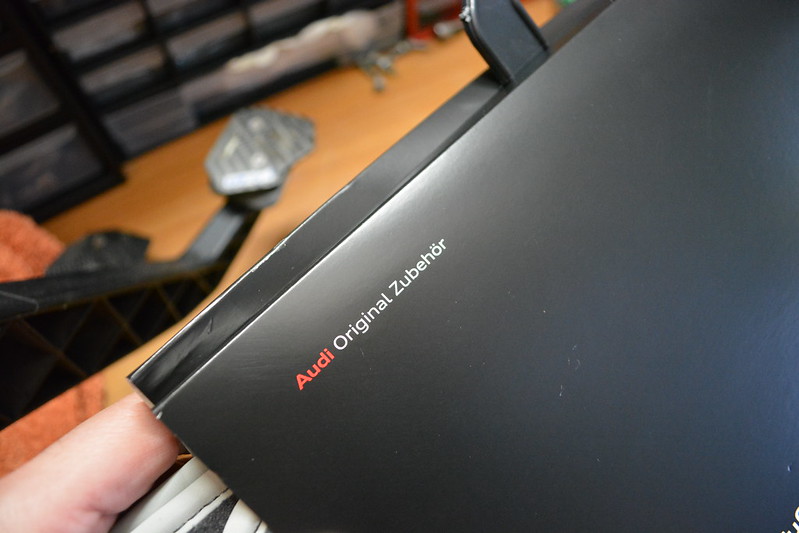
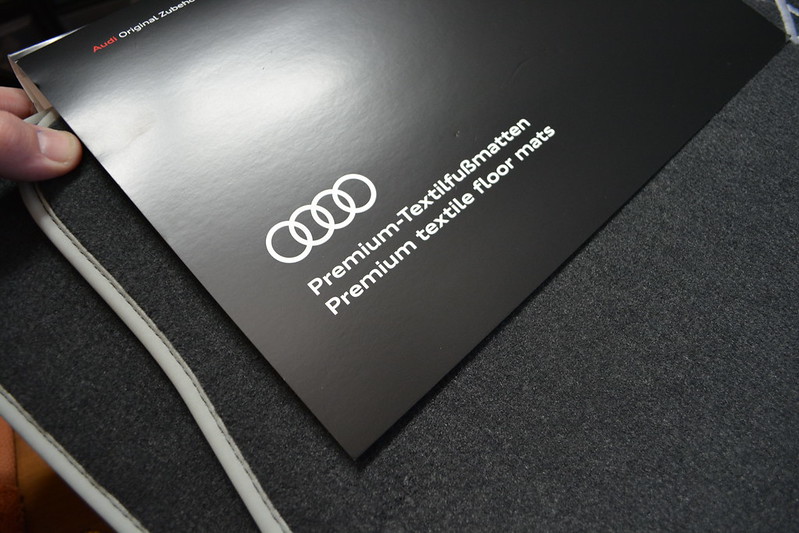
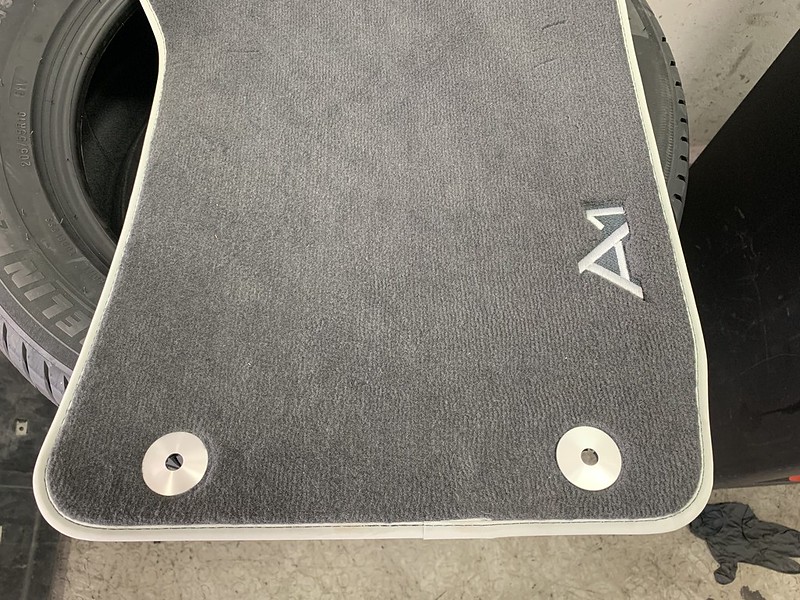
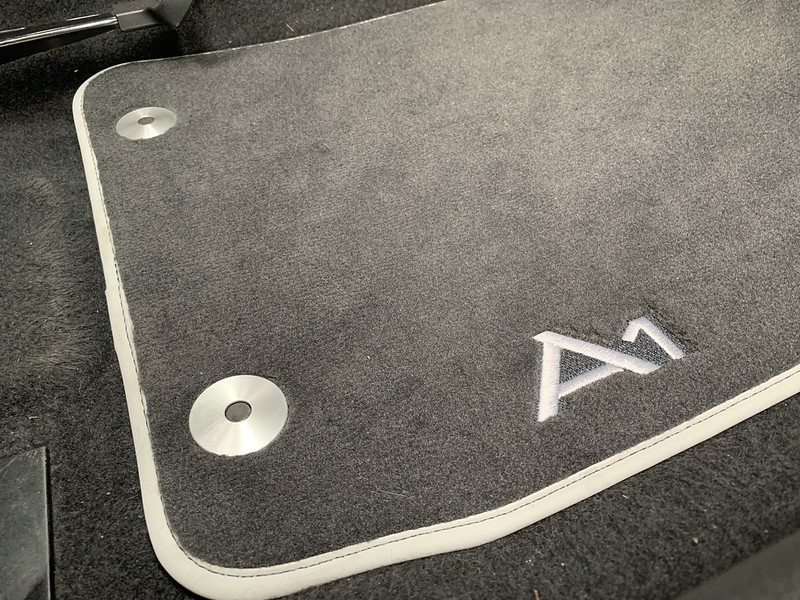
So decided to go for new OEM ones. Couldnt find the colour combo i was after so went with these.
 DSC_0022 by mgpdoc, on Flickr
 DSC_0023 by mgpdoc, on Flickr
DSC_0023 by mgpdoc, on Flickr
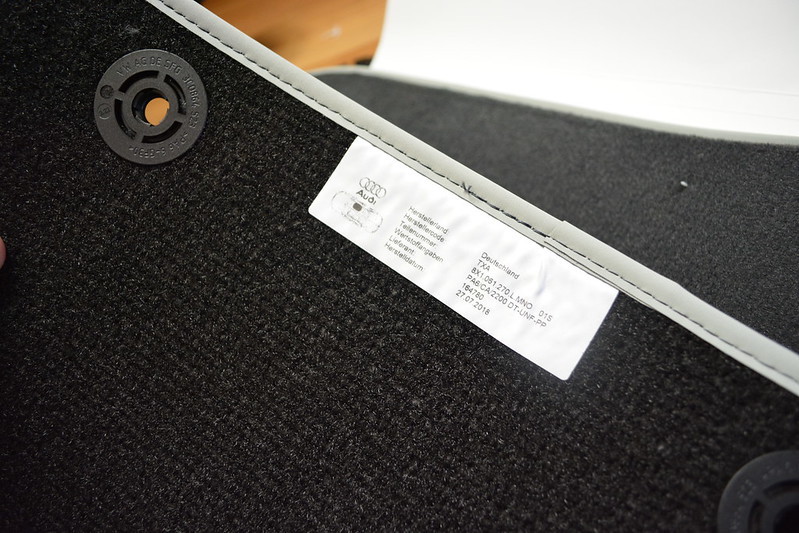 DSC_0025 by mgpdoc, on Flickr
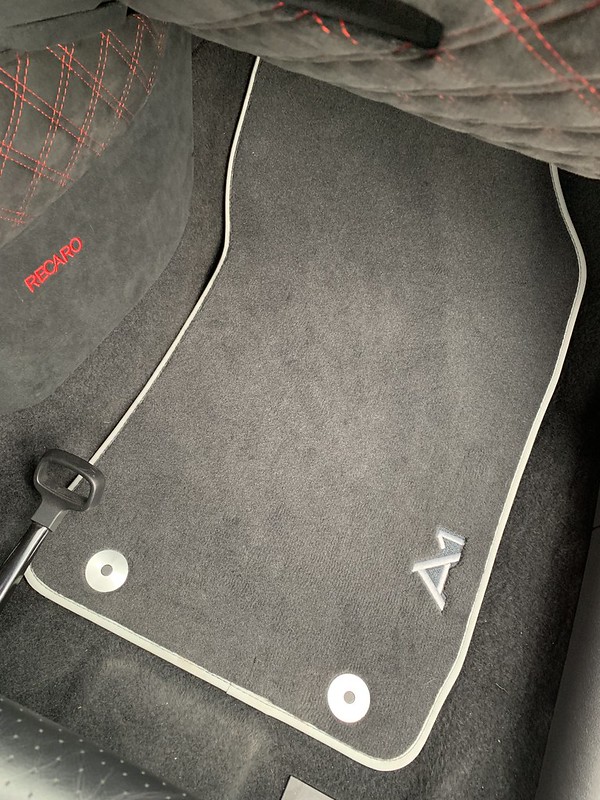
And here they are installed in the car
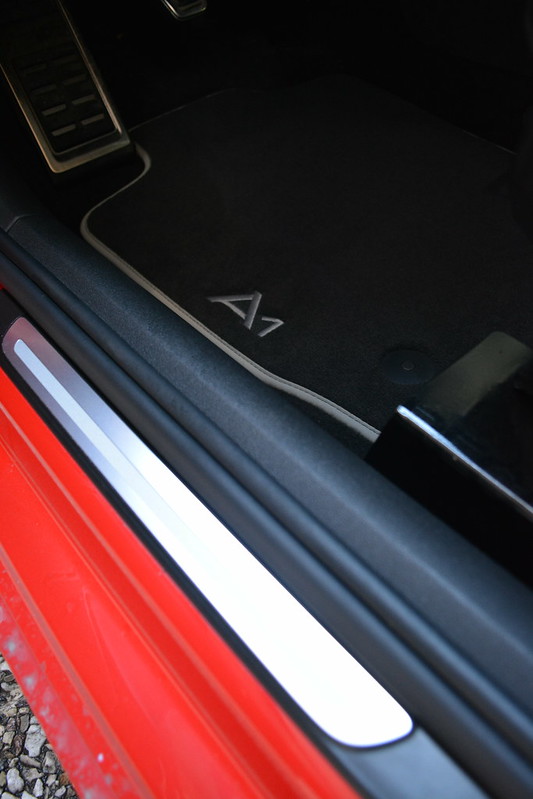 DSC_0032 by mgpdoc, on Flickr
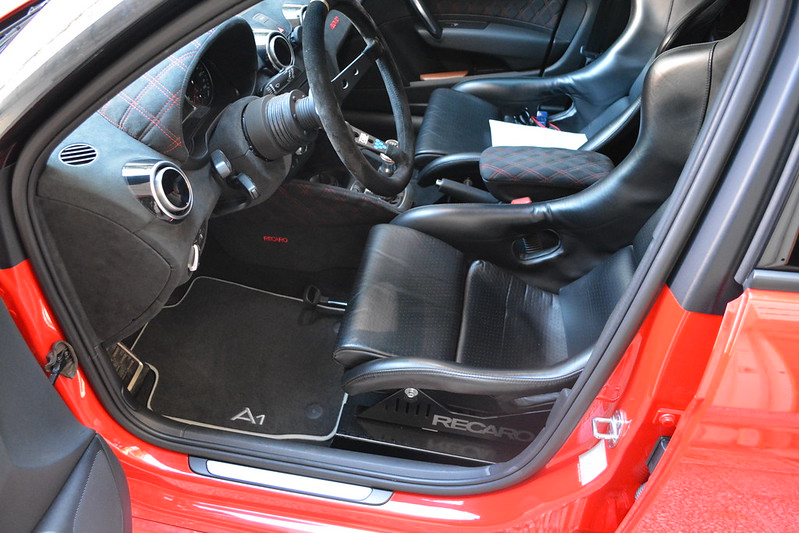 DSC_0033 by mgpdoc, on Flickr
 DSC_0030 by mgpdoc, on Flickr
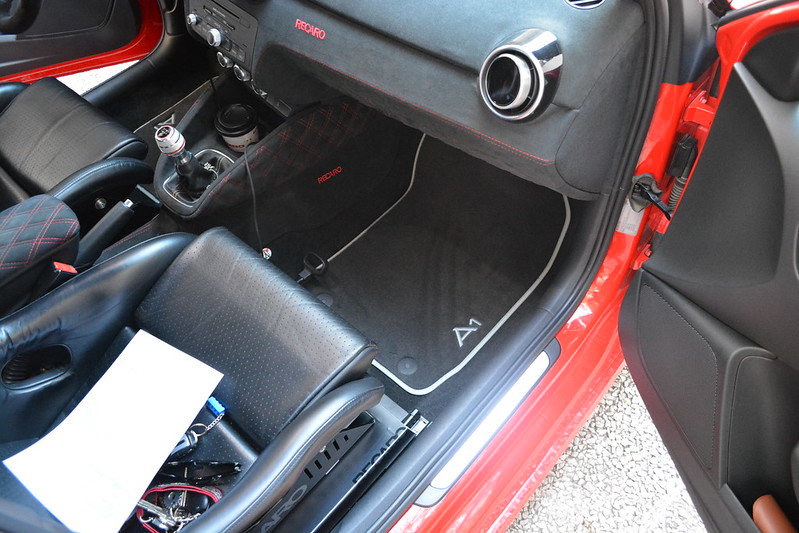 DSC_0038 by mgpdoc, on Flickr
Then I sourced something from Germany that i wanted for a long time. I bought it new, with instructions and hardware for installation.
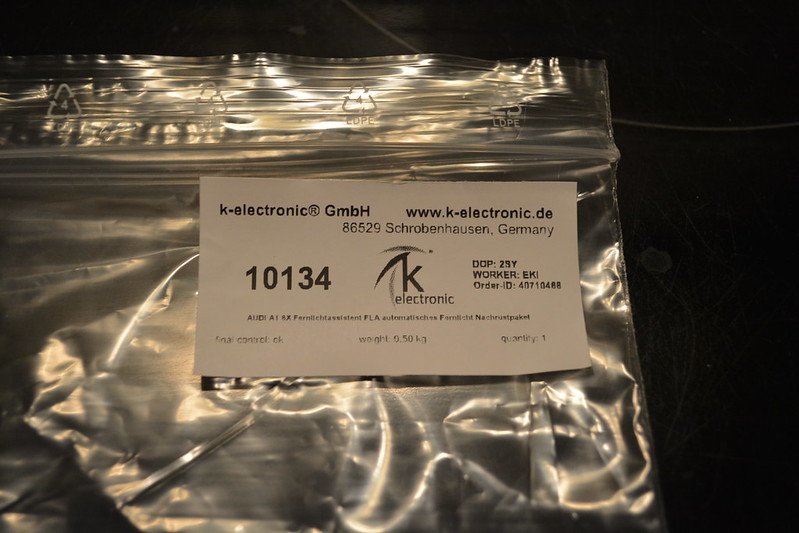 DSC_0039 by mgpdoc, on Flickr
You know what it is ?
 DSC_0040 by mgpdoc, on Flickr
 DSC_0041 by mgpdoc, on Flickr
Now you do
 DSC_0044 by mgpdoc, on Flickr
Yes it is a high beam assist mirror with auto dimming.
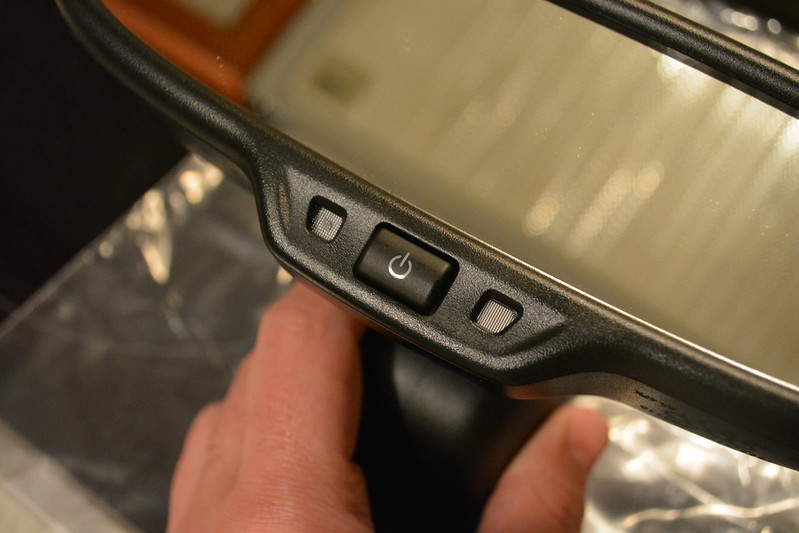 DSC_0046 by mgpdoc, on Flickr
 DSC_0053 by mgpdoc, on Flickr
Then, owning the car for 4 years, i decided to change a battery. Had zero issues with the factory one, none, but changed it nonetheless just to be safe. Also went for a slightly larger one, but still alowing for the spare wheel to fit inside. Given that this has the start-stop ability, it costs a lot. And i havent ever paid so much for a battery, ever, but oh well. Some photos of the installation.
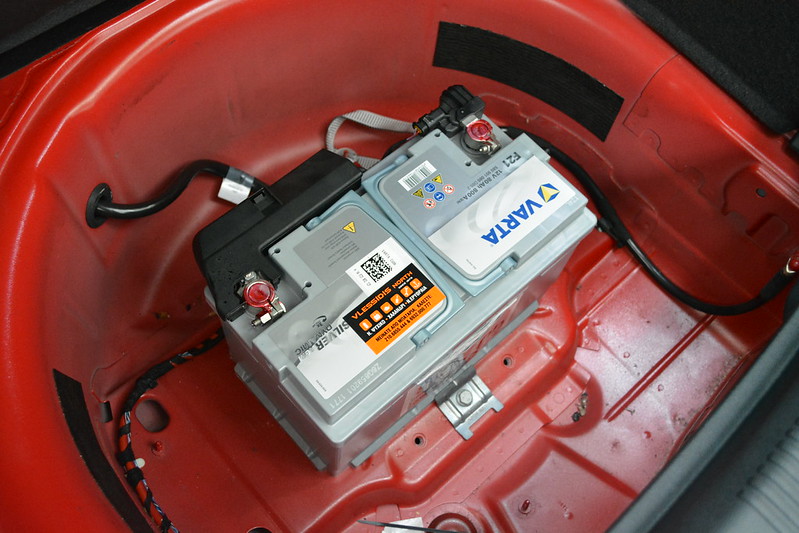 DSC_0055 by mgpdoc, on Flickr
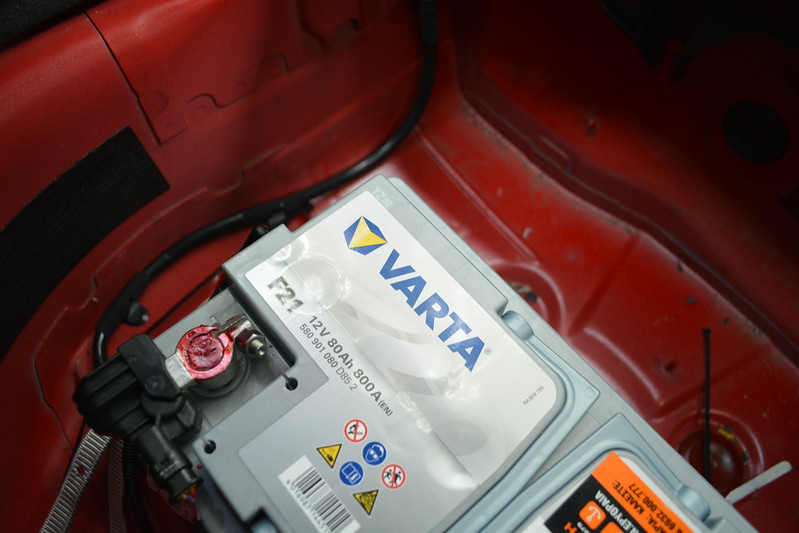 DSC_0057 by mgpdoc, on Flickr
 DSC_0059 by mgpdoc, on Flickr
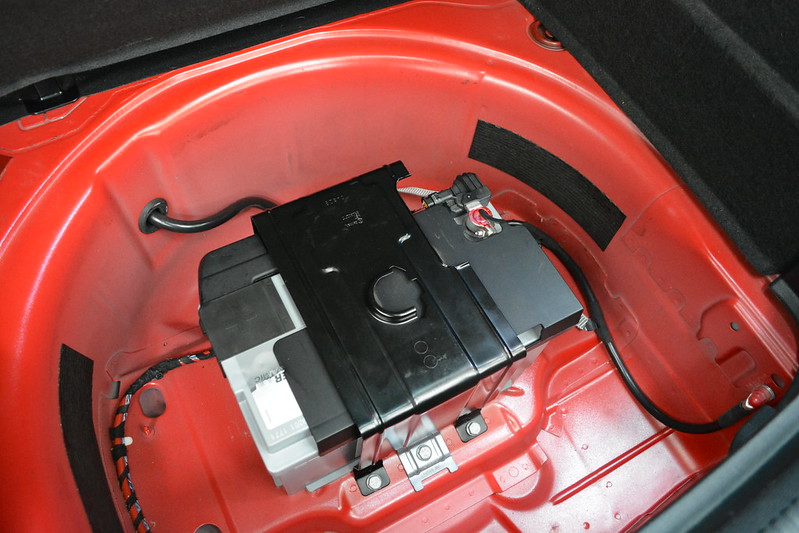 DSC_0060 by mgpdoc, on Flickr
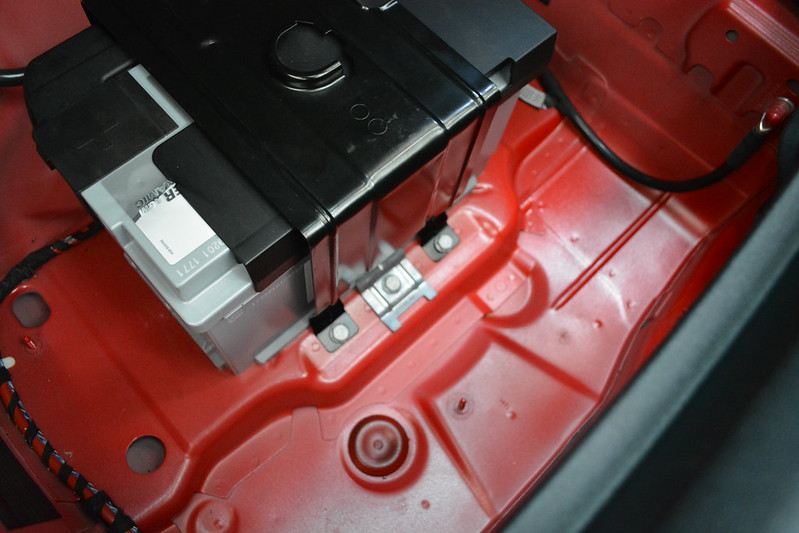 DSC_0062 by mgpdoc, on Flickr
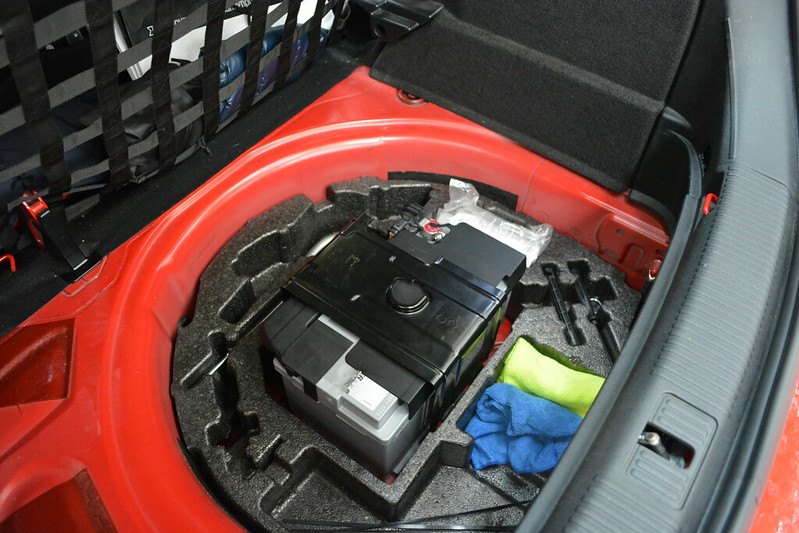 DSC_0063 by mgpdoc, on Flickr
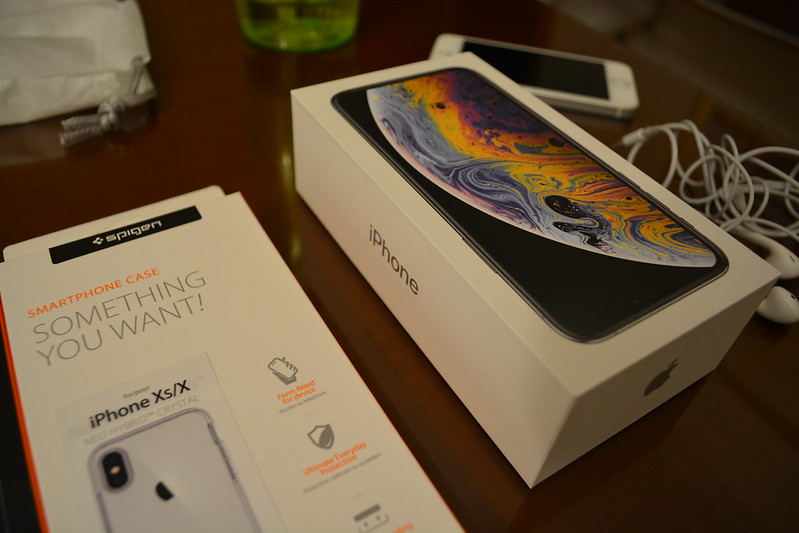
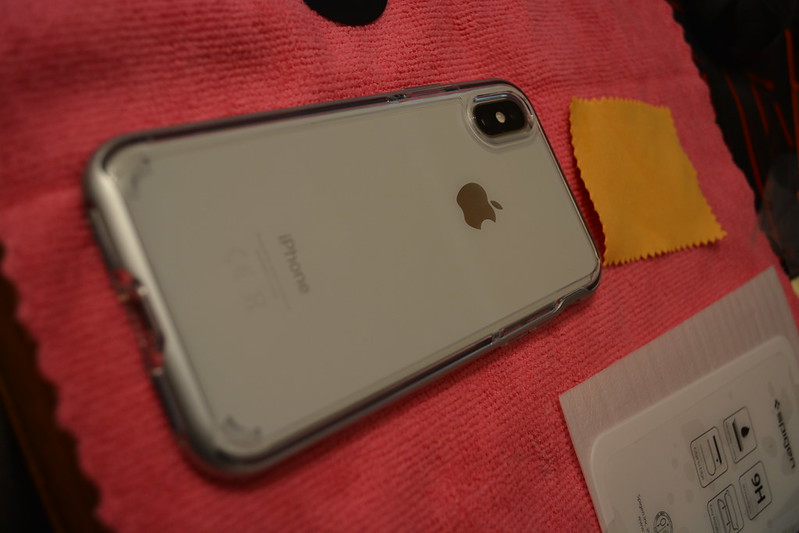
On a side note, I also picked up an Iphone XS 256, so i might take better pics even without my trusty Nikon, LoL
 DSC_0067 by mgpdoc, on Flickr
Always wear some protection I guess
 DSC_0081 by mgpdoc, on Flickr
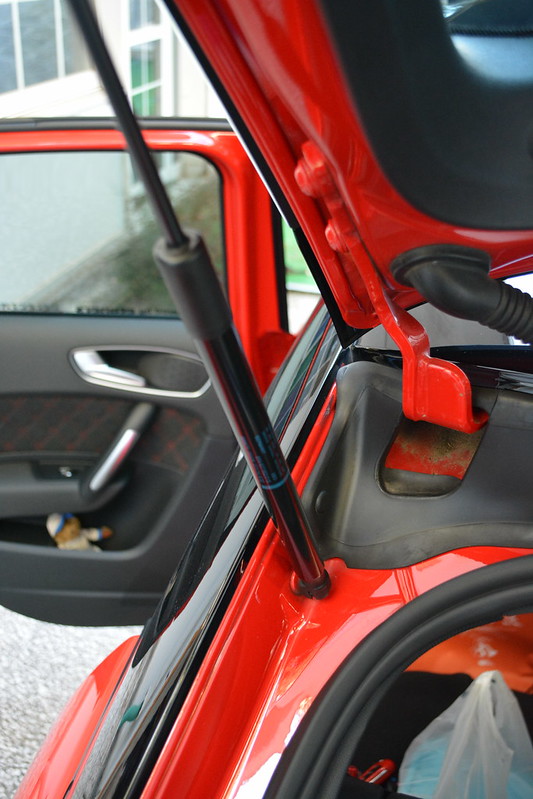
Another maintenance issue, is the trunk springs, which were a bit tired after the 4 years. Not too tired, but the trunk wanted some help to go up
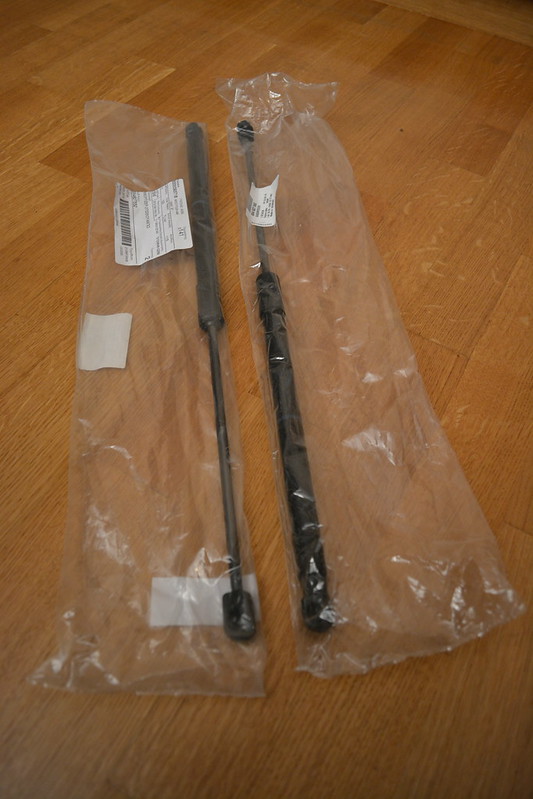 DSC_0084 by mgpdoc, on Flickr
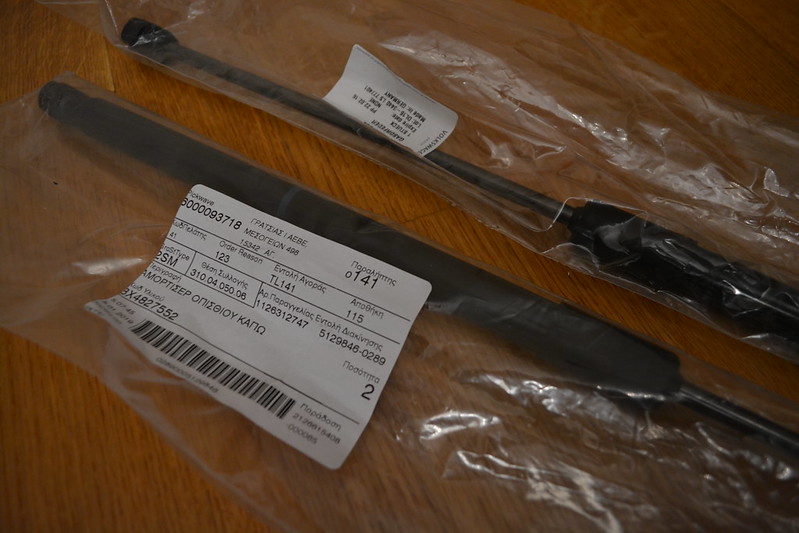 DSC_0085 by mgpdoc, on Flickr
Had to remove the stock ones, pretty straight forwards, just remove the pins
 DSC_0089 by mgpdoc, on Flickr
 DSC_0090 by mgpdoc, on Flickr
 DSC_0093 by mgpdoc, on Flickr
And then install the new ones. Job done.
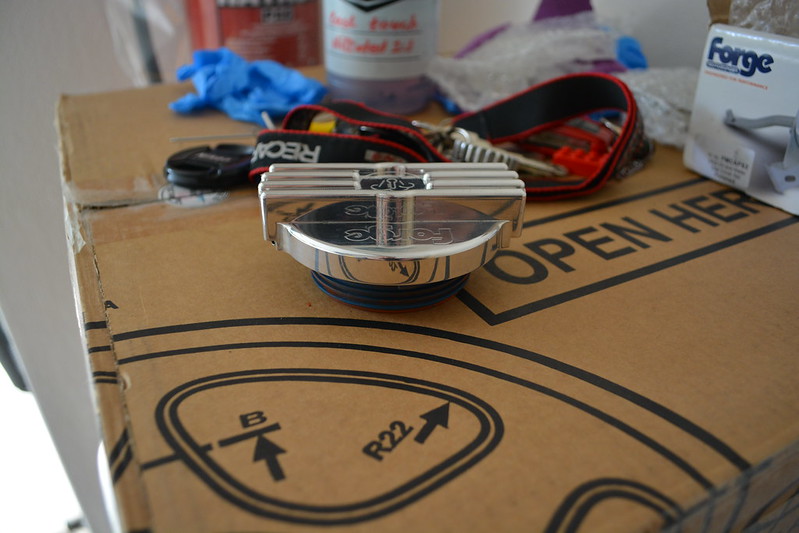
Lastly, something which was not planned but happened nonetheless.
Did it ever happen to you, to search for OSIR products on ebay and come across Forge products ? Well it happened to me. This guy was selling these, hardly used, so I just had to
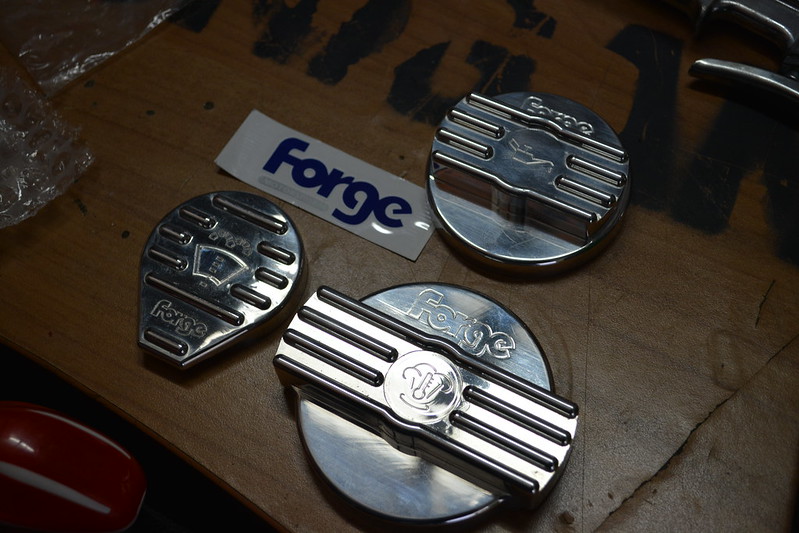 DSC_0095 by mgpdoc, on Flickr
They go on top of the OEM ones like this
 DSC_0102 by mgpdoc, on Flickr
 DSC_0103 by mgpdoc, on Flickr
I first tried these on the TFSI
 DSC_0105 by mgpdoc, on Flickr
 DSC_0108 by mgpdoc, on Flickr
But they didnt fit the theme. So i thought lets put these on the little Audi and bring the black ones on the TFSi. Like this .
Golf
 DSC_0116 by mgpdoc, on Flickr
 DSC_0110 by mgpdoc, on Flickr
 DSC_0118 by mgpdoc, on Flickr
 DSC_0114 by mgpdoc, on Flickr
And then, the new Forge ones on the little Audi
 DSC_0122 by mgpdoc, on Flickr
 DSC_0124 by mgpdoc, on Flickr
 DSC_0125 by mgpdoc, on Flickr
Cheers
More to come
Mike, @mgpdoc over on Instagram
Audi RS4PRA | VW Golf MKV GT-Y | Audi A1 SportBackComment
-
Proper a1 love the details on the car big or small wel sorted car where are you from main or an island from GreeceComment
-
love forum threads, glad your keeping this one alive. car looks awsome as always...Comment
-
Audi RS4PRA | VW Golf MKV GT-Y | Audi A1 SportBackComment
-
Had some snow time
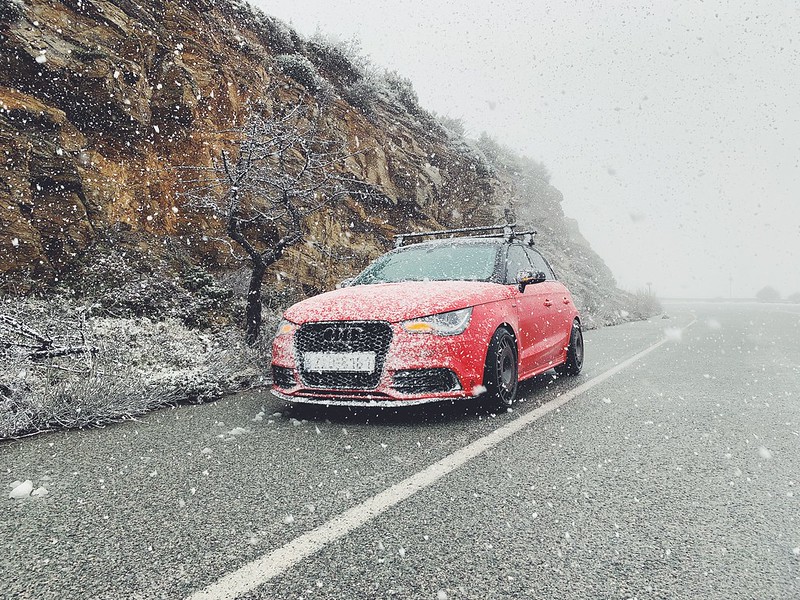 Untitled by mgpdoc, on Flickr
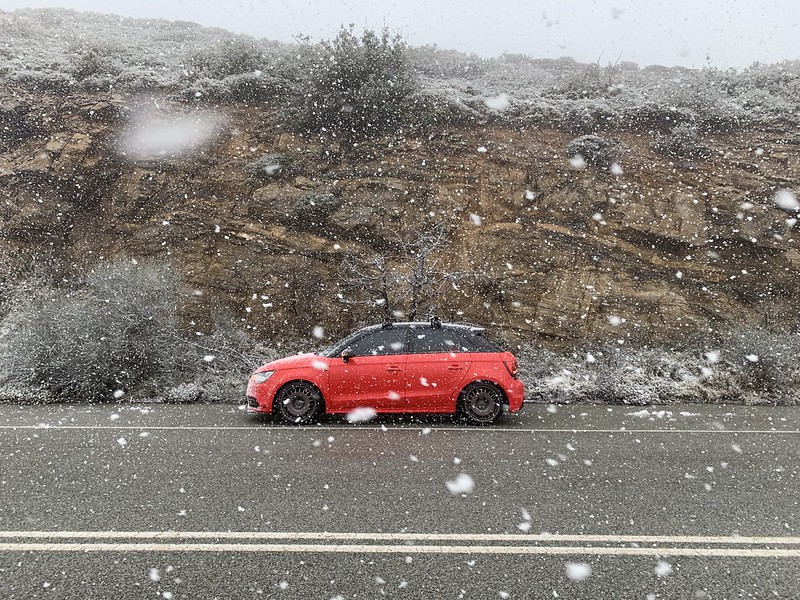 Untitled by mgpdoc, on Flickr
And then
I washed it like i should
 Untitled by mgpdoc, on Flickr
Here is where i first collected my car from
 Untitled by mgpdoc, on Flickr
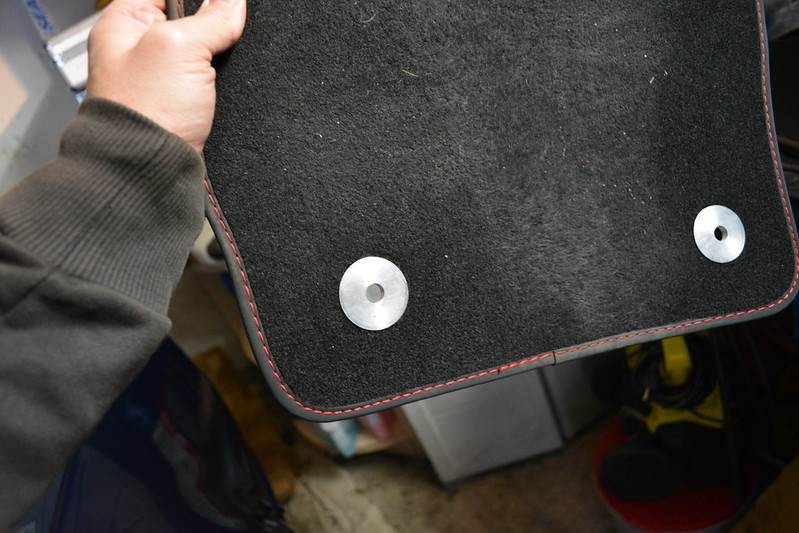
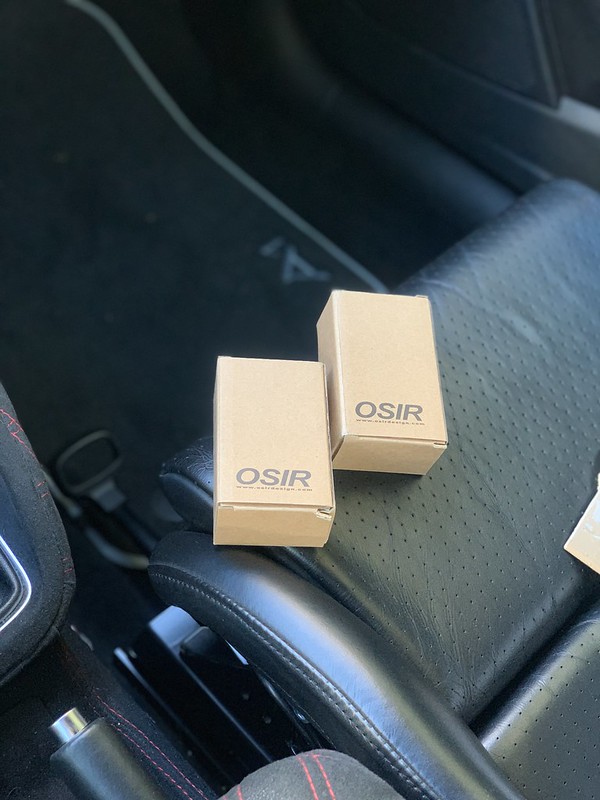
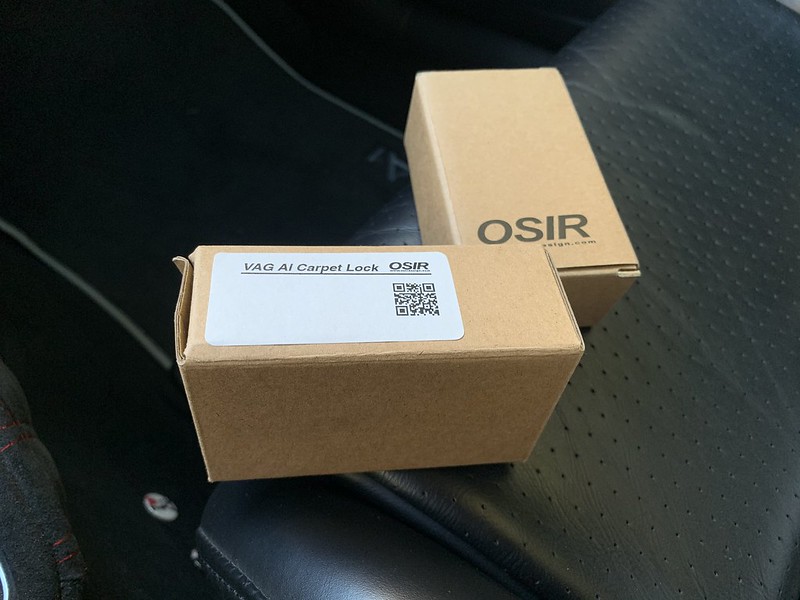
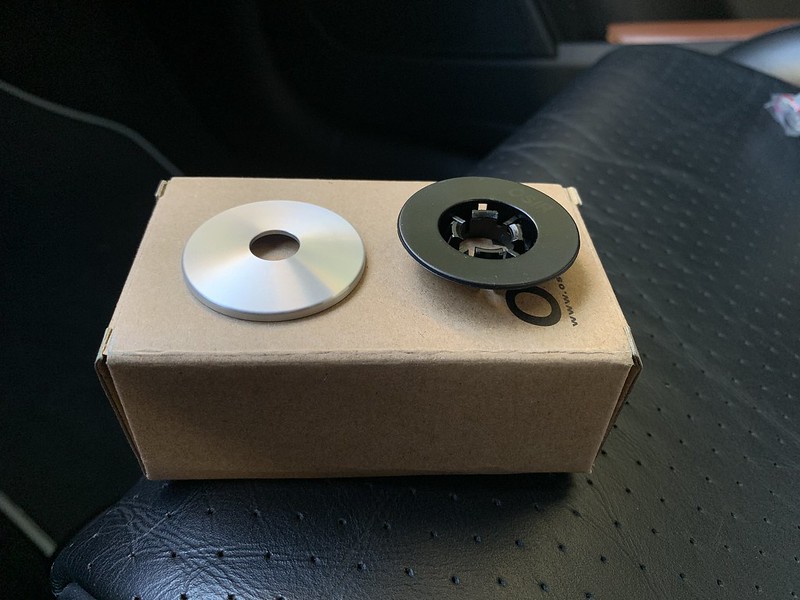
At last received my OSIR floormats mounting aluminum clips - as the ones i made didnt clip to my standards.
 Untitled by mgpdoc, on Flickr
 Untitled by mgpdoc, on Flickr
 Untitled by mgpdoc, on Flickr
 Untitled by mgpdoc, on Flickr
So befores.
 Untitled by mgpdoc, on Flickr
 Untitled by mgpdoc, on Flickr
Afters
 Untitled by mgpdoc, on Flickr
 Untitled by mgpdoc, on Flickr
 Untitled by mgpdoc, on Flickr
 Untitled by mgpdoc, on Flickr
Also did a service on these, although the factory doesnt require service every 7500km. However, I do.
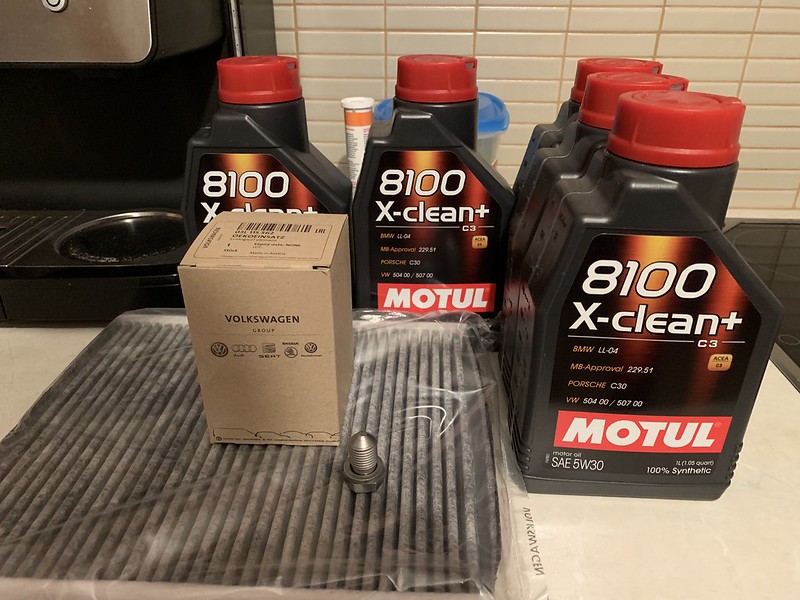 Untitled by mgpdoc, on Flickr
Also cleaned and re-oiled my air filter.
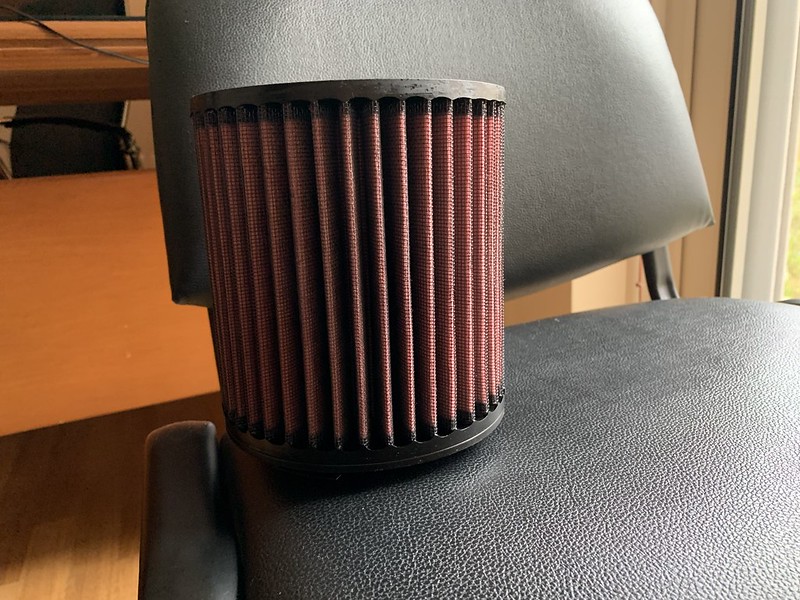 Untitled by mgpdoc, on Flickr
On another note here is a teaser of the steering wheel which is getting ready any day now . . .
 Untitled by mgpdoc, on Flickr
Cheers
Mike, @mgpdoc over on instagram
Audi RS4PRA | VW Golf MKV GT-Y | Audi A1 SportBackComment
-
Had some snow time
Untitled by mgpdoc, on Flickr
Untitled by mgpdoc, on Flickr
And then
I washed it like i should
Untitled by mgpdoc, on Flickr
Here is where i first collected my car from
Untitled by mgpdoc, on Flickr
At last received my OSIR floormats mounting aluminum clips - as the ones i made didnt clip to my standards.
Untitled by mgpdoc, on Flickr
Untitled by mgpdoc, on Flickr
Untitled by mgpdoc, on Flickr
Untitled by mgpdoc, on Flickr
So befores.
Untitled by mgpdoc, on Flickr
Untitled by mgpdoc, on Flickr
Afters
Untitled by mgpdoc, on Flickr
Untitled by mgpdoc, on Flickr
Untitled by mgpdoc, on Flickr
Untitled by mgpdoc, on Flickr
Also did a service on these, although the factory doesnt require service every 7500km. However, I do.
Untitled by mgpdoc, on Flickr
Also cleaned and re-oiled my air filter.
Untitled by mgpdoc, on Flickr
On another note here is a teaser of the steering wheel which is getting ready any day now . . .
Untitled by mgpdoc, on Flickr
Cheers
Mike, @mgpdoc over on instagram
Audi RS4PRA | VW Golf MKV GT-Y | Audi A1 SportBackComment
-
Something is wrong in the posting function . . . .
Audi RS4PRA | VW Golf MKV GT-Y | Audi A1 SportBackComment
-
I don't know where to begin from.
Let's see. Let's start with activating the OEM parking sensor radar which was a thing i hadnt ticked off the list
 Untitled by mgpdoc, on Flickr
The settings part, and then the visual presentation
 Untitled by mgpdoc, on Flickr
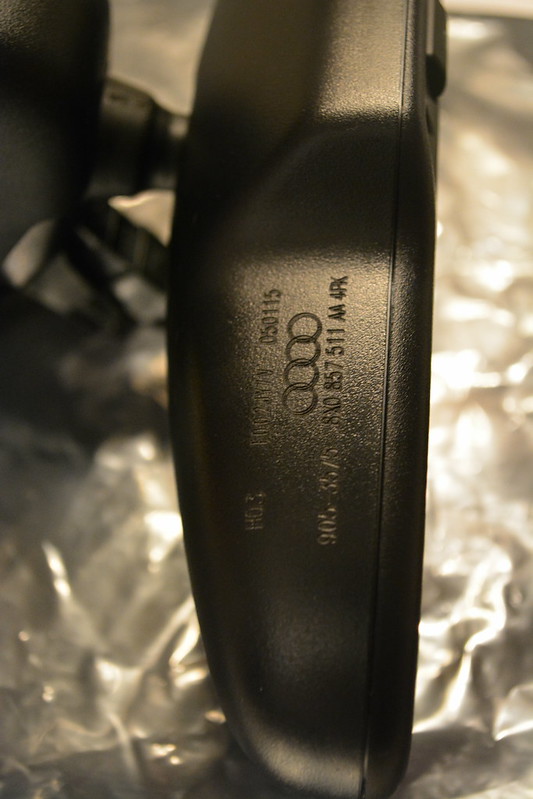
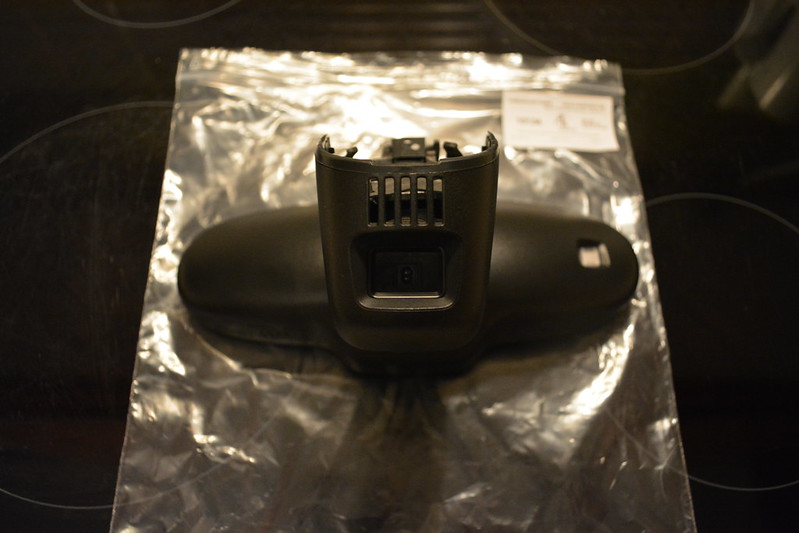
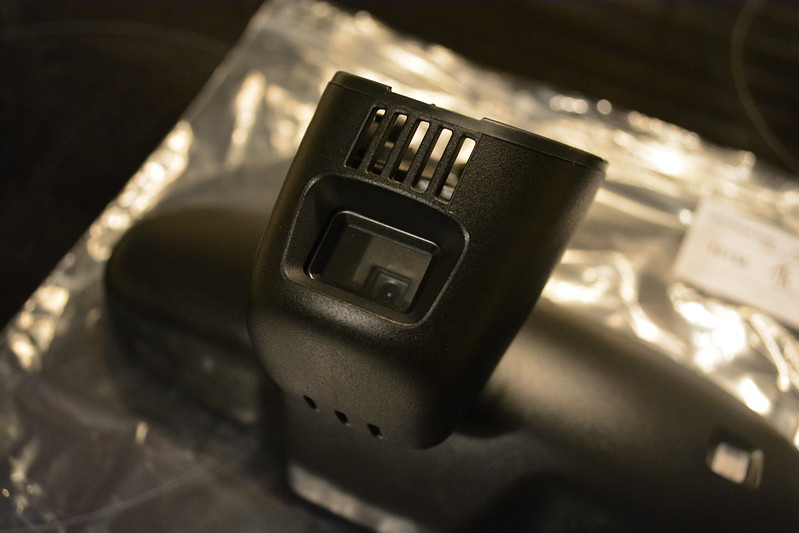
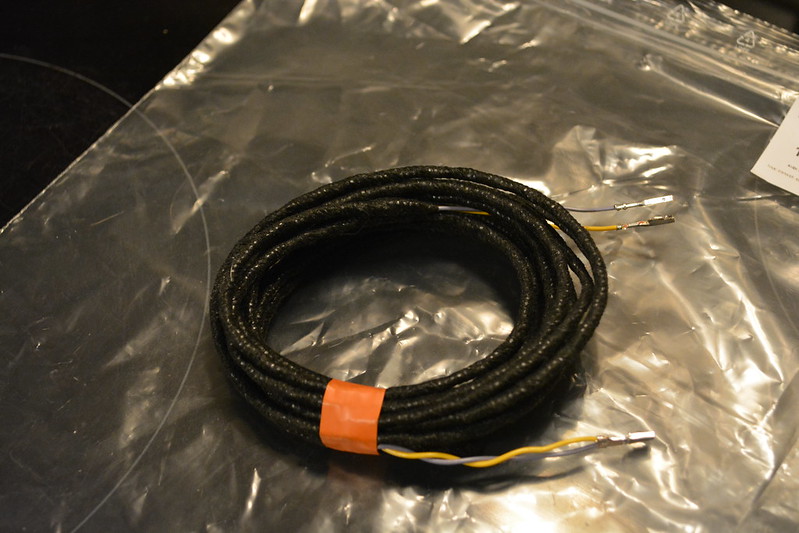
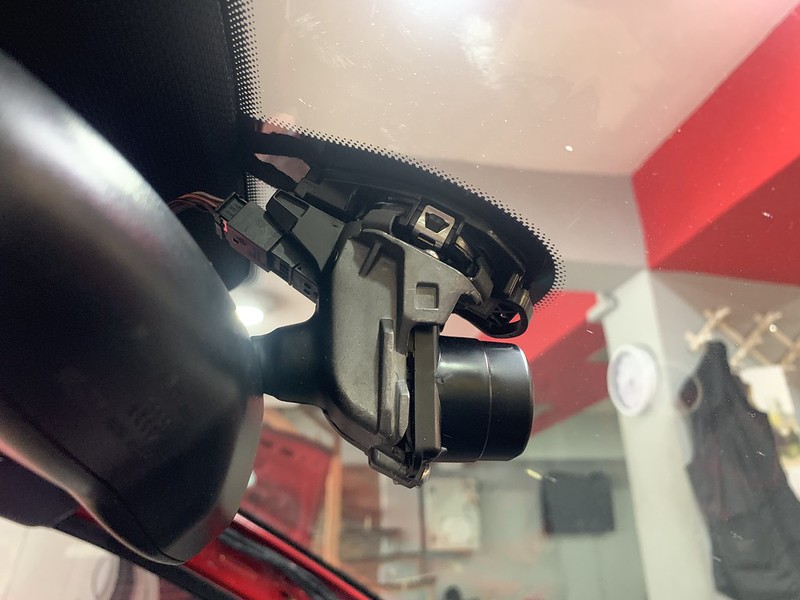
Then, if you recall, i had purchased a new OEM interior mirror, equipped with both the auto-blur/dark as well as high beam assist function, which for those who dont know what it is, you just turn your high beam on, and when it sees a car coming from the opposite direction it turns them off automatically and when you pass that vehicle, turms the high beam back on. Very very usefull feature for me.
So, this is the mirror and wiring
 DSC_0041 by mgpdoc, on Flickr
 DSC_0044 by mgpdoc, on Flickr
Removing the old mirror
 Untitled by mgpdoc, on Flickr
 Untitled by mgpdoc, on Flickr
Watch as you rotate, to not break the glass
 Untitled by mgpdoc, on Flickr
 Untitled by mgpdoc, on Flickr
New mirror and the wiring, to the canbus along with coding went on
 Untitled by mgpdoc, on Flickr
 Untitled by mgpdoc, on Flickr
 Untitled by mgpdoc, on Flickr
Then, knowing me, i couldnt leave the led being green, and the other one being red when lights went on, so i knew i had to open it, and change the leds. I was very careful cause it is very hard to open, and very easy to scratch. Taped it, and used these tools, as well as old credit cards.
 Untitled by mgpdoc, on Flickr
Handle with care
 Untitled by mgpdoc, on Flickr
Now we are talking
 Untitled by mgpdoc, on Flickr
 Untitled by mgpdoc, on Flickr
And here is the indication it is working as it should
 Untitled by mgpdoc, on Flickr
Cheers more to follow
Audi RS4PRA | VW Golf MKV GT-Y | Audi A1 SportBackComment
-
Next part, some changes made both to the interior's light colour, as well as the appearence. The changes were
1 -Defi BF meter needles converted to white
Before
 DSC_0949 by mgpdoc, on Flickr
During
 Untitled by mgpdoc, on Flickr
Testing it and looking great
 Untitled by mgpdoc, on Flickr
 Untitled by mgpdoc, on Flickr
2 -Audi Q3 needles retrofit converted to white
Audi A1 needles removed
 Untitled by mgpdoc, on Flickr
Audi Q3 needls converted to white
 Untitled by mgpdoc, on Flickr
All done
 Untitled by mgpdoc, on Flickr
Then . . . .
3 -Custom gauge cluster faces, with different colours, and different font
This is where the inspiration began
 Untitled by mgpdoc, on Flickr
Red option tacho
 Untitled by mgpdoc, on Flickr
Speedometer in Grey colour
 Untitled by mgpdoc, on Flickr
Yellow option tacho
 Untitled by mgpdoc, on Flickr
Let's begin disassembling
 Untitled by mgpdoc, on Flickr
 Untitled by mgpdoc, on Flickr
 Untitled by mgpdoc, on Flickr
During
 Untitled by mgpdoc, on Flickr
 Untitled by mgpdoc, on Flickr
Red all done
 Untitled by mgpdoc, on Flickr
The Red option as seen at night
 Untitled by mgpdoc, on Flickr
Yellow all done
 Untitled by mgpdoc, on Flickr
Yellow as seen at night
 Untitled by mgpdoc, on Flickr
Kept this for now, although i cant decide, i really like them both so much
 Untitled by mgpdoc, on Flickr
 Untitled by mgpdoc, on Flickr
(steering wheel is missing, i will explain why in a post later on.....)
Cheers, more to follow
Audi RS4PRA | VW Golf MKV GT-Y | Audi A1 SportBackComment
-
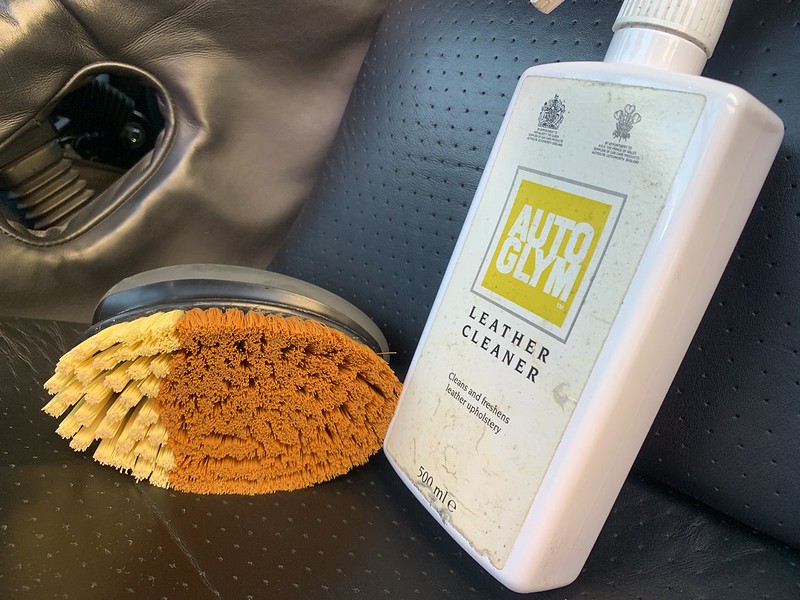
Then, it was time to give my leather seats a quick clean
 Untitled by mgpdoc, on Flickr
Amazing brush from Meg's
 Untitled by mgpdoc, on Flickr
 Untitled by mgpdoc, on Flickr
Looking fresh
 Untitled by mgpdoc, on Flickr
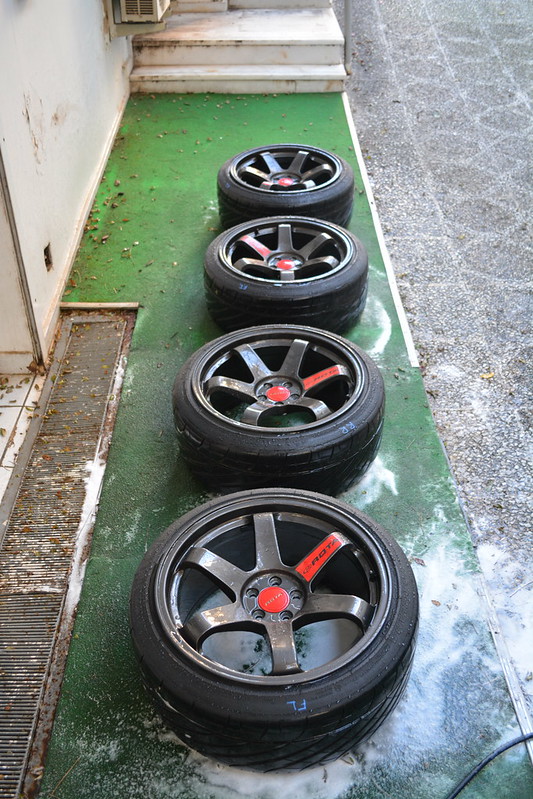
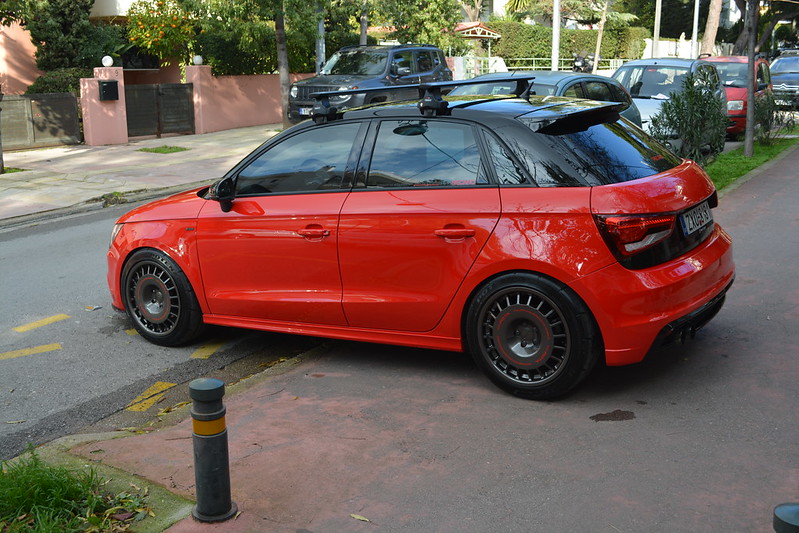
Then, it was time to remove my winter wheels' setup
 Untitled by mgpdoc, on Flickr
 Untitled by mgpdoc, on Flickr
Time for the summer setup
 Untitled by mgpdoc, on Flickr
However i had not summer tires, as i moved my Yoko Paradas to my Golf.
So I had to buy some new ones for the A1. I went for Michelin Pilot Supersports in 225.40.18 . The reviews were great. Let's see
Meaty with a touch of stretch
 Untitled by mgpdoc, on Flickr
 Untitled by mgpdoc, on Flickr
Touched the ground
 Untitled by mgpdoc, on Flickr
 Untitled by mgpdoc, on Flickr
Lets see some finished pics of the fitment, but . . .
first i had to wash, dry and seal the winter setup, as you can imagine
Really dirty and tired
 Untitled by mgpdoc, on Flickr
 Untitled by mgpdoc, on Flickr
After a quick rinse
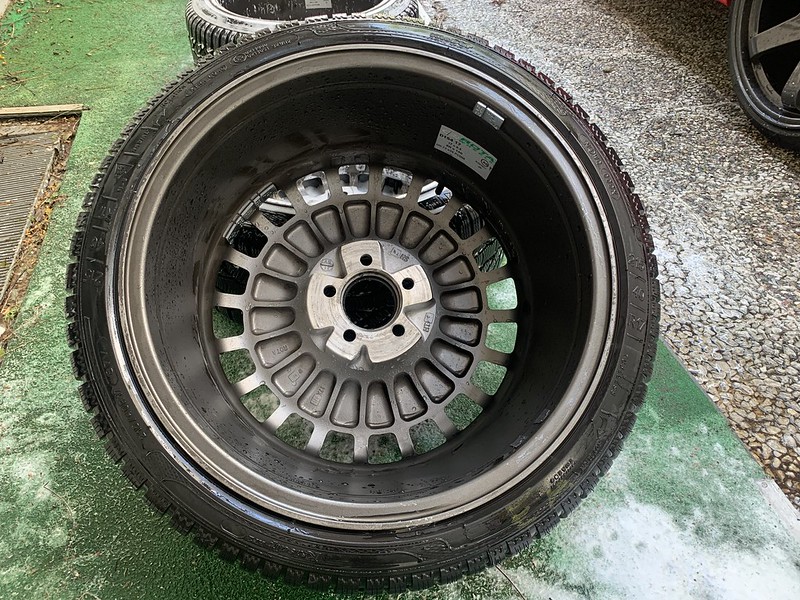 Untitled by mgpdoc, on Flickr
Snow foaming the inside
 Untitled by mgpdoc, on Flickr
Dirt came of easier than expected due to the wax i had applied the previous season
 Untitled by mgpdoc, on Flickr
Then the faces
 Untitled by mgpdoc, on Flickr
 Untitled by mgpdoc, on Flickr
 Untitled by mgpdoc, on Flickr
Came out perfect
 Untitled by mgpdoc, on Flickr
 Untitled by mgpdoc, on Flickr
 Untitled by mgpdoc, on Flickr
I love how it sits
 Untitled by mgpdoc, on Flickr
 Untitled by mgpdoc, on Flickr
 Untitled by mgpdoc, on Flickr
 Untitled by mgpdoc, on Flickr
Best grocery getter
 Untitled by mgpdoc, on Flickr
Cheers guys
Audi RS4PRA | VW Golf MKV GT-Y | Audi A1 SportBackComment
-
Really like this one. Although winter wheels look better to me than summer ones. Keep the thread running
Comment

Comment