 Tweet
Tweet
Today, we return to the Kawasaki Vulcan 2000 Classic, as we break it down further in preparation for a slew of new and custom parts.
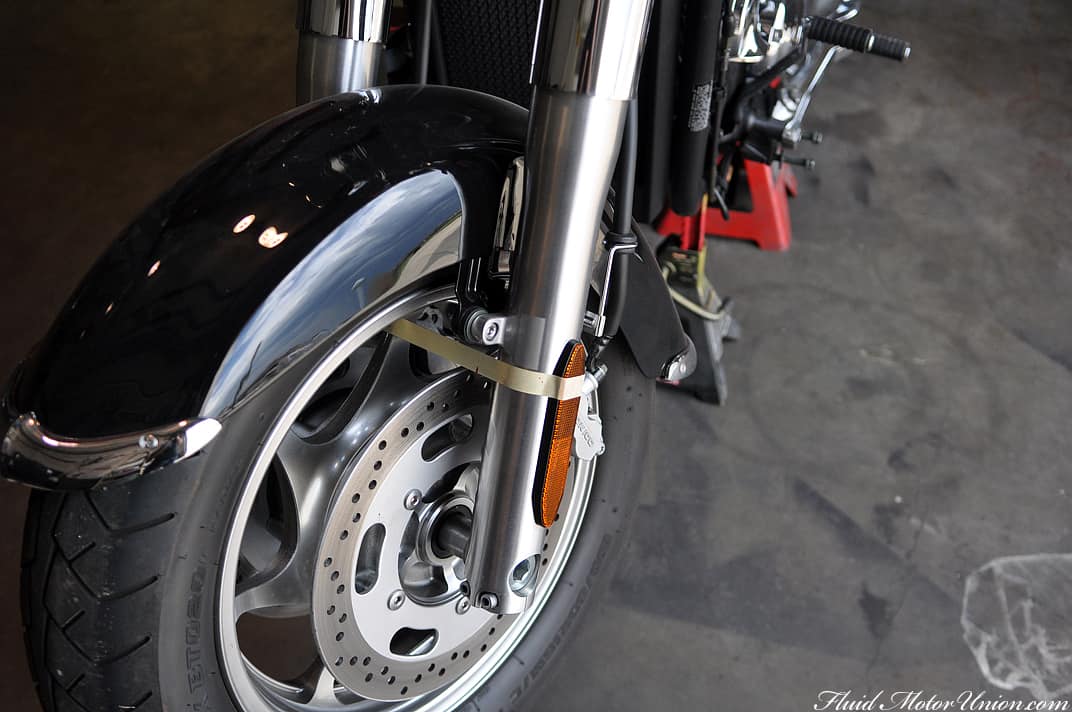
With the rear end of the bike removed and the wiring harness disconnected from its various plugs, we set about preparing the front end to receive another custom slew of parts. The axle is being turned down to fit a narrow glide front wheel to complement the fat rear wheel and tire. In order for that to happen, though, before we sent the axle out, we had to take some measurements. Namely, where several OEM parts align themselves on the axles. We marked the axle itself with these measurements, so the fabricator would know exactly where the parts lined up on the axle:
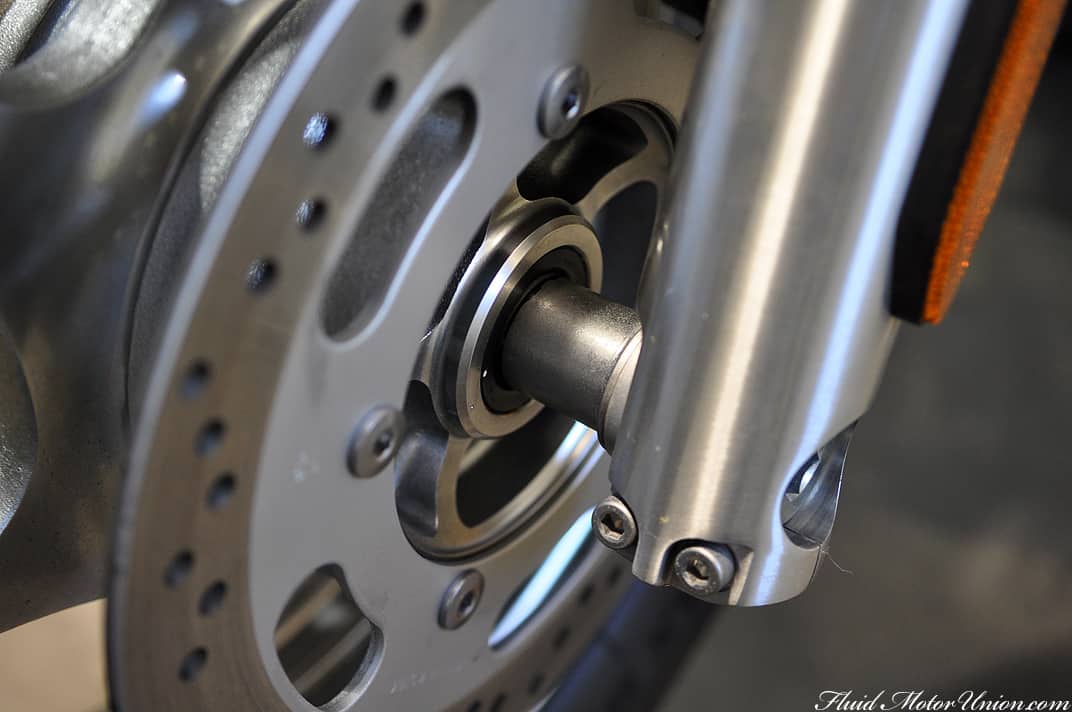

And thus begins the breakdown of the front end, now that the axle is all marked up. It�s being turned down in such a way that it will still bolt into the OEM front forks, but will be thin enough to take the narrow glide wheel. All that�s needed to keep it from wobbling are custom-machined wheel spacers, and also some small spacers between the wheel and the new front disc brakes (since the calipers won�t clear the new wheel to contact the new rotors correctly). That�ll be covered in a later chapter, but for now, the first step was to remove the front calipers, which are being painted anyway, so removal was necessary with or without a new front wheel.
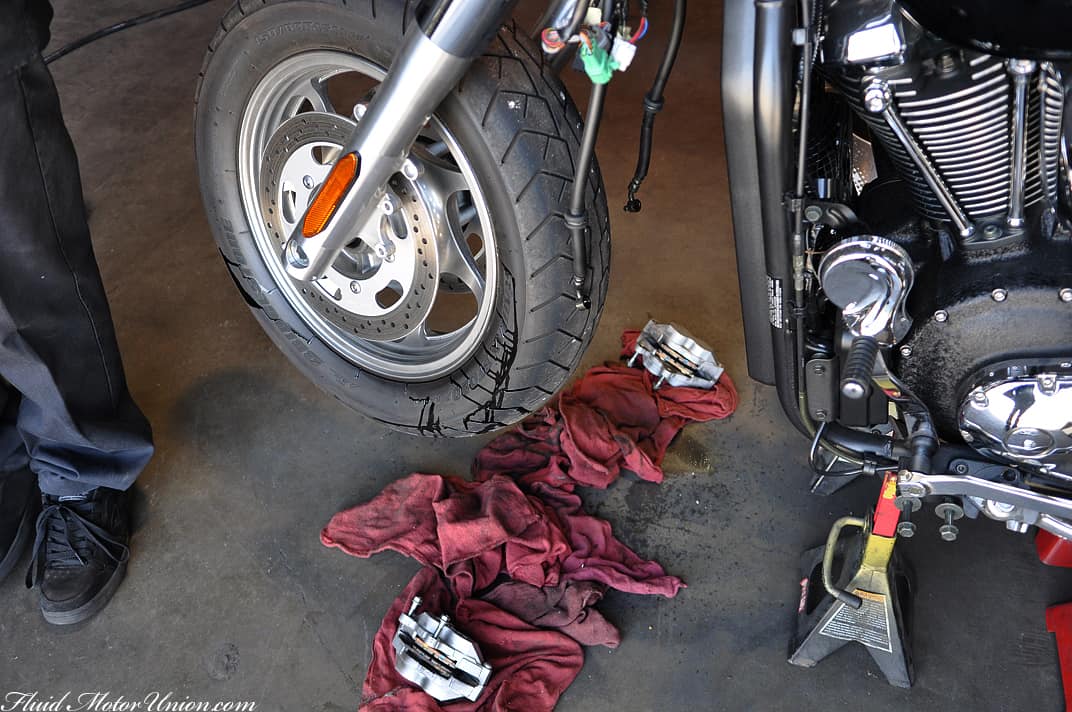
We also started disassembling other parts of the bike (exhaust, foot rests, etc.) in order to prepare for a few more upgrades.

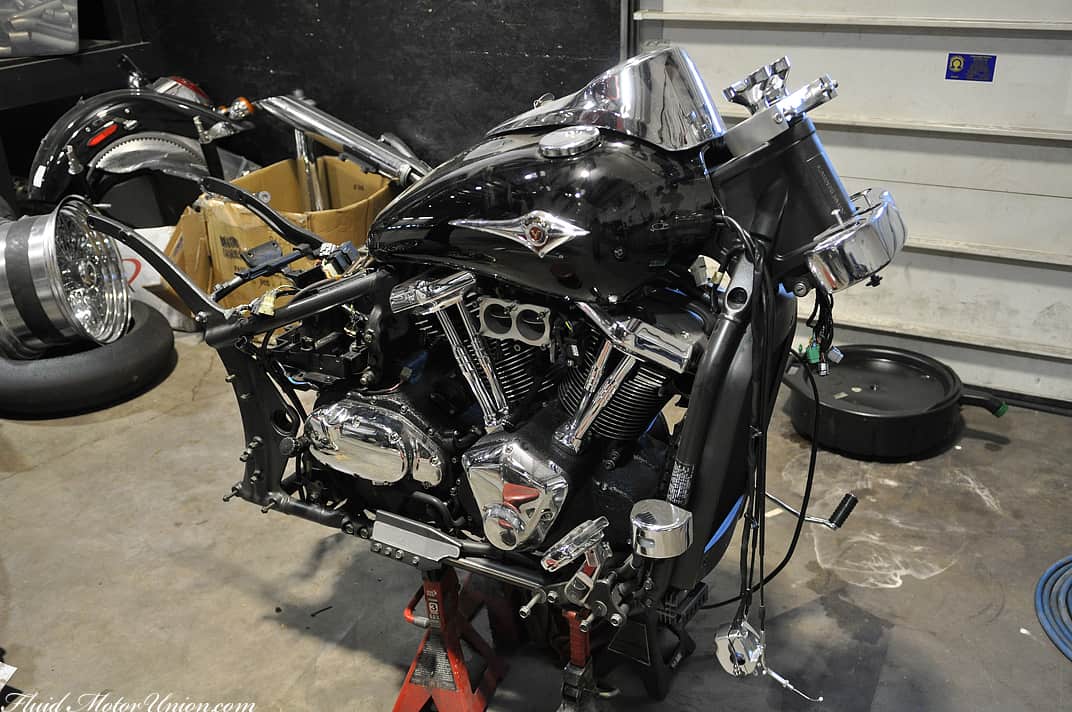
Before we knew it, boom, disassembled bike. Having a full service manual at the ready is clutch in this situation.

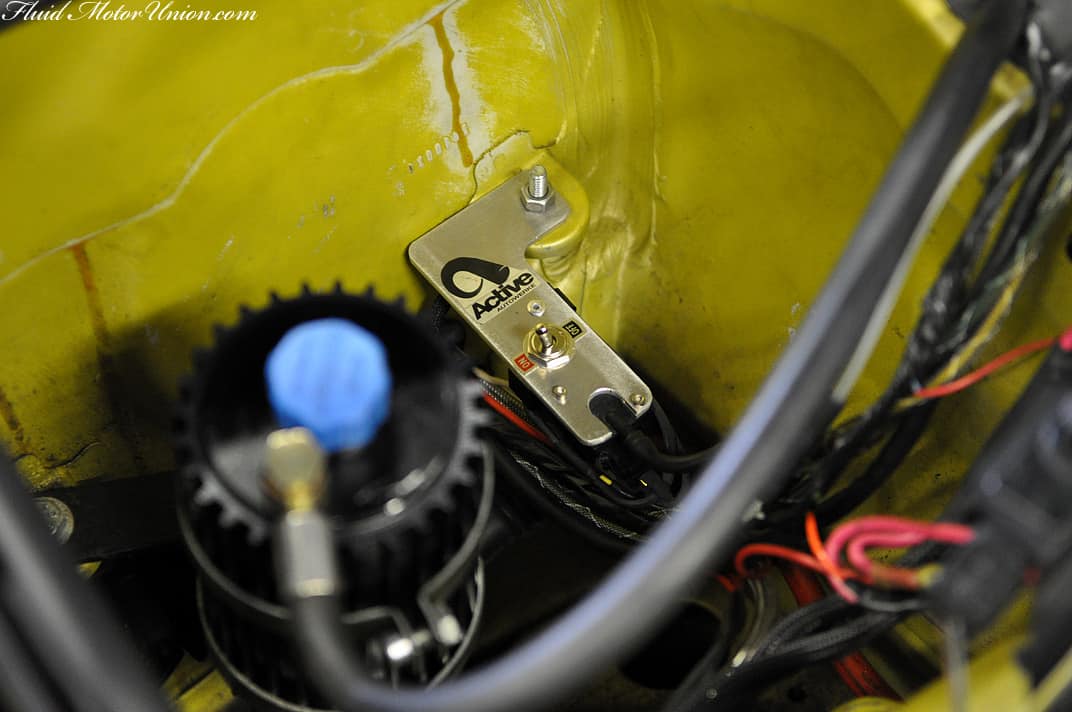
We�ll pick back up on the next chapter in a few days. In the meantime, let�s peek back in to Kris Boss�s engine bay, where we have the new Active/AEM water-meth controller installed and at the ready. The on-off switch is in a nice and easy-to-find location, just in case any issues arise.
And finally, we�ll end on a really interesting note. Animals exist just about everywhere outside. Sometimes, they like to make their homes in warm areas free of predators. Occasionally, that nest will end up in your car�s HVAC system, as it did with this unfortunate customer. After complaining of some HVAC-related noises, we set about checking to see what the issue was. Sometimes, particulate can pass the filter and get into the blower motor itself, which can cause some noise. Once we investigated, though, it was very apparent what the issue was. The mice, nesting inside this Audi, had eaten their way into the cabin filter (presumably for nesting material). Large chunks of the cabin filter were sucked into the blower motor, causing the noise. Thankfully there was no mouse gore to go along with it, nor were there any mice in the car when it was brought in, so nothing ended up hurt in the making of these pictures. A quick replacement and the customer is back in action!


Protip: If you ever plan on storing your car for some time, make sure to take precautions against nesting animals. Not only is it better for your car, but it�s better that the animals find a more permanent home than inside an occasionally moving vehicle.
With the rear end of the bike removed and the wiring harness disconnected from its various plugs, we set about preparing the front end to receive another custom slew of parts. The axle is being turned down to fit a narrow glide front wheel to complement the fat rear wheel and tire. In order for that to happen, though, before we sent the axle out, we had to take some measurements. Namely, where several OEM parts align themselves on the axles. We marked the axle itself with these measurements, so the fabricator would know exactly where the parts lined up on the axle:
And thus begins the breakdown of the front end, now that the axle is all marked up. It�s being turned down in such a way that it will still bolt into the OEM front forks, but will be thin enough to take the narrow glide wheel. All that�s needed to keep it from wobbling are custom-machined wheel spacers, and also some small spacers between the wheel and the new front disc brakes (since the calipers won�t clear the new wheel to contact the new rotors correctly). That�ll be covered in a later chapter, but for now, the first step was to remove the front calipers, which are being painted anyway, so removal was necessary with or without a new front wheel.
We also started disassembling other parts of the bike (exhaust, foot rests, etc.) in order to prepare for a few more upgrades.
Before we knew it, boom, disassembled bike. Having a full service manual at the ready is clutch in this situation.
We�ll pick back up on the next chapter in a few days. In the meantime, let�s peek back in to Kris Boss�s engine bay, where we have the new Active/AEM water-meth controller installed and at the ready. The on-off switch is in a nice and easy-to-find location, just in case any issues arise.
And finally, we�ll end on a really interesting note. Animals exist just about everywhere outside. Sometimes, they like to make their homes in warm areas free of predators. Occasionally, that nest will end up in your car�s HVAC system, as it did with this unfortunate customer. After complaining of some HVAC-related noises, we set about checking to see what the issue was. Sometimes, particulate can pass the filter and get into the blower motor itself, which can cause some noise. Once we investigated, though, it was very apparent what the issue was. The mice, nesting inside this Audi, had eaten their way into the cabin filter (presumably for nesting material). Large chunks of the cabin filter were sucked into the blower motor, causing the noise. Thankfully there was no mouse gore to go along with it, nor were there any mice in the car when it was brought in, so nothing ended up hurt in the making of these pictures. A quick replacement and the customer is back in action!
Protip: If you ever plan on storing your car for some time, make sure to take precautions against nesting animals. Not only is it better for your car, but it�s better that the animals find a more permanent home than inside an occasionally moving vehicle.


Comment