Announcement

Collapse
No announcement yet.

Opel Vectra Turbo

Collapse
X
 
  • Filter
  • Time
  • Show
Clear All
new posts

  • Opel Vectra Turbo

    Heya i’m maikel
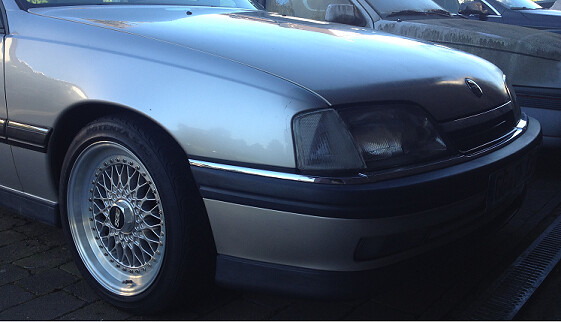
    So to begin, I bought a 1991 Opel Vectra 1.6 with only 70000km (40000 miles) last year for 120£.
    And since I sold my previous project car, I decided to go even further with this one.

    A pic from the previous one


    So to start with, I removed the whole rear end and started with the gas tank.


    After rinsing it and sanding it down, it was time for primer


    And next, the final coating


    The brackets have been powdercoated


    Cleaned the underside and checked for rust, and surprisingly it had none (apart ftom the wheel wells, but those get treated when i start bodywork), so applied a new coating


    And refitted the gas tank


    Rear axle ready for powdercoating


    Bushings have arrived


    New bearings


    And because of the disc conversion, the bearings wouldn’t fit the axle, so I had to make adapter plates


    Rear axle parts are back from powdercoating, so time to put them together


  • #2
    Rear axle is fitted, unfortunatly I don’t have any pics yet. So next up is the front suspension and engine bay

    Removed everything in the bay and got rid of supports wich won’t be used anymore or wich will be relocated (battery, windscreen wiper fluid) and started to remove the sealant in the corners and seams


    I started to sand everything down to bare metal, but decided to sandblast the whole engine bay


    And then covered everything in Etch primer


    Oh, and inbetween had to make some room for this one

    Comment


    • #3
      most of the engine bay got covered in primer, only the the windscreen wiper area and the underneath of the chassis beams left. Time to pick a color


      Comment


      • #4


        started to prep the front shocks and hubs. Sandblasted a set of gsi front shock supports, removed the damper/hub and bearing. Also I got rid of the spring cup since I’m going for airride


        Made some air bag supports on the lathe, these wil be tig welded on


        Test fitting


        my front axle parts arrived.
        Sandblasted, metalised and powdercoated


        Got my shock towers both sandblasted, and covered in etching primer and primer.
        These things rust as hell!! Had them untreated for 1 night and already had surface rust


        And a while ago I refurbished the steering rack

        Comment


        • #5
          To continue on the airride build.
          Got my hands on a set of rs6 bags from a friend. The new bearing and hubs have arrived.


          the first one is finished, second one should be done soon aswell, can’t wait to get them fitted

          Comment


          • #6
            Awesome build, great choice on the colour man, looking forward to more updates
            My BMW E36 318ti Steel Blue Compact build thread -
            http://www.stanceworks.com/forums/sh...ad.php?t=88271

            Comment


            • #7
              Didn’thave muchspare time lately, but did manage to get my hands on a gsi front bumper, since the original wouldn’t allow me to hide the IC. Little crack in the left corner but thats solved, and cut out a section for some more air flow

              75789-A04-2637-4-AE9-BA10-93462-F5-C1783

              90858237-91-C7-4-F40-987-F-E455-E6-C3-ECD3

              47735-A87-F46-C-483-D-94-CB-751-E0684339-D

              Then made a mesh for the cutout and mounted the front

              8-DC68266-6187-4-AC6-97-C2-C43-C1-DA56786

              The had the mesh and some orher parts coated satin black

              945975-EC-BDC9-47-DE-981-D-17286-AB4-FD87
              Last edited by MaikelW; 09-03-2019, 06:00 AM.

              Comment


              • #8
                Now we're talking! These are called Cavaliers in the UK, sooooo cool man, can't wait to see more!

                Comment


                • #9
                  Looking clean.

                  Comment


                  • #10
                    Due to a couple of busy weeks, I won’t be able to get much done on the garage, but I’m trying to fabricate my oxn camber plates, since i can’t find any available. Just printed a few parts of the first prototype, end product will be laser cut, anodised and zinc plated. If I manage to get it working.

                    2-FE6-B9-A8-D7-FF-4-B0-D-9-C9-C-28-F6-CD457104

                    8-C18-ACA8-3697-48-EC-A50-B-DF9901696025

                    Comment


                    • #11
                      The little giel wanted to be with me in the garage, so had to improvise

                      Comment


                      • #12
                        Had to chop the front bumper support in order to mount the IC, so made that fitting and coated it, also remade the little plastic caps since the original ones looked rather worn out


                        and on a sidenote, what image uploader do you guys recommend, since i'm using imgbb, and when I link the images, they turn out huge.. would like to have them a bit smaller, makes it easier to read aswell
                        Last edited by MaikelW; 09-13-2019, 05:46 AM.

                        Comment


                        • #13
                          Good to see some more Opels on here.

                          How do you plan to mount the camberplates? Vectras have a similar topmount as the omega, don't they?
                          I have look into this as well but haven't found anything...


                          As for pictures, i'm using flickr. You have the option to size the pic as you want.


                          Comment

                          Working...
                          X