Announcement

Collapse
No announcement yet.

Saving a 1993 FD...400+whp, widebody, shaved bay, etc

Collapse
X
 
  • Filter
  • Time
  • Show
Clear All
new posts

  • Saving a 1993 FD...400+whp, widebody, shaved bay, etc

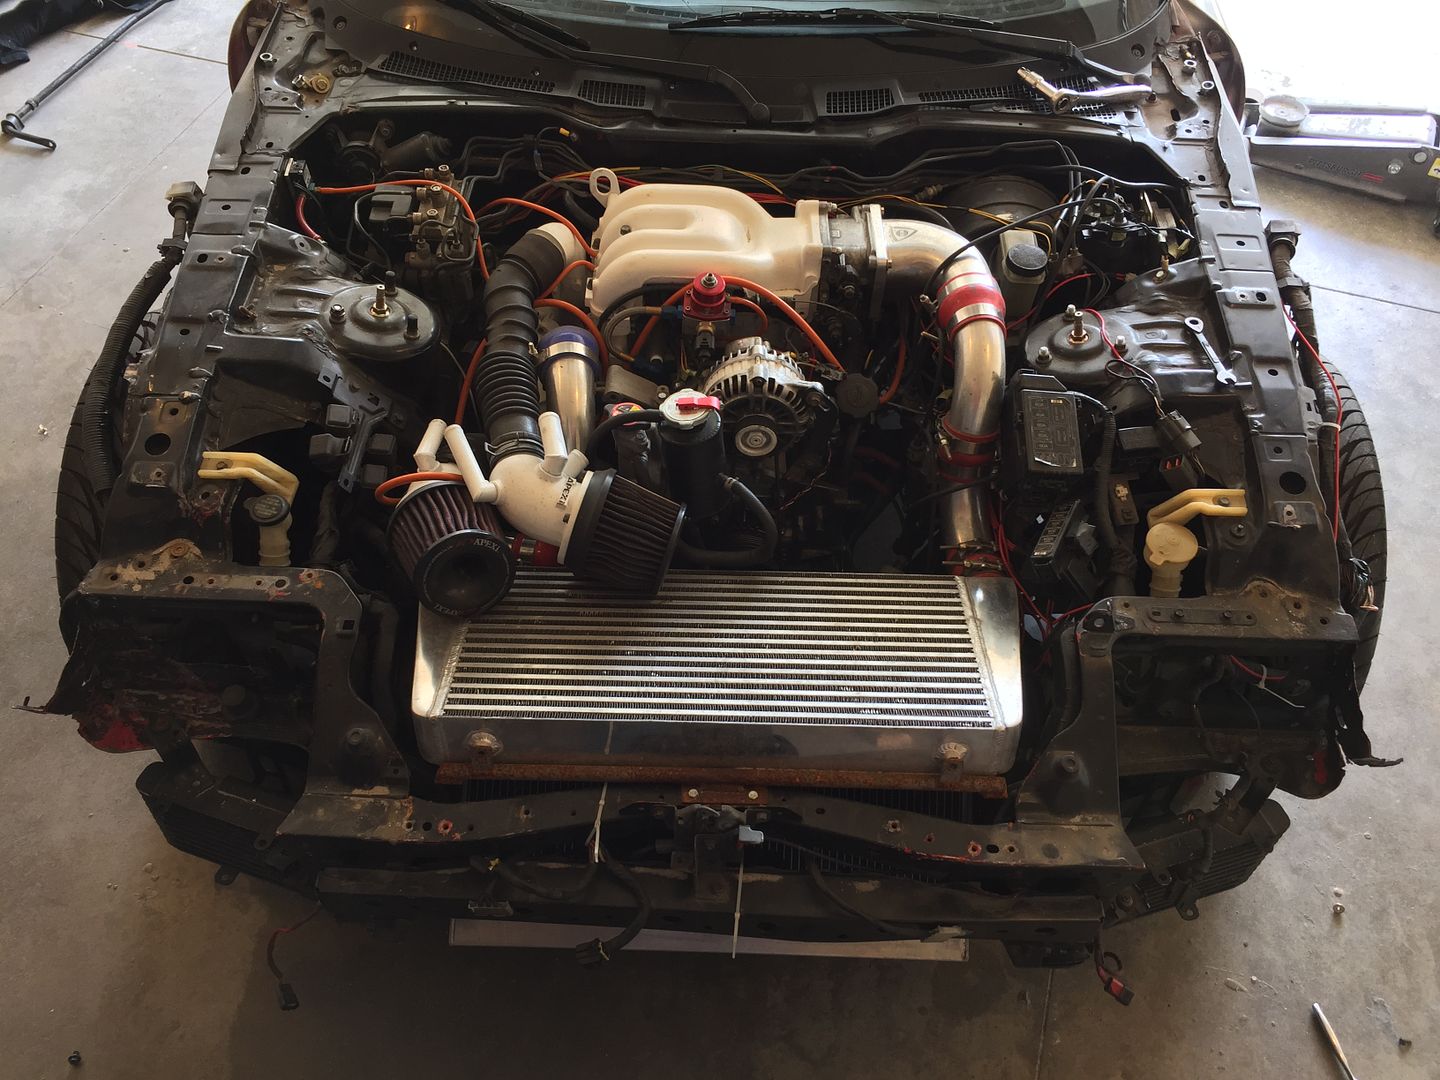
    Hello all, recently picked up a 1993 Rx-7 R1 this spring and have been working on it continuously since then (had it shipped from out of state). Plan is to shave the bay, decide on a widebody (already have the burnout kit but cant decide if I want to run it or not), and decide on a motor (already have the ls1 and t56).


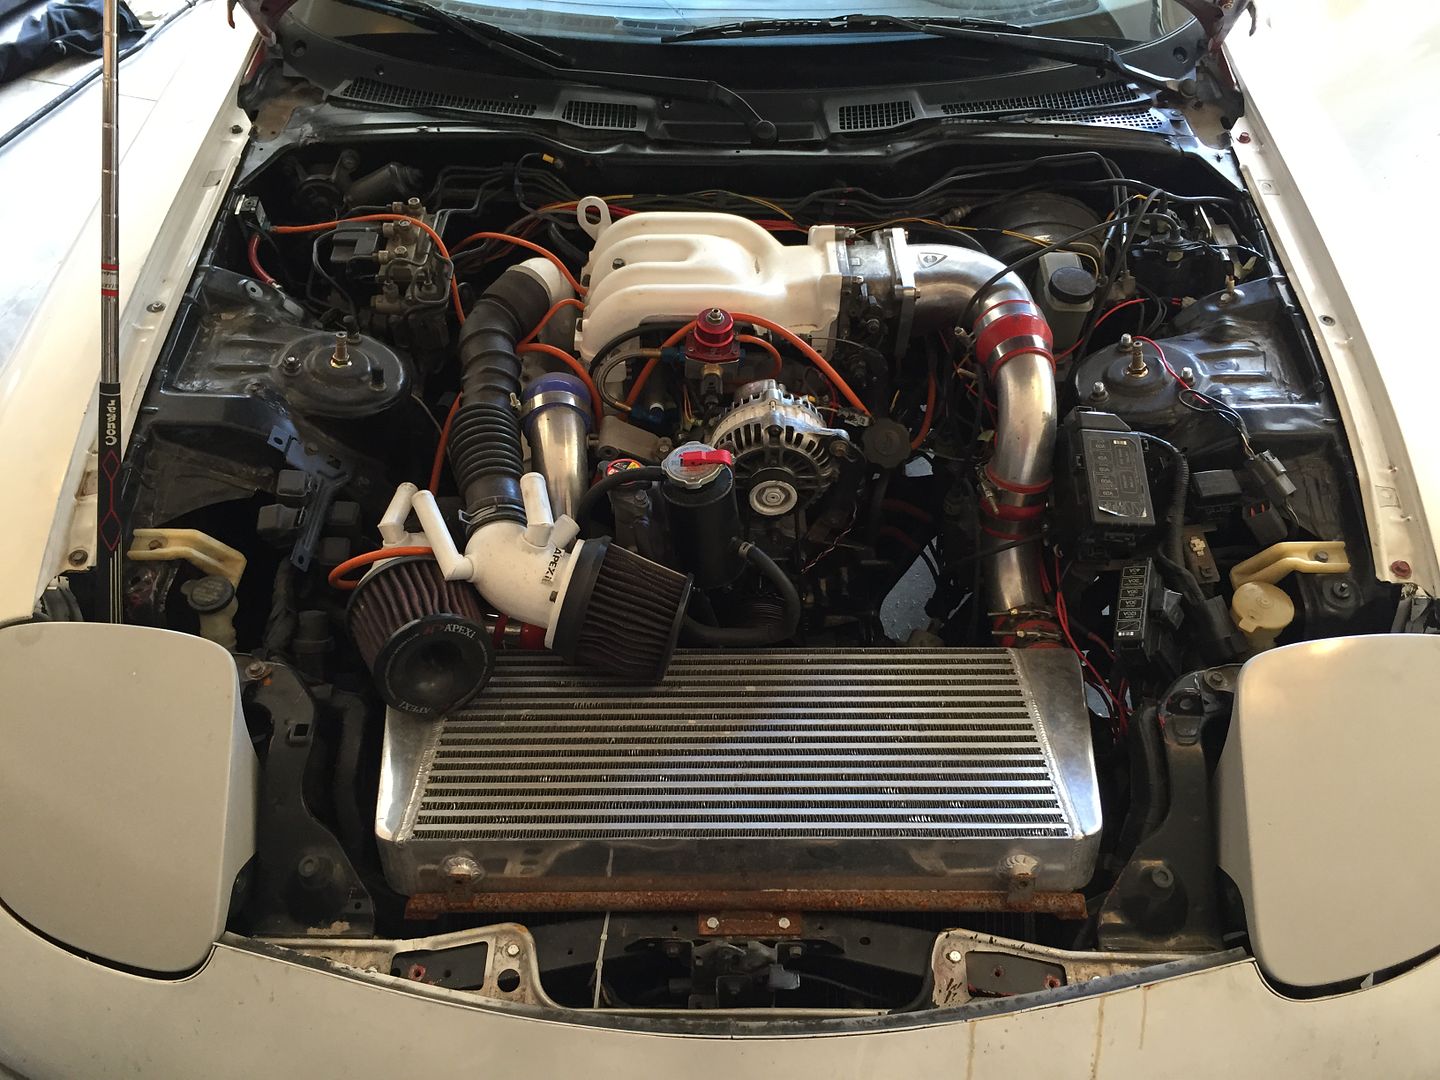
    Not exactly sure on mileage because carfax shows 18x,xxx as the last mileage and the cluster isn't original to the car and shows 8x,xxx. I wasn't worried about mileage though since nearly everything was replaced (and I won't feel bad driving the car a lot and racking up the miles). Previous owner rebuilt the motor, made a vmount setup, installed ID 750/1000cc injectors, walbro 255 fuel pump, rebuilt differential, all new superpro bushings, os giken twin plate clutch, stance coilovers, haltech ps1000, 3" exhaust, ST sway bars, and a few other things. It came with a spare transmission and stock turbos as well. Oh, and it has work xt7 wheels which I will be selling here soon. I picked it up for what I thought was a steal, but upon getting the car here I feel it was still a good deal, but not as good as I thought. ( I knew I was taking a chance buying it without being able to see it)

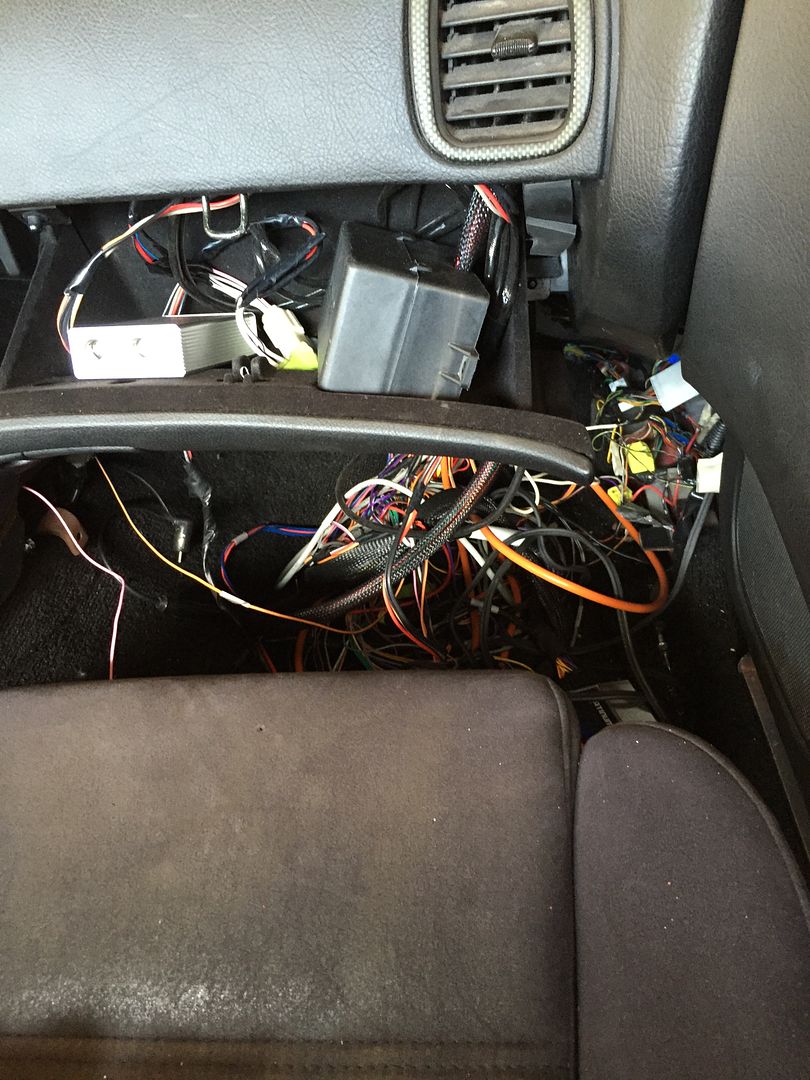
    I knew it needed the wiring redone so I went ahead and ordered loom and adhesive lined heatshrink.


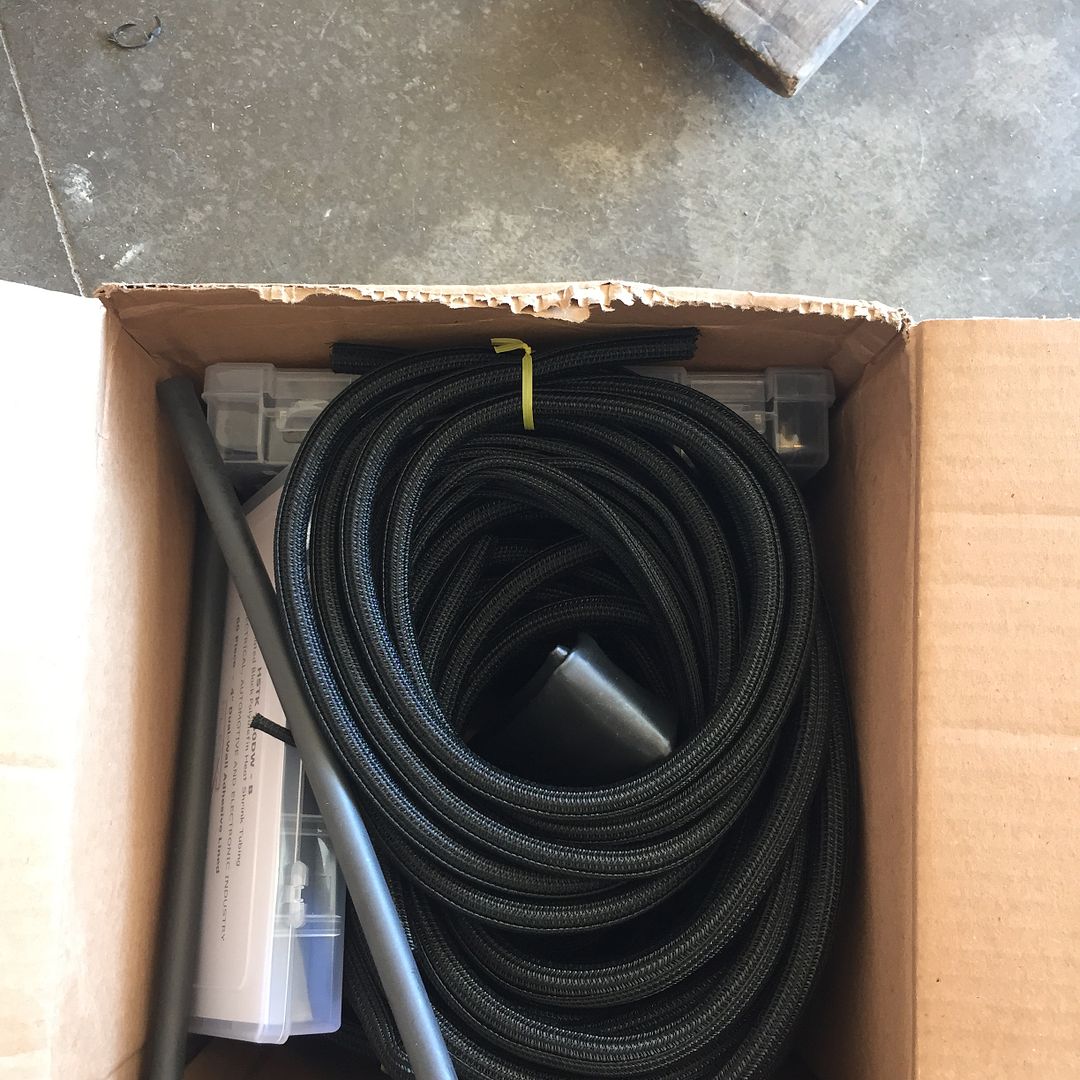
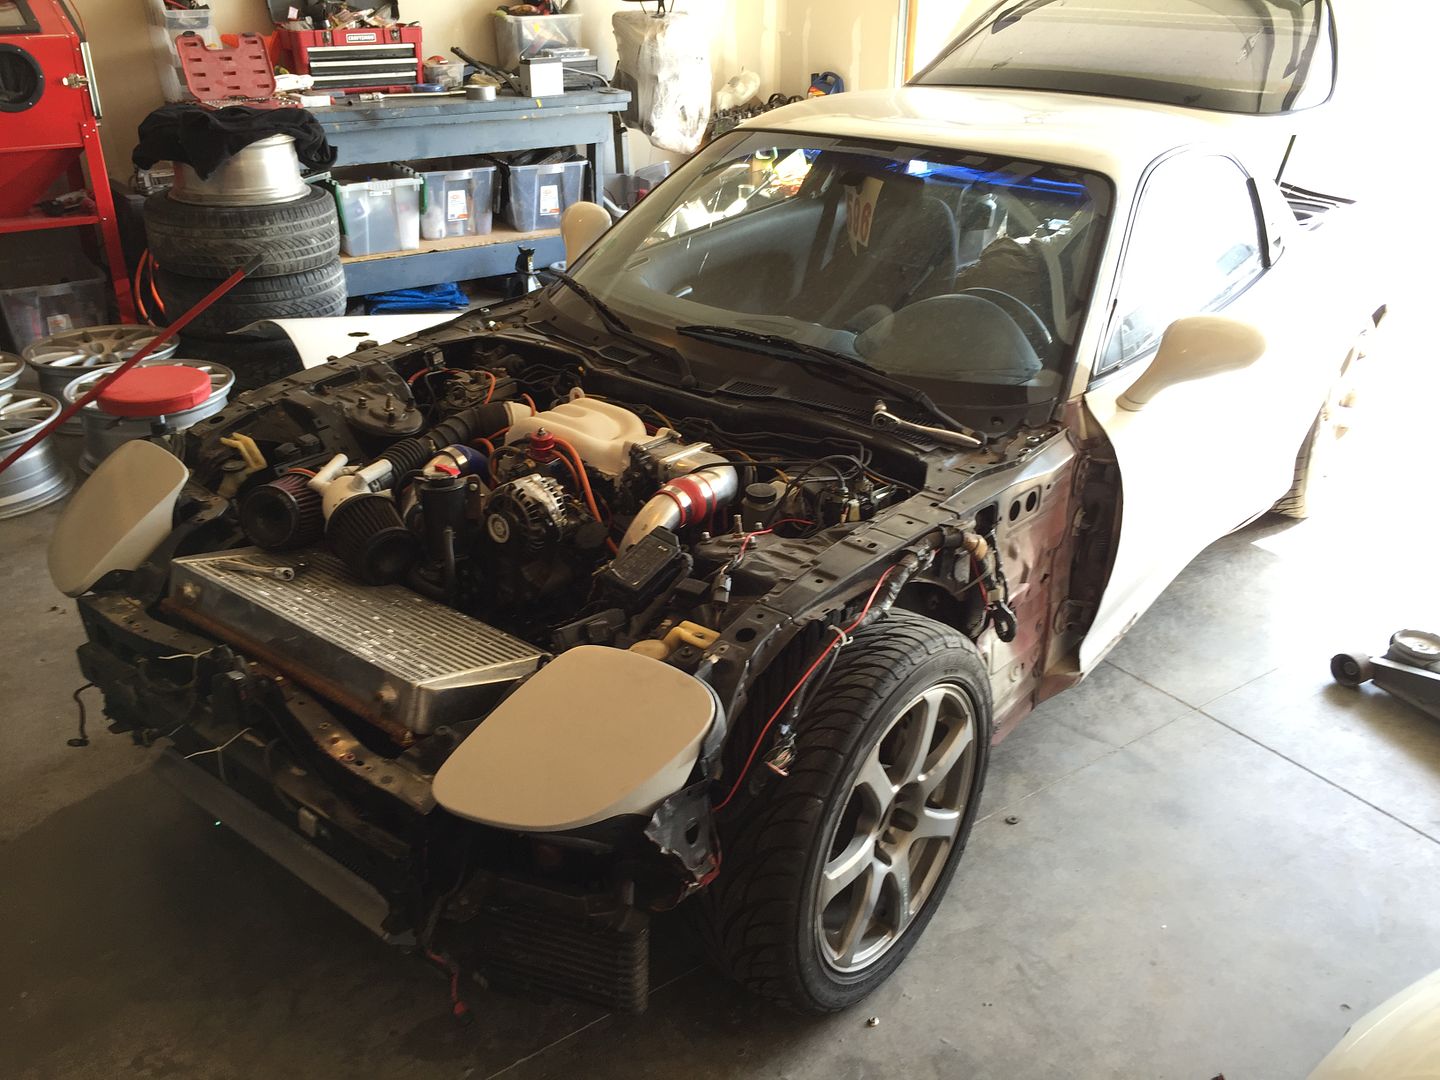
    I drove the car from the trailer into my garage and started tearing it down (wiring was laying on the front tires, no way I was driving it).


    Haltech wiring was just laying in the floorboard ( I knew this, hence I ordered loom before even getting the car in)


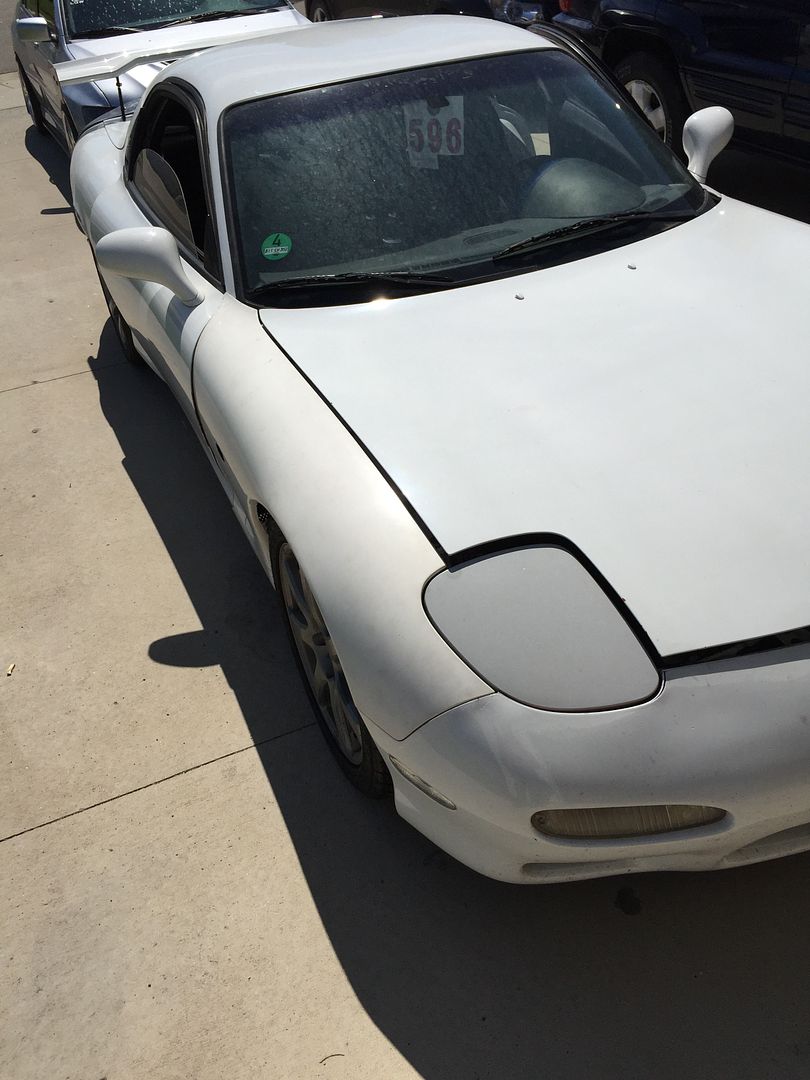
    I was a bit surprised to find two different color doors


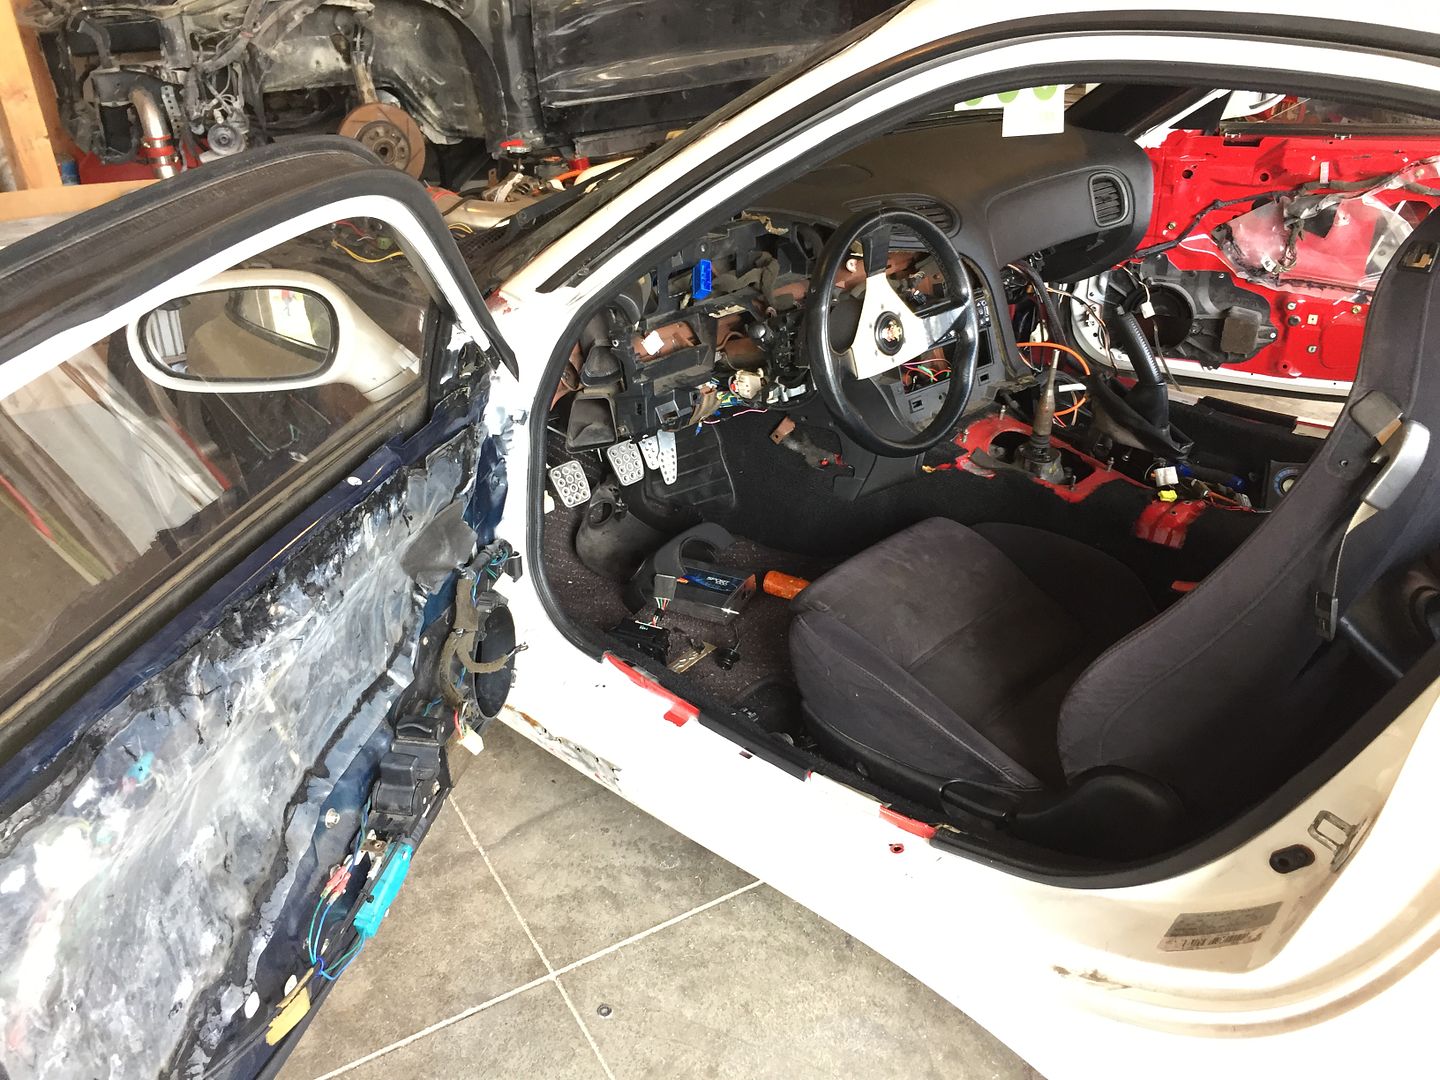
    So I started investigating some more. The carfax showed clean, no wrecks at all. I knew it had recently clipped the wall at a track in Germany and was aware of that damage (for the most part), but the door threw me off. So I started investigating the side skirt area with a magnet and what do ya know, tons of bondo from some shitty body work long ago


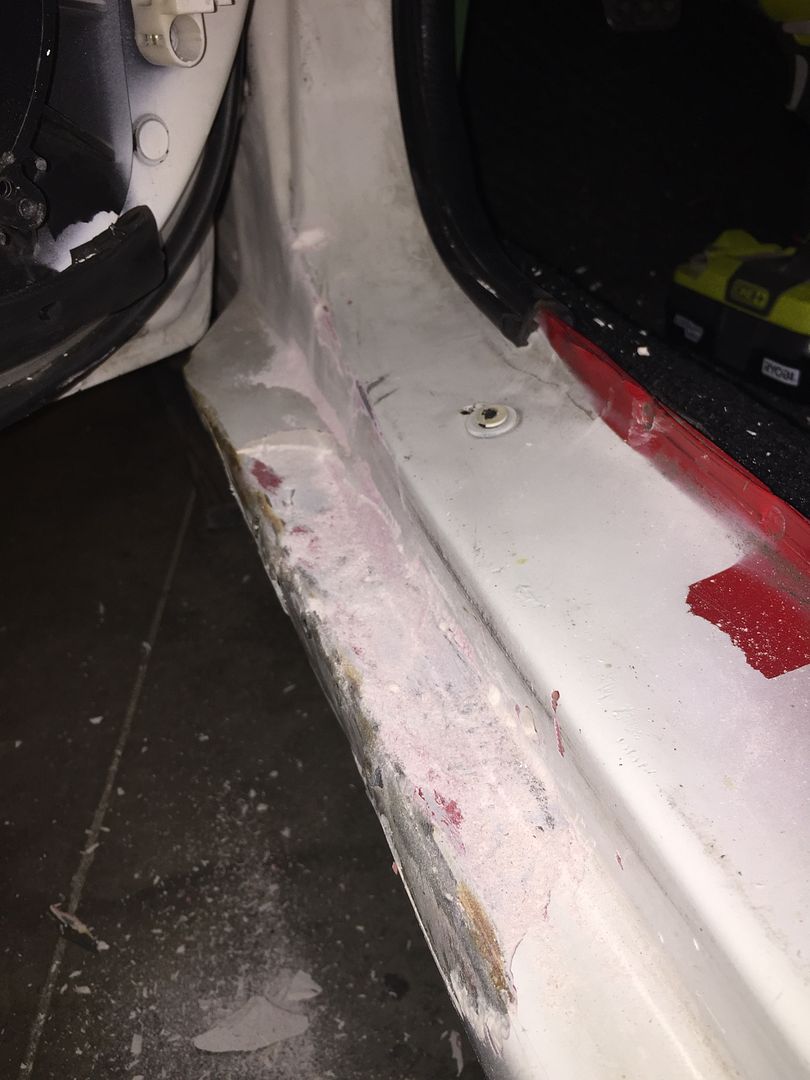
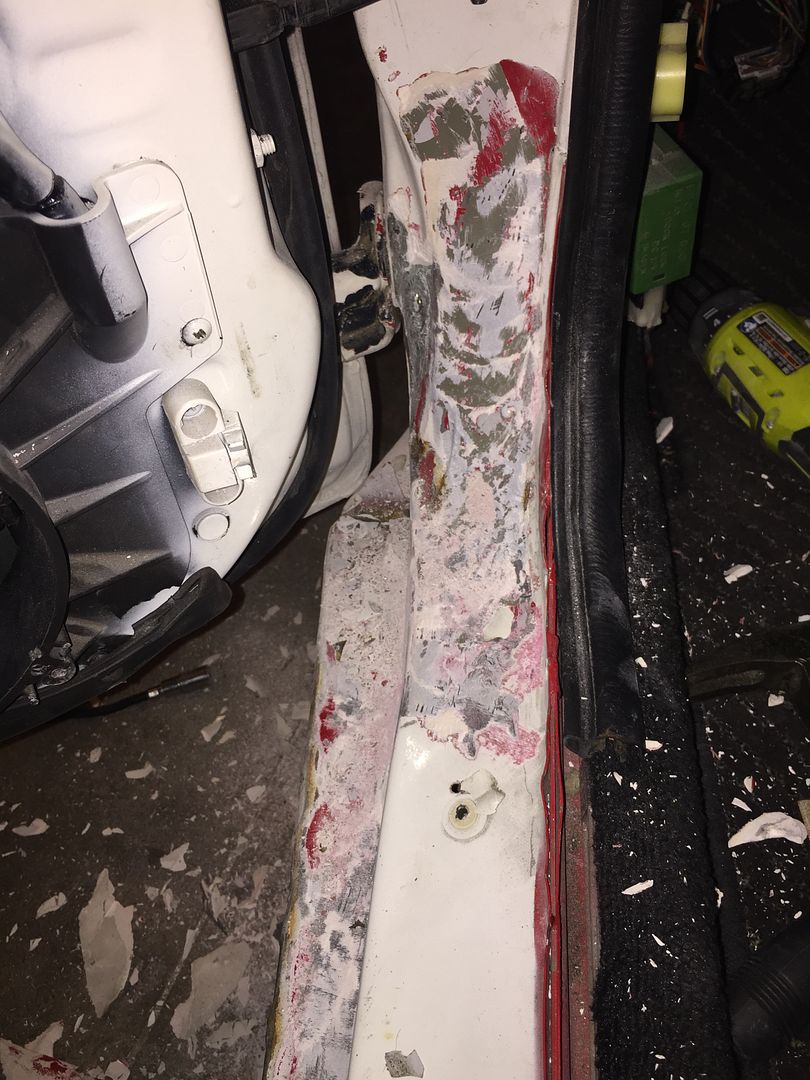
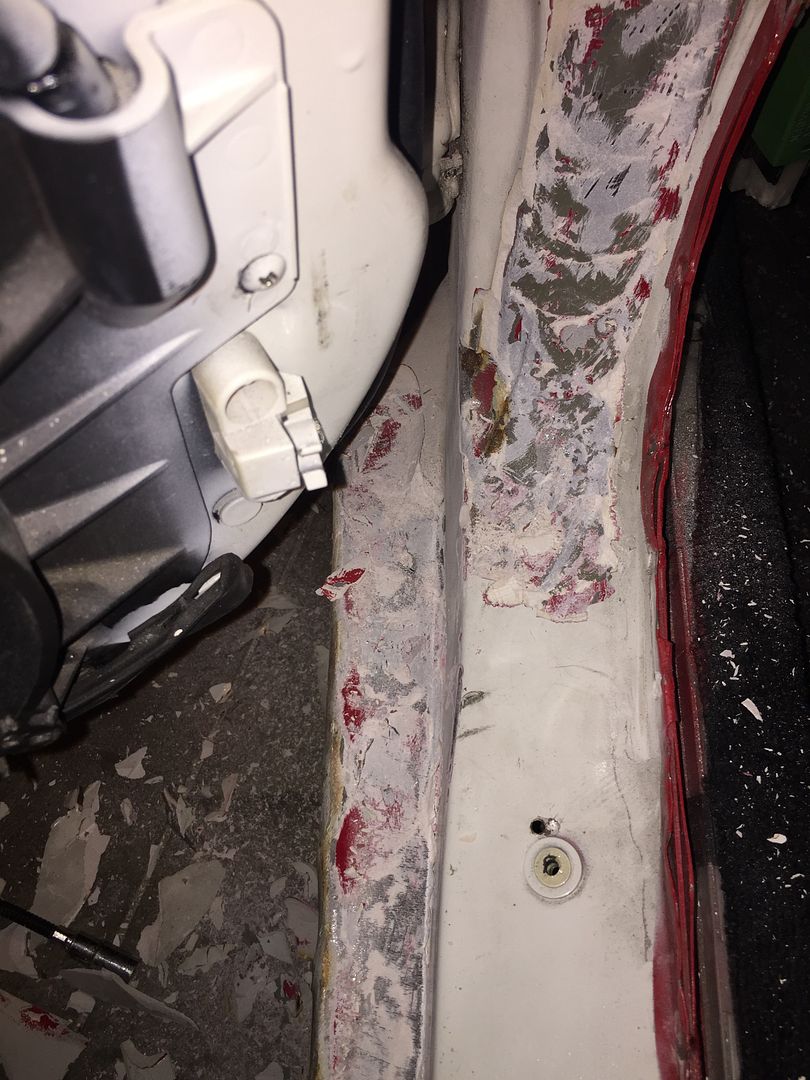
    So that sucked. I am going to strip down that whole area and pull the metal out as much as possible and then resmooth it with much less bondo. I recently started getting into bodywork as a side hobby (started making a widebody for my 1995 Eclipse GSX before I decided to part it out and buy this car) so this will give me the opportunity to delve into that a bit more.

  • #2
    Anyhow, here is the damage I knew about. I plan on doing a widebody kit so it didn't worry me since it would all be covered up/cut/molded anyhow


    I wasn't told about this though, which kind of irritated me (I was told there was nothing to really see when I asked for pictures of this area -_-)


    I'm going to buy a hammer and dolly set to flatten out that metal and then strip it for repainting so it won't look as ghetto.

    I already ordered burnout front bumper, burnout front fenders, burnout rear flares, sanai side skirts, sanai rear bumper pieces, carbon twill street diffuser, carbon twill fender ducts, and 3 piece undertray. Lead time on a few things is 10 weeks so it will be a bit before I can get started on the widebody. This is the look I will be going for (I will be molding the rear flares similar to this)


    Until the widebody gets here I will be busy getting all of the wiring redone and wiring up my gauges when they get here. None of the factory gauge wiring is hooked up or even ran since the Haltech used a flying lead harness and not one made for the 13b, so I went ahead and ordered Speedhut gauges so I will be good to go for the LS1 swap down the road.


    Besides the wiring I will be pulling out all of the dents and sanding down the car. I want to get all of the oem panels aligned correctly before I put the widebody parts on so I will be attempting that within the next few weeks. They lined up decently from what I could tell, but the hood was spaced up in the back so I couldn't really see the gaps all too well. The core support/fender mount area seems like it should move a bit to get everything into alignment fairly easily so we shall see.

    Well that's that, stay tuned for updates. If you want to see how motivated I am with my builds, take a look at what I brought my eclipse back from here.
    1995 GSX Build - Journey to a 450awhp daily driver | DSMtuners

    Comment


    • #3
      Almost forgot, already have the wheels as well. I bought 18x10.5 +15 Work CR Ultimates for my DSM that I didn't get to put on it, so I just had staggered tires put on instead. Going with 255/35 front and 285/30 rear on them.


      Also planning on doing the evo-r taillights and the evo-r headlights with fxr projectors

      Comment


      • #4
        Made a bit of progress on the car.

        Got a pair of 99 spec combo lights in. I plan to take them apart and paint them black.


        Also made a trip down to visit family and picked up some parts along the way. Got a scoot style hood from a friend along with door panels, headlights, gauge cluster hood, and gauge cluster surround.


        On my way down to visit family I stopped by a members house on here and picked up a 99 fiberglass bumper/lip combo for cheap


        Installed the Walbro 450 I had lying around from my DSM


        When I got the car I didn't want to drive it because of some open intake holes (car had dirt all in the engine bay so I was worried about some of it being in the intakes) and the wiring harness was lying on top of the front tires. So I took off the intercooler/intakes/tb and made sure nothing was inside and ziptied up the harnesses for now. Then I took it for a drive


        I knew my gauges would arrive soon and I would need to rewire everything under the dash when i got them, so, out came the dash


        And then my gauges got here! Love them, cant wait to get them mounted up


        These got here the same day Finally! I have had the worst luck with these wheels. The first pair I got was damaged during shipping and I had to wait 3 months to get new ones. The second set I got was damaged by the tire shop the day I got them (after the 3 month wait). One tire shop wasnt going to replace them because they said it wasn't them that caused the damage....huge ordeal. Anyhow, they replaced the wheels and I had them shipped to a friend in Vegas to have the tires installed so there wouldnt be any issues with mounting again.


        Comment


        • #5
          Continued...

          A picture of my daily driver beside the project


          I am completely redoing the interior and needed some paint, so after some research decided on SEM. Ordered black and some graphite to see if I like that for accents


          Also ordered some vinyl to rewrap the center console after I repair it (it has a huge hole in the center of it, looks like a common problem. I am also going to add a cup holder behind where your arm would sit with the seat all the way back. That way it wont get in the way of shifting and such.


          I ordered a lot of stuff lol. Got my center vent gauge pod in along with the connector I will be using for the gauges. Bought two just in case I wanted to use it somewhere else too


          Got a set of delphi connectors as well to make for some clean engine bay connections


          Annndd a tial bov flange that I will get welded on so I can install the tial bov I have lying around. And another connector for the engine bay harness most likely.


          ABS sheets for the gauges and the center console repair


          Ordered more heatshrink, some wires, and another connector


          Working on the gauge install


          Got distracted and started working on pulling out dents


          And that's it for now. Should have a lot of updates over the next few weeks as I start fixing the interior and doing the wiring etc.

          Comment


          • #6
            Made a little more progress over the past few days. I worked on the dent a little more and got it to a state that I am much happier with.

            I cleaned it up even more after this, but it is pulled out to where maybe 1/16" of bondo will be needed to smooth it, which I am happy with. This will all be covered up when my widebody shows up anyhow.

            After I finished up with that I decided to pull out my chassis harness. It was a pain because the vmount bracket is welded to the frame rails...going to fix that sometime soon and have it bolt on.

            Working on it in my living room


            That's it for now. Short update, but lots of hours into it so far. Still have a lot of wires to pull from the harness and then I will decide how I want to reroute it and then plug everything up to make sure it works, and then finally loom it and install

            Comment


            • #7
              Did some more work on the car. Mainly wiring, but a few other things too.

              While the car isn't running I figured I would fix a diff leak that the car has. I thought it was the cover not sealing well, but when I got under the car I found the passenger side axle to not be seated all the way


              So I spent the day trying to get it to seat in all the way and finally got it to a point I was happy with. I drained the fluid before working on it and when I went back to put fluid in it I found the fill plug wasnt even tight...so, I think that is where it was leaking from lol. Oh well.

              Next I worked on wiring some more. Big surprise! I have pretty much everything eliminated that I wanted to eliminate at this point so I have started on routing the wires where I want so I can cut and solder as required. I don't like where the chassis harness is routed (right behind the tire), so I decided I would use a quick disconnect on another hole. The body shop that fixed this car forever ago didnt pull the part underneath the fender so I had to do some work on it.


              I am trying to hold off on the bodywork until I get the car running again so I just did a quick job to pull out that part more. I will strip it to bare metal and paint it once I am finished.

              Got my fuse box mounted, I eliminated the others. I can't run the stock popups with it mounted here obviously, but I dont like popups much anyhow. I havent decided which lights I will go with yet so I will probably just modify some spare headlights I have and mount an led bar in there in the meantime.


              While I was working on the wiring today I got an exciting phone call...

              A delivery truck?? What could this be?

              Oh yes, my kit from ShineAuto!


              Couldn't contain my excitement so I mocked up a few of the pieces.


              I'm loving everything about how it is coming together I will try to start the car again tomorrow to make sure everything works before I start relooming everything. One thing I dont like too much is how the front fenders are designed so I am going to modify them more to my liking this winter, along with the rear flares of course. For now I will run the stock body (which I dont mind at all, it looks pretty damn good as is imo)

              Comment


              • #8
                Made more progress on the wiring and installed some parts

                Mounted the Delphi connector

                Wiring routed


                Got the car started back up to make sure everything worked and it seems to be good to go. I have the rear harness and engine harness to go through still, but it's slowly getting there. To break up the monotony of working on wiring, I decided to mount some body pieces.

                Passenger fender on


                I'll definitely be modifying these this winter to make them more of a +30mm fender (I am stationed in North Dakota, we have very long winters lol).

                Mocked up the rears, I'll run a spacer to make the fitment flush


                I'll also be making the rear flares a full overfender and not just the flare, similar to the feed rear overfender.

                I then decided to mount this beautiful thing


                Comment


                • #9
                  Pulled the car into the driveway to see the kit on outside. So stoked with my choices. I'll man up sometime after the car is actually driving and cut my rear quarters for the flares :/


                  Comment


                  • #10
                    Been busy with work and an unexpected move, but got some more work done on the car. I decided to put the gauges in the car just to make sure everything worked and took her off base for the first time. It was a pretty sketchy drive lol (way out of alignment, wiring hanging everywhere..literally...good times). Took a couple pics off base


                    Noticed the car would look really good bagged as I was pulling into my driveway :p


                    I plan on doing PKE and remote start on this car down the road, so I figured while the interior was apart that I would remove the steering wheel lock. Much simpler than I thought it would be. I just broke off the tab on there with some pliers and no more steering wheel lock!


                    When I got the steering wheel back on after that I noticed something odd...the car turned more one way than the other. Wtf. So I checked out the tie rods and the passenger side had a spacer on it, but not the driver side. Okay then. The car has an FC rack in it so I guess that rack is a bit shorter than the RX-7 rack, as seen here.


                    The previous owner used the FC inner tie rods and the FD outer tie rods, which didnt work well together. The FC outer tie rods are the wrong shape and wouldn't work, so I started doing some research.
                    FC vs FD


                    And here was my solution...sort of
                    S13 240sx outer tie rods vs FD


                    Unfortunately there seems to be some slight play between the inner and outer tie rod before tightening down, so that hasnt completely solved my problem. My next step will be to use some FD inner tie rods and see if that fixes the problem. If not then I will go through the process of depowering the spare FD rack I have sitting here. It shouldnt be too difficult from what I have seen, but I would rather just swap out the inner tie rods if I can.

                    Anywho, I finally finished up the majority of the interior wiring. Reloomed the dash harness, rear harness, and chassis harness (and eliminated the many unused wires of course). All that is left now is to clean up the gauge wiring, loom the outside chassis harness, and cut/loom the ecu harness. It's a lot left for wiring, but much closer than I was. Btw, I freaking love these gauges


                    As you can see I still have a ton to do in the interior, and even more to do on the exterior, but it is coming along slowly but surely.
                    Oh, and the move broke me and I had to use my car parts money for moving costs, so sleepy eye stock headlights for now. Also threw on my apr wing, which I removed today.


                    And further good news, I found that my upper control arm and hub assembly is bad on the driver front. Woohoo!

                    Comment


                    • #11
                      Alrrriiiggghhhttt, lots of updates. To begin with, I finished up the wiring on the car. Soo much better now


                      Well, thats about it for wiring I suppose. Finally got the ecu and fuse box mounted in the stock location and got everything cleaned up. So far so good, I did one wire at a time to make sure there were no mistakes made. Now every wire in the entire car has been gone over by me and either kept for later use or eliminated.

                      Moving on. I kept hearing a popping sound when I would back out of my driveway. Couldn't figure out what it was so I decided to check out the front suspension to be safe. It's a good thing I did because the lower coilover bolt was hand tight and the A arm balljoint was bad. Oh, and the wheel bearing was bad as well. Errthing bad up in there. So I got some replacement parts from Fritz and got it all good to go. Swapped out the prothane bushings before install


                      I had to get crafty getting the prothane bushings out


                      While I was waiting for parts from Fritz I also decided the abs didnt need to be there anymore. Bought the V1 Alex Rodriguez kit for cheap on here and got it installed. I dont like how it doesnt replace the actual brake lines in the wheel well as well, so I will be ordering some -3an lines to extend down to the caliper over winter. Also bought a trans tunnel cover since mine was missing.


                      Lets see, what next...oh, the piece that goes under the steering wheel was cracked so I ordered a new one of those as well


                      I was tired of my gauges being zip tied in place so I did a really quick job on the cluster surround just to get the gauges mounted up so I can enjoy the car before winter


                      Got the quarter panel smoothed out for the most part. Still some work left to do, but again, waiting for winter (winter here is really long).


                      Decided to put the stock front fenders back on since I didnt have the rear flares installed yet and it didnt match front to rear. I would say my fitment is pretty tight :p

                      Comment


                      • #12
                        Exciting stuff here! My Evo-R taillights came in

                        Mmmmmmmmmm

                        Legit!!


                        Alright, last thing before some more pictures. The car was multiple shades of white with the various body parts on it, so I decided to go ahead and plastidip it.

                        Did a light coat of black so I could see how my coverage was

                        Done!


                        Took the car for a drive to take some pictures of it after everything was finished and started noticing a wooshing noise coming from near my brake pedal...turns out the previous owner didn't have a check valve installed in the booster line so once positive pressure entered that line, and therefore the booster, it decided to pop. Luckily I had a spare at home so I swapped them out real quick. Looks like it is a RHD booster, but it bolted up without issue.

                        Old vs New


                        And now lots of random pics after taking it on drives

                        Comment


                        • #13
                          Well bit of an update here. The stock turbos decided to die on me...both sets that I had lol. Previous owner only planned to use them for break in with no boost, so I guess I couldn't have expected too much. Anyhow, the second set decided to die after I changed the oil. Pulled out of my garage and looked in my rear view mirror and it was like a freaking smoke screen. Found the perpetrator


                          Doin work, single turbo time


                          I think I need to reinforce the center of my bumper a bit...it bends down with the wind and scrapes pretty easily


                          Just doing something cheap for now since I may do an LS swap, haven't decided yet. Already had the manifold and downpipe. Also had the turbo lying around from my DSM so I just needed a new exhaust housing. Using a t3 16cm housing with a t4-t3 adapter and 2.5"-3" vband adapter to the downpipe


                          Picked up a used greddy wastegate and decided to take it apart to clean everything. The spring in it only goes down to .8 bar so I decided to throw in a tial spring I had lying around. Once I have done a bit more break in I'll throw the original spring back in.


                          Manifold and downpipe on


                          Made a rear oil drain plate


                          Getting closer

                          Comment


                          • #14
                            I'm not sure if anyone here has ever dealt with the Holset snap rings, but they are a big pita. So I decided to make a tool to ease the process a bit


                            Nearly finished!


                            Downpipe cut and ready to weld back up


                            Having the proper oil pressure for a holset is essential, so I used the setup from my DSM to dial in pressure as well. I use a fp filter with the tip cut off and various sizes of jets to get the oil pressure where I need it.


                            I'll snap a few more pictures tomorrow of the completed setup. It seems to be working pretty well. I've driven about 50 miles on it so far and no issues yet!

                            Comment


                            • #15
                              Picture of the bay after the single setup was finished


                              Fixed a crack in my bumper, stupid Minot roads


                              Picked up some "sleek" headlight buckets, so made up some quick brackets and installed those


                              Night pic of my Speedhut gauges


                              When I put together the single setup the oil drain was way too close to the exhaust. I wrapped the manifold and put some reflective heat wrap on the drain, but it wasnt enough.


                              So I picked up some pipe from Home Depot and welded it onto my drain fitting


                              Comment

                              Working...
                              X