 Tweet
Tweet
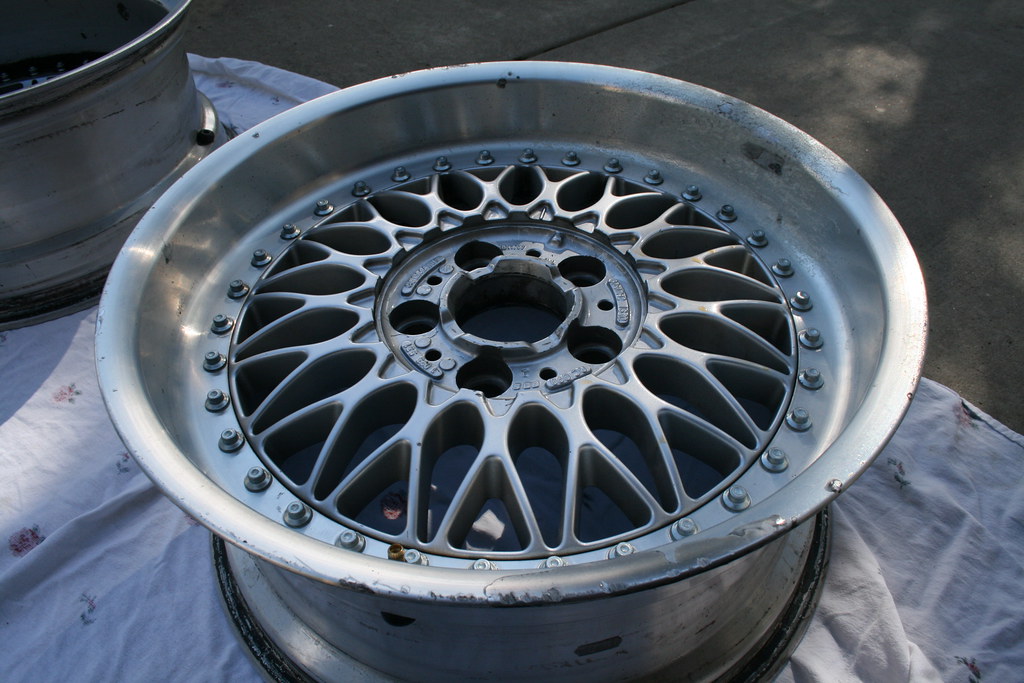
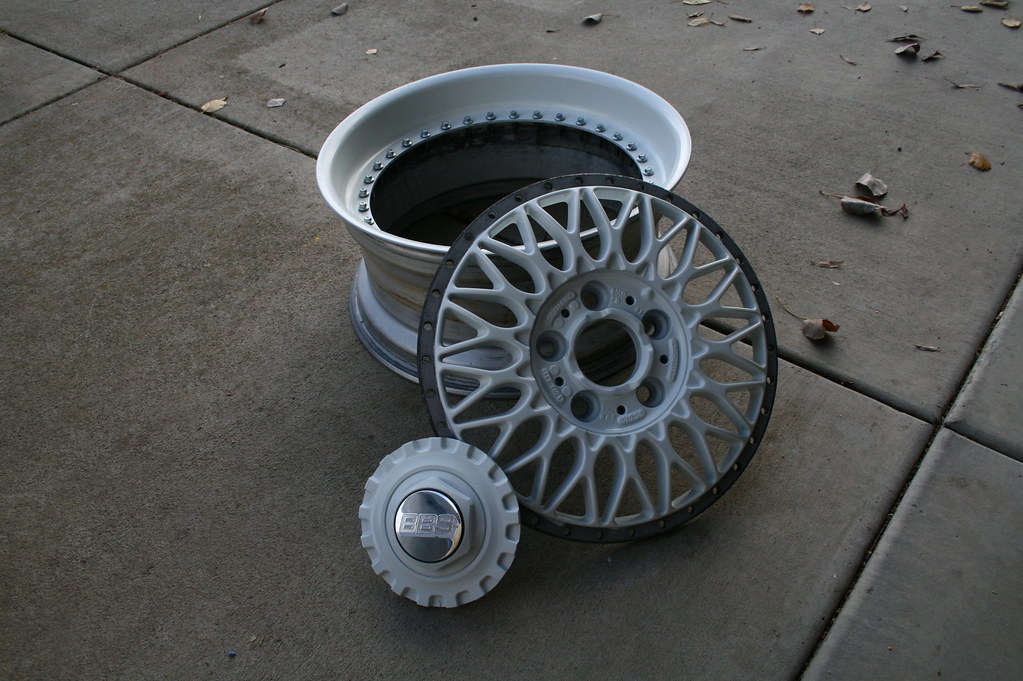
The specs for style 5s are pretty generic but for those that don't know the wheels are:
17x8 et20 From an E39 528i with sport package.
I plan on running 205/40/17 Falken ZE-912 UHPAS.
*As well it should be noted that to properly mate these wheels to an E36 they need hubcentric rings. The hub bore on the E39 is 74.1 and the E36 is 72.5 - just slightly smaller. The hubcentric ring just makes up for that small gap.
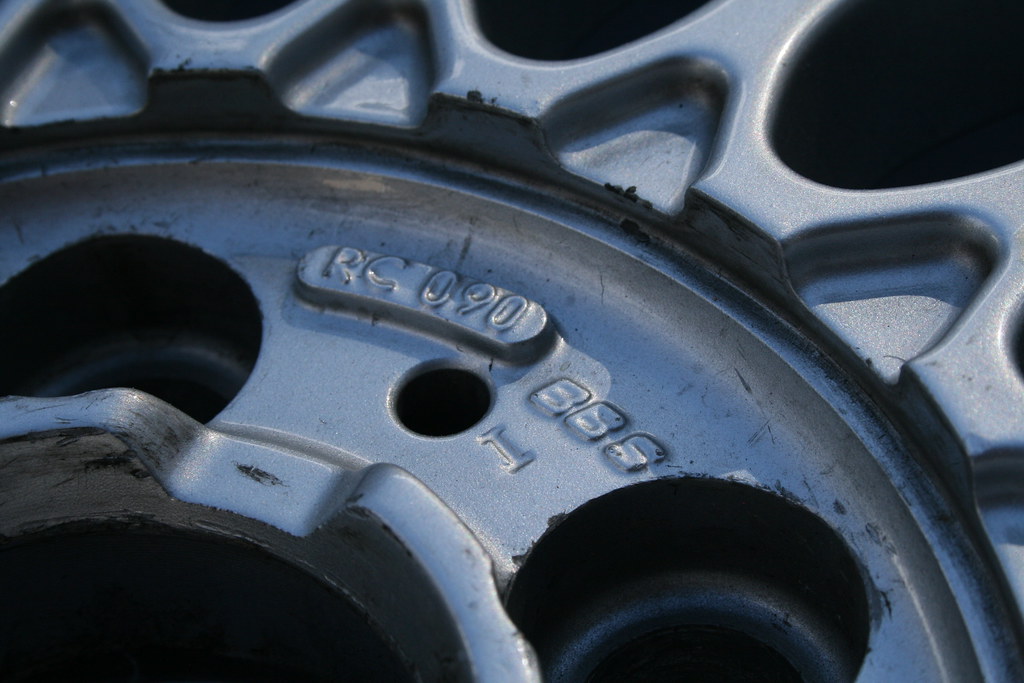
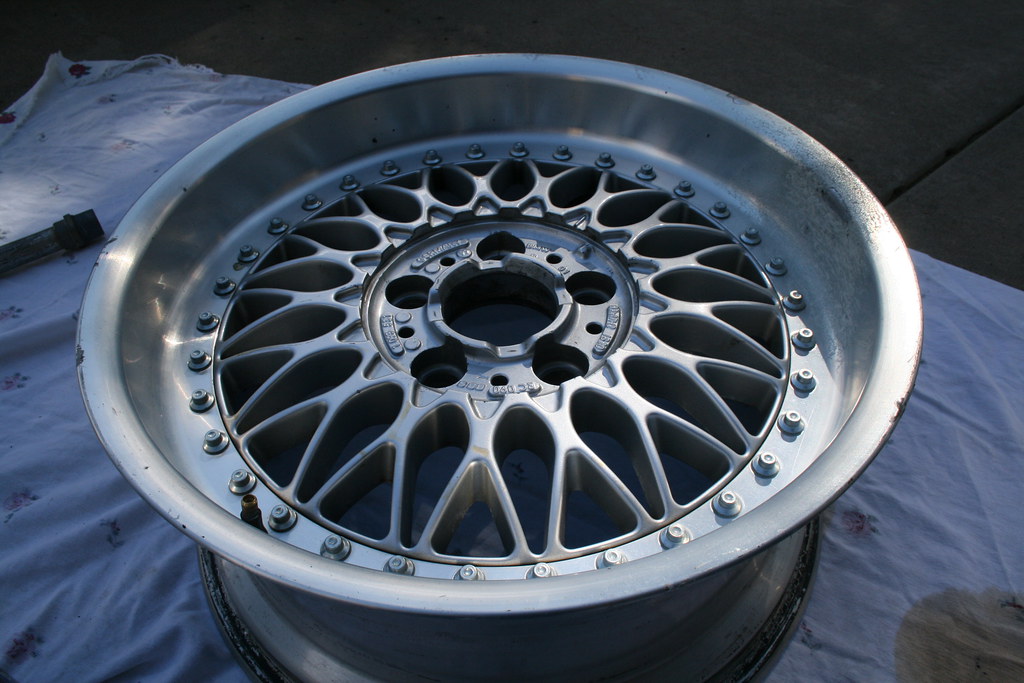
BBS RC090
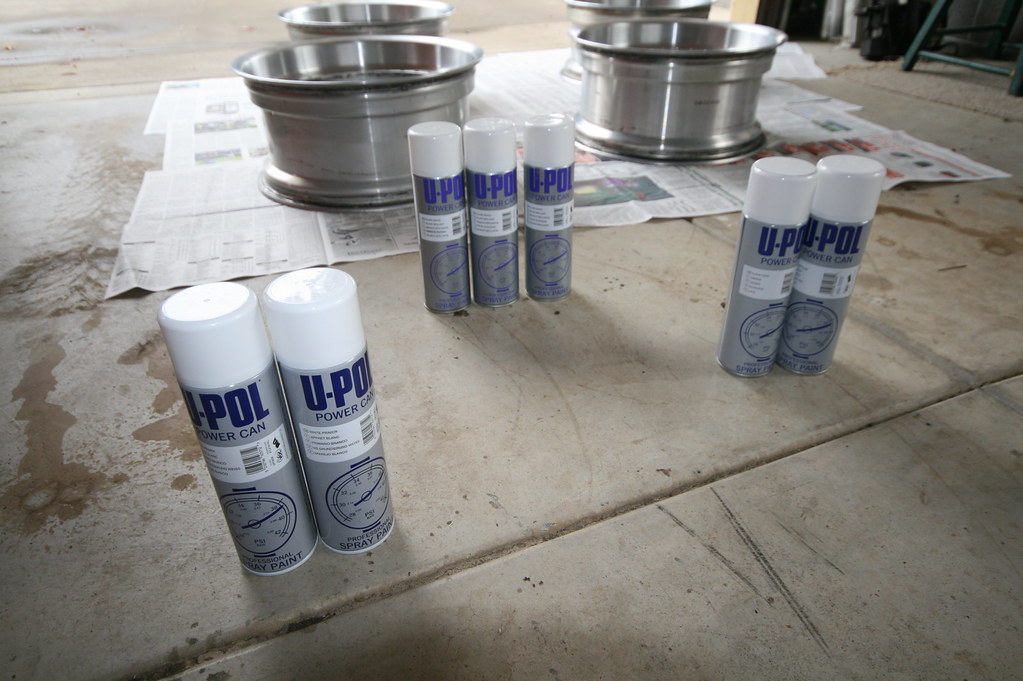
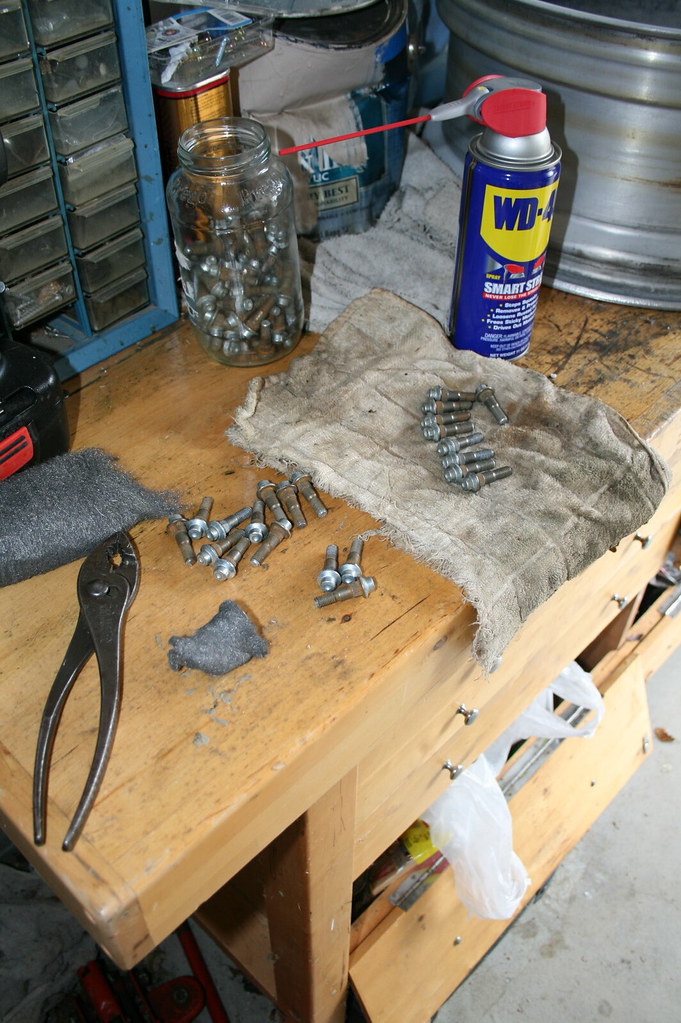
I started yesterday with a trip to the hardware store to get all the necessities. I bought:
A 10mm 12 point socket - to remove the bolts ($3)
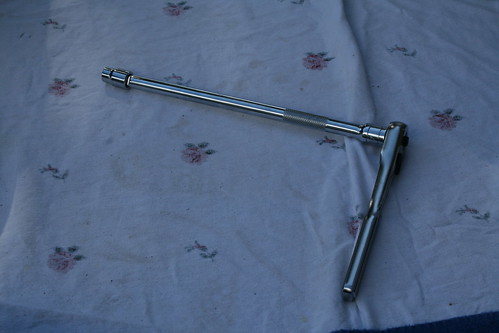
A 10 inch extension - to be able to reach all the way in to the wheel ($10)
A "Nail set" *the grey one* - this is to tap out all the bolts after removing the nuts. They come in different colors, each represents a different size. The grey one is a good size. ($5)
Jasco - Paint and epoxy remover ($10)
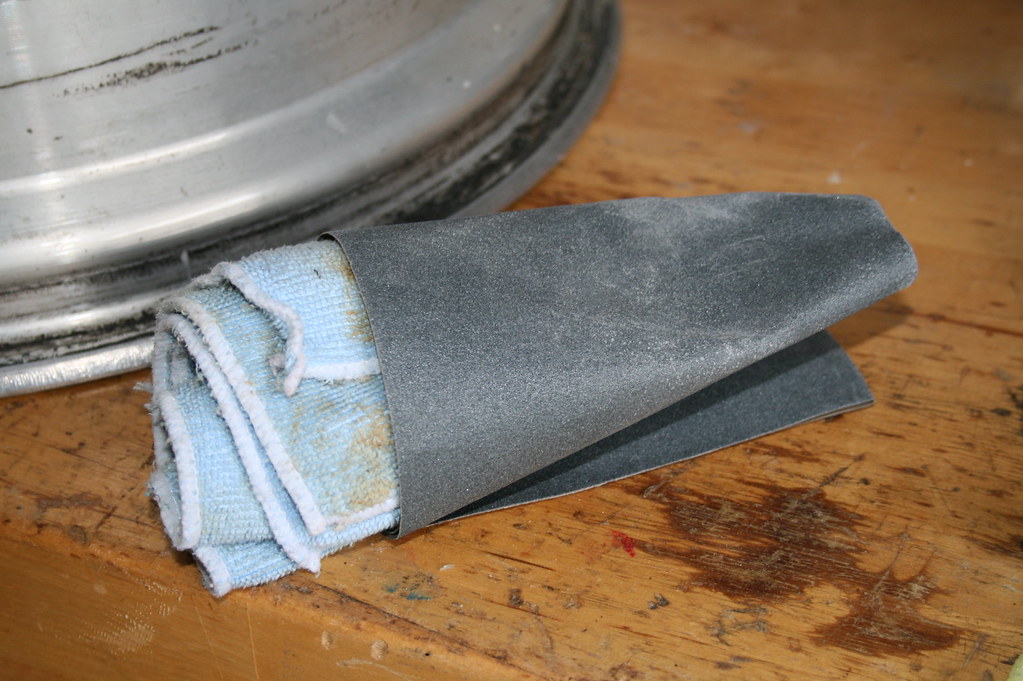
Sand paper - 150, 220, 400, 600, 1500 grit (>$2 each)
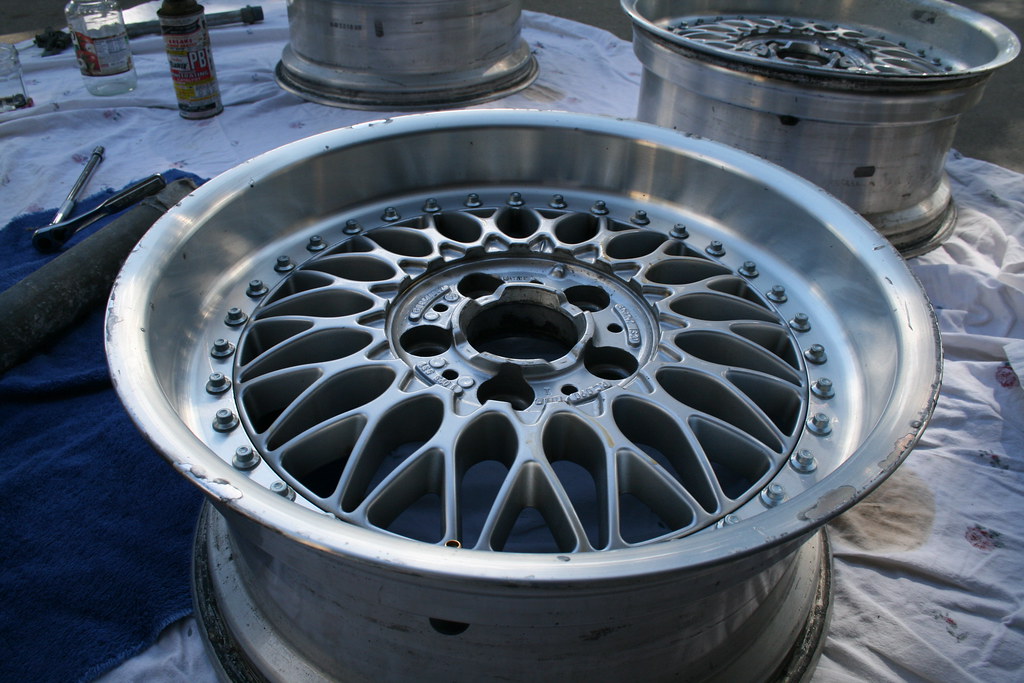
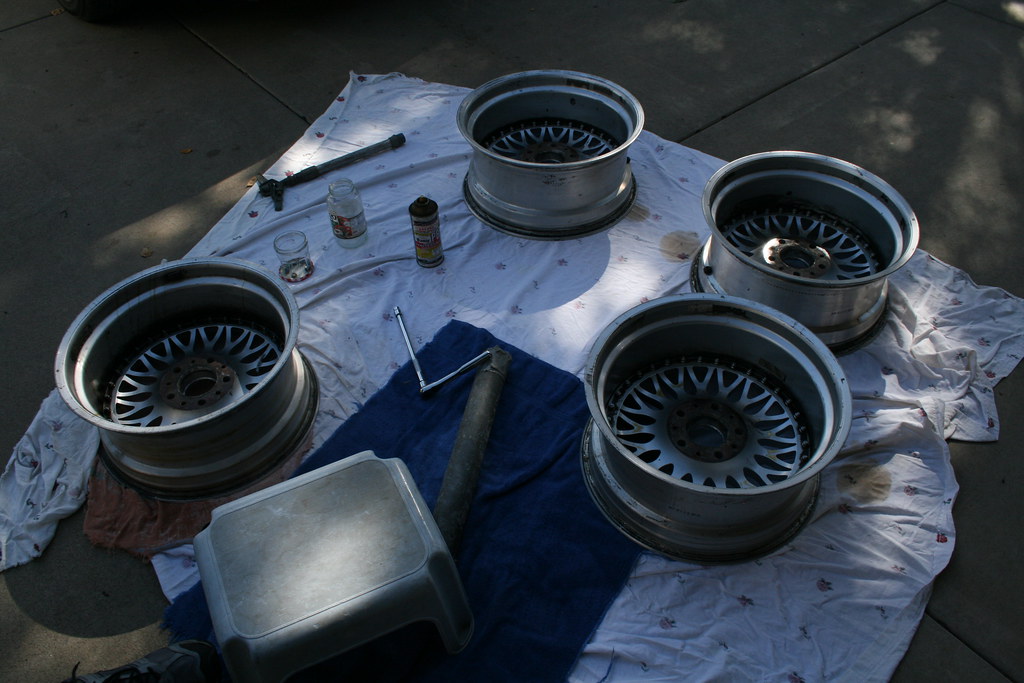
You will also need some sort of extension for the socket, it made taking the bolts off a piece of cake. I used a random piece of pipe that fit over the end of my socket handle. You can see it in my third and fifth picture.
AND
A dead blow hammer
OR a piece of wood, I used a 4x4 block that was laying around in the yard :dunno This is for pounding on the center after taking out the bolts. Just be sure to wrap it in a towel so you don't damage your wheel.
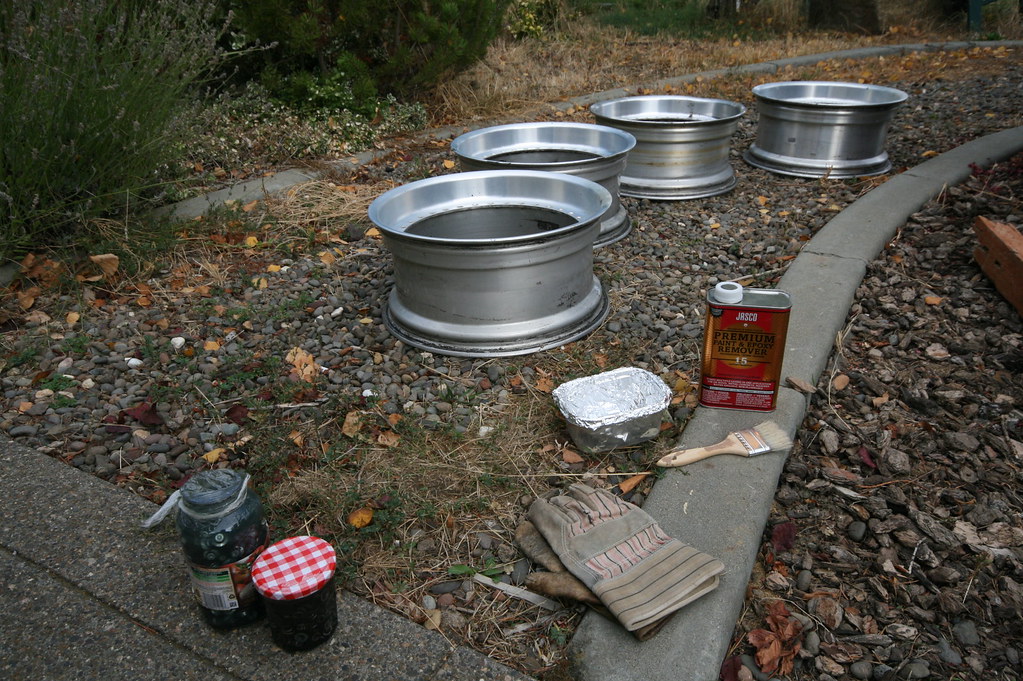
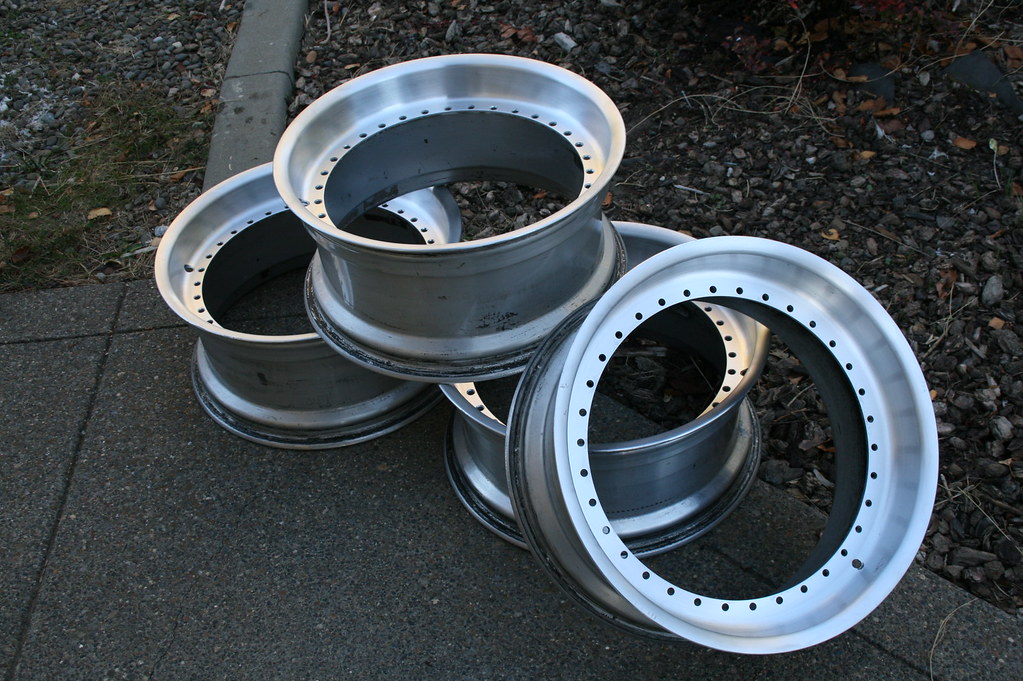
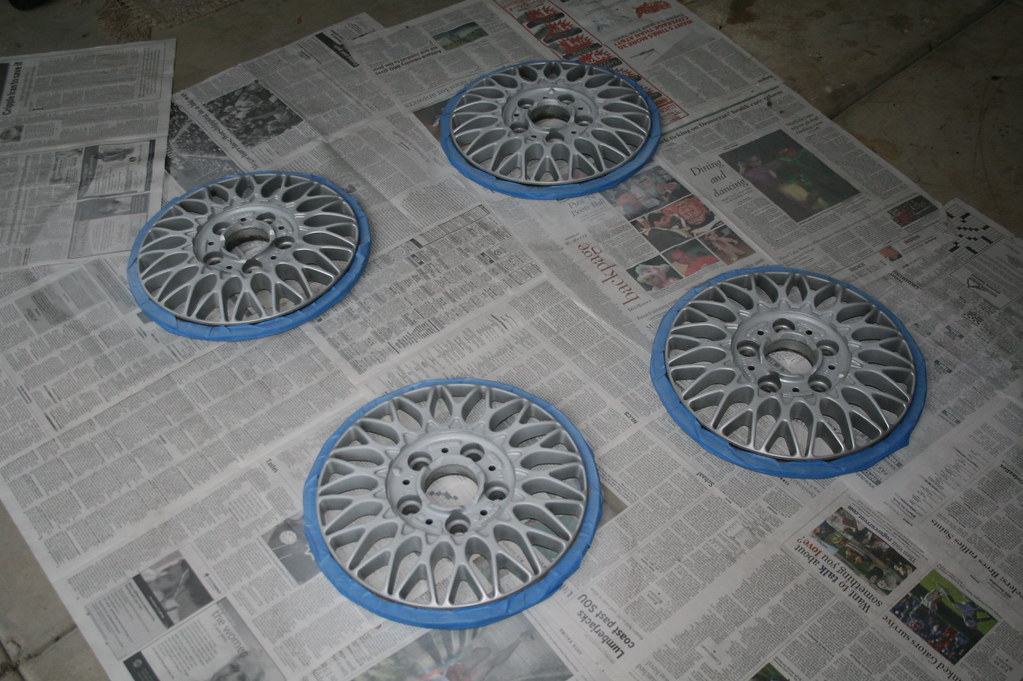
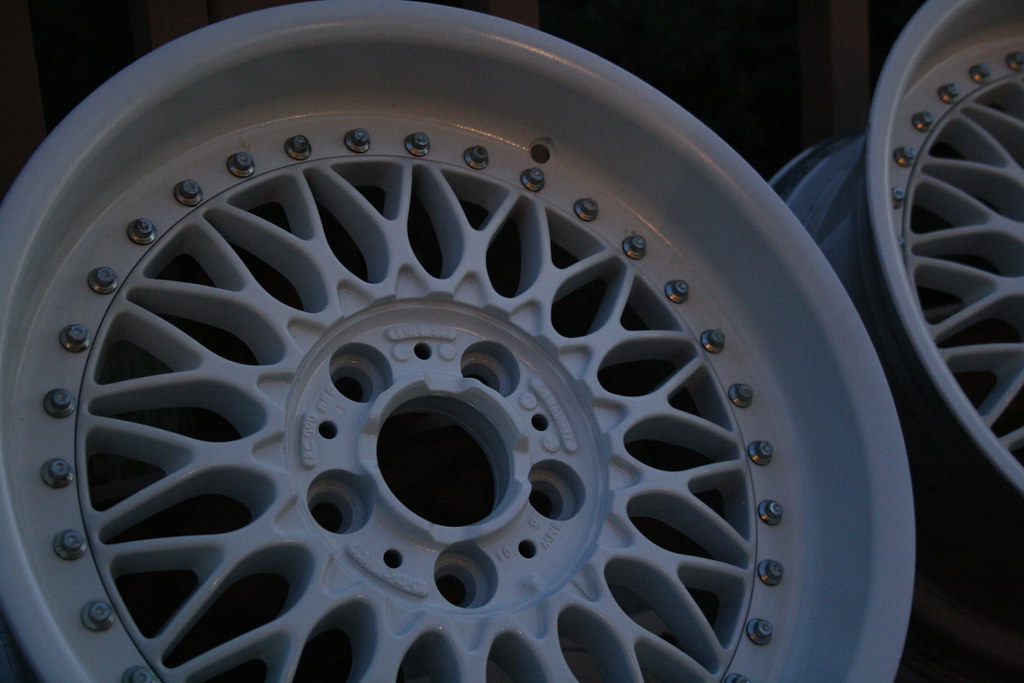
Today I started the disassembly process:
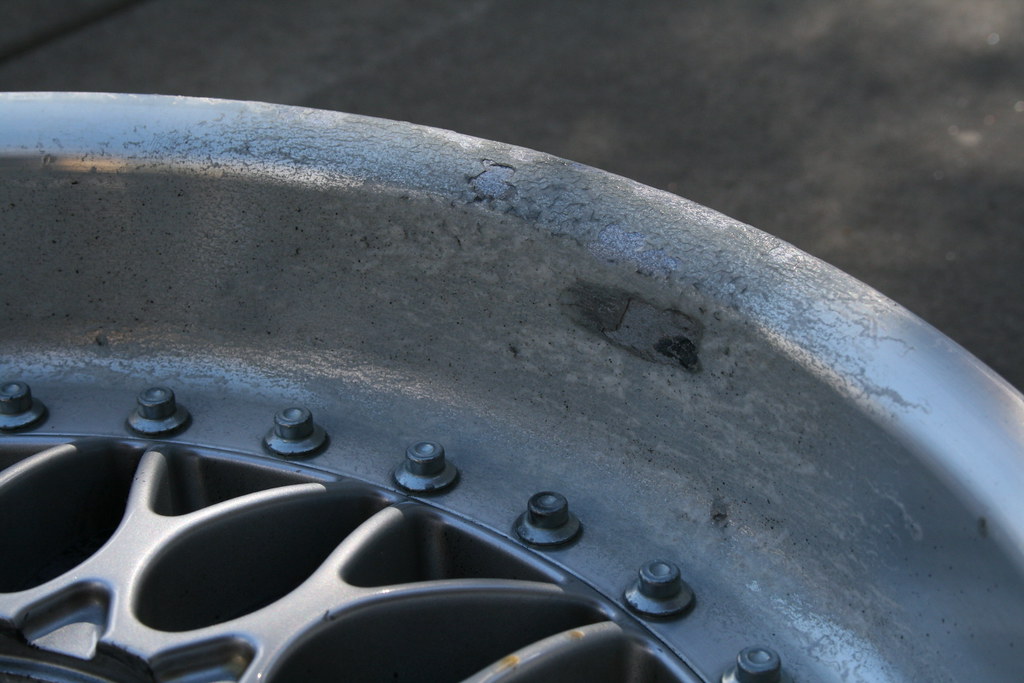
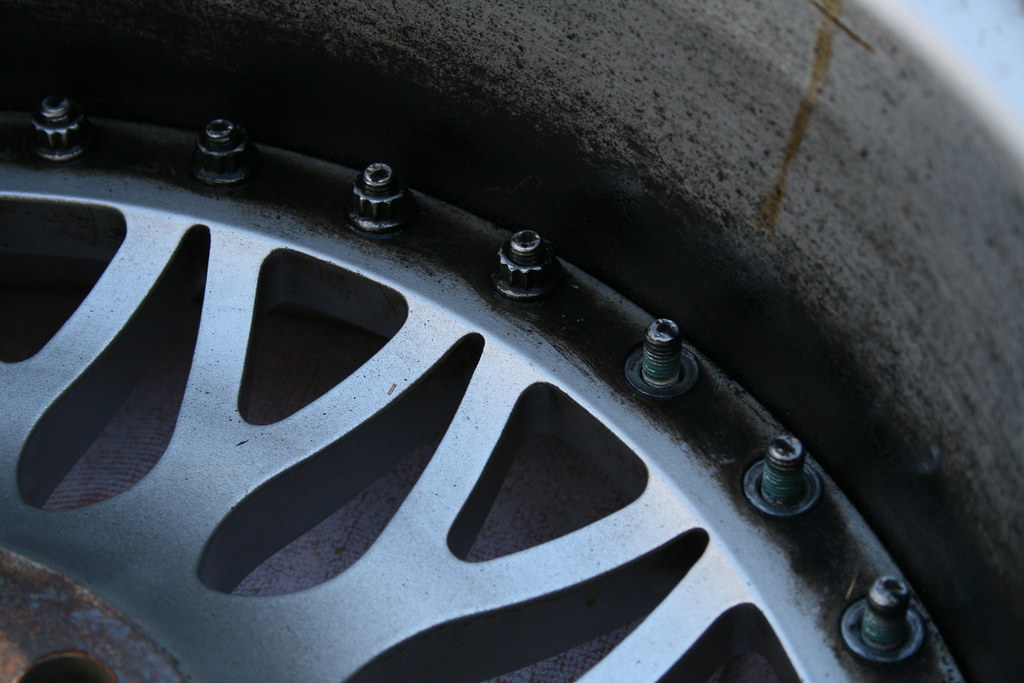
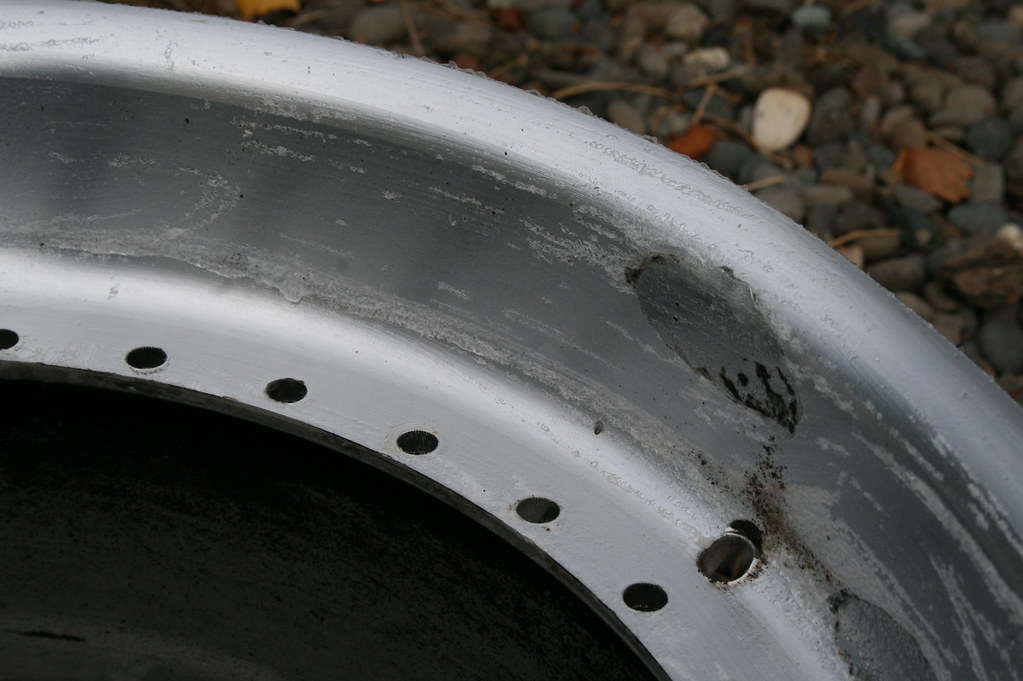
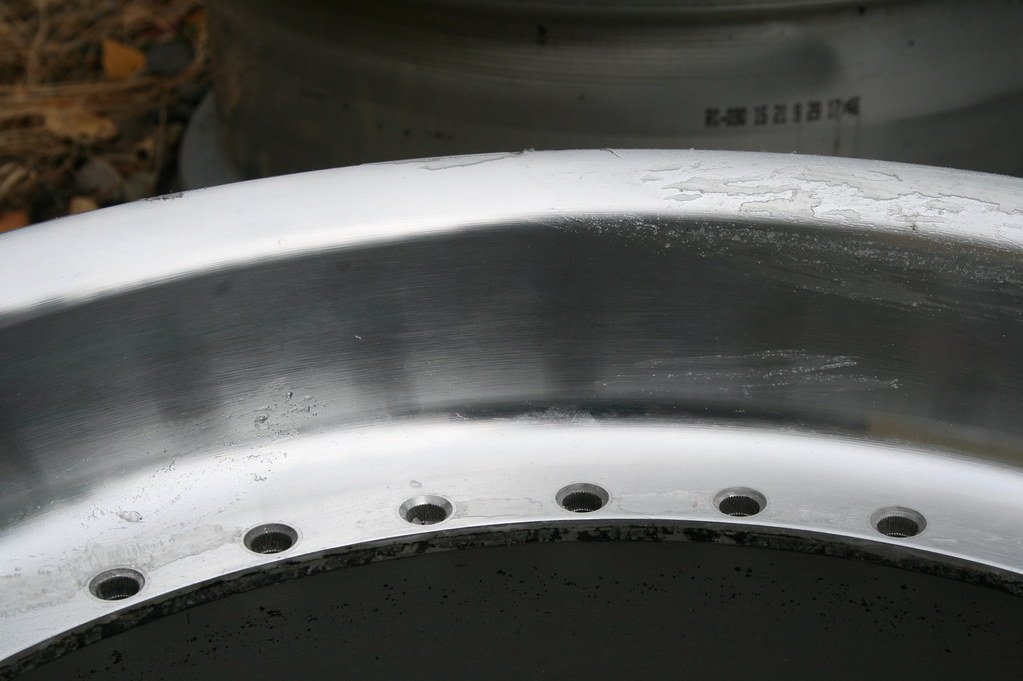
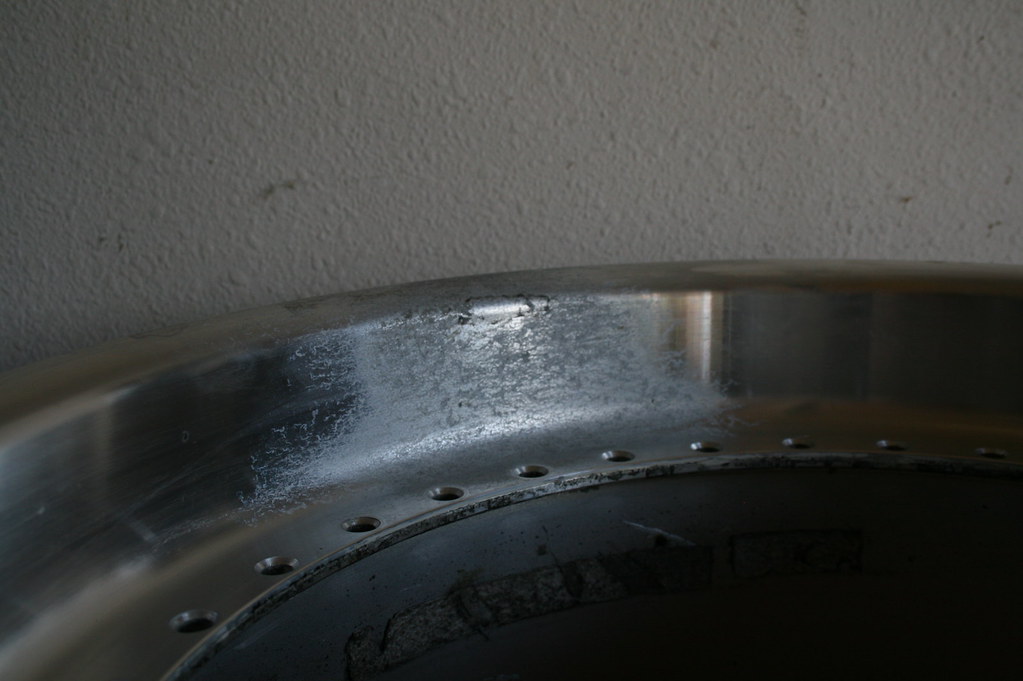
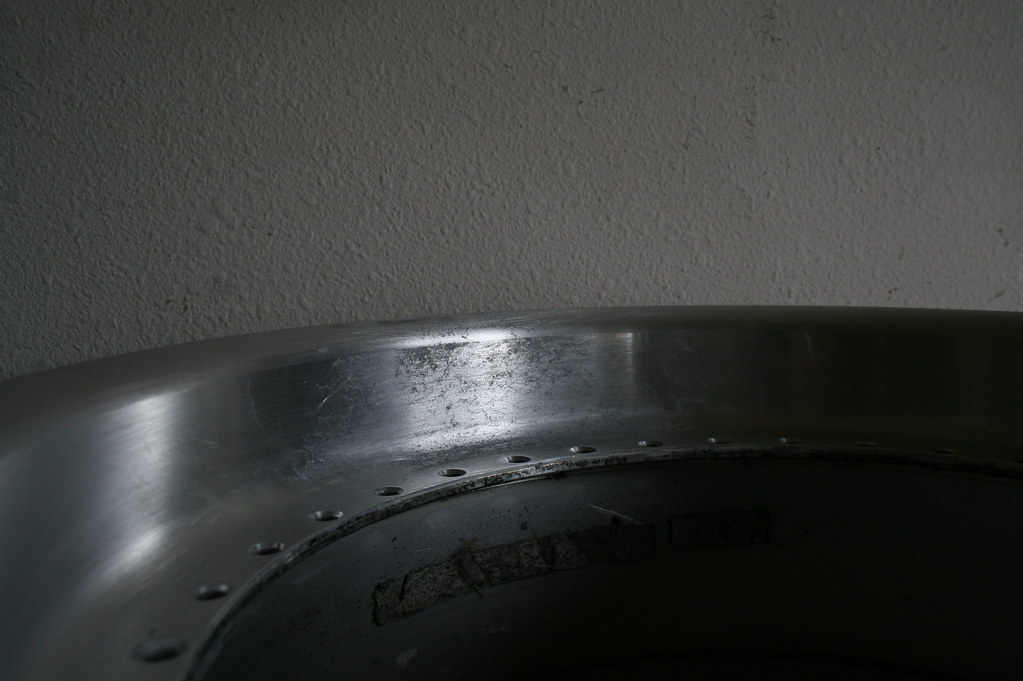
Close up of the worst areas:
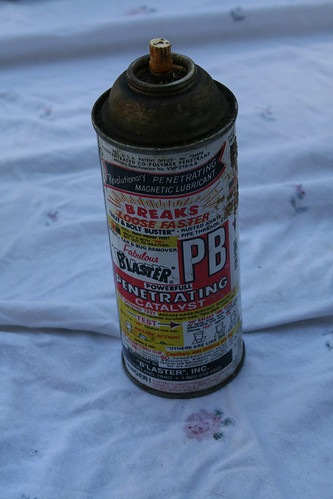
I flipped all the wheels over and sprayed them all with PB Blaster, to loosen the bolts up a little before trying to take them apart.
Then I used the pipe extension around my socket wrench to go to town on the bolts. I separated the nuts and bolts into two different jars each full of vinegar.
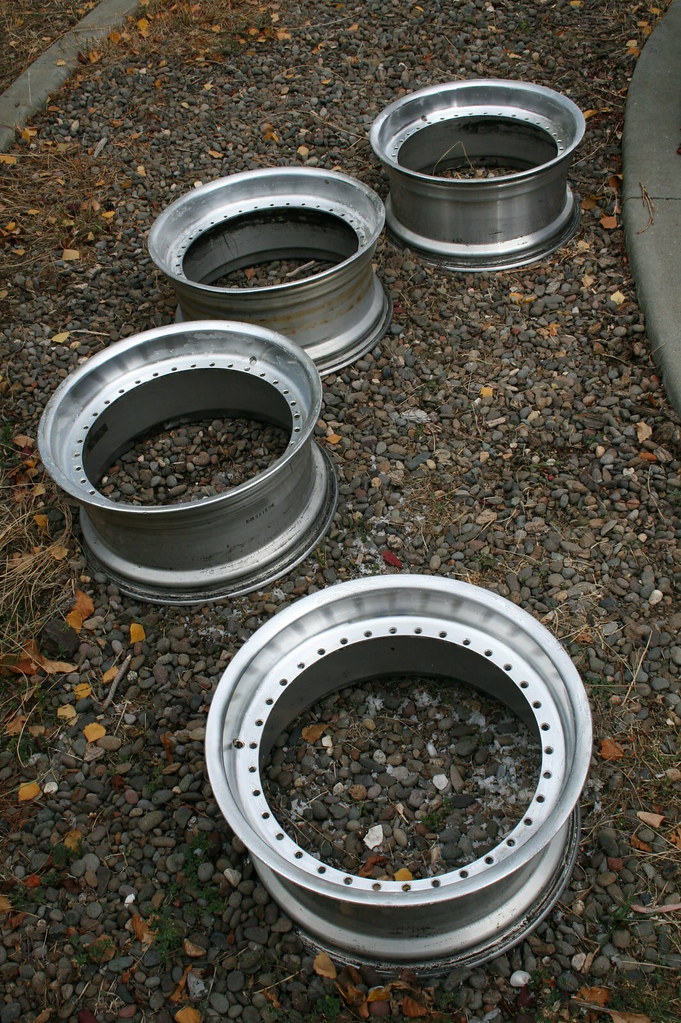
This is the wheel with all the nuts off.
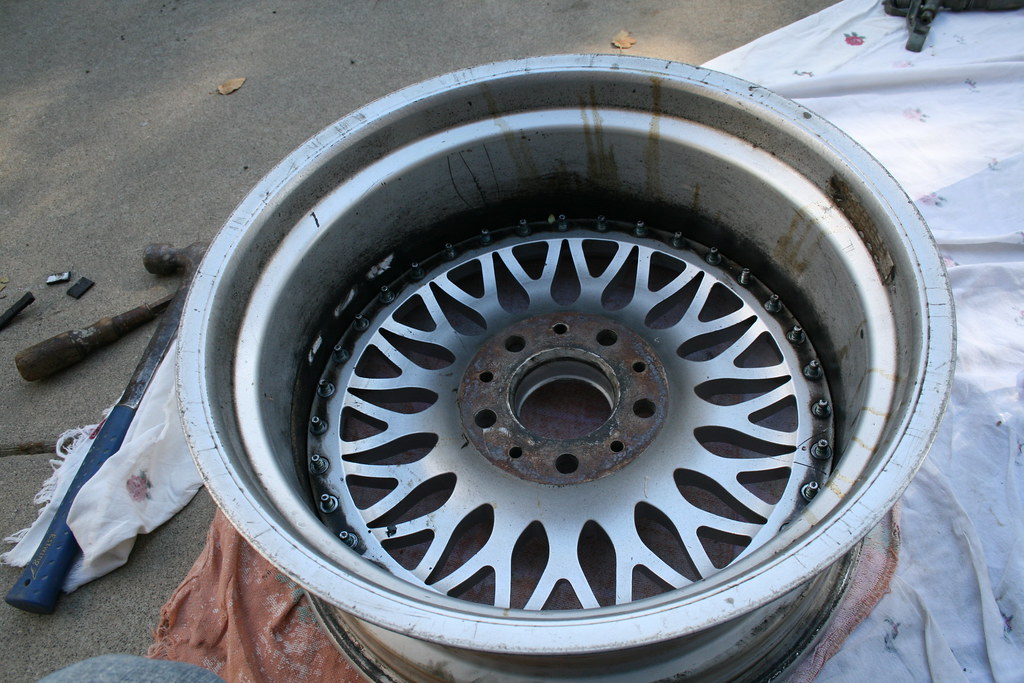
Now that you have all the nuts off, you have to use the "nail set" to tap the bolts out. Now this may seem easier than it really is. You have to smack the bolts pretty damn hard, some come out on the first hit some take 3 or 4 hits. You will figure out your own technique on how you want to hold the nail set and at which angle you find more comfortable. I say that because I hit my thumb a few times and scratched the wheel a few times This is the hardest part of taking them apart. It is very tedious work, so remember that the slower you go the less likely you will scratch, gouge or hit your wheel.
It was a pain in the ass doing the first wheel but by the time I was doing the 4th I totally had the hang of it. It gets easier as you go.
Now that you have the bolts out, flip the wheel over, get your wood block wrapped in a towel or your dead blow hammer. Place it on the center of the wheel - hit it. Now move the block to one edge (3 o'clock postion) - hit it, rotate the wheel - hit it, rotate the wheel - hit it so on and so forth.... They'll come out eventually, and like those damn bolts some come out easier than others. It took 4 or 5 hits before they came out.

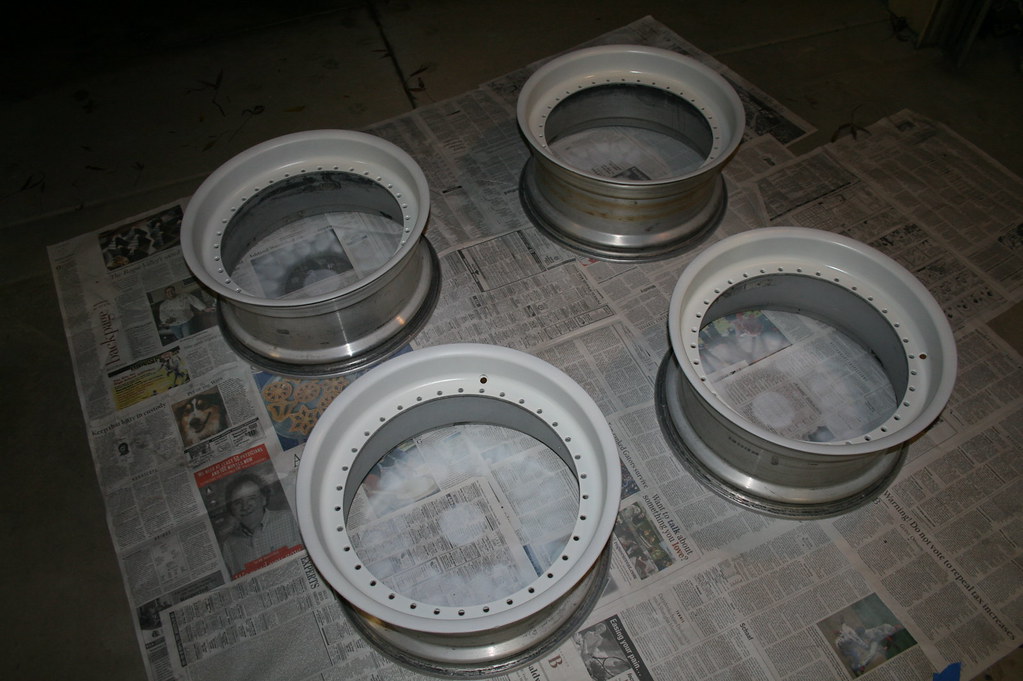
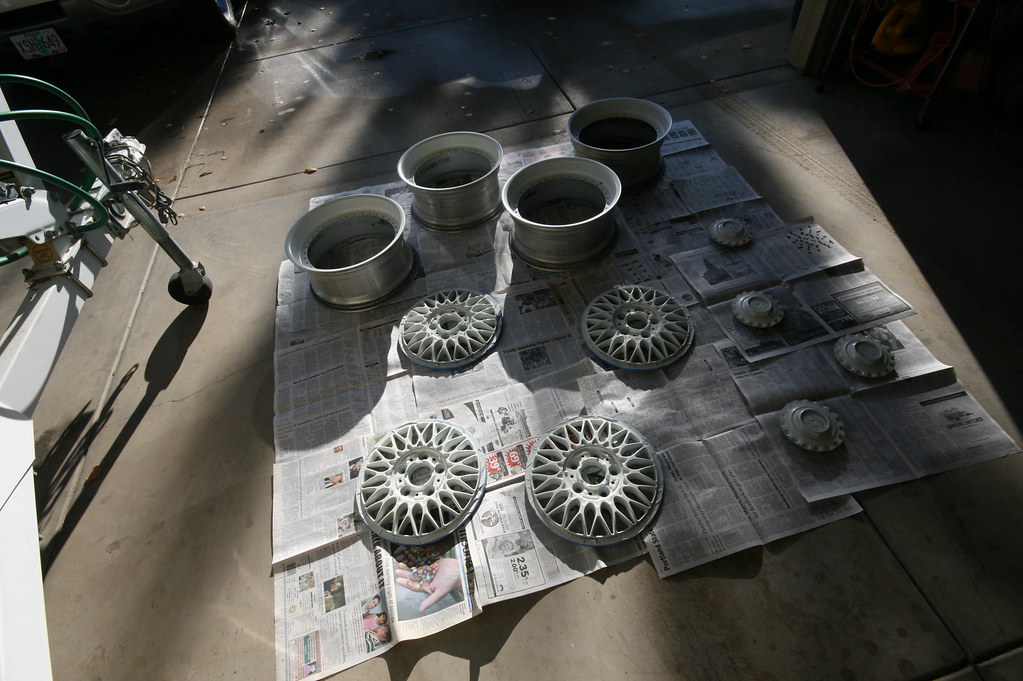
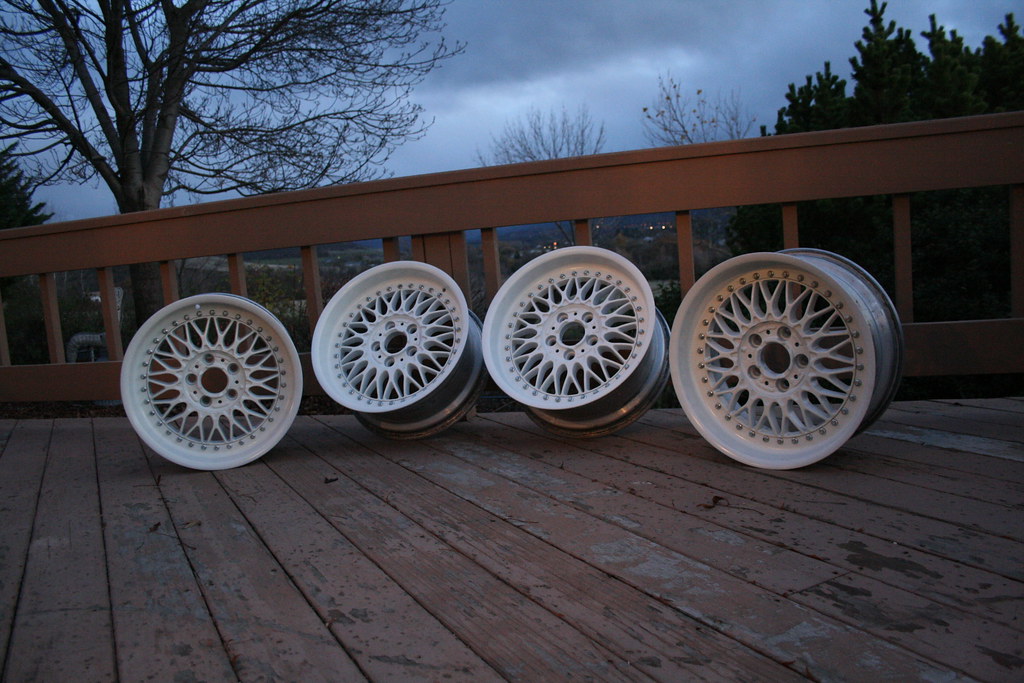
After doing this same process to each of the 4 wheels, I sprayed them all with some degreaser and gave them a light scrub down. They were so dirty from years of road grime and PB Blaster.
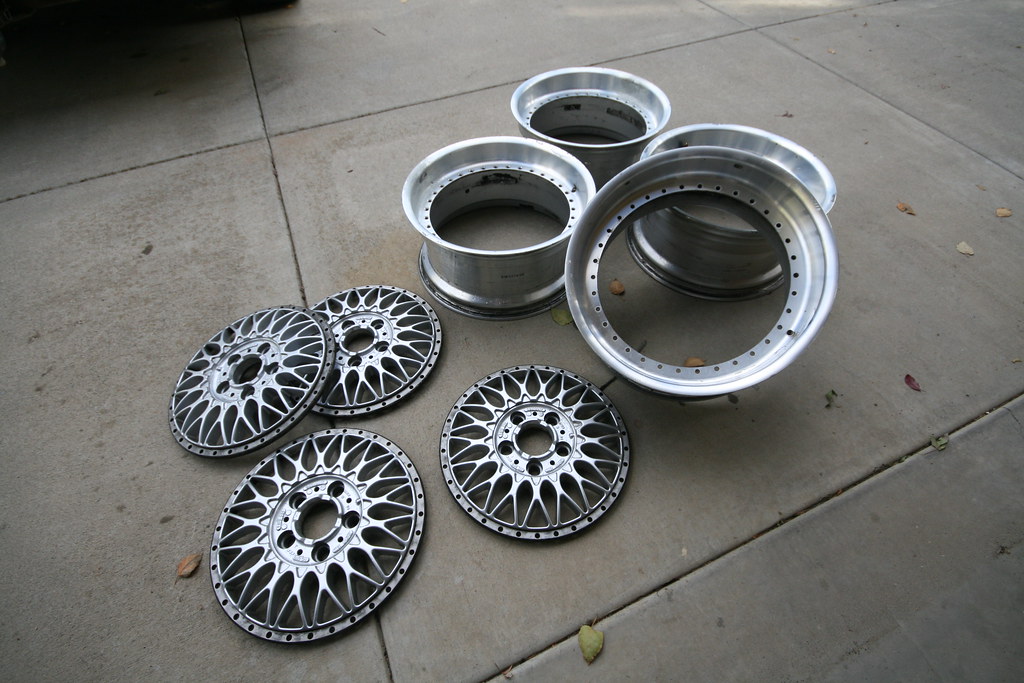
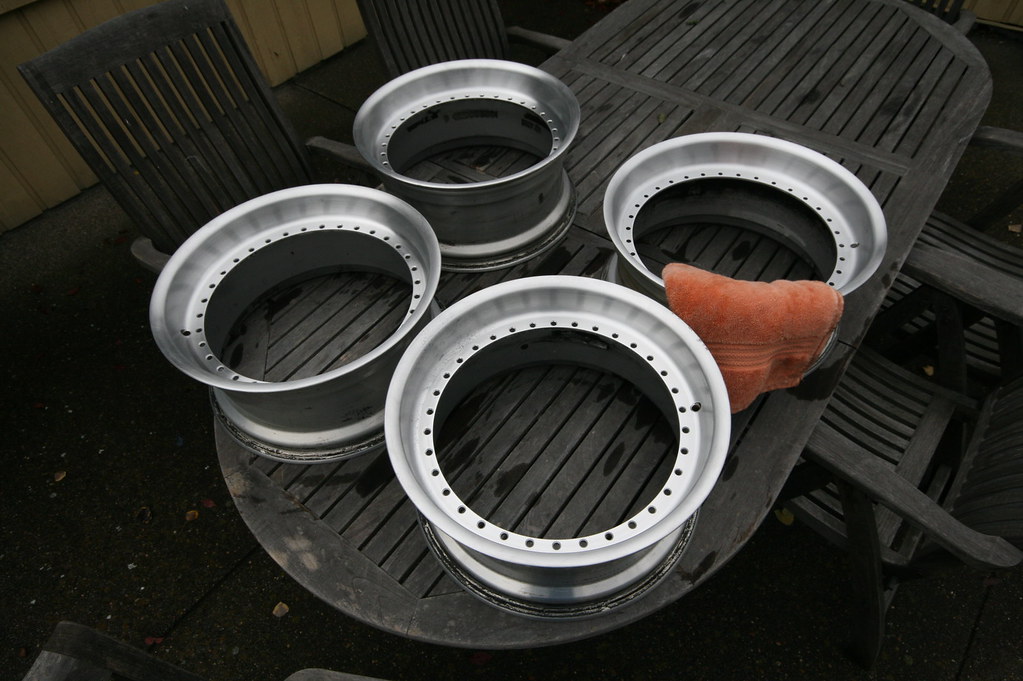
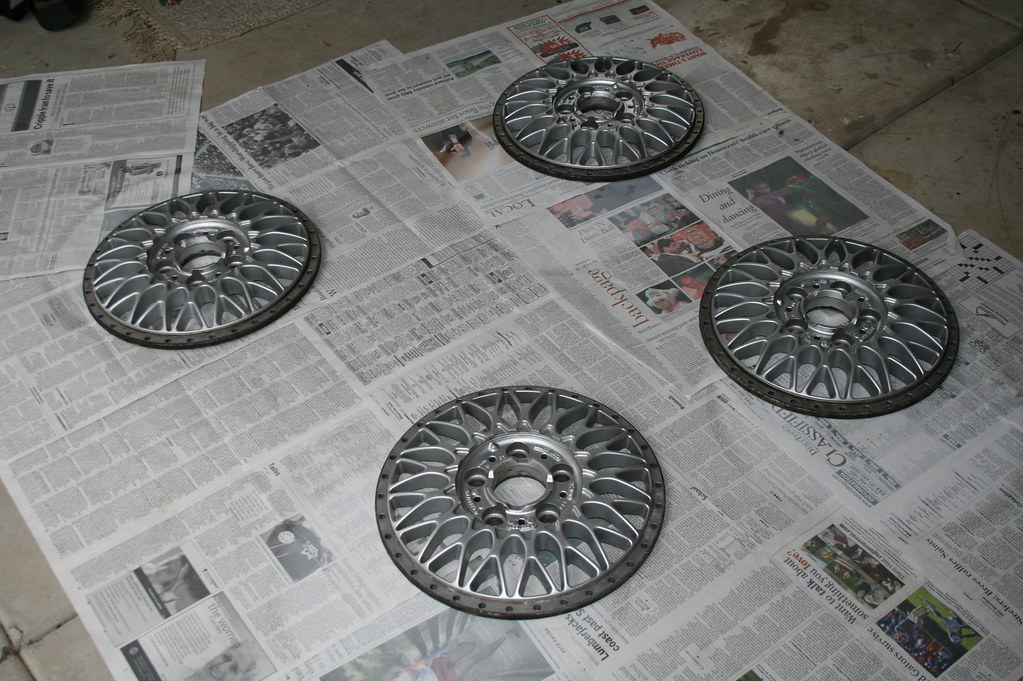
This is what I was left with.
The bolts and nuts are still soaking in their jars of vinegar.
DAY #2
UPDATE:
What you will need:
Some things I list I'm just going to go ahead and assume you will have lying around.
Jasco
Paint brush
Metal container
Old rags
Any open area
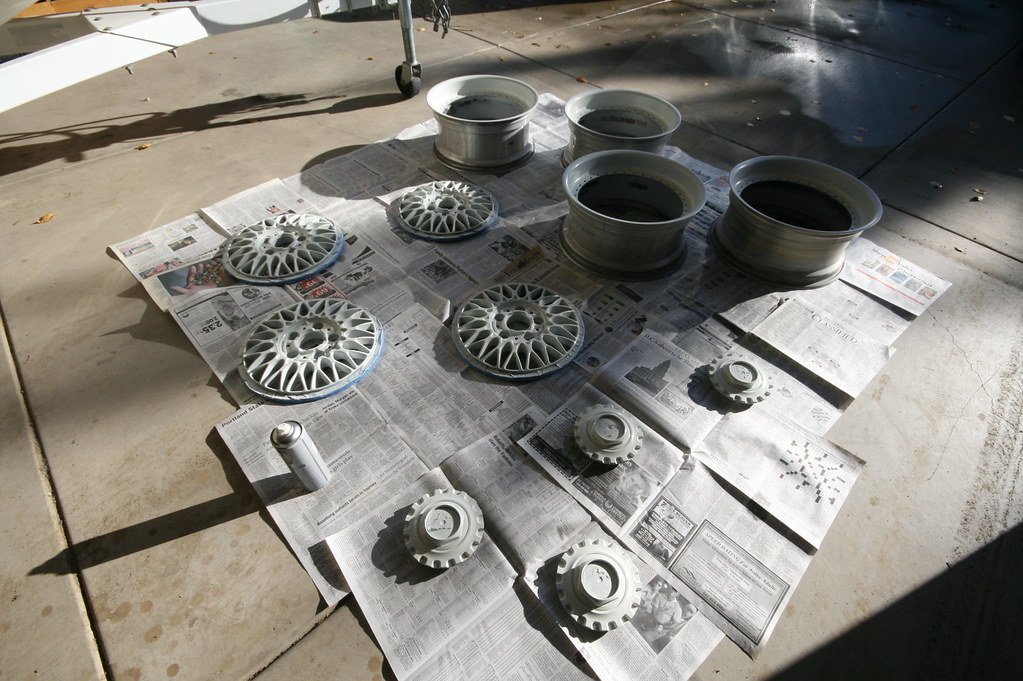
I started by taking the barrels out to a very well ventilated area where I could apply the Jasco. This is to remove the clear coat from the barrels.
Note: the nuts and bolts in vinegar.
This stuff is nasty.
Do not breathe it and DO NOT GET IT ON YOUR SKIN. Wear long sleeves and thick gloves. I accidentally let my wrist brush against one of the wheels after the Jasco was applied and even though it was dry it started burning me instantly. Just be safe, use your head.
Pour the Jasco in to a shallow metal container. I used a plastic container lined with aluminum foil, which worked just fine. Then with your paint brush, brush the Jasco on to your lips. I found that the more you use the more clear coat it eats away and the easier it is to get off.
This was my first coat, which was pretty light - but go ahead and glob it on. The more the merrier.
After applying it to all 4 wheels let it dry for 20 to 30 minutes. It works pretty fast. I could hear one of the wheels making a hissing noise within seconds after applying the Jasco.
I drained out my vinegar jars and took a look at the nuts and bolts.
The vinegar did a good job cleaning them up. It loosened all the grime and blue loctite was gone.
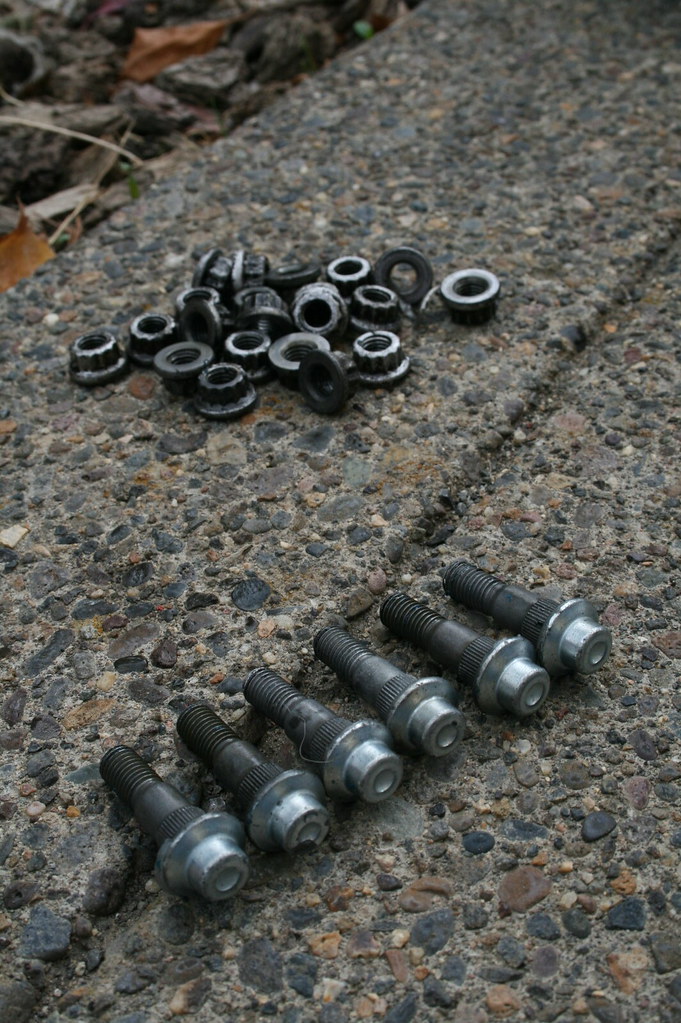
While waiting for the Jasco to dry I wiped each bolt... Yes, individually. And put them separately in other clean jars.
30 minutes later, the lips should be dry and are ready to be wiped down.
Get your gloves and your old rag, and start wiping the lip. I found that one of three possible outcomes will occur.
1.It is easy to wipe off and your left with nice smooth bare metal.
or
2. It doesn't come off at all.
or
3. Where it sort of comes off but leaves behind a residue.
This is the first coat...
Second or third coat and a lot of wiping later...
Still a lot of residue, but getting there...
So depending on how much you can get off with the first round of Jasco, just keep doing what we did before. Apply - Wait - Rub off, Apply - Wait - Rub off... Until its all gone. It took me 4 maybe 5 different coats before I got it all off.
*Remember, as in accordance with the rest of this project, it takes a while.
Since it might take a while... What do you do with all that in between time?
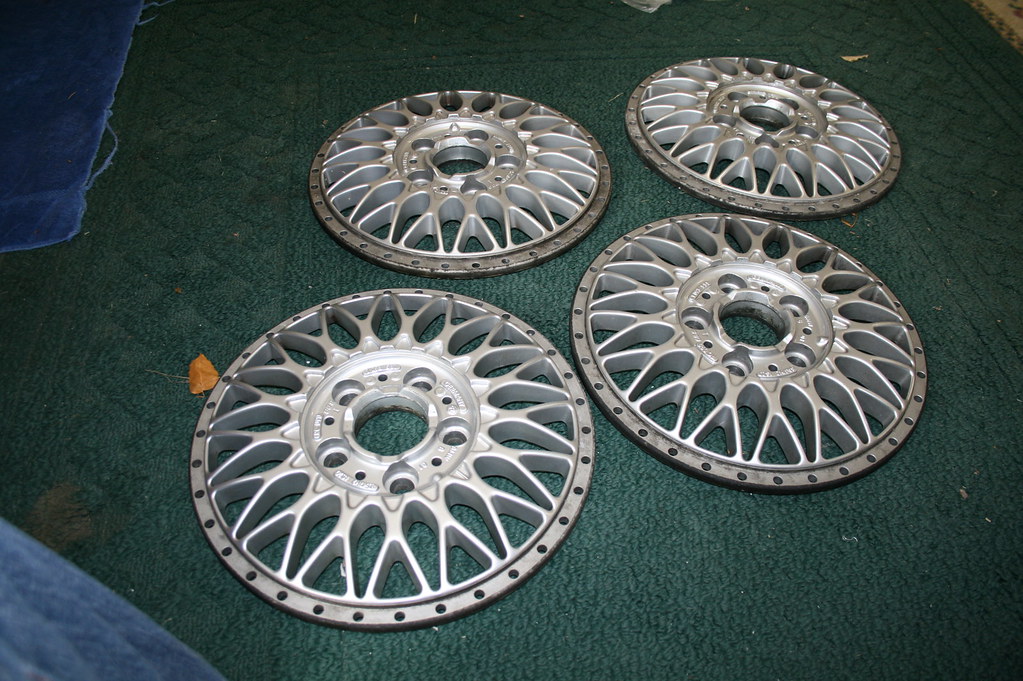
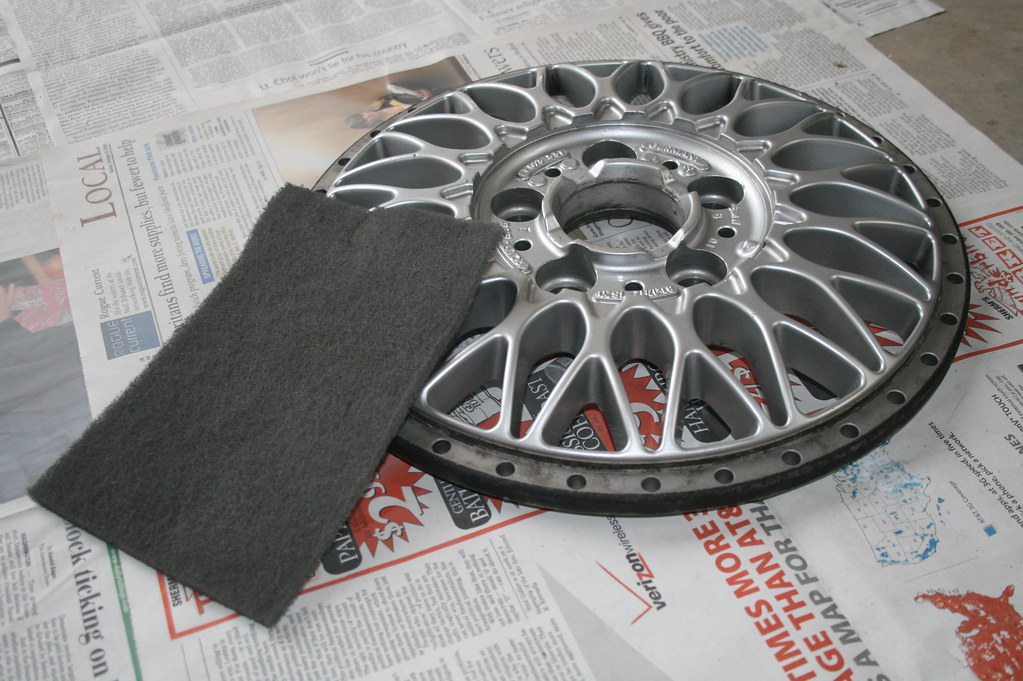
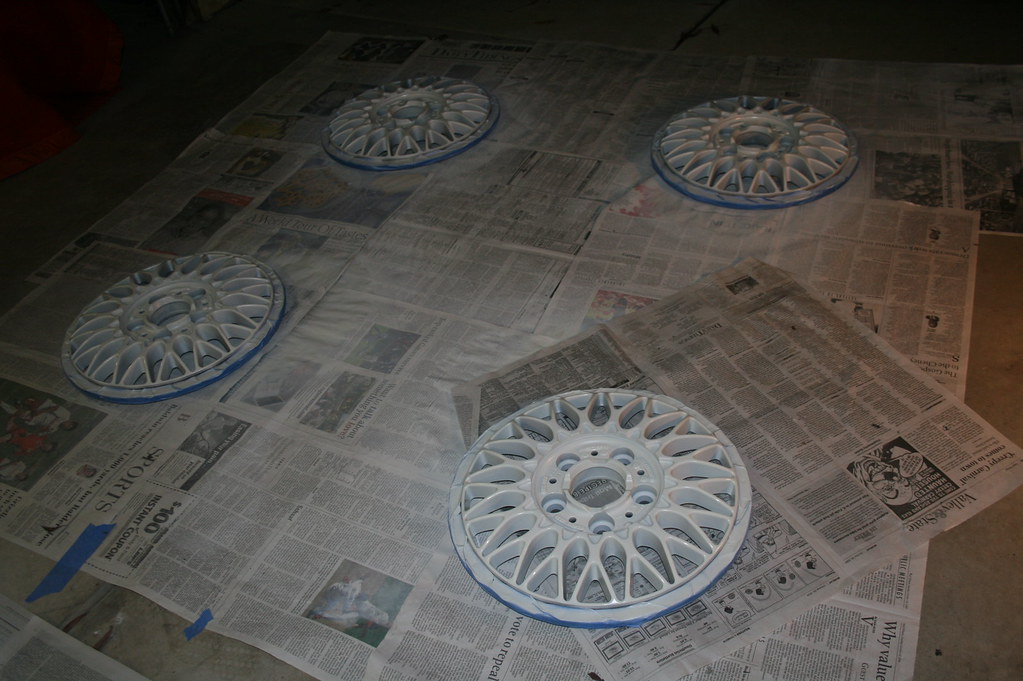
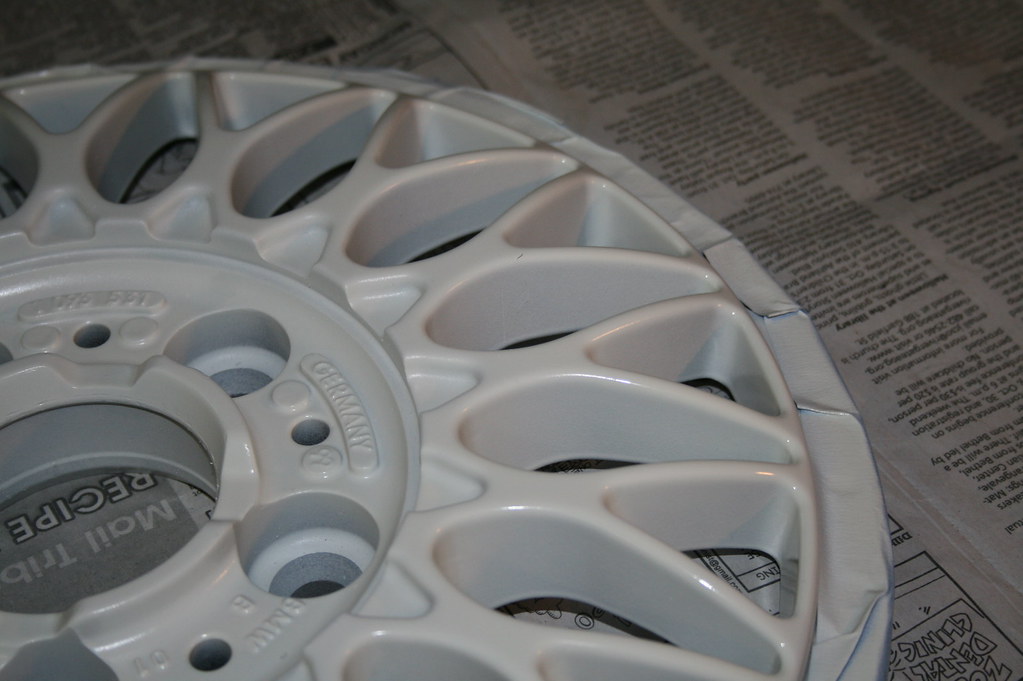
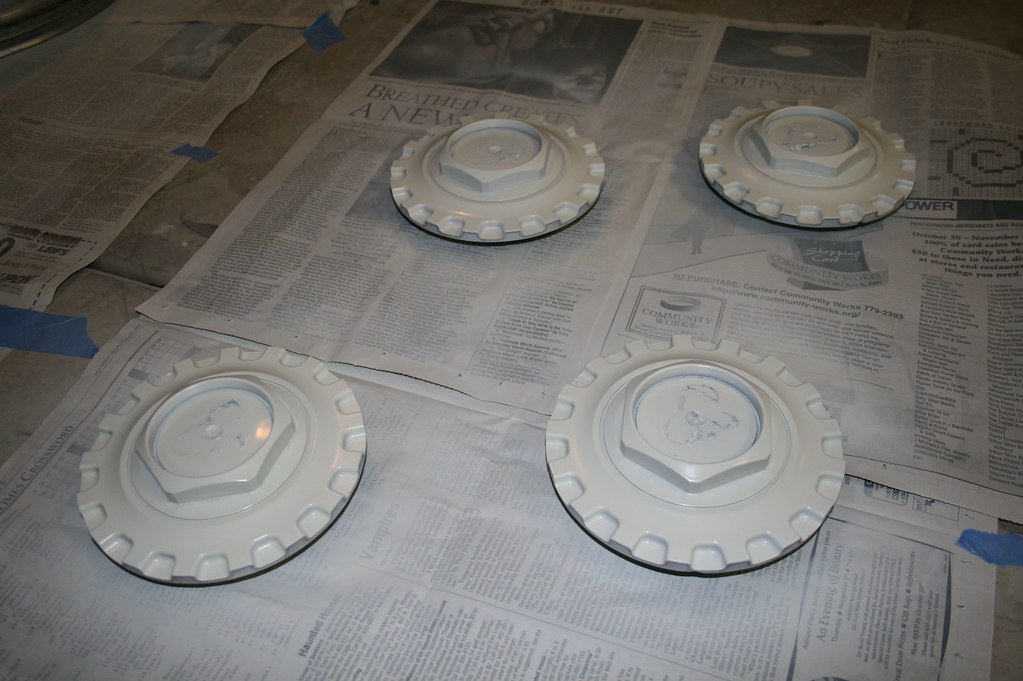
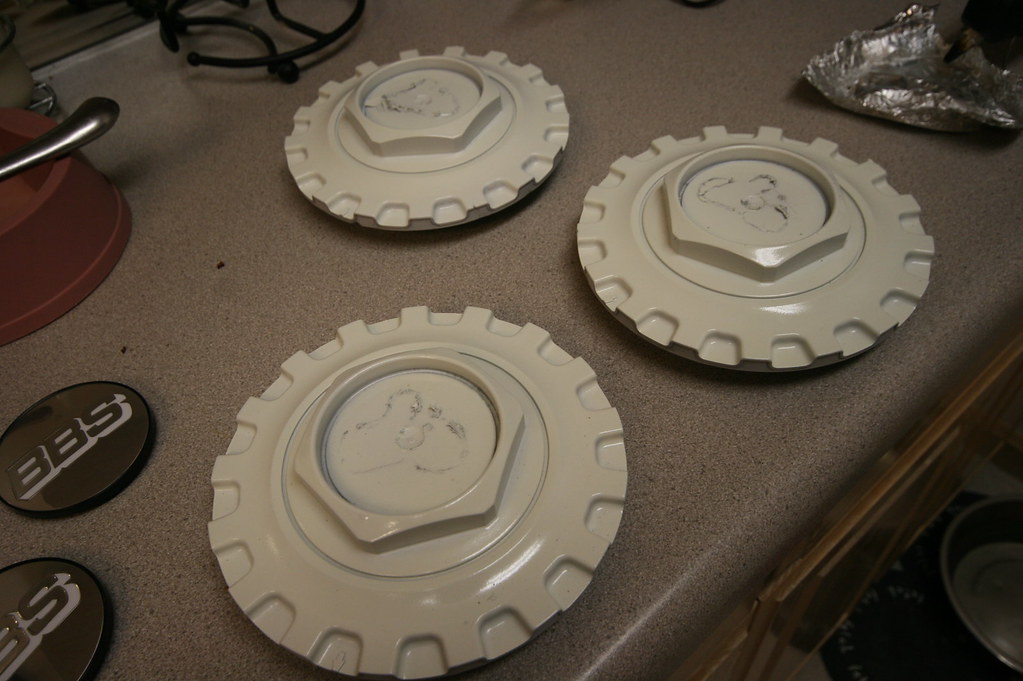
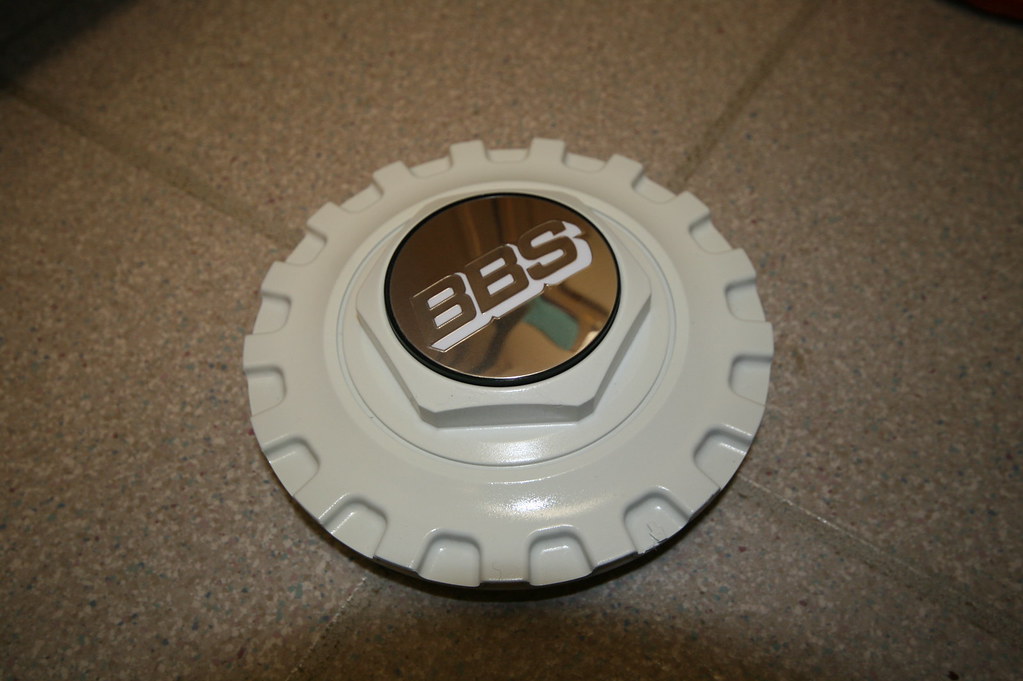
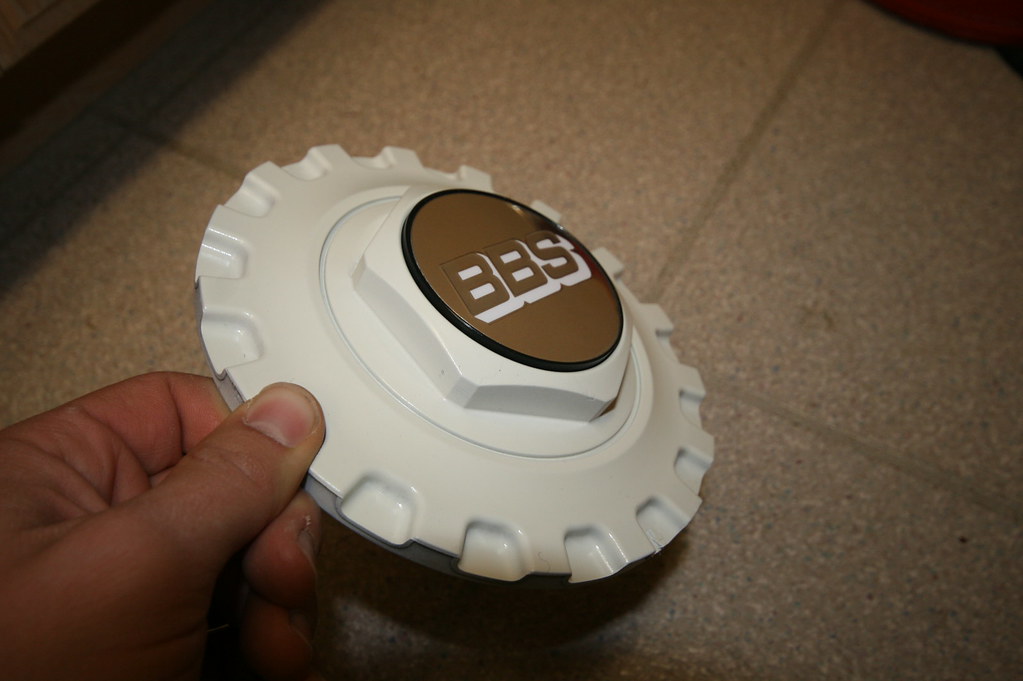
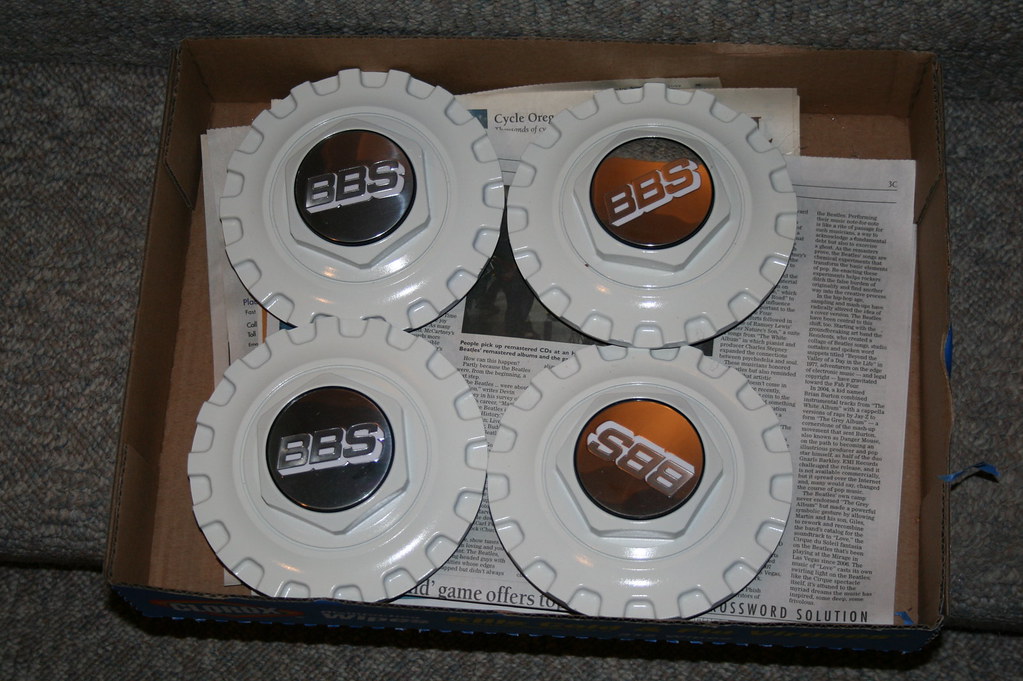
Clean up your centers!
I've found that the Mr.Clean magic eraser is a wonderful tool to use. They are $2.50 for a 2 pack and happen to work great for stuff like this.
Note: The bottom left one is clean
This

To This

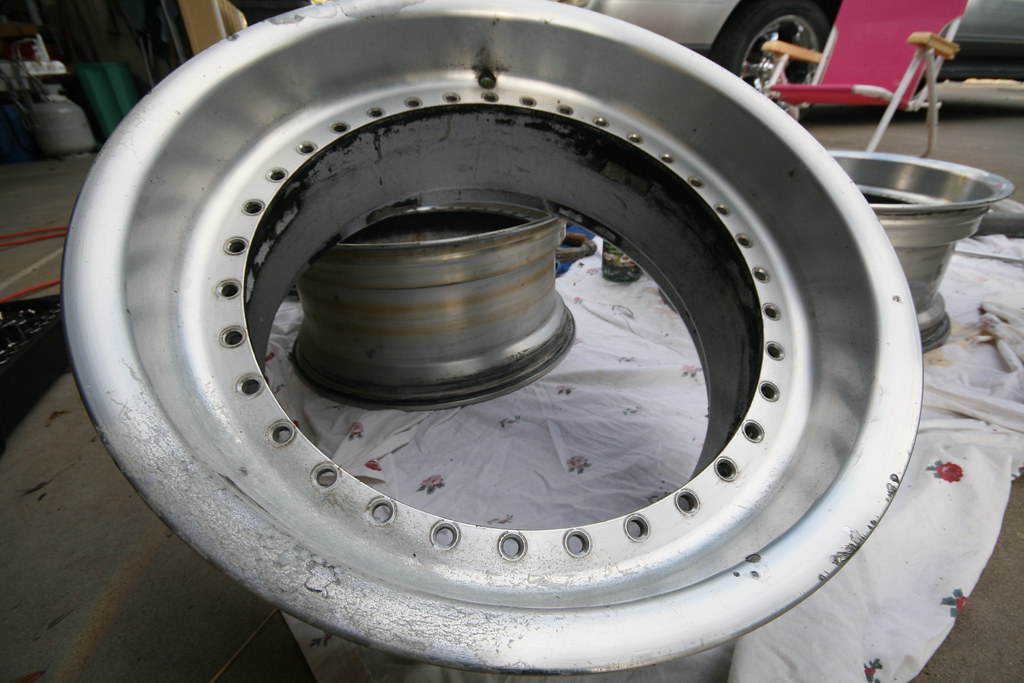
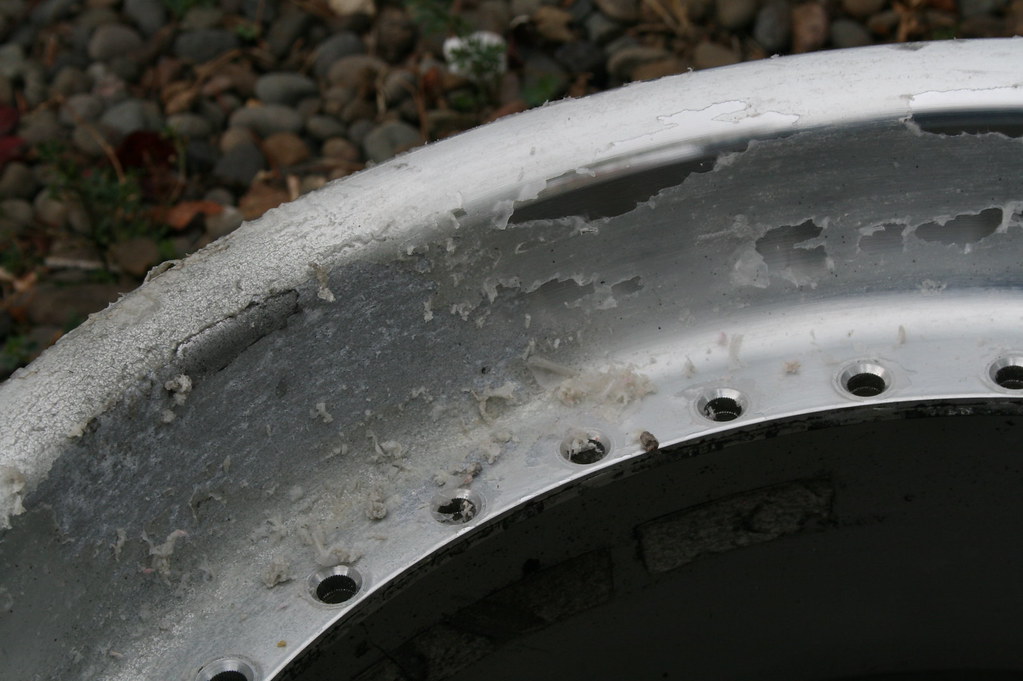
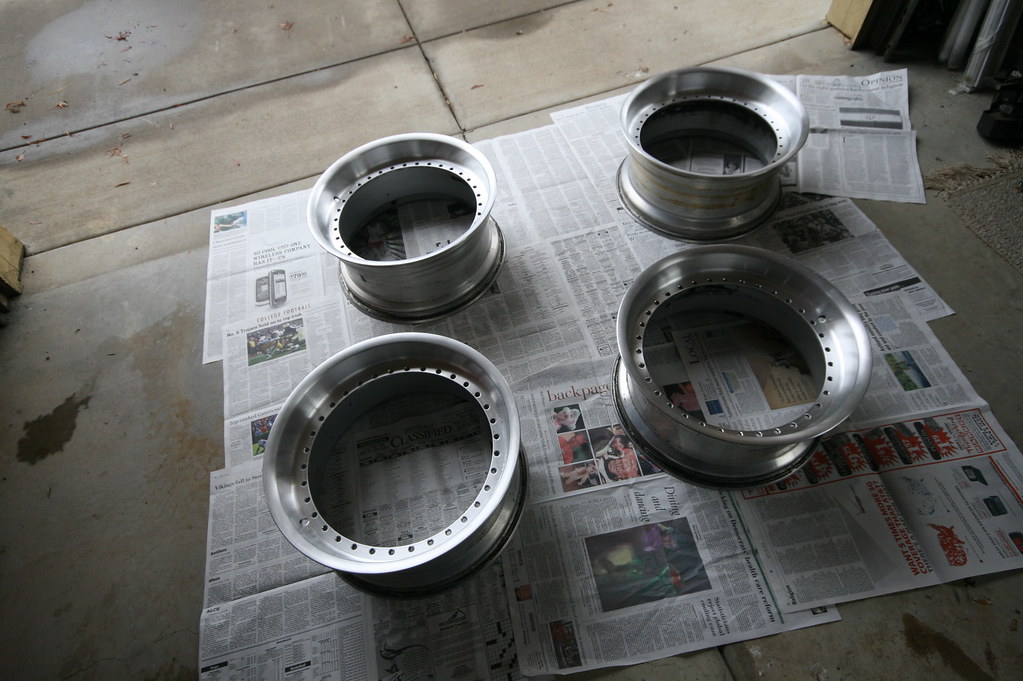
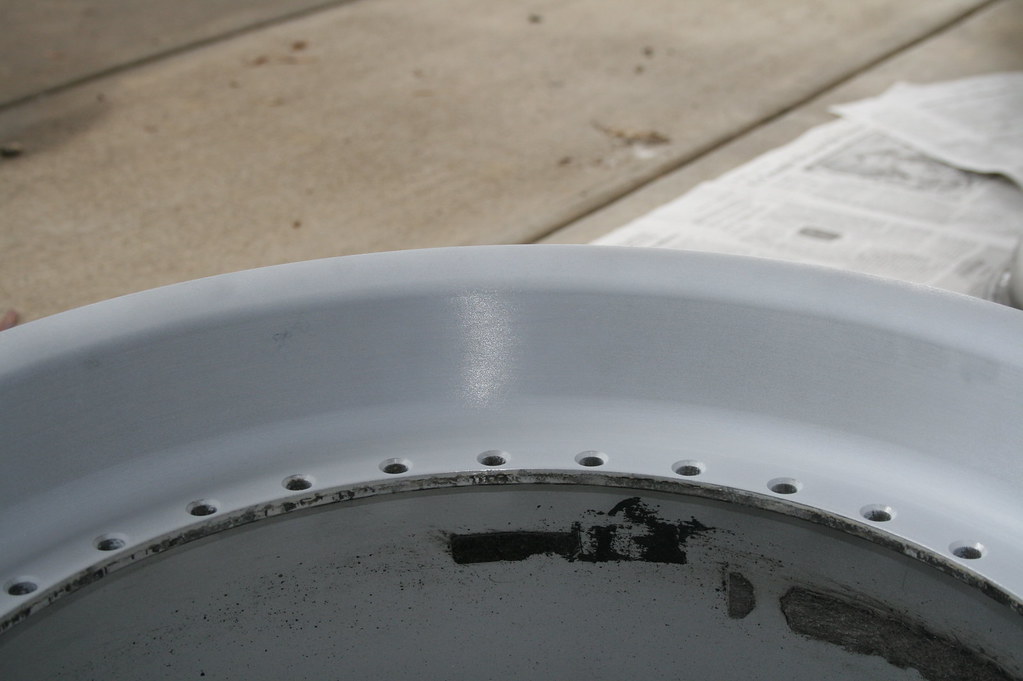
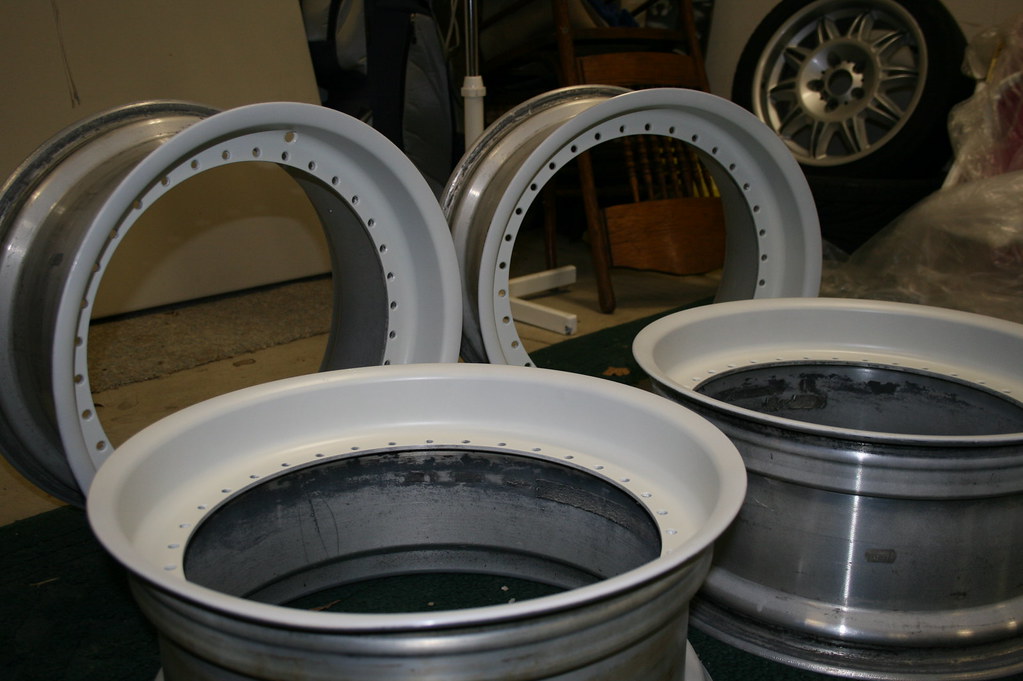
Back out side the lips are almost there, about 95% clear coat free. It takes a lot of scrubbing to get it all off.

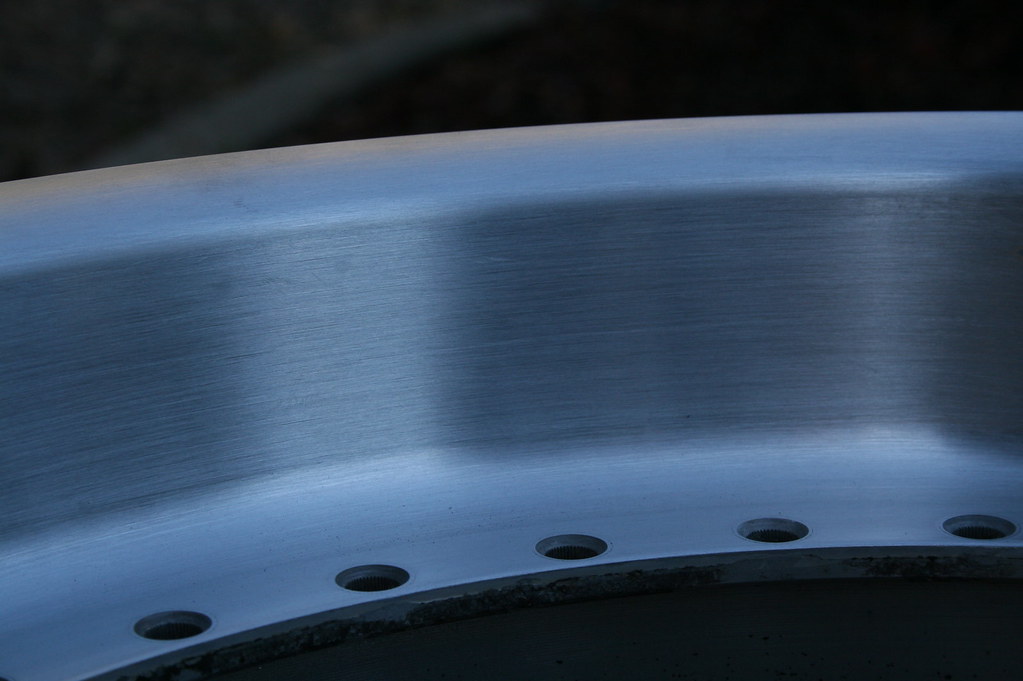
Here is one of the lips all done. I haven't even started sanding yet and it looks way better with out the clear coat.

17x8 et20 From an E39 528i with sport package.
I plan on running 205/40/17 Falken ZE-912 UHPAS.
*As well it should be noted that to properly mate these wheels to an E36 they need hubcentric rings. The hub bore on the E39 is 74.1 and the E36 is 72.5 - just slightly smaller. The hubcentric ring just makes up for that small gap.
BBS RC090
I started yesterday with a trip to the hardware store to get all the necessities. I bought:
A 10mm 12 point socket - to remove the bolts ($3)
A 10 inch extension - to be able to reach all the way in to the wheel ($10)
A "Nail set" *the grey one* - this is to tap out all the bolts after removing the nuts. They come in different colors, each represents a different size. The grey one is a good size. ($5)
Jasco - Paint and epoxy remover ($10)
Sand paper - 150, 220, 400, 600, 1500 grit (>$2 each)
You will also need some sort of extension for the socket, it made taking the bolts off a piece of cake. I used a random piece of pipe that fit over the end of my socket handle. You can see it in my third and fifth picture.
AND
A dead blow hammer
OR a piece of wood, I used a 4x4 block that was laying around in the yard :dunno This is for pounding on the center after taking out the bolts. Just be sure to wrap it in a towel so you don't damage your wheel.
Today I started the disassembly process:
Close up of the worst areas:
I flipped all the wheels over and sprayed them all with PB Blaster, to loosen the bolts up a little before trying to take them apart.
Then I used the pipe extension around my socket wrench to go to town on the bolts. I separated the nuts and bolts into two different jars each full of vinegar.
This is the wheel with all the nuts off.
Now that you have all the nuts off, you have to use the "nail set" to tap the bolts out. Now this may seem easier than it really is. You have to smack the bolts pretty damn hard, some come out on the first hit some take 3 or 4 hits. You will figure out your own technique on how you want to hold the nail set and at which angle you find more comfortable. I say that because I hit my thumb a few times and scratched the wheel a few times
This is the hardest part of taking them apart. It is very tedious work, so remember that the slower you go the less likely you will scratch, gouge or hit your wheel. It was a pain in the ass doing the first wheel but by the time I was doing the 4th I totally had the hang of it. It gets easier as you go.
Now that you have the bolts out, flip the wheel over, get your wood block wrapped in a towel or your dead blow hammer. Place it on the center of the wheel - hit it. Now move the block to one edge (3 o'clock postion) - hit it, rotate the wheel - hit it, rotate the wheel - hit it so on and so forth.... They'll come out eventually, and like those damn bolts some come out easier than others. It took 4 or 5 hits before they came out.
After doing this same process to each of the 4 wheels, I sprayed them all with some degreaser and gave them a light scrub down. They were so dirty from years of road grime and PB Blaster.
This is what I was left with.
The bolts and nuts are still soaking in their jars of vinegar.
DAY #2
UPDATE:
What you will need:
Some things I list I'm just going to go ahead and assume you will have lying around.
Jasco
Paint brush
Metal container
Old rags
Any open area
I started by taking the barrels out to a very well ventilated area where I could apply the Jasco. This is to remove the clear coat from the barrels.
Note: the nuts and bolts in vinegar.
This stuff is nasty.
Do not breathe it and DO NOT GET IT ON YOUR SKIN. Wear long sleeves and thick gloves. I accidentally let my wrist brush against one of the wheels after the Jasco was applied and even though it was dry it started burning me instantly. Just be safe, use your head.
Pour the Jasco in to a shallow metal container. I used a plastic container lined with aluminum foil, which worked just fine. Then with your paint brush, brush the Jasco on to your lips. I found that the more you use the more clear coat it eats away and the easier it is to get off.
This was my first coat, which was pretty light - but go ahead and glob it on. The more the merrier.
After applying it to all 4 wheels let it dry for 20 to 30 minutes. It works pretty fast. I could hear one of the wheels making a hissing noise within seconds after applying the Jasco.
I drained out my vinegar jars and took a look at the nuts and bolts.
The vinegar did a good job cleaning them up. It loosened all the grime and blue loctite was gone.
While waiting for the Jasco to dry I wiped each bolt... Yes, individually. And put them separately in other clean jars.
30 minutes later, the lips should be dry and are ready to be wiped down.
Get your gloves and your old rag, and start wiping the lip. I found that one of three possible outcomes will occur.
1.It is easy to wipe off and your left with nice smooth bare metal.
or
2. It doesn't come off at all.
or
3. Where it sort of comes off but leaves behind a residue.
This is the first coat...
Second or third coat and a lot of wiping later...
Still a lot of residue, but getting there...
So depending on how much you can get off with the first round of Jasco, just keep doing what we did before. Apply - Wait - Rub off, Apply - Wait - Rub off... Until its all gone. It took me 4 maybe 5 different coats before I got it all off.
*Remember, as in accordance with the rest of this project, it takes a while.
Since it might take a while... What do you do with all that in between time?
Clean up your centers!
I've found that the Mr.Clean magic eraser is a wonderful tool to use. They are $2.50 for a 2 pack and happen to work great for stuff like this.
Note: The bottom left one is clean
This
To This
Back out side the lips are almost there, about 95% clear coat free. It takes a lot of scrubbing to get it all off.
Here is one of the lips all done. I haven't even started sanding yet and it looks way better with out the clear coat.


") ) Scruff pad - Ultra Fine $1
) Scruff pad - Ultra Fine $1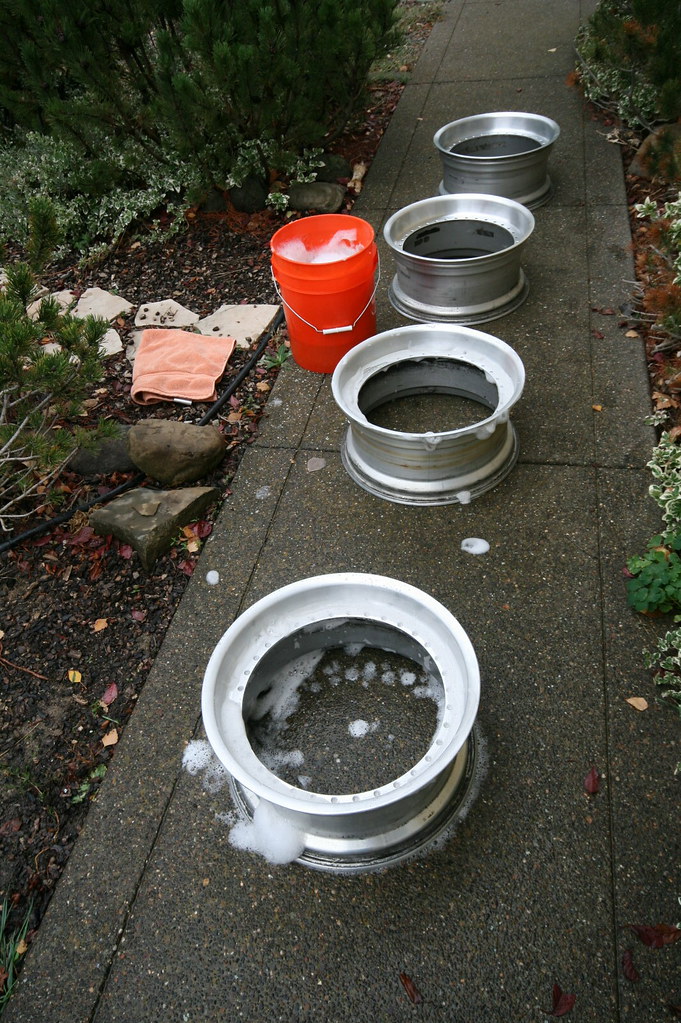


Comment