There is something visceral about seeing ideas take shape. Envisioning objects forming together to become a unified celebration of art. This concept transcends into various avenues, such as the efforts of different individuals utilizing their skills to form something grand. There is nothing more fulfilling then the end result of master craftsmen gathering to toil the day and night away in order to out-perform their prior masterpiece. This doesn’t happen often, but when it does, you want to make sure and be there to witness it. Andrew and I were fortunate to be in the center of just that this past weekend at AccuAir Suspension.

When Mike Alexander, head of Marketing at AccuAir, arranged a weekend to gather for an install, we had no idea how rare a moment this really was. With AccuAir’s previous install record including the likes of James Hetfield’s 1952 Olds and Kirk Hammett’s 1936 Ford, we experienced a heightened sense of humility. We rolled into San Luis Obispo late Friday to begin outlining the approach for install, and bright and early Saturday morning it was game on!

We begin walking through the install with tackling the front height sensors. Air management education was in full swing. The first step in the process is setting up the TruPosition height sensors and ensuring they are mounted at an appropriate length for travel. The fronts were pretty straight forward, with a good mounting location on the front of the Clubman.
One of the most important tasks in any AccuAir e-Level install is to ensure that the height sensors are located correctly within the ideal travel range to avoid over extending the sensors. All types of suspensions offer a pivot point that an “arm” rotates around. By determining where the control arm rests at full droop and at full compression, you’ll be able to find the point on the arm which travels within the ideal range of 2.75 inches or less. Reno showed us a great method to find this point by tracing the control arm while it rested at full droop on the lift and then tracing it again after placing a jack under the tire to compress the suspension. You can see as he points out the ideal location for the sensor where they would be attaching the ball joint of the sensor linkage.

Every car’s suspension setup varies, so AccuAir has made sure that the sensors are easily adapted to accommodate all of the different requirements. Depending on the mounting location of the sensors, the linkage can be shortened accordingly. This is made simple through the combined use of threaded rod and an airline cover. Both pieces can easily be shortened without the use of special tools or any complicated work. Once cut to length, the airline slides over the newly shortened rod to provide a great finished look. It’s details like this that illustrate the amount of time and planning that went into each of these kits.


Armed with a vice and a drill, Stan, Reno, and Derek fabricated aluminum brackets to mount the rear height sensors directly to the MINI’s sub-frame. From there the arms were bolted to the upper control arms at the point that they found using the aforementioned measuring system. Residing here, the sensor would be able to follow the rear suspension through its complete range and monitor the height changes for the e-Level system. The MINI Cooper Xenon auto-leveling system includes height sensors on the drivers side so they utilized one of the factory mounting points for the AccuAir sensors. It was great to see both sensor arms moving in unison as we put the suspension through its motions.


Walking through the shop and watching the guys at AccuAir work on the build, it’s clear that every one of them has a profound respect for craftsmanship and fabrication. Right angle rulers and calipers were used at every step to ensure that everything lined up perfectly and maintained the desired symmetry. The suspension parts that were soon to be hidden under the low car were still carefully crafted and shined up even though they might not ever be seen. Every detail and aspect of the build was carefully planned, fabricated, and executed to the high standards that the AccuAir employees pride themselves on. These same characteristics shine through in all of the products that AccuAir manufactures.

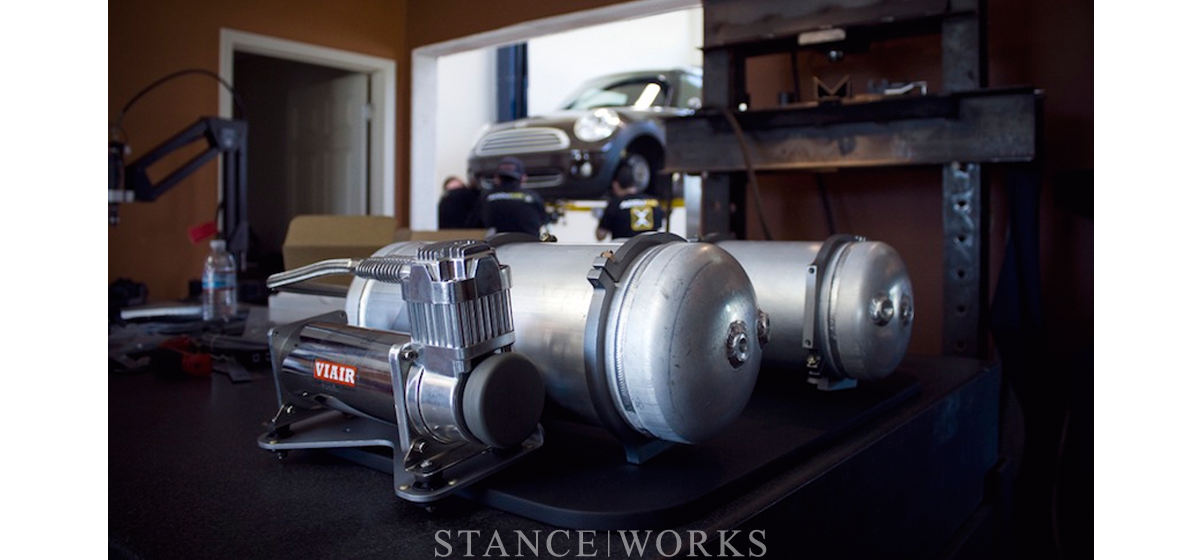
The StanceWorks MINI sees a lot of long distance road trips to out of state shows and meets, so a worthy air management upgrade has been long awaited. We chose to go with AccuAir’s complete e-Level Air Management Package paired with the eXo Mount system. This allowed us to configure two 3-gallon tanks and two compressors in the limited space we had to work with, and still keep the symmetry and aesthetics that we were after. Because the AccuAir eXo Mounts are extremely versatile and simple to work with, we were able to try a few different configurations before landing on the final choice.

The compressors were bolted to the vibration isolating mounts of the eXo Mounts and the tanks were positioned on the vinyl wrapped floorboard when Dustin proposed the idea of fabricating a custom mounting method for the VU4 Manifold. His goal was to mount the manifold to flow with the symmetrical balance that we had been working on for the rest of the system. That’s the great thing about the AccuAir eXo Mounts. They organize the management into a clean, organized system and they still offer a great platform for the owner to create their own custom setup. With raw aluminum and tig welder in hand, Dustin approached the blank eXo Mount canvas. What rose from his steady planning and hard work was a beautiful cross-member piece that matched the industrial aesthetics of the other components and provided a custom floating mount for the ECU and VU4.


With the suspension sensors mounted and much of the trunk components pieced together, it was time to address the user interface in the cabin. For a clean and subtle install, I opted for the Rocker Switch control and chose to hide the TouchPad in a hidden compartment on my dash. I tore into the dash while Reno used the provided template to make room for the Rocker Switch under the e-brake handle. Only a single USB cord needs to be routed for the TouchPad, so it was strung through the dash and in through the back end of the compartment where the TouchPad would be mounted within reach of the driver. The user controls are sleek and stylish while also being intuitive to use.

A sensor wire is routed from each corner into the trunk where the ECU would reside, while a new power wire was run from the battery under the car to power the dual compressors. All wires are running into the spare tire well, for centralized access, while also concealing them nicely. If you need adjustments to your battery, then consider a car battery installation service to fix it for you.

Finally, we have Derek inspecting the hardware setup and running all wires into the ECU before final installation. Part II of our journey to AccuAir will showcase the finished product as well as Andrew’s review of the product, now having put over 1,000 miles on the system. Stay tuned!